
As I was flipping through family photos from last Easter, it hit me: dessert doesn’t have to be complicated to be memorable. Enter the delightful Mini Easter Cheesecake Jars, a no-bake sensation that captures the spirit of spring in every colorful layer. Perfect for those of us who love to host without the fuss of baking, these jars are ultra-customizable, letting your creativity shine with different flavors and toppings. Imagine a crumbly cookie base that cradles a luscious cheesecake filling, all topped with whimsical Easter treats—what’s not to love? Plus, they’re make-ahead marvels, so whether it’s a holiday brunch or a cozy gathering, you’ll look like a culinary superstar without the last-minute chaos. Ready to impress your friends and family with this festive dessert? Let’s dive into the recipe!
Why Are Mini Cheesecake Jars So Adorable?
Customization, the mini jars allow you to get creative with flavors and toppings, making them perfect for every palate. Time-saving is key; no baking means less mess and more time enjoying your guests’ company. Kid-Friendly Fun: Let your little ones decorate with colorful candies—it’s a delightful activity! Versatile enough for any occasion, these jars work beautifully for Easter or just a spring day treat. Plus, they’re easily portable for potlucks or brunches. If you’re looking for more inspiration, check out these Meatloaf Stuffed Mini pumpkins for another festive centerpiece! Enjoy the delightful summer feel these jars bring to your table!
Mini Easter Cheesecake Jars Ingredients
For the Crust
- Graham Cracker Crumbs – Use as a sturdy base, or substitute with chocolate cookie crumbs for a richer flavor.
- Unsalted Butter (melted) – Binds the crust ingredients together; try coconut oil for a dairy-free option.
- Sugar – Sweetens the crust; for a natural twist, use honey or maple syrup instead.
- Pinch of Salt – Enhances the flavors of both the crust and filling.
For the Filling
- Cream Cheese (softened) – Provides a smooth and creamy texture; mascarpone can be used for a lighter variation.
- Powdered Sugar – Adds sweetness and a silky touch to the filling.
- Vanilla Extract – Enhances flavor; consider almond extract for a distinct taste.
- Lemon Juice – Brightens and balances the creamy filling’s flavor.
- Cold Heavy Whipping Cream – Lightens the texture of the cheesecake filling; use a chilled bowl for easy whipping.
- Gel Food Coloring (optional) – Perfect for adding vibrant hues to your filling.
For Topping
- Mini Chocolate Eggs – Adds a festive touch; use them for a classic Easter vibe.
- Jelly Beans – Colorful options that kids love; perfect for adding whimsy.
- Pastel Sprinkles – Fun embellishments that elevate the jars’ appearance.
- Shredded Coconut – Creates a cute “grass” effect; flavor with coconut dye for an extra pop.
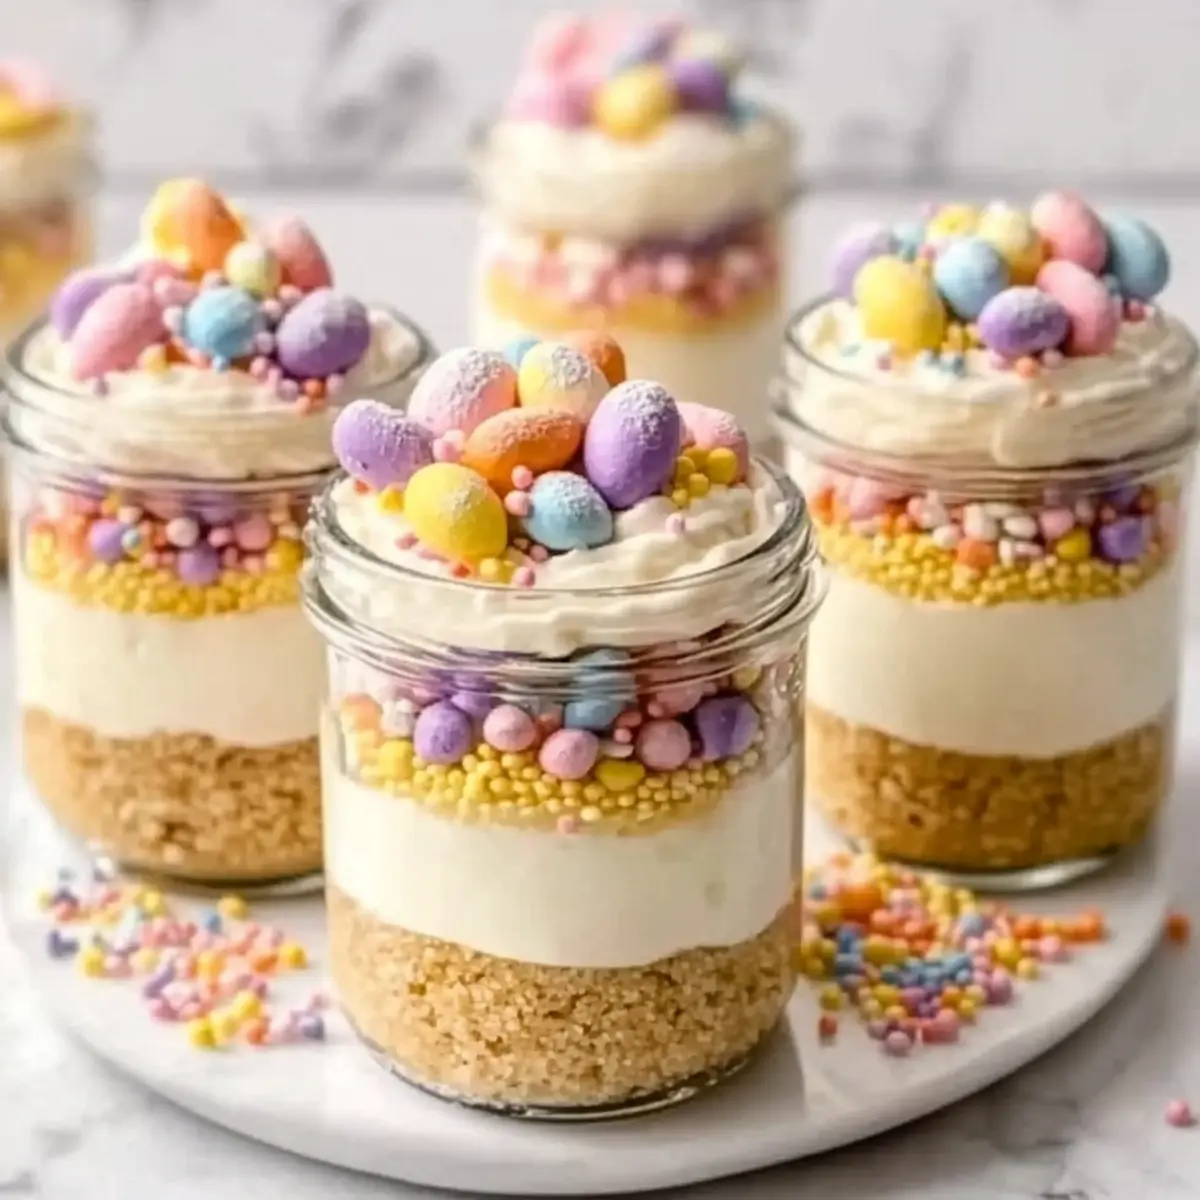
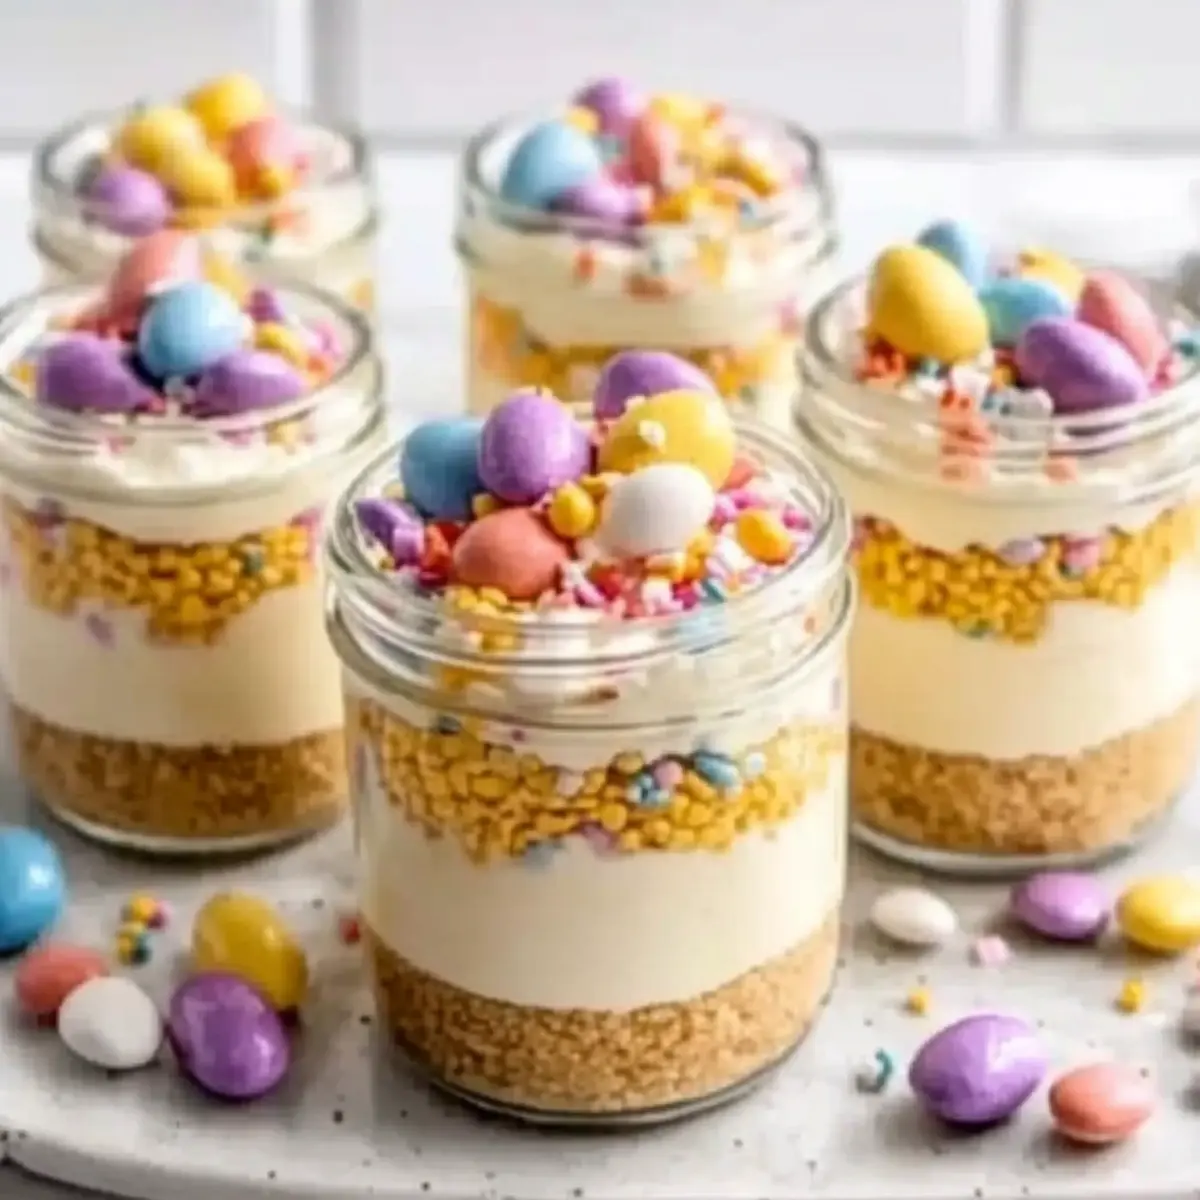
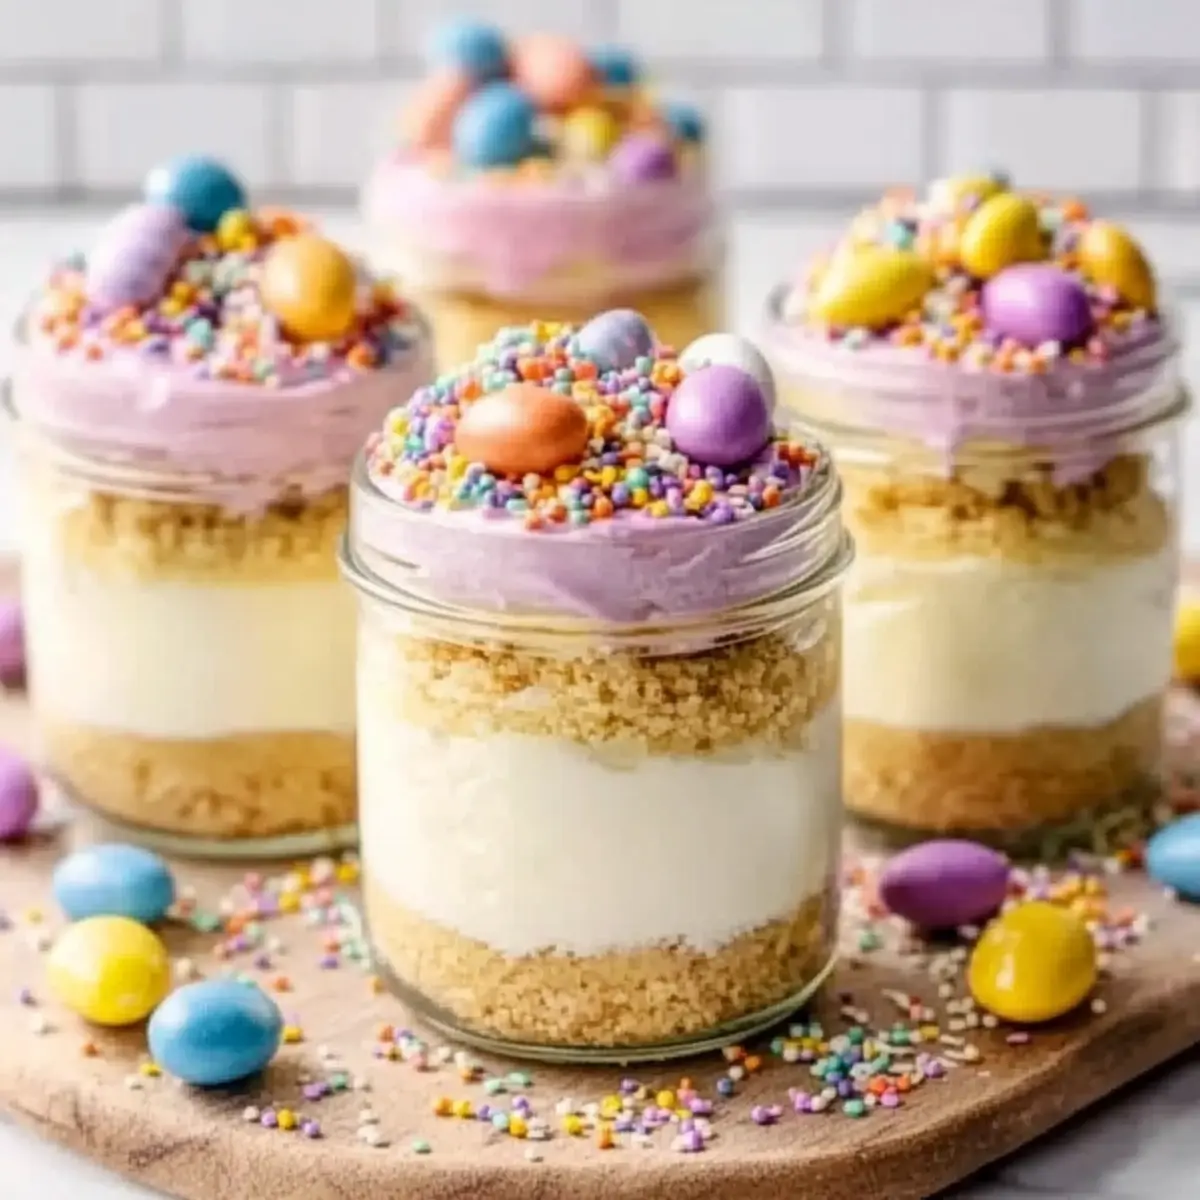
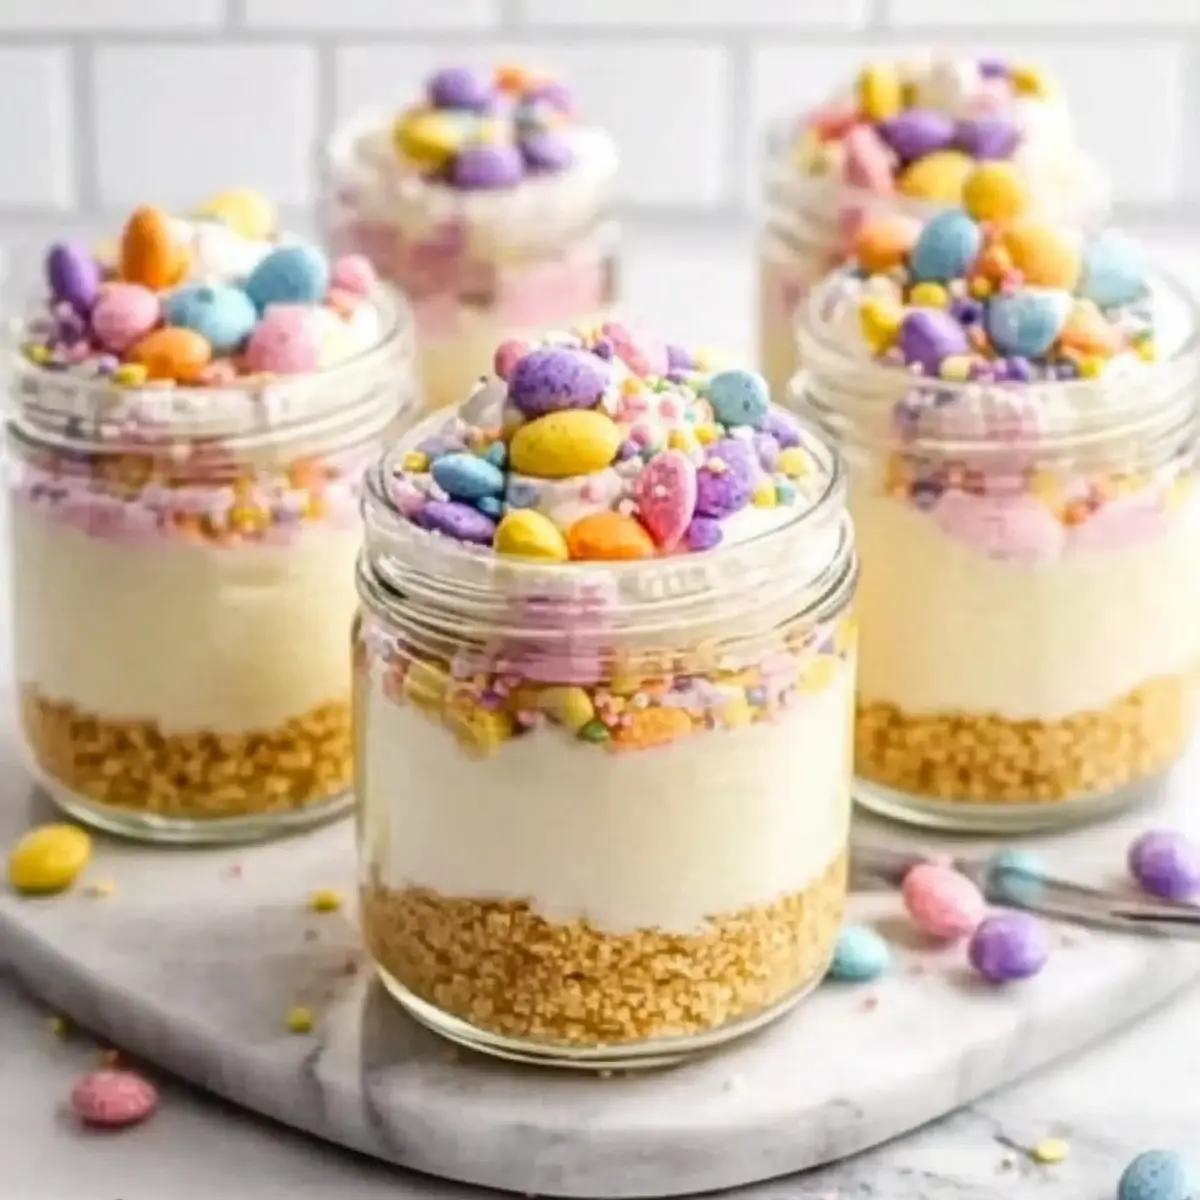
These Mini Easter Cheesecake Jars not only look adorable but are also a delightful treat to share with family and friends during your festive gatherings!
Step‑by‑Step Instructions for Mini Easter Cheesecake Jars
Step 1: Prepare the Crust
Begin by combining graham cracker crumbs, melted unsalted butter, sugar, and a pinch of salt in a mixing bowl. Stir until the mixture resembles wet sand, ensuring the crumbs are well-coated. Firmly pack this mixture into the bottom of small jars using a spoon or your fingers, creating an even layer. Set the jars aside as you prepare the cheesecake filling.
Step 2: Whip the Cream
In a chilled mixing bowl, pour in the cold heavy whipping cream. Using an electric mixer, whip the cream on medium speed until medium-stiff peaks form, about 2-3 minutes. Be sure not to overwhip; the cream should be fluffy but not dry. Once ready, cover with plastic wrap and refrigerate to keep it cold while you mix the cheesecake filling.
Step 3: Mix Cream Cheese Filling
In a separate bowl, combine softened cream cheese, powdered sugar, vanilla extract, and lemon juice. Using an electric mixer, beat the ingredients together on medium speed until the mixture is smooth and fluffy, about 4-5 minutes. This creamy filling is the heart of your Mini Easter Cheesecake Jars, so take your time to achieve a luscious texture without lumps.
Step 4: Combine Mixtures
Gently fold the chilled whipped cream into the cream cheese mixture using a spatula or large spoon. Start by adding a small portion of whipped cream to lighten the mixture, then gradually fold in the remaining whipped cream until no streaks remain. This delicate folding technique ensures that your cheesecake filling stays airy, crucial for your Mini Easter Cheesecake Jars.
Step 5: Add Color
If you’d like to add a festive touch to your filling, now’s the time to incorporate gel food coloring. Start with a small drop, then gently mix until you achieve your desired pastel shade. This step is optional, but adding a pop of color can make your Mini Easter Cheesecake Jars even more delightful and visually appealing for your spring gathering.
Step 6: Fill the Jars
Using a piping bag or a spoon, carefully fill each jar with the cheesecake filling, layering it over the crust. Leave some space at the top for toppings. Aim for a smooth and even surface, allowing the vibrant color of the filling to shine through. This step is where the magic of your Mini Easter Cheesecake Jars starts to take shape!
Step 7: Chill
Place the filled jars in the refrigerator and let them chill for at least 2 hours, or up to 24 hours if you want to prepare them in advance. Chilling allows the cheesecake to set properly, creating a delightful, creamy texture that perfectly complements the crust. It’s an essential step that transforms your jars into a refreshing spring dessert.
Step 8: Decorate
Just before serving, unleash your creativity by decorating the top of each jar with colorful toppings. Add shredded coconut to mimic grass, sprinkle pastel decorations, and place mini chocolate eggs or jelly beans atop the filling. This final touch brings the spirit of Easter to your Mini Easter Cheesecake Jars, making them not only tasty but visually inviting too.
Step 9: Serve Cold
Once decorated, grab some small spoons and serve your Mini Easter Cheesecake Jars cold. They are perfect individually sized treats that everyone can enjoy, providing a delightful blend of textures and flavors. Celebrate the joy of spring and the festive season with these charming desserts!
Mini Easter Cheesecake Jars Variations
Customizing your Mini Easter Cheesecake Jars can be as fun as eating them! Think of how each delightful bite can surprise your taste buds with different flavors and textures.
-
Lemon Blueberry Twist: Replace vanilla with lemon extract and top with fresh blueberries for a bright finish.
-
Chocolate Delight: Swap graham cracker crumbs for chocolate cookie crumbs and fold in cocoa powder; finish with chocolate eggs.
-
Pistachio Flavor: Blend pistachio paste into the filling and sprinkle chopped pistachios on top for a nutty crunch.
-
Fruit Layer: Add a vibrant layer of strawberry or raspberry compote between the crust and cheesecake filling for a fruity surprise.
-
Dairy-Free Option: Use coconut cream instead of heavy cream and substitute cream cheese with cashew cream for a rich, creamy texture without dairy.
-
Spicy Kick: Mix in a pinch of cayenne or cinnamon with the crust for an unexpected flavor twist that gives a little warmth.
-
Caramel Swirl: Drizzle caramel sauce into the cheesecake filling before chilling for a sweet, gooey surprise as you dig in.
-
Fruity Yogurt Base: Replace some of the cream cheese with your favorite fruit-flavored yogurt for a lighter, tangy option that still satisfies the cheesecake craving.
For a unique serving idea, why not pair these jars with some delightful Meatloaf Stuffed Mini pumpkins? They make a fantastic combination for your festive gatherings! Have fun crafting your perfect Mini Easter Cheesecake Jars!
What to Serve with Mini Easter Cheesecake Jars
Let’s create a delightful spread that perfectly complements the charming flavors of your dessert, bringing joy to your festive gathering.
-
Fresh Berries: A vibrant mix of strawberries, blueberries, and raspberries adds a refreshing burst of flavor, balancing the creaminess of the cheesecake.
-
Spring Salad: A light salad with arugula, avocado, and citrus vinaigrette provides a crisp contrast to the sweet jars, enhancing the seasonal theme.
-
Savory Quiche: A slice of quiche, with its fluffy eggs and savory fillings, draws attention away from sweetness while offering a hearty option for brunch.
-
Herbal Lemonade: A refreshing glasses of herbal lemonade or iced tea brings a zesty flair that pairs nicely with the rich flavors of the cheesecake jars.
-
Mini Veggie Platter: Colorful vegetables, served with a creamy ranch dip, offer a crunchy bite that contrasts well with the smooth texture of the cheesecake.
-
Easter-Themed Cookies: Soft sugar cookies decorated like Easter eggs will resonate with the theme and provide a fun, festive touch alongside the jars.
-
Chocolate Milkshake: Indulge in a creamy chocolate milkshake for a playful twist that echoes the dessert’s sweetness, delighting both kids and adults alike.
-
Carrot Cake: A moist slice of carrot cake, with its warm spices and creamy frosting, is a wonderful way to tie in seasonal flavors while offering a different dessert option.
Expert Tips for Mini Easter Cheesecake Jars
-
Perfectly Softened Cream Cheese: Make sure your cream cheese is softened just right; too warm can lead to a runny filling. Time is key for that creamy texture!
-
Whipping Whipped Cream: Aim for medium-stiff peaks when whipping cream; this provides the desired lightness without drying out, ensuring your Mini Easter Cheesecake Jars stay fluffy.
-
Gentle Folding Technique: Take care not to overmix when folding whipped cream into the filling. Gentle movements help retain air and keep the mixture airy and light.
-
Chill Before Decorating: Allow your jars to chill fully—at least 2 hours—before adding toppings. This ensures the filling sets nicely for a beautiful presentation.
-
Customize Your Toppings: Feel free to adapt the toppings! Using gluten-free cookies for the crust is a fantastic option for dietary preferences while maintaining the festivity of the Mini Easter Cheesecake Jars.
Make Ahead Options
These Mini Easter Cheesecake Jars are a fantastic choice for busy home cooks looking to save time while still impressing guests! You can prepare the crust and filling up to 24 hours in advance, storing each layer separately in the refrigerator to maintain freshness. Simply combine the graham cracker crumbs, melted butter, sugar, and salt for the crust, and store it in an airtight container. Whip the cream and mix it with the cheesecake filling, then refrigerate that mixture as well. When you’re ready to serve, fill the jars, let them chill while you set up your celebration, and add your favorite toppings just before serving. This way, you’ll enjoy stress-free entertaining with creamy, delicious Mini Easter Cheesecake Jars that are just as delightful as when freshly made!
Storage Tips for Mini Easter Cheesecake Jars
Fridge: Keep your jars covered in the refrigerator for up to 3 days. Always add any toppings just before serving to maintain freshness and presentation.
Freezer: You can freeze the jars (without toppings) for up to 1 month. When ready to enjoy, simply thaw in the fridge overnight for a easy, delicious treat.
Reheating: These Mini Easter Cheesecake Jars are best served cold. There’s no need to reheat them; they’re delicious straight from the fridge!
Airtight Storage: For any leftover jars, ensure they are tightly sealed to avoid any off-flavors or spoilage. Enjoy the delightful flavors of your cheesecake jars for days!
Mini Easter Cheesecake Jars Recipe FAQs
What’s the best way to select ripe ingredients for my cheesecakes?
When choosing ingredients like cream cheese and heavy whipping cream, look for items that are not close to their expiration dates for the best flavor and texture. The cream cheese should be soft at room temperature (not melted) to create a smooth filling. For toppings, vibrant, shiny candies are typically fresher—avoid those with dull colors or visible damage.
How should I store leftover Mini Easter Cheesecake Jars?
Keep your jars covered in the refrigerator for up to 3 days. It’s essential to add any decorative toppings just before serving to maintain their freshness and prevent sogginess. If you find yourself with remaining jars after a gathering, ensure they are tightly sealed to preserve their delightful flavors.
Can I freeze Mini Easter Cheesecake Jars?
Absolutely! You can freeze the jars (without toppings) for up to 1 month. To do this, ensure they are completely sealed in airtight containers to avoid freezer burn. When you’re ready to enjoy them, thaw in the fridge overnight. You’ll have a delicious dessert ready to serve without any extra work!
What if my whipped cream isn’t holding its shape?
If your whipped cream isn’t forming medium-stiff peaks, make sure you’re using cold heavy cream and a chilled bowl, which helps create a luscious texture. If it does start to collapse, gently re-whip it—just be mindful not to over-whip, as that can make it grainy. Adding a small amount of cornstarch can also help stabilize the whipped cream.
Are there any dietary considerations for my Mini Easter Cheesecake Jars?
Yes! Ensure to check labels for gluten-free options if you’re catering to those with gluten sensitivities or allergies, especially with cake toppings like candies and sprinkles. For a dairy-free option, substitute cream cheese with vegan cream cheese and use coconut cream in place of heavy whipping cream. This way, everyone can join in on the festive fun!
Creamy Mini Easter Cheesecake Jars for a Festive Treat
Ingredients
Equipment
Method
- Combine graham cracker crumbs, melted butter, sugar, and salt in a bowl; mix until resembling wet sand. Pack into jars to create the crust.
- In a chilled bowl, whip the cold heavy cream on medium speed until medium-stiff peaks form, about 2-3 minutes. Refrigerate.
- In another bowl, beat together cream cheese, powdered sugar, vanilla extract, and lemon juice until smooth and fluffy, about 4-5 minutes.
- Gently fold the whipped cream into the cream cheese mixture until no streaks remain.
- If desired, add gel food coloring to the filling and mix until achieving a pastel shade.
- Fill each jar with cheesecake filling, layering over the crust; leave space for toppings. Smooth the surface.
- Chill the filled jars in the refrigerator for at least 2 hours before serving.
- Before serving, decorate with toppings like coconut, sprinkles, and mini chocolate eggs or jelly beans.
- Serve cold with small spoons; enjoy the festive flavors and textures!
Leave a Reply