
“Can you believe it’s time for dinner again?” I overheard my partner say, eyes darting to the clock while we started to feel the effects of our busy day. That’s when the craving hit: a delicious, homemade Easy Grilled Cheese Burrito inspired by a Taco Bell favorite! This dish is not only customizable to suit your taste—think spicy seasoned beef, creamy nacho cheese, and fluffy rice wrapped up in a perfectly grilled tortilla—but it also comes together in under 30 minutes. Imagine a meal that’s not just kid-approved but also a big win for everyone at the table! The best part? You can easily swap ingredients for vegetarian or dairy-free options without sacrificing flavor. Ready to transform your dinner into a cozy culinary adventure? Let’s dive into this quick and mouthwatering recipe!
Why Is This Burrito So Irresistible?
Quick and Easy: With just 30 minutes from start to finish, this burrito fits perfectly into your busy schedule.
Customizable Flavor: Tailor it to your taste! Add beans for protein or jalapeños for a spicy kick.
Kid-Approved: This fun and cheesy dish is bound to please picky eaters.
Versatile Variations: Easily switch ingredients for vegetarian or dairy-free options while keeping the flavors bold. Check out our other delicious treats like the Grilled Cheese Burrito for more inspiration!
Satisfying and Filling: Packed with savory beef, creamy cheese, and fluffy rice, it’s a complete meal that everyone will love!
Easy Grilled Cheese Burrito Ingredients
Get ready to create a cheesy masterpiece!
For the Filling
- Ground Beef – Provides protein and savory flavor; feel free to substitute with beans or tofu for a delightful vegetarian option.
- Taco Seasoning – Adds spice and depth; you can make a homemade blend for a healthier kick.
- Cooked White Rice – Adds bulk and texture; swap it for brown rice or cauliflower rice to lighten things up.
- Sour Cream – Brings creaminess and tang; try a dairy-free alternative for a vegan twist.
- Nacho Cheese Sauce – Offers a rich, cheesy flavor; consider preparing a homemade version or using dairy-free options.
- Chipotle Sauce – Infuses smokiness and heat; adjust to your taste for the perfect kick.
- Shredded Cheddar Cheese – Melts beautifully and enhances flavor; use dairy-free cheese for a vegan-friendly version.
- Shredded Mozzarella – Provides that gooey texture we all love; any melting cheese can be replaced here.
- Flour Tortillas – The foundation of your burrito; opt for whole wheat or gluten-free tortillas for a healthier choice.
- Butter or Oil – Used for grilling to achieve a crispy exterior; try non-stick cooking spray or olive oil for lighter cooking.
Make your homemade Easy Grilled Cheese Burrito today, and it’s sure to become a family favorite!
Step‑by‑Step Instructions for Easy Grilled Cheese Burrito
Step 1: Cook the Beef
Start by browning 1 pound of ground beef in a skillet over medium heat for about 8–10 minutes, breaking it up with a spatula as it cooks. Once browned, drain the excess grease and sprinkle in taco seasoning with ¼ cup of water. Simmer this mixture for an additional 5 minutes, ensuring it’s heated through and well combined.
Step 2: Warm the Tortillas
While the beef simmers, take 4 flour tortillas and heat them in a dry skillet over low heat or pop them in the microwave for 30 seconds until pliable. This will make it easier to fold the tortillas without tearing them. Set them aside, ensuring they stay warm and soft.
Step 3: Assemble the Burrito
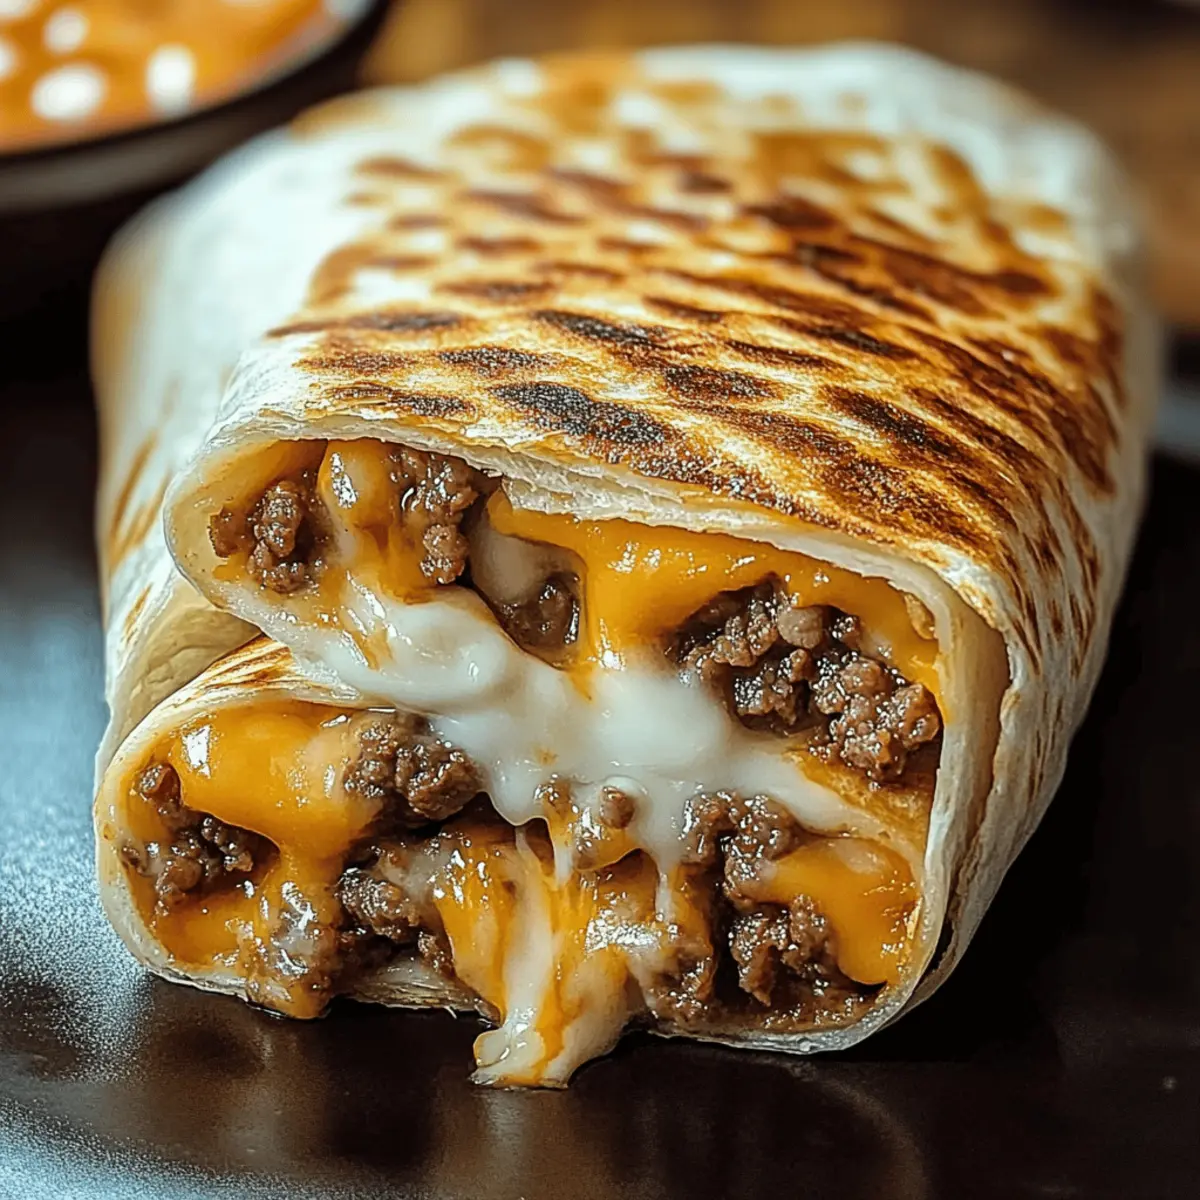
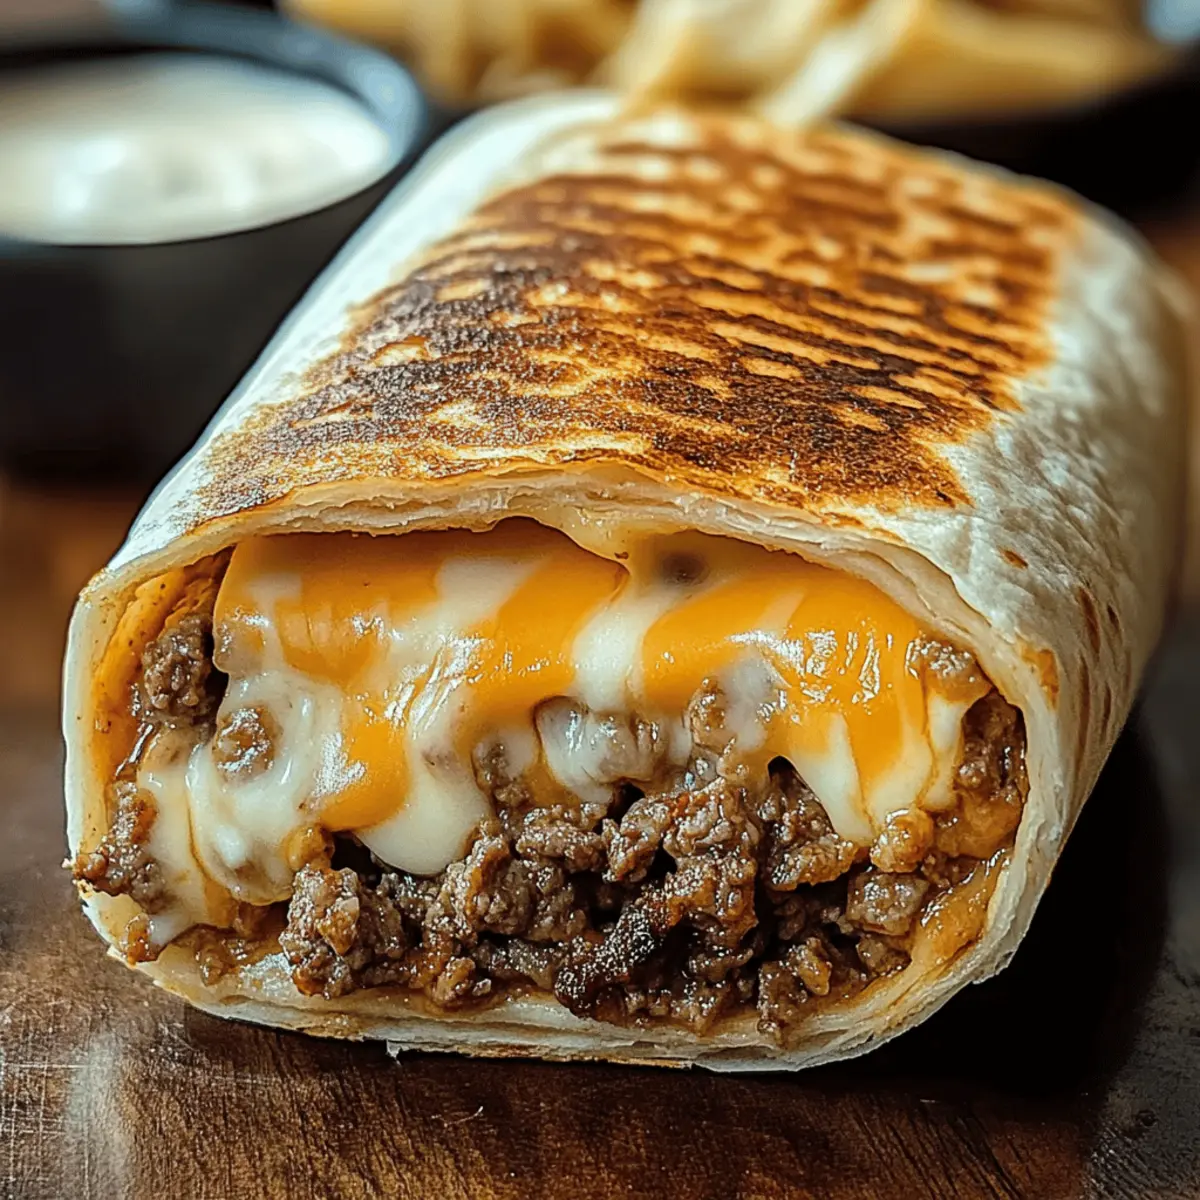
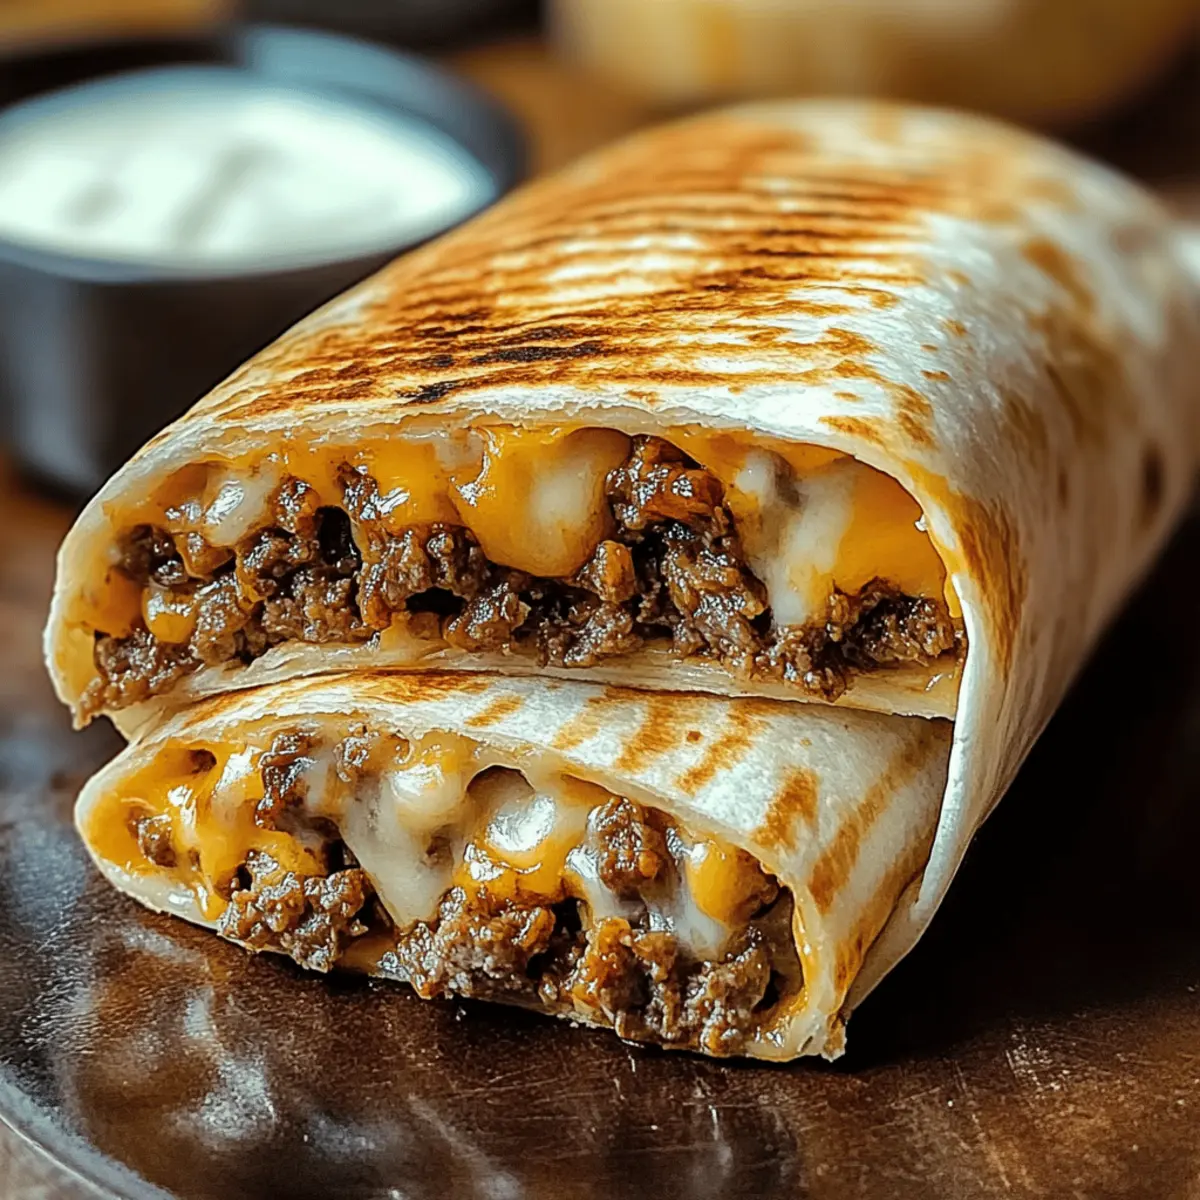
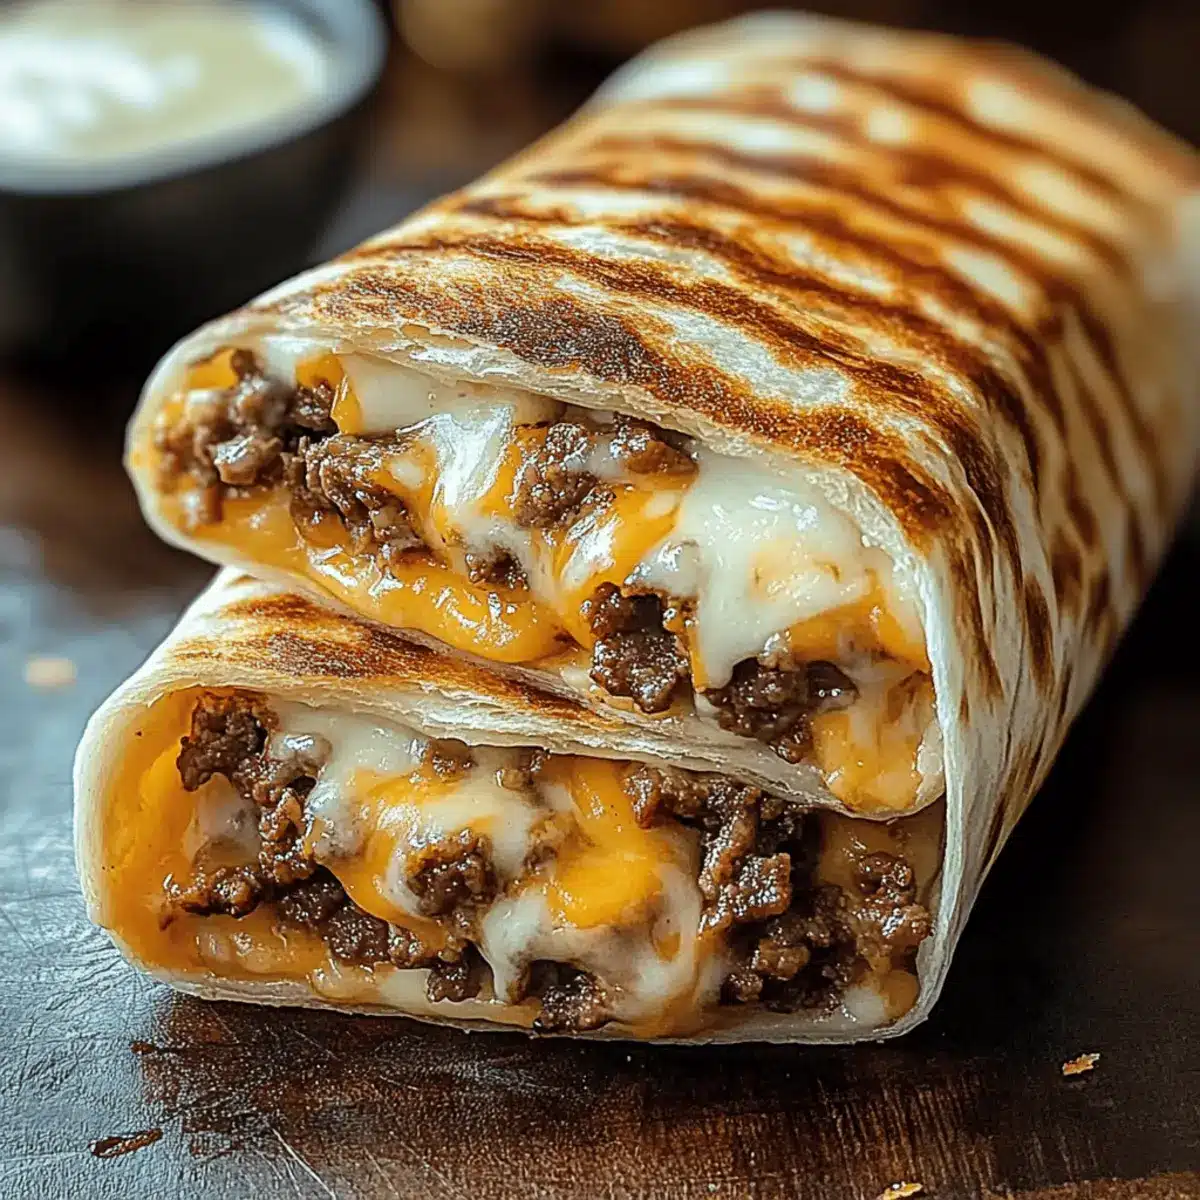
Lay a warm tortilla flat on a clean surface and begin layering. Start with a scoop of cooked white rice, followed by your seasoned beef, ¼ cup of nacho cheese sauce, a drizzle of chipotle sauce, and a dollop of sour cream. To finish, sprinkle on shredded cheddar and mozzarella cheese, ensuring an even distribution for that irresistible cheesy pull.
Step 4: Grill the Burrito
Preheat a skillet over medium heat and add a little butter or oil. Carefully place your assembled burrito seam-side down in the skillet. Sprinkle a bit of shredded cheese on the outside of the burrito, and grill for 3–4 minutes until golden brown and crispy. Flip and repeat for the other side, checking that the cheese is melted and the burrito is heated through.
Step 5: Serve and Store
Once both sides are crispy and the cheeses are melted, remove your Easy Grilled Cheese Burrito from the skillet. Let it cool for a minute before cutting it in half to reveal the gooey interior. If you have leftovers, store them in an airtight container for up to 3 days, and reheat gently in the skillet for the best texture.
Easy Grilled Cheese Burrito Variations
Customize your Easy Grilled Cheese Burrito with these delightful twists to elevate your meal experience!
-
Vegetarian Delight: Substitute ground beef with black beans or grilled vegetables for a hearty plant-based option. It’s delicious and filling!
-
Dairy-Free Dream: Swap the nacho cheese and shredded cheeses for dairy-free alternatives to keep the flavor while making it vegan-friendly. Your taste buds won’t miss a beat!
-
Spicy Kick: Add jalapeños or your favorite hot sauce to crank up the heat and give your burrito a fiery twist. Just remember, spice is nice!
-
Grain-Free Goodness: Use large collard greens or lettuce leaves instead of tortillas for a low-carb, gluten-free option that’s fresh and crunchy. Embrace the healthy change!
-
Crispy Crunch: Mix in crushed tortilla chips with your fillings for an added layer of texture. The crunch will make each bite even more satisfying!
-
Flavor Boost: Drizzle a bit of ranch dressing or avocado crema inside for extra richness and flavor that kids will love. It’s a creamy bonus everyone will appreciate!
-
Bowl Version: For a quick and gluten-free meal, deconstruct your burrito into a flavorful bowl with all the same toppings! Each spoonful will bring a smile.
-
Make It Sweet: Try adding a touch of cinnamon and sugar to your tortilla when grilling, and fill it with sweet cream cheese for a dessert-style burrito! An unexpected treat to end your meal on a sweet note.
Remember to also check out my Grilled Cheese Burrito for fun inspiration on crafting your own mouthwatering burrito creations!
What to Serve with Easy Grilled Cheese Burrito
Elevate your dining experience by pairing your burrito with delightful sides and beverages that enhance its cheesy, spicy flavors.
-
Fresh Salsa: A zesty, bright salsa balances the rich flavors of the burrito, adding a refreshing crunch that awakens the taste buds. Diced tomatoes, onions, cilantro, and a squeeze of lime create the perfect topping.
-
Guacamole: Creamy and smooth, this avocado dip not only complements the burrito’s crunch but also adds a luxurious element to your meal. A hint of lime and cilantro makes it even more irresistible.
-
Mexican Street Corn (Elote): This sweet and spicy corn dish sprinkled with cheese and chili powder perfectly contrasts and enhances the burrito’s savory goodness. It’s a fun, flavorful addition that can steal the show!
-
Crispy Tortilla Chips: Serve a side of crunchy chips with homemade queso or salsa for dipping. The added texture perfectly contrasts with the soft burrito, making every bite exciting.
-
Light Salad: A simple side salad with mixed greens, cherry tomatoes, and a tangy vinaigrette can lighten up the meal. The freshness helps balance the heavier flavors of the burrito.
-
Chilled Horchata: This sweet rice drink is a classic complement to Mexican food. Its creamy, cinnamon-infused flavor is the perfect contrast to the spice of your burrito.
Transform your Easy Grilled Cheese Burrito into a complete feast—your family and friends won’t be able to resist!
Expert Tips for Easy Grilled Cheese Burrito
-
Cheese Adhesion: For the best cheese pull, ensure your skillet is adequately heated while grilling and press the burrito gently.
-
Wrap Wisely: Make sure to layer your fillings evenly and don’t overstuff, as this can lead to bursting while grilling.
-
Prep Ahead: Assemble burritos in advance and refrigerate them; grill when ready to serve for an optimal texture.
-
Freeze for Later: Want to save some for later? Wrap burritos individually in foil and freeze for up to 1 month. Reheat in the oven for a crispy finish.
-
Vegetarian Alternatives: For a vegetarian option, swap ground beef for black beans or lentils, maintaining that hearty flavor profile in your Easy Grilled Cheese Burrito.
How to Store and Freeze Easy Grilled Cheese Burrito
Airtight Container: Store leftovers in an airtight container in the fridge for up to 3 days to keep them fresh and flavorful.
Freezing: Wrap each burrito individually in foil and freeze for up to 1 month. For best texture, reheat in the oven or a skillet.
Reheating: When ready to enjoy, reheat the burrito in a skillet over medium heat until heated through, crisping the exterior for that delightful crunch.
Make Ahead: If prepping in advance, you can assemble burritos and store them in the fridge for quick grilling later, ensuring a satisfying meal is just minutes away!
Make Ahead Options
These Easy Grilled Cheese Burritos are perfect for meal prep, saving you time on busy weeknights! You can assemble the burritos up to 24 hours in advance. To do this, prepare the filling (like the seasoned beef and rice) and layer the components in the tortillas, then wrap them tightly in plastic wrap and refrigerate. This helps maintain freshness and prevents the tortillas from drying out. When you’re ready to serve, simply grill the burritos in a preheated skillet until crispy and cheese melts, about 3-4 minutes per side. With this make-ahead method, you’ll enjoy a delicious, home-cooked meal with minimal effort and the same great taste!
Easy Grilled Cheese Burrito Recipe FAQs
How do I choose the right ingredients for my burrito?
Absolutely! When selecting ingredients for your Easy Grilled Cheese Burrito, opt for fresh ground beef that is bright red without dark spots. If you’re going vegetarian, black beans should be firm and not overly mushy, while ripe vegetables can be a great addition for freshness. Always aim for quality cheeses that melt well, like sharp cheddar or mozzarella.
What’s the best way to store leftovers?
Very! To store leftovers, place your Easy Grilled Cheese Burrito in an airtight container and refrigerate it for up to 3 days. When you’re ready to enjoy it again, gently reheat it in a skillet over medium heat for the best texture, ensuring that it stays crispy on the outside while warming through on the inside.
Can I freeze burritos for later?
Yes, absolutely! To freeze your Easy Grilled Cheese Burritos, wrap each one individually in foil and then place them in a freezer-safe bag. They can be frozen for up to 1 month. When you’re ready to eat, you can reheat them directly from the freezer in the oven at 350°F (175°C) for about 25-30 minutes, or in a skillet for a crisper finish.
What do I do if my burrito bursts while grilling?
No worries! If your burrito bursts while grilling, it could be due to overstuffing or insufficient sealing. Next time, ensure you don’t overstuff your burrito and fold it tightly, pressing the seam downwards against the skillet. If you find it already bursts, just scoop up the filling and enjoy it in a bowl!
Are there any dietary considerations for pets or allergies?
Certainly! While your Easy Grilled Cheese Burrito is perfect for humans, be cautious with pets. Ingredients like cheese and onions can be harmful to dogs and cats; it’s best to keep it as a strictly human meal. If anyone in your family has allergies, ensure to swap out ingredients like dairy for alternatives such as almond or oat milk cheese to suit their needs!
Can I make this burrito ahead of time?
Yes, indeed! To make ahead, assemble your Easy Grilled Cheese Burrito without grilling it, then wrap it tightly in plastic wrap or foil and store it in the fridge. When you’re ready to serve, simply grill it for 3-4 minutes per side until golden and melty. This way, you’ll have a quick and delicious dinner that’s ready in a flash!
Easy Grilled Cheese Burrito: Your New Favorite Comfort Food
Ingredients
Equipment
Method
- Brown 1 pound of ground beef in a skillet over medium heat for about 8–10 minutes, breaking it up. Drain excess grease and stir in taco seasoning with 1/4 cup of water. Simmer for 5 minutes.
- Warm 4 flour tortillas in a dry skillet over low heat or microwave for 30 seconds until pliable.
- Layer a warm tortilla with cooked rice, seasoned beef, 1/4 cup nacho cheese sauce, chipotle sauce, sour cream, and sprinkle with cheddar and mozzarella cheese.
- Preheat skillet, add butter or oil, place burrito seam-side down, sprinkle shredded cheese on the outside, and grill for 3–4 minutes until golden brown. Flip and repeat.
- Remove finished burrito, let cool for a minute, then cut in half to reveal gooey interior. Store leftovers in an airtight container for up to 3 days.
Leave a Reply