
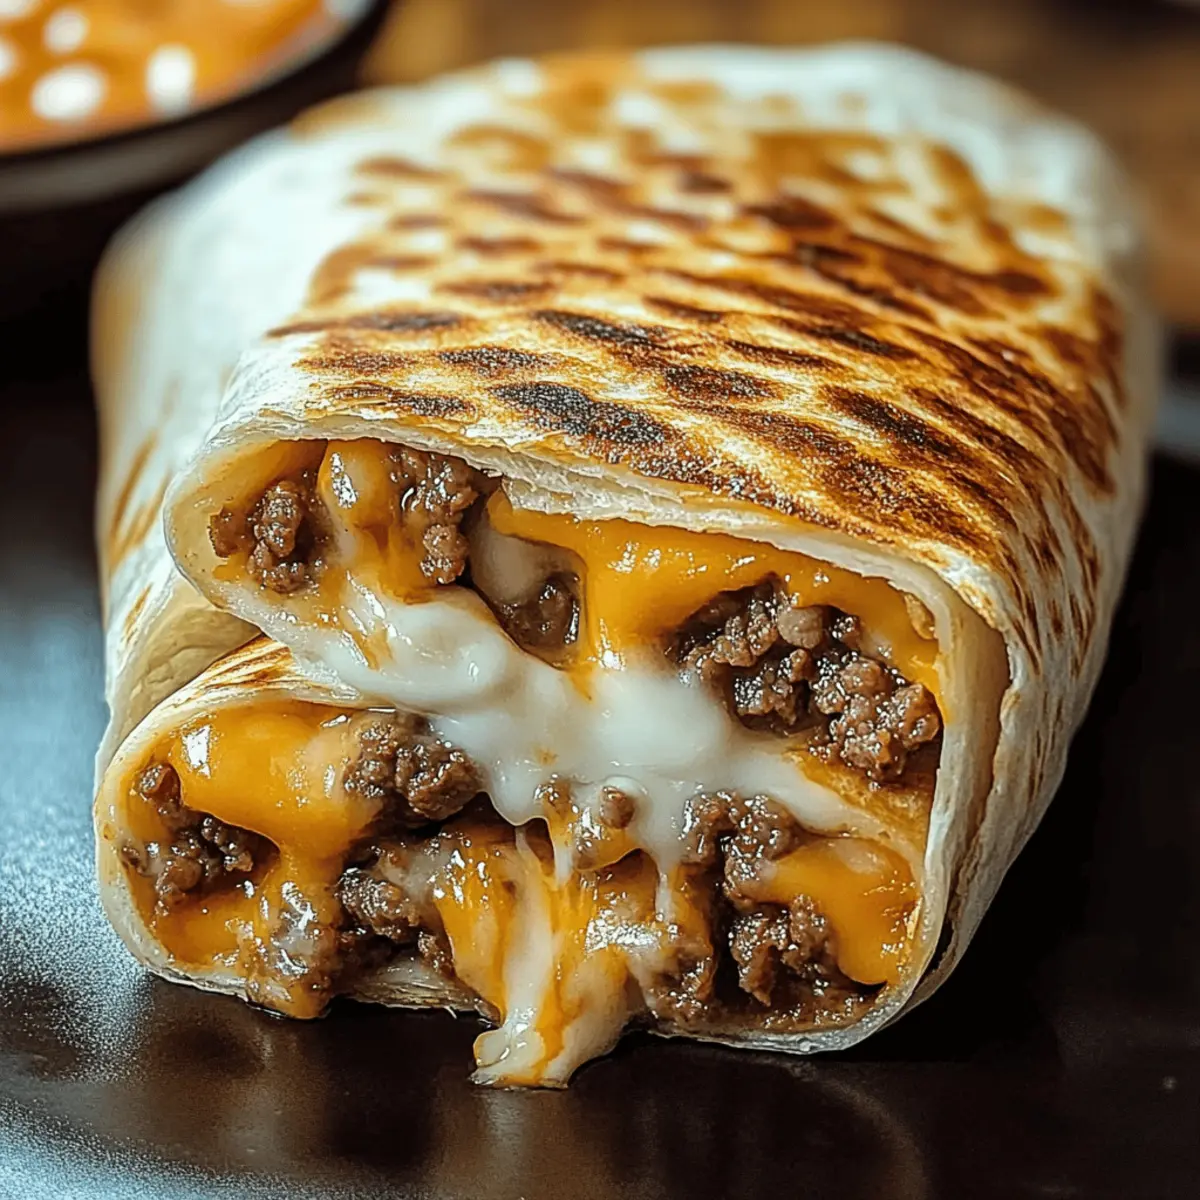
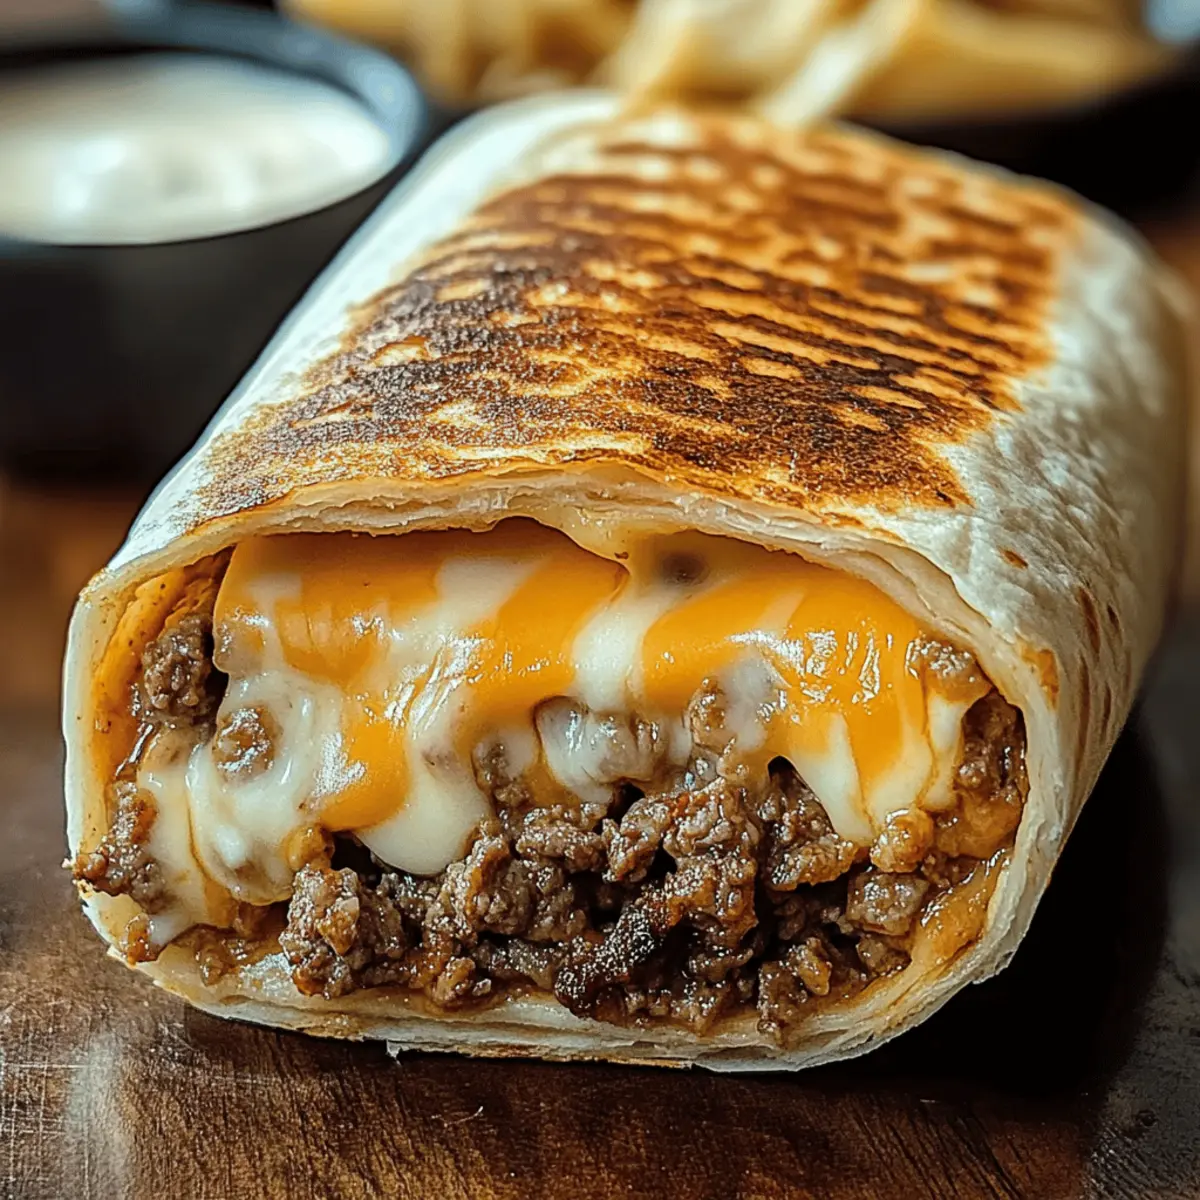
“Can you believe it’s time for dinner again?” I overheard my partner say, eyes darting to the clock while we started to feel the effects of our busy day. That’s when the craving hit: a delicious, homemade Easy Grilled Cheese Burrito inspired by a Taco Bell favorite! This dish is not only customizable to suit your taste—think spicy seasoned beef, creamy nacho cheese, and fluffy rice wrapped up in a perfectly grilled tortilla—but it also comes together in under 30 minutes. Imagine a meal that’s not just kid-approved but also a big win for everyone at the table! The best part? You can easily swap ingredients for vegetarian or dairy-free options without sacrificing flavor. Ready to transform your dinner into a cozy culinary adventure? Let’s dive into this quick and mouthwatering recipe!
Why Is This Burrito So Irresistible?
Quick and Easy: With just 30 minutes from start to finish, this burrito fits perfectly into your busy schedule.
Customizable Flavor: Tailor it to your taste! Add beans for protein or jalapeños for a spicy kick.
Kid-Approved: This fun and cheesy dish is bound to please picky eaters.
Versatile Variations: Easily switch ingredients for vegetarian or dairy-free options while keeping the flavors bold. Check out our other delicious treats like the Grilled Cheese Burrito for more inspiration!
Satisfying and Filling: Packed with savory beef, creamy cheese, and fluffy rice, it’s a complete meal that everyone will love!
Easy Grilled Cheese Burrito Ingredients
For the Filling
- Ground Beef – Provides protein and savory flavor; substitute with beans or tofu for a vegetarian option.
- Taco Seasoning – Adds spice and flavor depth; consider using a homemade blend for a healthier option.
- Cooked White Rice – Adds bulk and texture; substitute with brown rice or cauliflower rice for a healthier twist.
- Sour Cream – Contributes creaminess and tang; use dairy-free alternatives for a vegan version.
- Nacho Cheese Sauce – Offers creaminess and rich cheese flavor; use a homemade cheese sauce or dairy-free version if desired.
- Chipotle Sauce – Adds smokiness and heat; adjust the amount based on heat preference.
- Shredded Cheddar Cheese – Melts beautifully and enhances flavor; substitute with dairy-free cheese for a vegan option.
- Shredded Mozzarella – Provides a gooey texture; can be replaced with any melting cheese of choice.
For the Wrap
- Flour Tortillas – The base for the burrito; use whole wheat or gluten-free tortillas as an alternative.
- Butter or Oil – Used for grilling to create a crispy exterior; choose a non-stick cooking spray or olive oil for lighter options.
Step‑by‑Step Instructions for Easy Grilled Cheese Burrito
Step 1: Cook the Beef
In a skillet over medium heat, add 1 pound of ground beef and cook for 8–10 minutes until browned and no longer pink. Drain any excess grease, then stir in taco seasoning and ¼ cup water. Simmer for 5 minutes, or until the mixture is heated through and fragrant, bringing the flavor of your Easy Grilled Cheese Burrito to life.
Step 2: Warm the Tortillas
While the beef is cooking, warm your flour tortillas to make them pliable for easy folding. You can either heat them in a dry skillet for about 30 seconds on each side or microwave them for 30 seconds wrapped in a damp paper towel. This step ensures your tortillas will wrap around the filling without tearing.
Step 3: Assemble the Burrito
Lay a warmed tortilla flat on a clean surface. Generously layer it with fluffy cooked rice, the seasoned beef mixture, creamy nacho cheese sauce, and a drizzle of chipotle sauce. Don’t forget to add a dollop of sour cream and sprinkle shredded cheddar and mozzarella cheese on top for that gooey goodness.
Step 4: Grill the Burrito
Heat a non-stick skillet over medium heat and lightly coat it with butter or oil. Place the burrito seam-side down in the skillet, then sprinkle with a bit of shredded cheese on top. Grill for about 3–4 minutes until the cheese melts and the bottom is golden brown. Gently flip the burrito using a spatula and repeat for another 3–4 minutes to achieve a perfectly crispy exterior.
Step 5: Serve and Enjoy!
Once both sides are crispy and browned, remove the Easy Grilled Cheese Burrito from the skillet and let it cool for a moment before slicing in half. Serve it warm with your favorite sides like salsa or guacamole for an extra kick. If you have leftovers, store them in an airtight container for up to 3 days.
Expert Tips for Easy Grilled Cheese Burrito
-
Optimal Tortilla Care: Warm your tortillas carefully to prevent tearing. Using a damp paper towel in the microwave works wonders for maintaining flexibility.
-
Cheesy Perfection: For best results, add a little extra cheese on the outside while grilling to create a deliciously crispy layer on your Easy Grilled Cheese Burrito.
-
Flavor Boosting: Don’t hesitate to add fresh ingredients like diced tomatoes, cilantro, or even avocado for an elevated flavor profile.
-
Make-Ahead Convenience: You can prepare the filling ahead of time and store it in the fridge for up to 3 days, ensuring a quick assembly during busy weeknights.
-
Storage Savvy: Wrap any leftovers in foil to keep them fresh. Reheating in a skillet helps to restore that delightful crispy texture.
Easy Grilled Cheese Burrito Variations
Feel free to let your creativity shine and customize this delicious burrito to fit your taste buds and dietary needs!
-
Vegetarian Option: Swap the ground beef for black beans or a plant-based meat alternative for a hearty and satisfying meal.
-
Dairy-Free Delight: Replace sour cream and cheese with coconut yogurt and dairy-free cheese to create a vegan-friendly version.
-
Hearty and Healthy: Opt for brown rice or cauliflower rice instead of white rice for a nutritious twist that enhances the flavor.
-
Spice it Up: Mix in diced jalapeños or a splash of hot sauce to kick up the heat. A little bit goes a long way!
-
Flavor Fusion: Add grilled chicken or sautéed peppers for an exciting mix of flavors. This also adds an appealing crunch and extra nutrition.
-
Homemade Seasoning: Consider making your taco seasoning for a fresh, vibrant taste. It’s easier than you think and allows you to control the spice!
-
Wrap It Right: Experiment with whole wheat or gluten-free tortillas if you’re looking for healthier wrap options without compromising taste.
-
Meal Prep Magic: Assemble burritos ahead of time, refrigerate, and then simply grill when you’re ready to enjoy. Try it alongside a Grilled Cheese Burrito meal for a fun variety!
What to Serve with Easy Grilled Cheese Burrito
Enhance your dining experience with delightful sides that complement this cheesy favorite perfectly!
-
Fresh Salsa: Bright and tangy, salsa adds a refreshing crunch that balances the richness of the burrito. Choose a mild version for the kids or a spicy one for an extra kick!
-
Guacamole: Creamy avocado pairs beautifully with the bold flavors of the burrito. It cools down spice levels while adding a satisfying texture that everyone will love.
-
Minty Cucumber Salad: Crisp and rejuvenating, this salad breaks the heaviness of the burrito and introduces freshness with every bite. Toss with a light vinaigrette for extra zing.
-
Corn on the Cob: Sweet and buttery corn complements the savory profile of the Easy Grilled Cheese Burrito perfectly. Serve it grilled or boiled with a dash of lime and salt for a summer flair.
-
Crispy Tortilla Chips: A crunchy side that invites dipping into salsa or guacamole, tortilla chips add texture and playful enjoyment to your meal. The perfect snack for those who can’t wait!
-
Iced Lemonade: A cool drink to wash it all down, lightly sweetened lemonade brightens each bite with its citrusy freshness. It’s a fun way to keep your meals lively and refreshing!
Make Ahead Options
These Easy Grilled Cheese Burritos are perfect for meal prep enthusiasts! You can assemble the burritos and refrigerate them for up to 24 hours before grilling. To maintain their quality, ensure you wrap them in plastic wrap or store them in an airtight container to prevent the tortillas from drying out. When you’re ready to enjoy, simply heat a skillet over medium heat and grill the burritos seam-side down for 3–4 minutes on each side until golden brown and crispy. This method allows you to savor that mouthwatering flavor and texture with minimal effort on busy weeknights! Just imagine diving into a delicious homemade burrito that’s just as satisfying as your favorite fast-food treat!
How to Store and Freeze Easy Grilled Cheese Burrito
Fridge: Store wrapped burritos in an airtight container for up to 3 days. This helps maintain freshness and flavor while keeping them ready for a quick reheat.
Freezer: To extend storage, individually wrap burritos in foil and freeze for up to 1 month. When you’re ready to enjoy, simply reheat in the oven or skillet for the best results.
Reheating: For a crispy texture, heat in a skillet over medium heat for about 5–6 minutes on each side. You can also microwave for a quick fix, although it may not be as crispy.
Wrap Properly: Always ensure that the burritos are tightly wrapped before storage to prevent freezer burn and retain the delicious taste of your Easy Grilled Cheese Burrito.
Easy Grilled Cheese Burrito Recipe FAQs
What kind of ground beef is best for this recipe?
I recommend using lean ground beef (85/15) for your Easy Grilled Cheese Burrito. This allows you to enjoy the savory flavor without excess grease. If you prefer a healthier option or need a vegetarian substitute, feel free to use black beans, lentils, or even tofu to maintain that hearty texture.
How should I store leftovers from the burrito?
Absolutely! You can store any leftover burritos wrapped in an airtight container in the fridge for up to 3 days. This keeps them fresh and flavorful, ready for a quick reheat whenever you’re craving that cheesy goodness on a busy day.
Can I freeze the burritos for later?
Yes, you can! Simply wrap each assembled Easy Grilled Cheese Burrito tightly in foil and freeze them for up to 1 month. When it’s time to enjoy, just reheat them in the oven at 350°F (175°C) for 20-25 minutes, or cook in a skillet for about 5-6 minutes per side to bring back that crispy exterior.
What should I do if my burrito is too soggy after cooking?
If you notice your burrito is soggy, it could be from too much filling or not cooking the beef long enough to evaporate excess moisture. Next time, ensure your filling isn’t overly wet and allow any sauces to thicken up. You can also grill it for a few extra minutes, pressing down gently to help crisp up the exterior.
Are there any dietary considerations for this burrito?
Yes! This Easy Grilled Cheese Burrito is quite versatile. For a vegan version, substitute ground beef with a hearty bean or tofu mix, use dairy-free cheese, and plant-based sour cream. Always check labels, especially for allergies, ensuring all ingredients suit your dietary needs.
How can I make this recipe spicier?
If you love heat, you can add diced jalapeños or a splash of hot sauce to the filling. Alternatively, use pepper jack cheese instead of cheddar for an extra kick. Customize it to your fire tolerance; the more the merrier!
Easy Grilled Cheese Burrito: A Cheesy Homemade Delight
Ingredients
Equipment
Method
- Cook the Beef: In a skillet over medium heat, add 1 pound of ground beef and cook for 8–10 minutes until browned and no longer pink. Drain any excess grease, then stir in taco seasoning and ¼ cup water. Simmer for 5 minutes until heated through.
- Warm the Tortillas: While the beef is cooking, warm your flour tortillas to make them pliable. Heat them in a dry skillet for about 30 seconds on each side or microwave wrapped in a damp paper towel for 30 seconds.
- Assemble the Burrito: Lay a warmed tortilla flat, layer with rice, beef mixture, nacho cheese sauce, chipotle sauce, sour cream, and shredded cheeses.
- Grill the Burrito: Heat a skillet over medium heat with butter or oil. Place burrito seam-side down, sprinkle with cheese, grill for 3–4 minutes until golden, flip, and repeat.
- Serve and Enjoy: Remove from skillet, let cool slightly, slice in half, and serve with salsa or guacamole.
Leave a Reply