
A cozy kitchen, a gentle simmering sound, and the unmistakable aroma of vanilla can transport me back to my childhood in an instant. Making Homemade Vanilla Pudding is not just a treat; it’s a nostalgic celebration of simplicity that transforms everyday moments into something special. This classic dessert is a comforting favorite that’s surprisingly easy to whip up; it requires minimal ingredients and just a bit of attention. The reward? A rich, creamy pudding that outshines any pre-packaged option and makes the perfect addition to family gatherings or quiet evenings. Whether you’re a seasoned home chef or just stepping into the culinary world, this recipe is sure to impress and satisfy! Ready to revive those cherished memories and savor the taste of this delightful dessert? Let’s dive in!
Why is Homemade Vanilla Pudding special?
Nostalgic Comfort: Homemade Vanilla Pudding takes you back to childhood with every creamy, velvety bite. Simplicity at Its Finest: With just a handful of ingredients, this recipe makes deliciousness accessible to everyone. Versatile Template: Easily adapt it to create fruity or chocolate variations, enhancing the experience! Quick Preparation: With minimal cooking time, it’s perfect for last-minute gatherings or weeknight desserts. Crowd-Pleasing Delight: Serve it at dinner parties or family get-togethers, and watch it disappear, leaving smiles all around. Whether you’re layering it like in parfait cups or enjoying it straight from the bowl, you won’t regret choosing this classic treat!
Homemade Vanilla Pudding Ingredients
• For the Pudding
- Sugar – Provides sweetness; can substitute with a sugar substitute for a low-calorie option.
- Whole Milk – Gives richness and creaminess; if needed, can replace with half-and-half for a creamier pudding or use a non-dairy milk for a vegan version.
- Cornstarch – Serves as a thickening agent for desired texture; arrowroot powder can be used as an alternative for a gluten-free option.
- Salt – Enhances the sweetness; leave out for a low-sodium version.
- Egg Yolks – Adds richness and acts as an emulsifier; for a vegan alternative, consider using a commercial egg replacement.
- Unsalted Butter – Adds flavor and creaminess; omit for a dairy-free version or replace with coconut oil.
- Vanilla Extract – Provides essential flavor; use pure vanilla extract for best results or try a vanilla bean for a more intense flavor.
This carefully crafted Homemade Vanilla Pudding comes together effortlessly, letting you create a delicious dessert that warms both the heart and the palate!
Step‑by‑Step Instructions for Homemade Vanilla Pudding
Step 1: Combine Ingredients
In a double boiler set over medium heat, combine sugar, whole milk, cornstarch, and a pinch of salt. Stir constantly with a wooden spoon until the mixture is smooth and starts to heat up, about 5 minutes. Keep an eye on it to ensure it does not scorch, as the gentle steam will gradually warm the mixture, making it easier to thicken later.
Step 2: Temper the Egg Yolks
As the mixture begins to thicken and bubble gently, take a small amount and slowly whisk it into the beaten egg yolks in a separate bowl. This step, which takes about 1 minute, will temper the egg yolks, preventing them from curdling when added to the hot mixture. Once fully combined, return the tempered yolk mixture to the double boiler.
Step 3: Cook Until Thickened
Continue cooking the combined mixture in the double boiler, stirring regularly. In about 5–7 minutes, the pudding should thicken to a custard-like consistency. You’ll know it’s ready when it coats the back of a spoon and holds the shape when drizzled. Make sure to monitor the heat, adjusting as necessary to keep a gentle simmer.
Step 4: Add Butter and Vanilla
Once thickened, remove the pudding from heat and immediately stir in unsalted butter and vanilla extract. The warmth of the pudding will melt the butter quickly, resulting in a creamy texture. Mix until both are fully dissolved and incorporated, enhancing the richness of your Homemade Vanilla Pudding.
Step 5: Transfer and Cool
Carefully pour the pudding into individual serving dishes or a bowl. Allow it to cool slightly, about 15 minutes, at room temperature. This step is crucial for letting the flavors meld while preventing condensation from forming as it chills in the refrigerator.
Step 6: Chill for the Perfect Texture
Cover the pudding with plastic wrap, pressing it gently against the surface to avoid a skin from forming. Refrigerate for at least 2 hours or until chilled completely, which will give you that luscious, creamy texture that makes Homemade Vanilla Pudding so memorable.
What to Serve with Homemade Vanilla Pudding?
Indulge in the comforting sweetness of your creamy creation with these delightful accompaniments that will elevate your dessert experience.
-
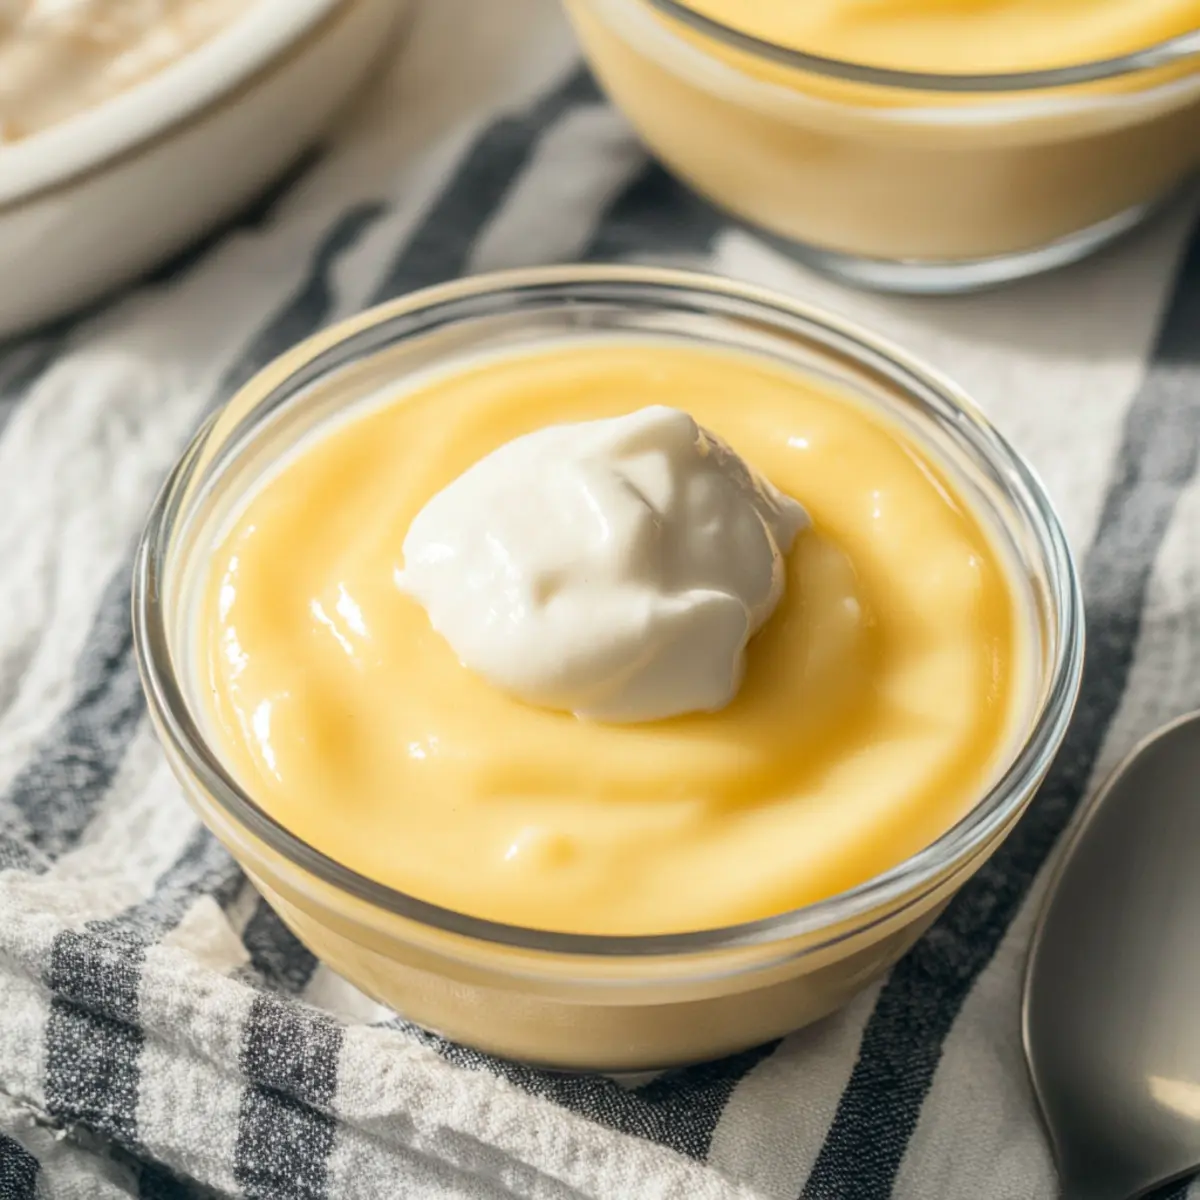
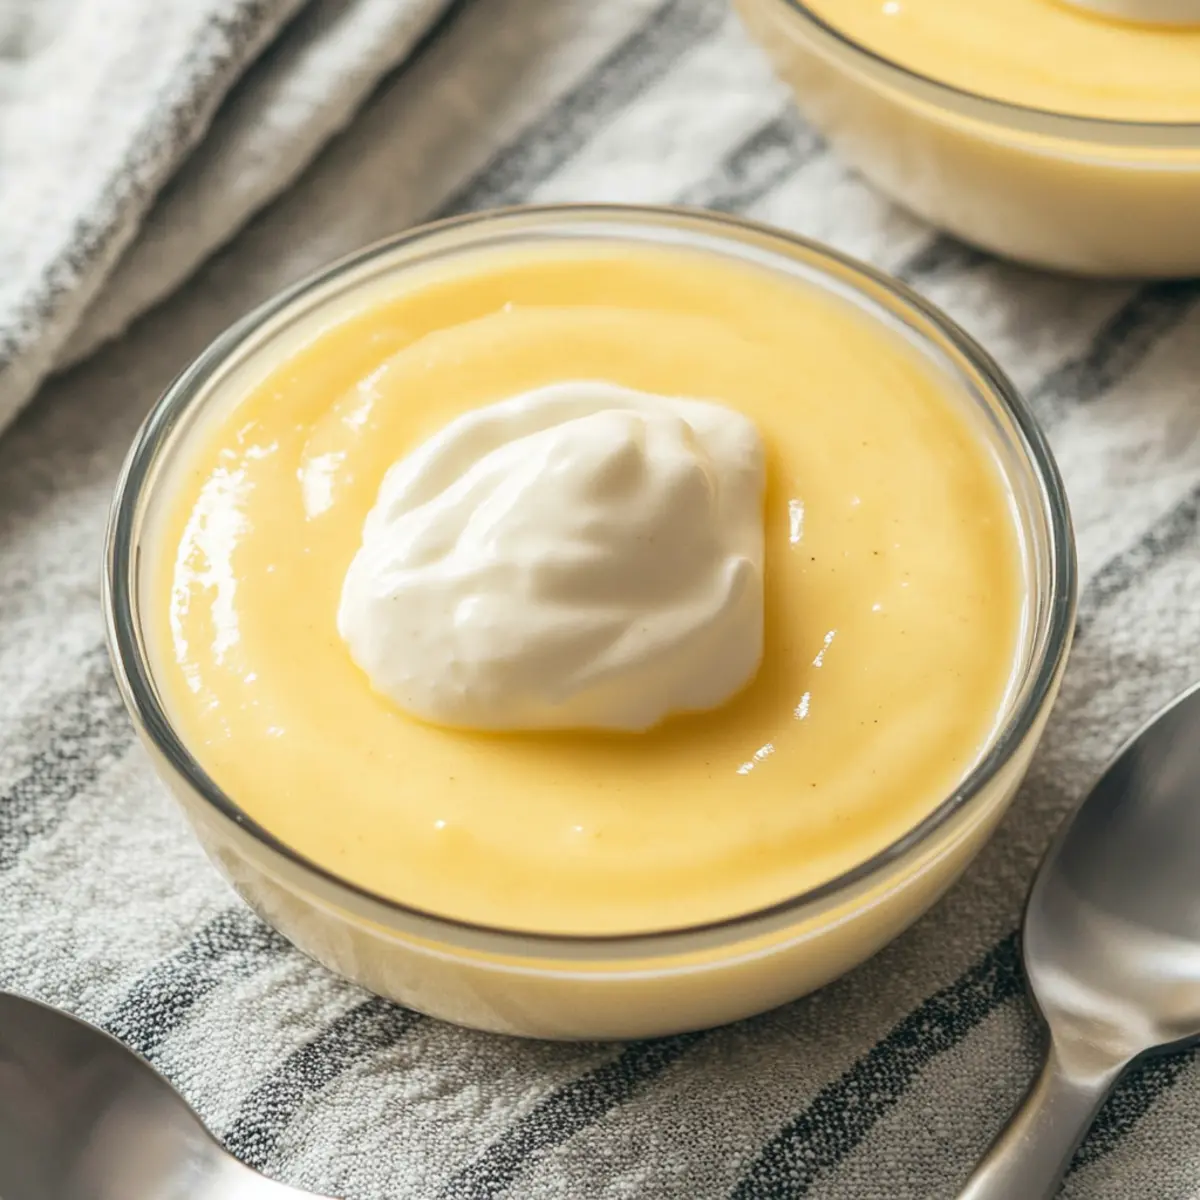
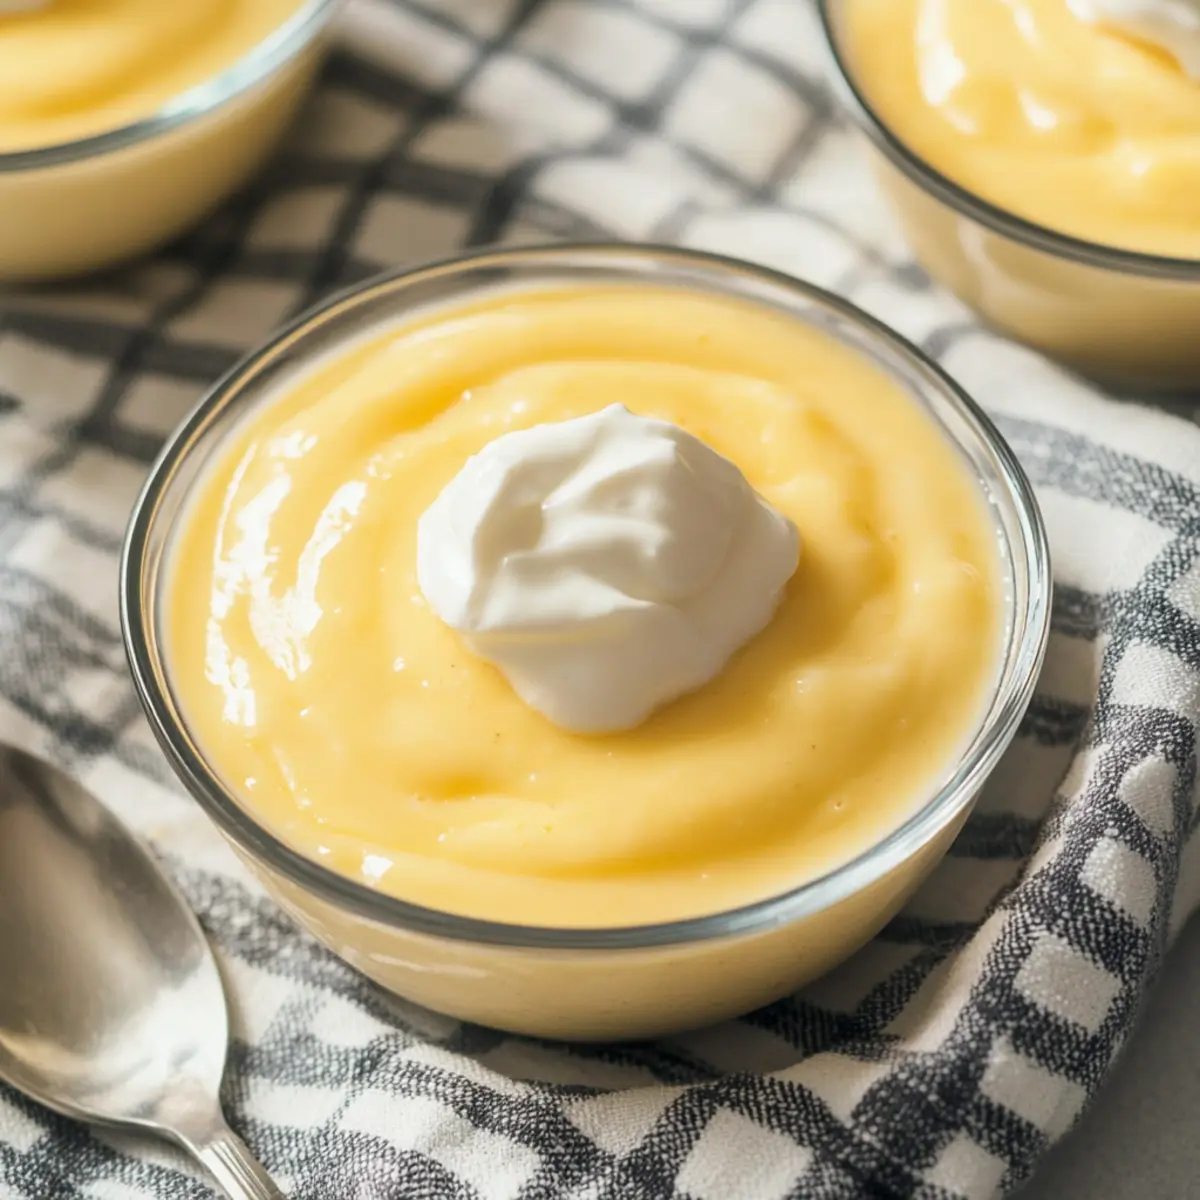
Whipped Cream: Topped with a generous dollop of fresh whipped cream for an airy contrast, it adds richness and a silky mouthfeel.
-
Fresh Berries: Vibrant strawberries, blueberries, or raspberries provide a tangy burst that perfectly complements the sweetness of the pudding.
-
Chocolate Shavings: Decadent chocolate shavings or curls create a stunning visual and a rich flavor contrast, enhancing the creamy vanilla.
-
Granola Crunch: A sprinkle of crunchy granola adds a textural element, bringing a delightful crunch that balances the pudding’s smoothness.
-
Caramel Drizzle: Drizzling warm caramel sauce over the pudding introduces a warm, buttery sweetness that makes every bite a tantalizing treat.
-
Coconut Flakes: Toasted coconut flakes add a delightful tropical note that harmonizes beautifully with the classic vanilla flavor.
-
Mint Leaves: Fresh mint leaves provide a refreshing, aromatic finish, enhancing the pudding’s flavors while adding a pop of color.
-
Earl Grey Tea: A steaming cup of Earl Grey tea pairs nicely, offering floral notes and a hint of citrus to balance the richness of the pudding.
-
Chocolate Chip Cookies: Serve with warm chocolate chip cookies for a nostalgic pairing that elevates your dessert into a satisfying treat.
With these pairings, your Homemade Vanilla Pudding will take center stage at any gathering while creating memorable moments for all to enjoy.
Storage Tips for Homemade Vanilla Pudding
Refrigerator: Store Homemade Vanilla Pudding in an airtight container; it can last for up to 3–5 days while keeping its creamy texture.
Covering: To prevent a skin from forming, press plastic wrap directly onto the surface of the pudding before sealing it.
Serving: When ready to enjoy, give the pudding a gentle stir; it may thicken slightly in the fridge.
Freezing: While not recommended, if you must freeze it, do so in an airtight container for up to a month; thaw in the refrigerator and whisk to restore texture.
Homemade Vanilla Pudding Variations
Feel free to get creative and make this recipe your own with these delightful twists that elevate your Homemade Vanilla Pudding experience!
-
Chocolate Pudding: Stir in cocoa powder while whisking the sugar for a rich chocolatey flavor. Imagine the decadent sweetness as it mingles with creamy vanilla.
-
Butterscotch Pudding: Swap out white sugar for brown sugar to infuse a warm, caramel-like taste. The depth of flavor will remind you of cozy nights by the fireplace.
-
Fruity Variants: Mix in pureed fruits such as banana or raspberry after cooking for a refreshing finish. This adds a burst of vibrant color and flavor, making each bite a surprise!
-
Spiced Delight: Add a pinch of cinnamon or nutmeg during cooking for a comforting twist. The warmth of the spices will evoke memories of family gatherings.
-
Nutty Creaminess: Fold in finely chopped nuts like pecans or almonds for added texture and richness. Their crunch enhances the smoothness in every spoonful.
-
Coconut Cream Pudding: Replace part of the milk with coconut milk and add shredded coconut for a tropical flair. Every bite will whisk you away to a sunny beach!
-
Coffee Infusion: Add a tablespoon of instant coffee granules to the mixing bowl before heating for a caffeinated kick. The delicate balance between coffee and vanilla makes for a sophisticated treat.
-
Whipped Topping: For an extra layer of creaminess, top your pudding with homemade whipped cream or even layer it in parfait cups with granola and fruit. It’s a delightful way to present your creation, making it a feast for the eyes too!
Trying these variations will keep your Homemade Vanilla Pudding engaging while delighting your taste buds. For more unique ideas, check out Grilled Cheese Burrito or explore the wonderful flavors of Katsu Bowls Tonkatsu. Each recipe is a new adventure waiting for you in the kitchen!
Expert Tips for Homemade Vanilla Pudding
- Watch the Heat: Maintain a gentle simmer in the double boiler to prevent scorching and curdling of the egg yolks for perfect Homemade Vanilla Pudding.
- Perfect Thickness: Stir continuously; the pudding should coat the back of a spoon when ready—don’t rush it!
- Tempering Technique: Always temper egg yolks before adding to the hot mixture, avoiding any unwanted curdles.
- Flavor Boost: Enhance your pudding by infusing milk with vanilla beans or even a hint of cinnamon before cooking.
- Storage Solutions: Store your pudding in an airtight container; it lasts up to 5 days, retaining that silky texture.
Make Ahead Options
Making Homemade Vanilla Pudding ahead of time is a fantastic way to save some valuable minutes during a busy day! You can easily prepare the pudding up to 24 hours in advance. Simply follow the recipe through to the chilling step, then cover it tightly with plastic wrap pressed against the surface to prevent a skin from forming. Refrigerate until you’re ready to serve. When it’s time for dessert, give the pudding a gentle stir before portioning it out into bowls or parfait cups. This ensures the pudding maintains its velvety texture and delicious flavor, making it just as delightful as when freshly made!
Homemade Vanilla Pudding Recipe FAQs
What type of milk is best for Homemade Vanilla Pudding?
For the creamiest texture, whole milk is recommended. However, you can substitute it with half-and-half for an even richer flavor, or use a non-dairy milk like almond or coconut milk for a vegan alternative. Just ensure that whatever you choose is unsweetened to maintain the pudding’s balance.
How should I store Homemade Vanilla Pudding?
Store your Homemade Vanilla Pudding in an airtight container in the refrigerator for up to 3-5 days. Make sure to cover the surface with plastic wrap to prevent a skin from forming, keeping that silky, smooth texture intact.
Can I freeze Homemade Vanilla Pudding?
While it’s generally not ideal to freeze pudding due to potential texture changes, if you must, place it in an airtight container for up to one month. When ready to use, thaw in the refrigerator overnight, then whisk it gently to restore its creamy consistency.
What if my pudding doesn’t thicken properly?
If your pudding isn’t thickening, you may need to adjust the heat. Ensure it’s cooking on a gentle simmer, and stir consistently. If it still doesn’t thicken after about 10 minutes, you can make a slurry by mixing an extra tablespoon of cornstarch with a tablespoon of cold milk. Gradually stir this into the warming pudding and continue cooking until thickened.
Are there any dietary considerations I should be aware of?
Yes! Homemade Vanilla Pudding usually contains egg yolks and dairy. For vegan options, replace the egg yolks with a commercial egg replacer and use plant-based milk and butter alternatives. Always check for allergies, as some individuals may be sensitive to dairy or eggs.
How do I know when the pudding is ready?
You’ll know your Homemade Vanilla Pudding is ready when it coats the back of a spoon and holds its shape when drizzled. If you’re unsure, it should take about 5-7 minutes of simmering after adding the tempered yolks. Keep stirring and monitoring to avoid burning!

Homemade Vanilla Pudding: Comforting Nostalgia in Every Bite
Ingredients
Equipment
Method
- In a double boiler set over medium heat, combine sugar, whole milk, cornstarch, and a pinch of salt. Stir constantly with a wooden spoon until smooth and heated, about 5 minutes.
- Once thickened, take a small amount of the mixture and whisk it slowly into the beaten egg yolks in a separate bowl to temper. Return the tempered yolk mixture to the double boiler.
- Continue cooking, stirring regularly, until the pudding thickens to a custard-like consistency, about 5-7 minutes.
- Remove from heat and stir in unsalted butter and vanilla extract until fully incorporated.
- Pour the pudding into individual serving dishes or a bowl and allow to cool slightly for about 15 minutes.
- Cover with plastic wrap pressed against the surface to avoid a skin forming, and refrigerate for at least 2 hours.
Leave a Reply