
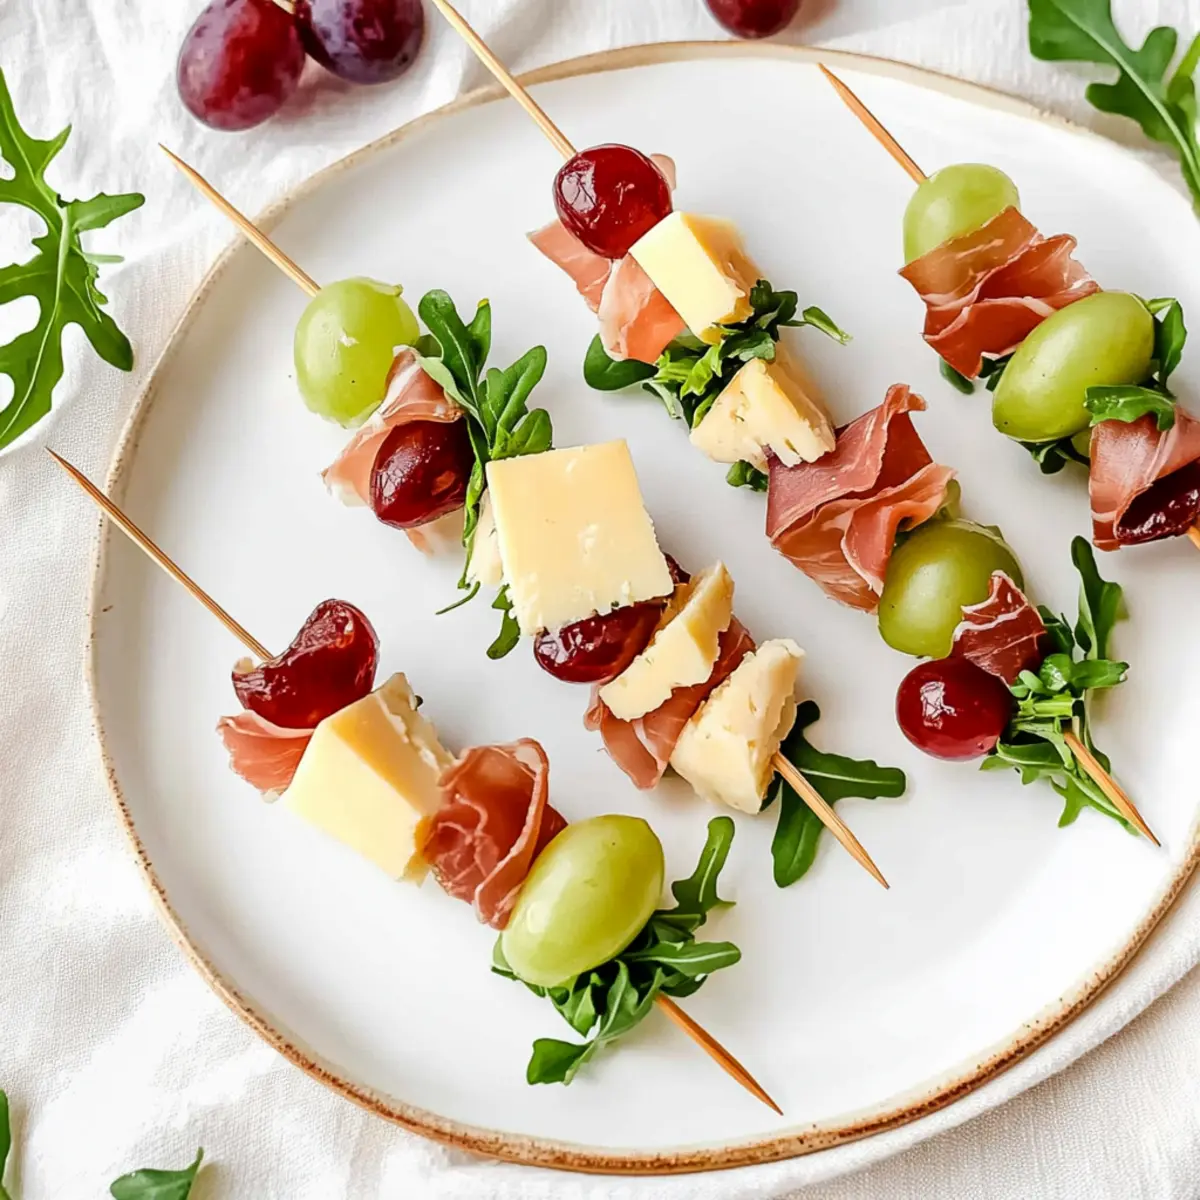
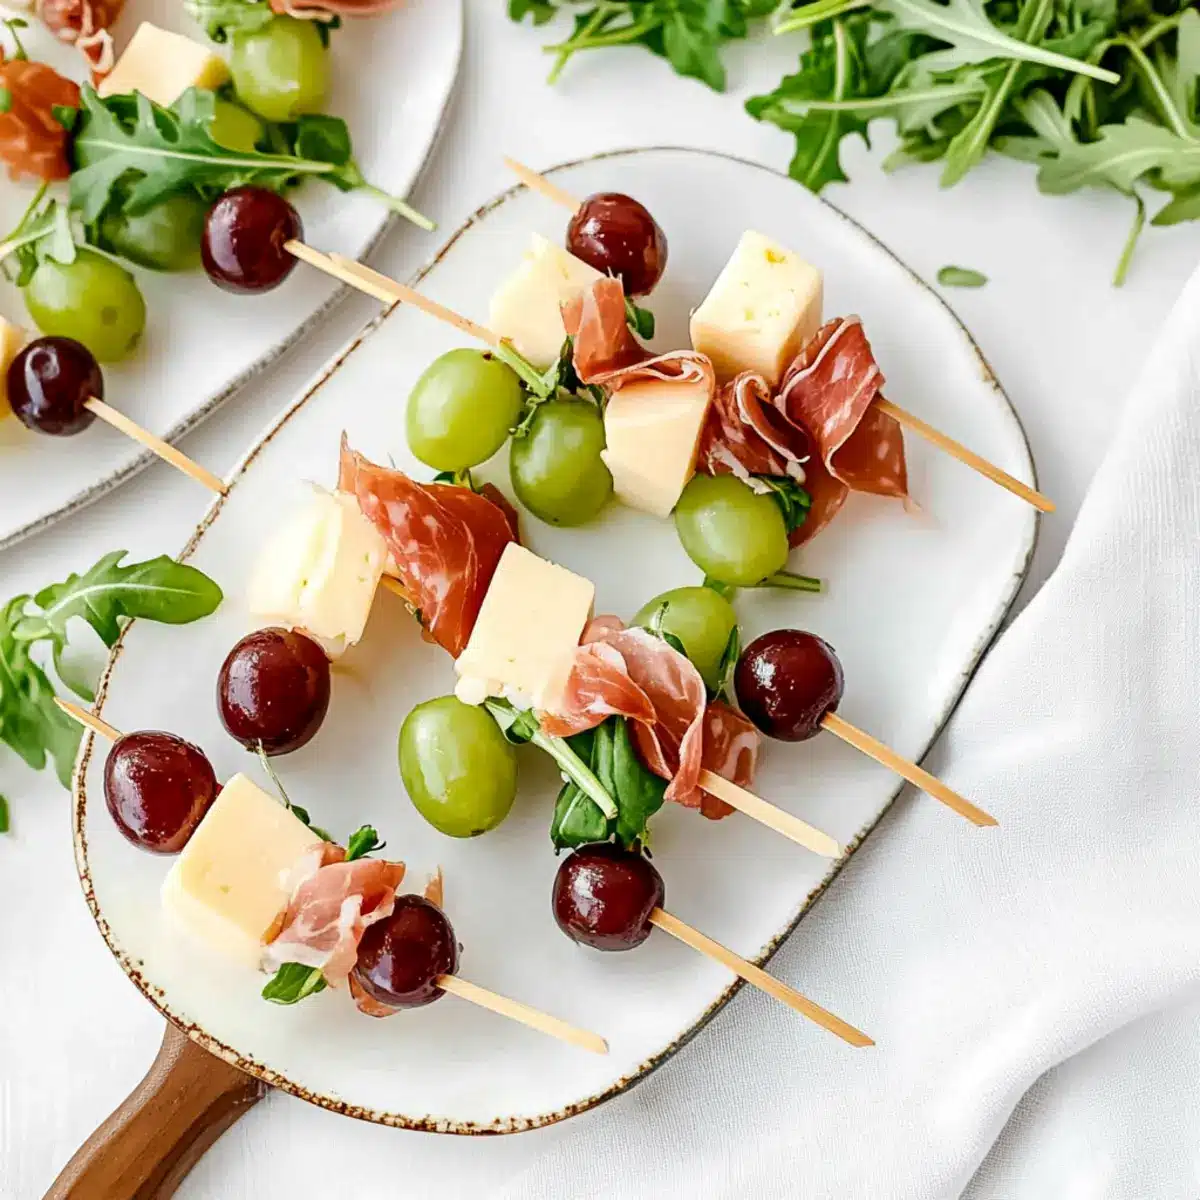
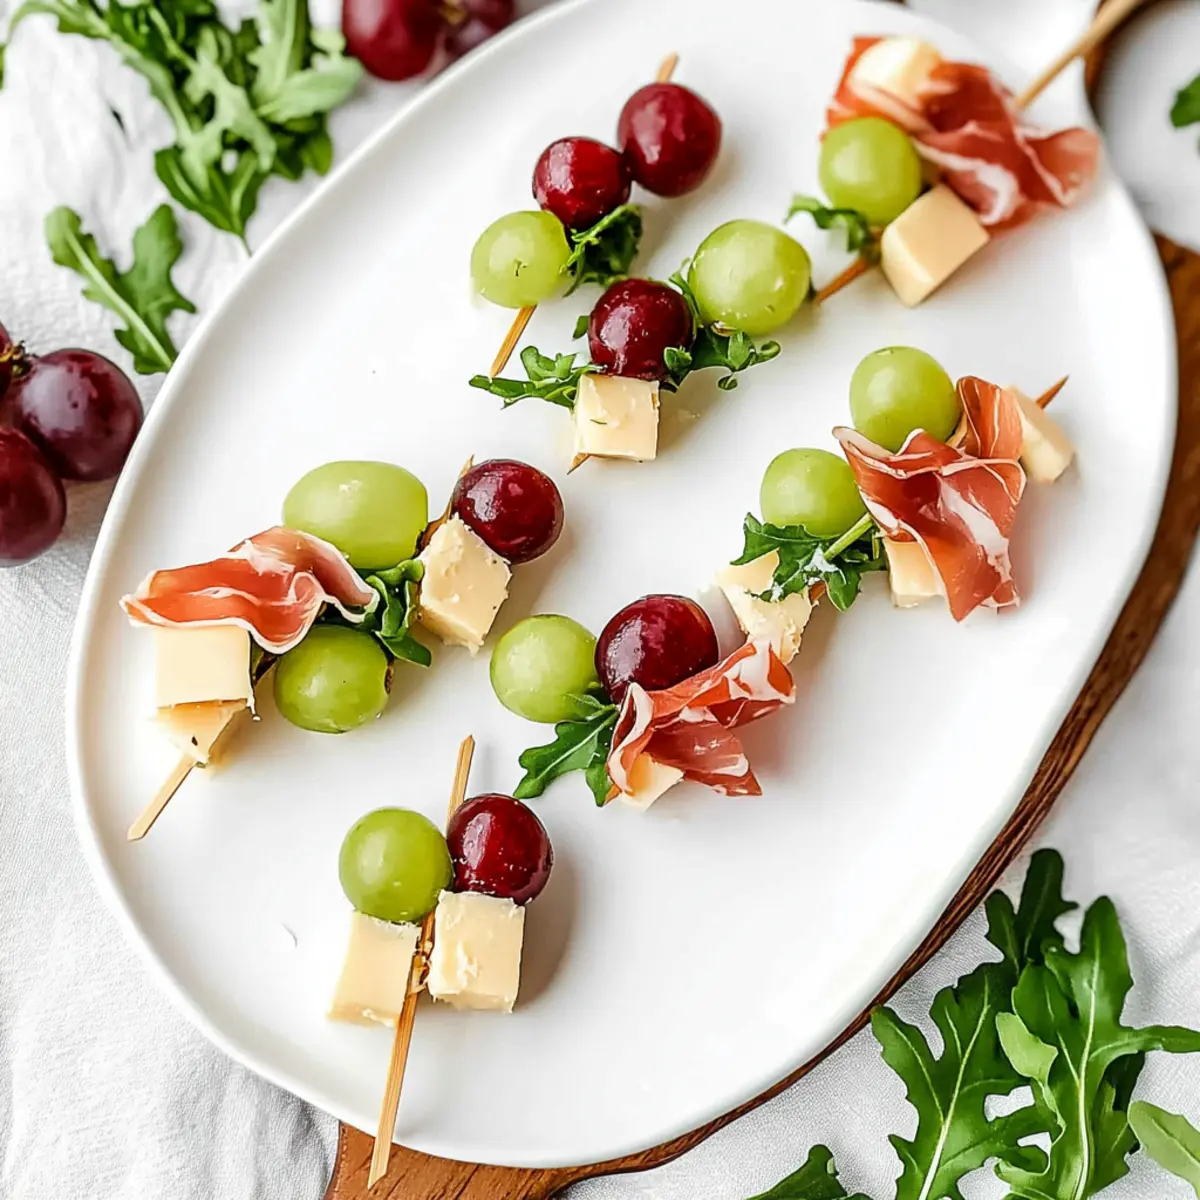
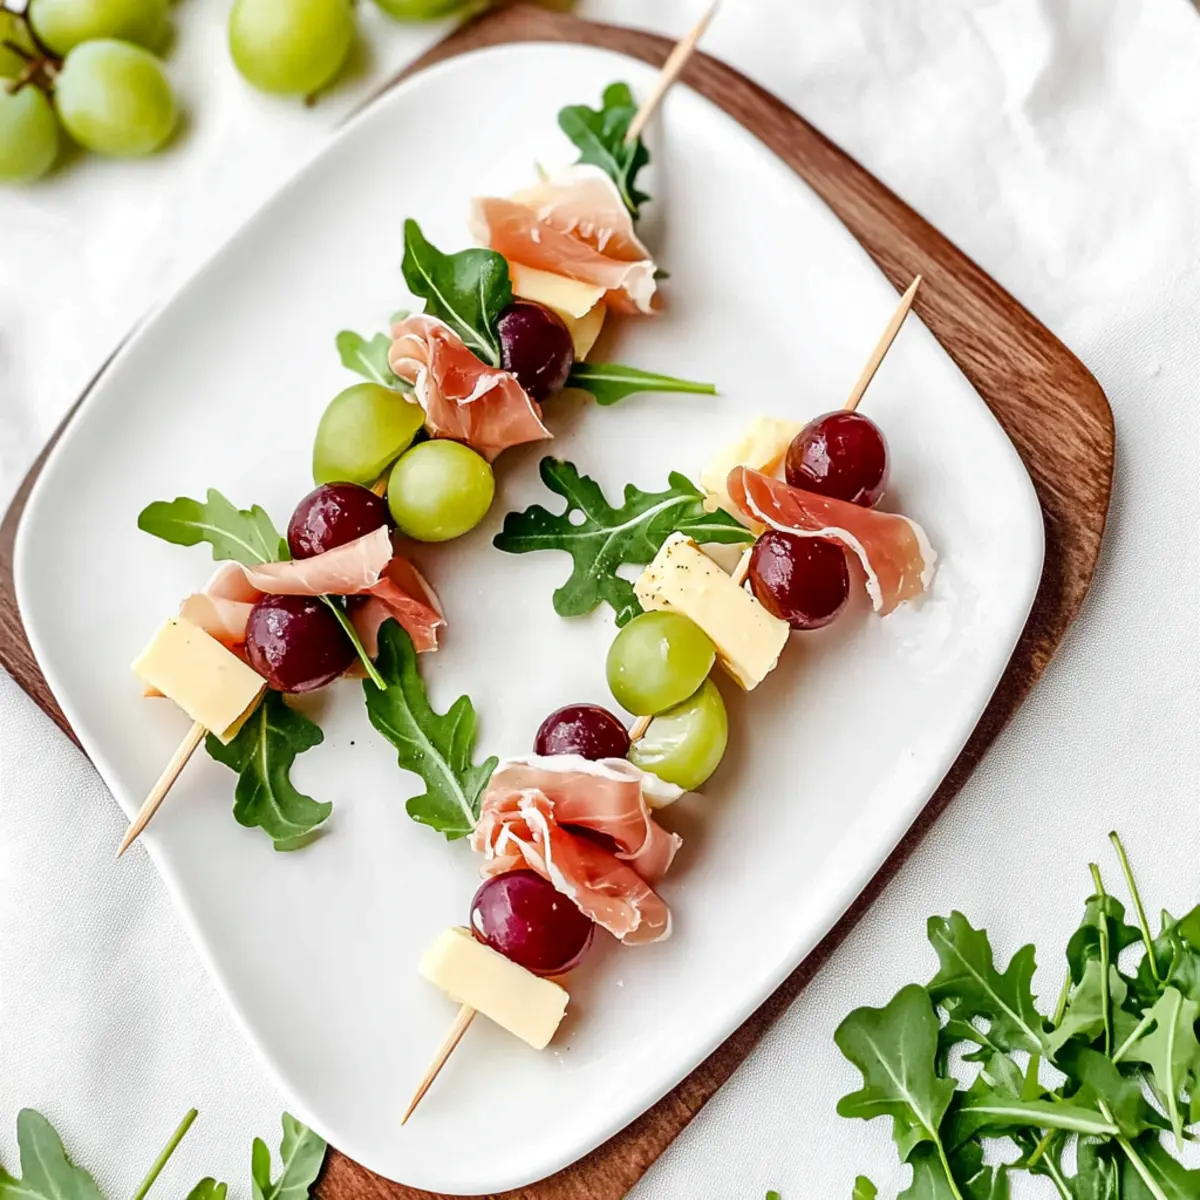
As I watched summer gatherings come to life, I found myself gravitating toward these vibrant Cheese and Grape Skewers. Their colorful arrangement not only pleases the eyes but serves up a refreshing medley of sweet grapes, creamy gouda, and savory prosciutto. In less than 15 minutes, you can elevate any occasion with this quick and healthy appetizer that’s as versatile as it is delicious. These skewers are perfect for impressing guests or simply treating yourself to a satisfying snack that balances crunchy, creamy, and sweet flavors. Plus, with endless possibilities for cheese and seasonal fruit substitutions, they keep things exciting and fresh. Are you ready to dive into this easy-to-make delight?
Why are Cheese and Grape Skewers a Must-Try?
Quick and Easy: These skewers come together in under 15 minutes, making them a perfect option for last-minute gatherings.
Vibrant Presentation: The colorful combination of grapes and cheese not only creates a stunning visual delight but also entices your guests before they even take a bite.
Flavor Balance: Each bite is a lovely mix of sweet, savory, and creamy notes that satisfy every palate.
Endless Variations: The flexibility to swap cheeses and fruits means you can create something new each time, just like when preparing a Grilled Cheese Burrito.
Healthy Snack: With just 49 calories per skewer, you can indulge without guilt, making them a feel-good choice for everyone.
Get ready to elevate your appetizer game with these Cheese and Grape Skewers!
Cheese and Grape Skewers Ingredients
For the Skewers
• Red Seedless Grapes – Provides sweetness and juiciness; substitute with green grapes for a different flavor.
• Green Seedless Grapes – Adds a refreshing balance; can use other fruits like pears or cherries.
• Arugula Leaves – Offers a peppery flavor and visual appeal; substitute with spinach or kale as desired.
• Gouda Cheese (1/2 inch cubes) – Adds nutty and creamy texture; can substitute with cheddar, provolone, or Brie.
• Prosciutto (sliced and quartered) – Contributes a savory component; replace with salami or omit for a vegetarian option.
For the Drizzle (Optional)
• Balsamic Glaze – Enhances flavor with a sweet and tangy profile; can substitute with honey or a fruit-based glaze.
Step‑by‑Step Instructions for Cheese and Grape Skewers
Step 1: Prepare the Ingredients
Start by washing and thoroughly drying both red and green seedless grapes. Use a clean kitchen towel to remove any excess moisture, ensuring that the grapes are dry for better sticking to the skewers. Gather your arugula leaves, gouda cheese cubes, and prosciutto slices, laying them out on a cutting board for easy access as you assemble your colorful cheese and grape skewers.
Step 2: Assemble the Skewers
Take a skewer and thread one red grape onto it, leaving about an inch of space at the top. This will provide stability as you continue layering. Make sure the grape fits snugly but is not over-tightened, as you still want it to be easy to bite into once completed.
Step 3: Add the Arugula
Next, fold one or two arugula leaves and carefully thread them onto the skewer beneath the red grape. The peppery taste of arugula adds a wonderful contrast to the sweetness of the grapes. Position it such that the leaves maintain their green hue, showcasing that fresh, vibrant look.
Step 4: Incorporate the Cheese
Below the arugula, add a cube of gouda cheese. Gently press it down to secure it without squishing the ingredients. The creamy texture of gouda complements the crunchy grapes and peppery arugula beautifully, enhancing the flavors of your cheese and grape skewers.
Step 5: Layer in the Prosciutto
Fold a piece of prosciutto, creating a compact shape before threading it onto the skewer beneath the cheese. The rich, savory flavor of the prosciutto balances the sweetness of the grapes, creating a delicious bite. Ensure that it is snug but allow some room for the flavors to shine through without being overwhelming.
Step 6: Finish with a Green Grape
Finally, add a green grape beneath the prosciutto on the skewer. This adds a refreshing crunch and a pop of color to your cheese and grape skewers. Make sure the grape sits securely and complete the skewer with enough space at the end for easy handling.
Step 7: Drizzle with Balsamic Glaze
Once all components are assembled on the skewers, arrange them neatly on a serving platter. Just before serving, drizzle with balsamic glaze, if desired. The tangy sweetness of the glaze enhances the overall flavor profile, making your cheese and grape skewers irresistible and ready for your guests.
Cheese and Grape Skewers Variations
Feel free to take these Cheese and Grape Skewers to new heights and customize them to your taste!
-
Cheese Swap: Replace gouda with sharp cheddar or creamy brie for different flavor profiles. Each cheese adds its own unique character to the skewers.
-
Fruit Fusion: Add cherry tomatoes or seasonal fruits like peaches or figs for a burst of flavor. This can create a sweet and savory combination that keeps everyone guessing.
-
Herb Enhancement: Incorporate fresh basil or mint leaves alongside arugula. The fresh herbs elevate the flavors, making each bite a delightful surprise.
-
Vegetarian Delight: Skip the prosciutto entirely and load up on extra veggies. Consider adding cucumber slices or bell pepper chunks for extra crunch.
-
Spicy Kick: Drizzle with a little hot honey or add spicy salami instead of prosciutto for those who love some heat. It’ll create an exciting twist that will ignite your taste buds!
-
Nutty Addition: Sprinkle some toasted nuts, like walnuts or almonds, over the assembled skewers for added crunch and nutrition. It contrasts the juicy grapes perfectly.
-
Balsamic Variations: Try a sweet chili sauce instead of balsamic glaze to give a tangy and spicy kick. This glaze change can dramatically shift the overall flavor of your skewers.
-
Platter Pairing: Serve alongside Grilled Cheese Burritos or Skillet Cheese Buffalo for a delightful appetizer spread. The combinations will surely wow your guests!
Feel free to experiment with these variations and make these skewers your own!
Expert Tips for Cheese and Grape Skewers
-
Fresh Ingredients: Always use ripe grapes and fresh arugula to ensure the best flavor and texture in your cheese and grape skewers.
-
Proper Size: Choose grapes that fit snugly on the skewers but are not too large. Halving them is safer, especially for kids, enhancing both ease of eating and aesthetics.
-
Layer Wisely: Securely layer your ingredients on the skewer, ensuring each element is visible. This not only makes them visually appealing but also provides a balanced bite.
-
Time for Drizzle: Drizzle the balsamic glaze right before serving to prevent it from making the skewers soggy, ensuring every bite is crisp and fresh.
-
Chill Before Serving: If possible, chill your assembled skewers in the fridge for a few minutes before serving. It enhances the refreshing aspect of the cheese and grape skewers and keeps them firm.
Make Ahead Options
These Cheese and Grape Skewers are a fantastic meal prep option for busy home cooks! You can prepare the individual components—grapes, cheese cubes, arugula, and prosciutto—up to 24 hours in advance, storing them separately in airtight containers in the refrigerator. This helps maintain the freshness and prevents the grapes from becoming soggy, preserving their delightful crunch. When you’re ready to impress your guests, simply skewer the prepped ingredients together and drizzle with balsamic glaze just before serving. This way, you’ll enjoy a stunning, gourmet appetizer with minimal effort, saving you valuable time during busy gatherings or weeknight dinners!
How to Store and Freeze Cheese and Grape Skewers
Refrigerator: Store any leftover skewers in an airtight container for up to 3-4 days. This keeps the ingredients fresh and flavorful for your next snacking occasion.
Make-Ahead: You can prepare the cheese and grape skewers a day in advance. Just ensure they’re stored properly to maintain freshness, ideal for busy days or impromptu gatherings.
Room Temperature: If serving at a party, try to keep them at room temperature for no more than 2 hours. This helps preserve the delightful flavors and textures of the ingredients.
Reheating: These skewers are best enjoyed cold or at room temperature; avoid reheating to maintain the delightful crispness of the grapes and freshness of the arugula.
What to Serve with Cheese and Grape Skewers?
Add a delightful touch to your gatherings with these vibrant bites, perfect for any occasion.
- Creamy Hummus: A smooth dip that provides a wonderful contrast to the skewers’ crunch, enhancing your snacking experience.
- Fresh Fruit Salad: Combining seasonal fruits adds sweetness and freshness, creating a refreshing contrast to the savory elements of the skewers.
- Herbed Flatbread: The warm, soft texture of flatbread pairs beautifully with the cheese, making for a satisfying addition to the appetizer spread.
- Quinoa Salad: This hearty, nutritious salad complements the skewers with its nutty flavors and adds a wholesome touch to your meal.
- Sparkling White Wine: Bubbles and crisp acidity in sparkling wine elevate the flavors of both cheese and grapes, making for a delightful sip between bites.
- Chocolate-Dipped Strawberries: A sweet finale, these decadent bites provide a satisfying contrast to the savory notes of the skewers.
- Olive Tapenade: Rich and flavorful, this spread adds a gourmet touch to your platter, turning your appetizer into a rustic feast.
Each pairing brings a distinct flavor, enhancing the overall experience of enjoying your delightful cheese and grape skewers!
Cheese and Grape Skewers Recipe FAQs
How do I select the best grapes for the skewers?
Absolutely! Look for grapes that are firm, plump, and have a vibrant color without any dark spots or wrinkles. They should be free from bruising to ensure a juicy bite. Both red and green seedless grapes work beautifully, so choose based on your preference or visual appeal!
What’s the best way to store leftover skewers?
Very! Store any leftover cheese and grape skewers in an airtight container in the refrigerator for up to 3-4 days. This keeps them fresh and tasty. Just make sure to separate any ingredients that might wilt, like arugula, to keep your skewers looking and tasting their best!
Can I freeze cheese and grape skewers?
No, I don’t recommend freezing them. While individual components like cheese can be frozen, the fresh grapes and arugula will lose their texture and flavor. It’s best to prepare the skewers fresh and enjoy them cold or at room temperature.
What if my grapes are too big for the skewers?
If your grapes are on the larger side, you can simply halve them. This not only helps them fit better on the skewer but also makes it safer for young children, reducing the choking hazard while still serving delightful flavors!
Are there any dietary considerations I should keep in mind?
Absolutely! If you’re serving these skewers to guests, be mindful of potential allergies, particularly to dairy or meats. You can easily adapt the recipe by using plant-based cheese alternatives and omitting or replacing prosciutto with an equally delicious vegetarian option like marinated tofu or mushrooms. Enjoying the versatility of cheese and grape skewers means accommodating all preferences!
Cheese and Grape Skewers: The Perfect Summer Delight
Ingredients
Equipment
Method
- Start by washing and thoroughly drying both red and green seedless grapes. Gather your arugula leaves, gouda cheese cubes, and prosciutto slices on a cutting board for easy assembly.
- Take a skewer and thread one red grape onto it, leaving about an inch of space at the top.
- Fold one or two arugula leaves and carefully thread them onto the skewer beneath the red grape.
- Add a cube of gouda cheese below the arugula, gently pressing it down.
- Fold a piece of prosciutto and thread it onto the skewer beneath the cheese.
- Finally, add a green grape beneath the prosciutto on the skewer.
- Arrange them on a serving platter and drizzle with balsamic glaze just before serving.
Leave a Reply