
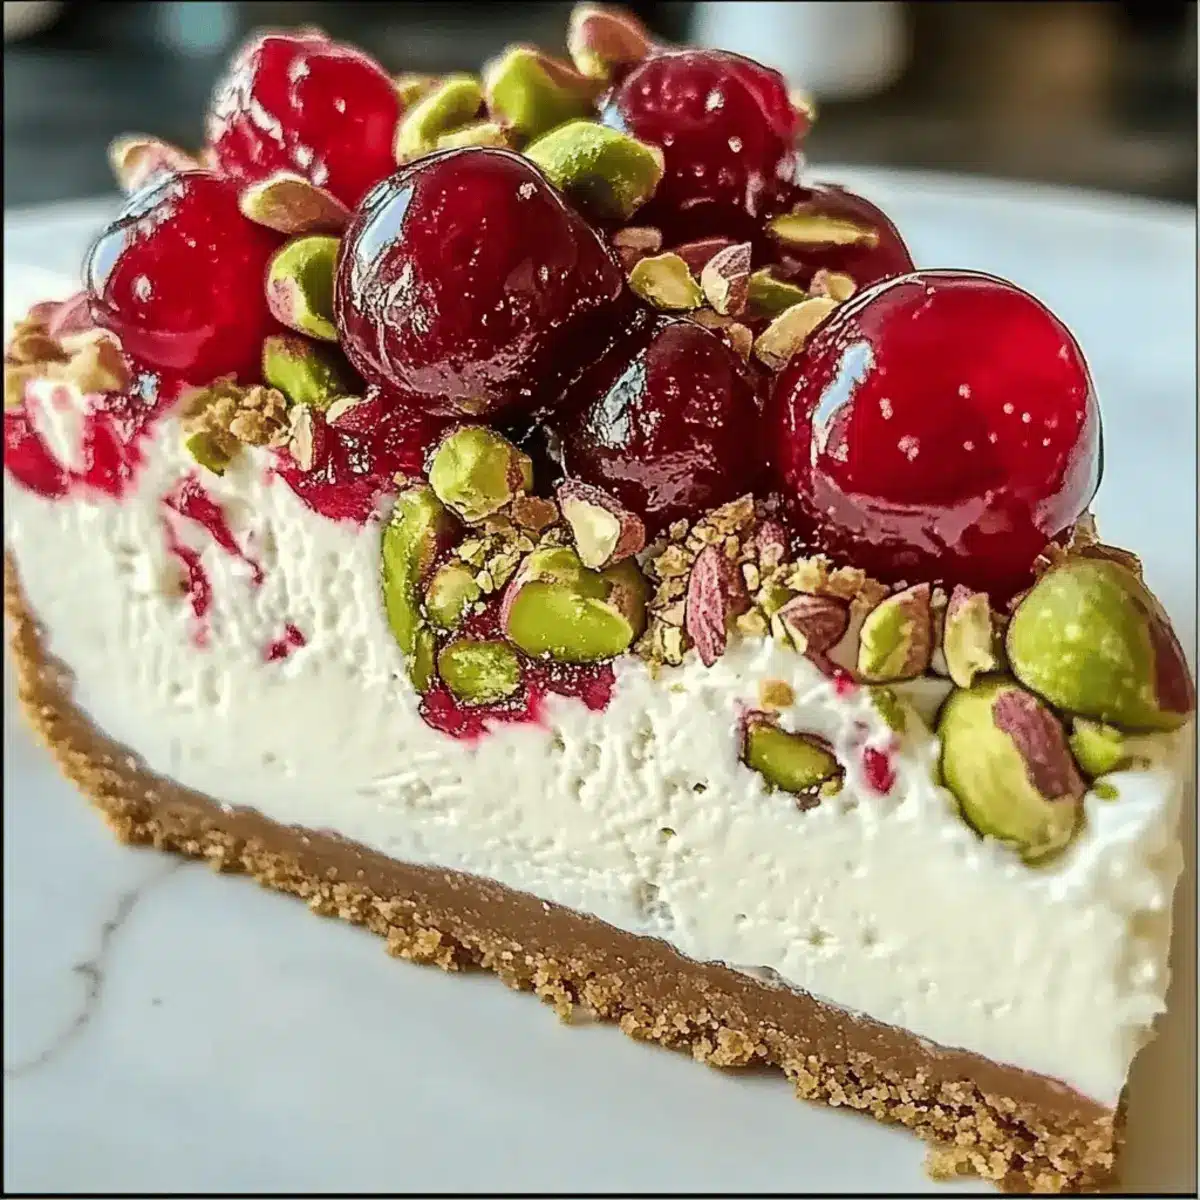
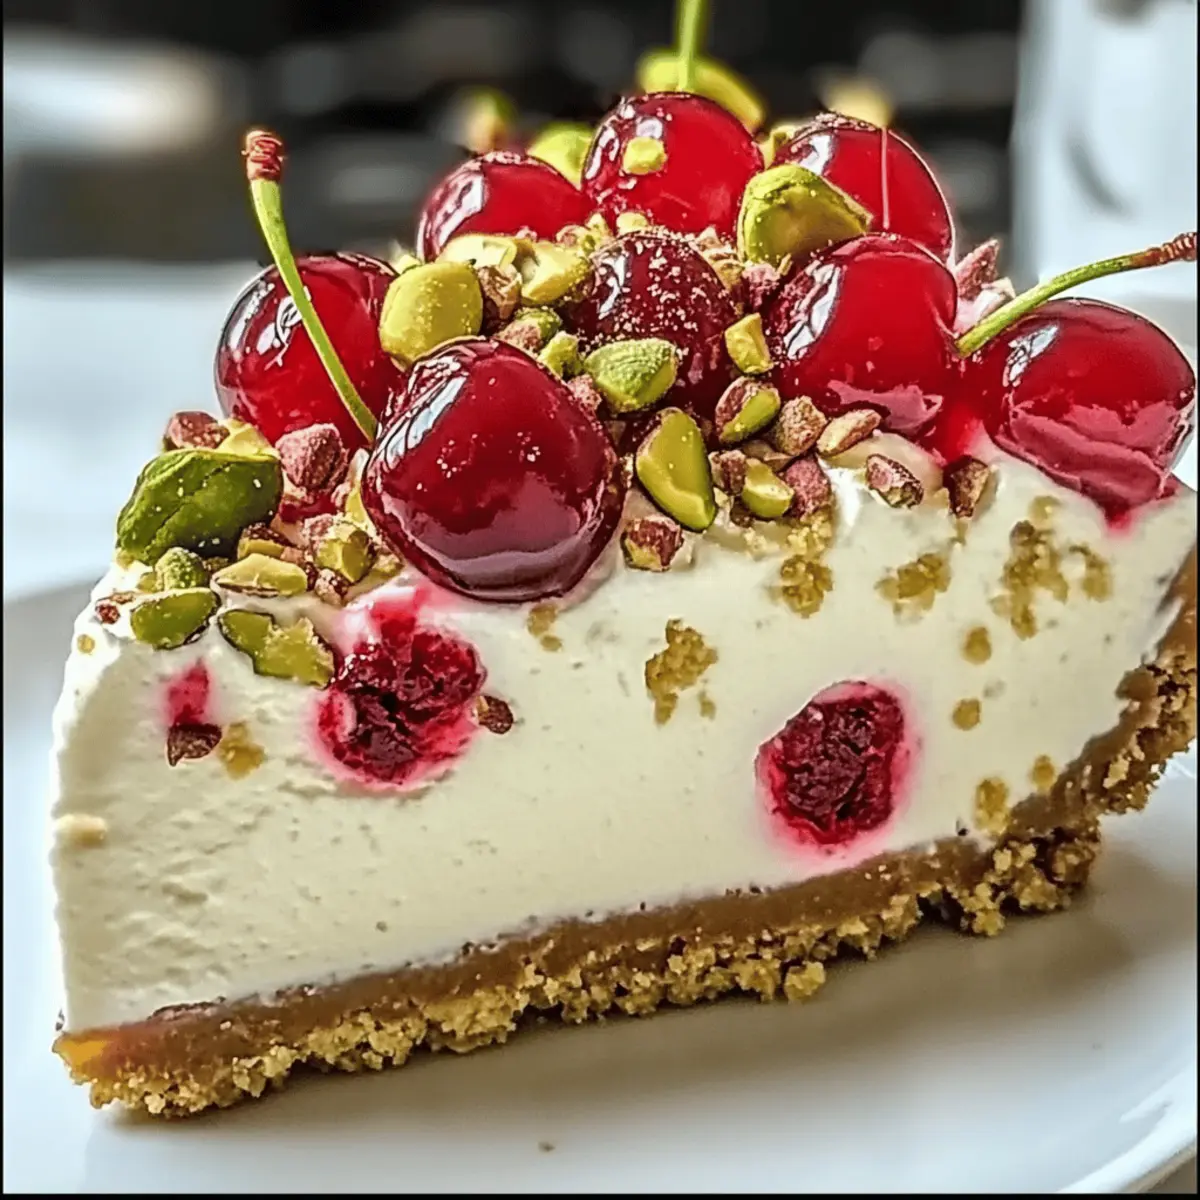
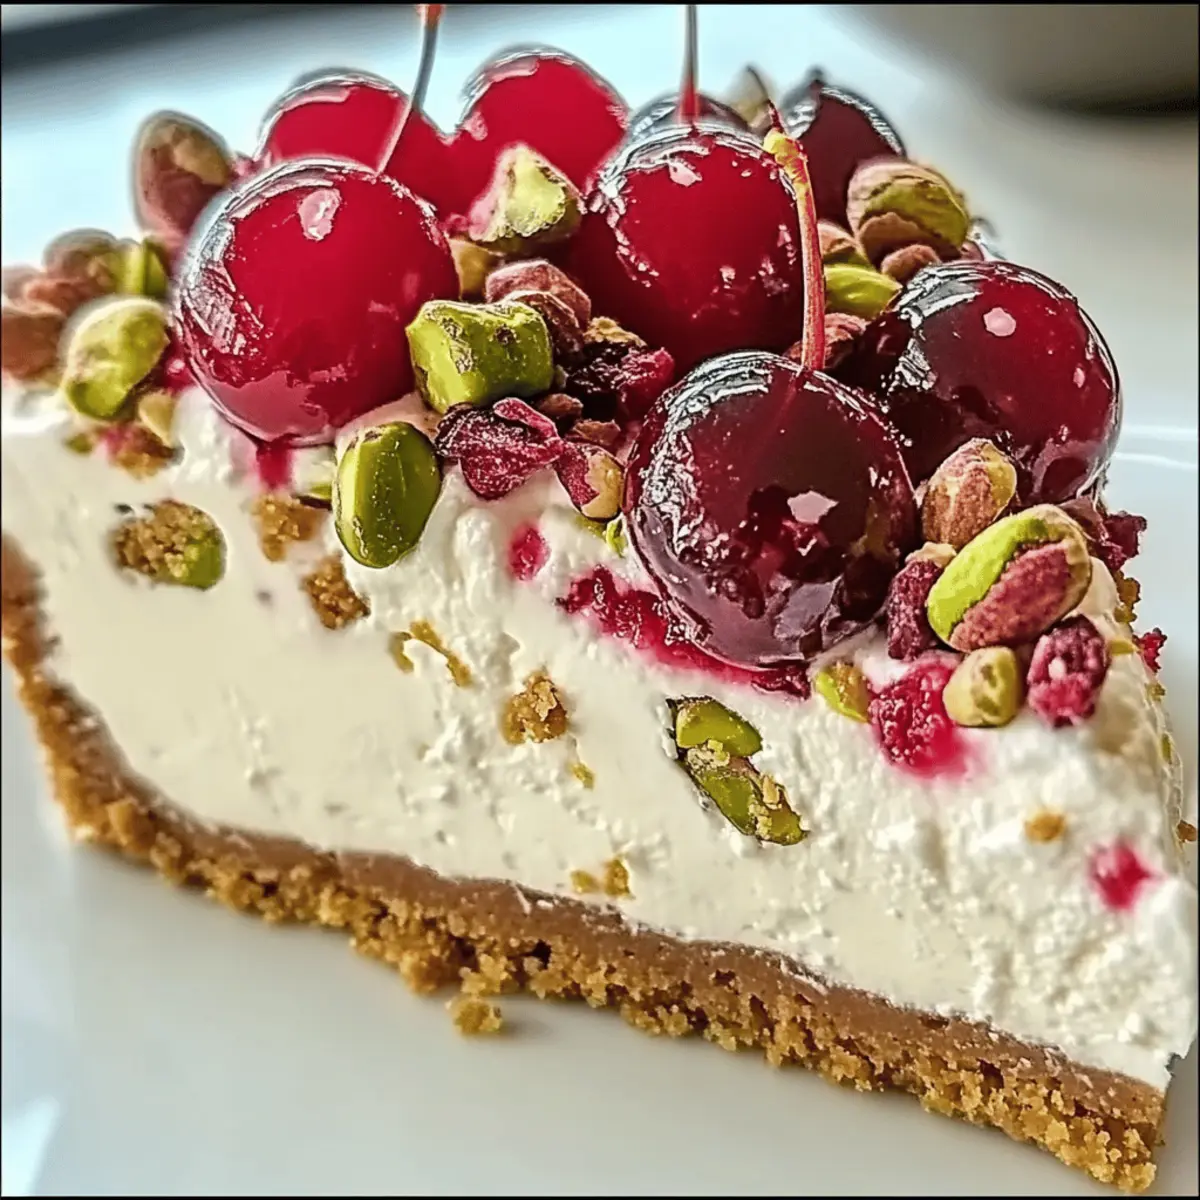
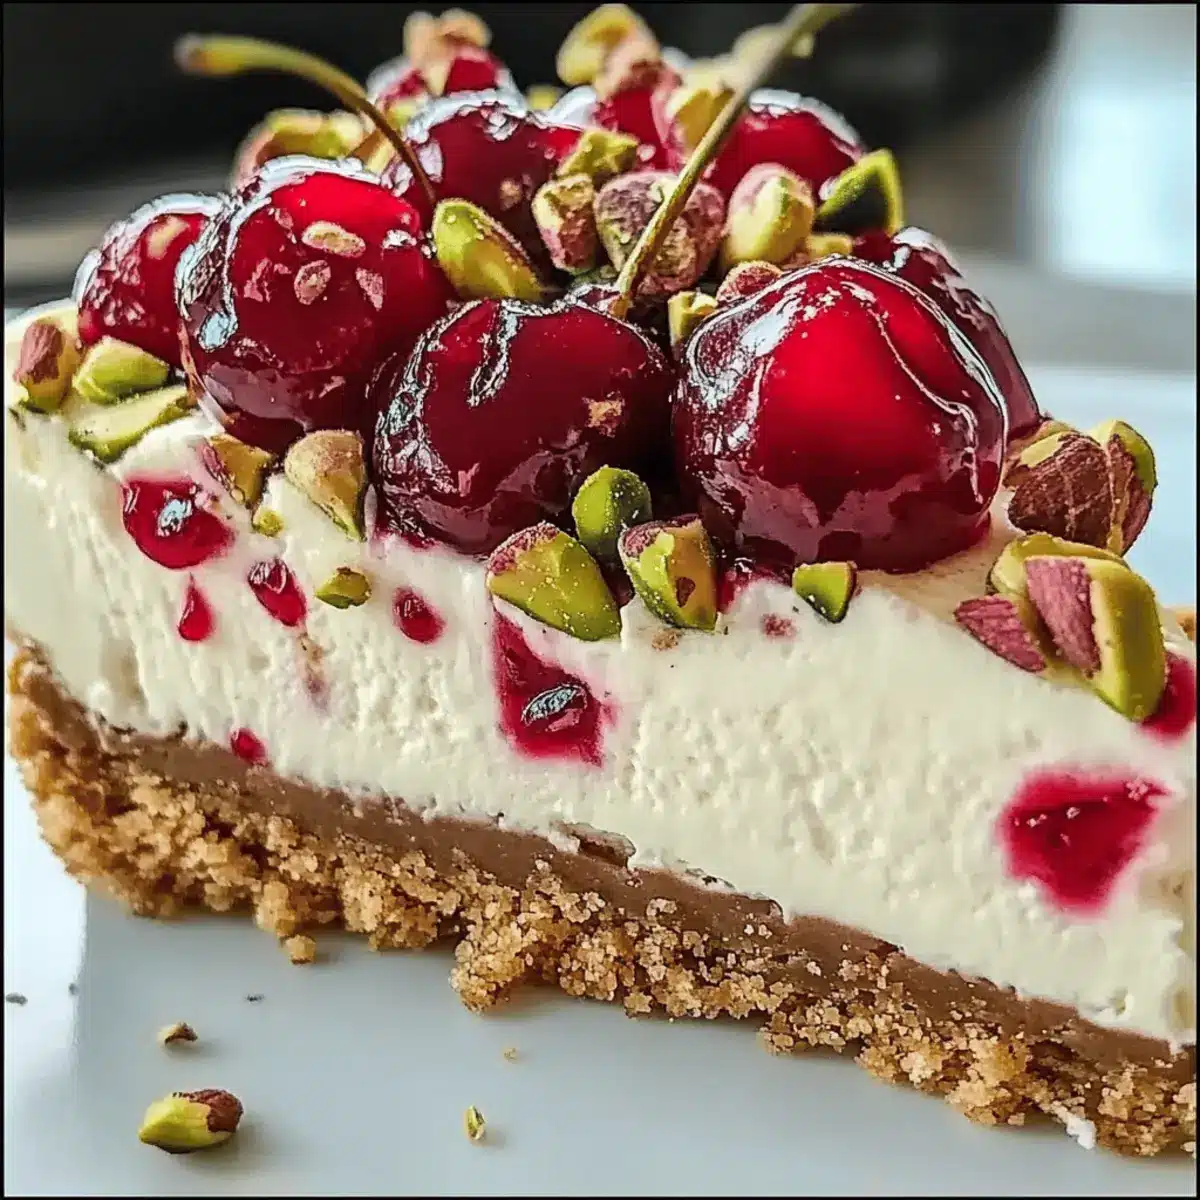
“Can you believe how easy it is to create something so stunning?” Those words lingered in my mind as I pulled out my latest creation from the oven: a Cherry Pistachio Cheesecake. This show-stopping dessert is not just a feast for the eyes; it’s a creamy indulgence that marries the rich flavors of pistachios with the vibrant sweetness of cherries. What’s more, this recipe is simple to make, requiring minimal prep time while delivering a restaurant-quality experience right at home. It’s the perfect treat for special occasions or simply for when you’re craving a moment of pure bliss in the kitchen. Intrigued? Let’s dive into the delightful layers of flavor and texture that await!
Why is this cheesecake a must-try?
Creamy Indulgence: This Cherry Pistachio Cheesecake features a luxuriously smooth filling that melts in your mouth, offering a delightful contrast to the crunchy pistachios.
Show-Stopping Appearance: The vibrant cherry topping against the creamy cheesecake creates a visually appealing centerpiece, perfect for gatherings or special events.
Simple Preparation: Despite its elegant taste, this recipe is quick and easy to make, requiring just a few simple steps for a stunning result that will impress anyone.
Versatile Flavor: Feel free to adapt the flavors—swap maraschino cherries for fresh ones or even try almond flour for a nut-free option.
Crowd-Pleasing Delight: Ideal for any occasion, this cheesecake is bound to win over friends and family, making it a reliable dessert choice you can return to time and again.
Don’t forget to check out my tips on serving suggestions to elevate your cheesecake experience!
Cherry Pistachio Cheesecake Ingredients
• Unleash your baking potential with this cherry pistachio cheesecake!
For the Crust
- Graham Cracker Crumbs – Creates a buttery and crunchy base; substitute with digestive biscuits for a different flavor.
- Melted Butter – Acts as a binding agent for the crust; optional coconut oil yields a dairy-free crust.
- Granulated Sugar – Adds sweetness to the crust; can be exchanged with a sugar substitute for a lower calorie option.
For the Filling
- Cream Cheese – The key ingredient for a rich and creamy texture; using full-fat ensures the best results.
- Granulated Sugar (in filling) – Sweetens the cheesecake; consider powdered sugar for a smoother blend.
- Vanilla Extract – Introduces aromatic warmth; almond extract can be a lovely alternative.
- Lemon and Lime Zest/Juice – Brightens the flavors perfectly; use just one citrus if simplicity is preferred.
- Large Eggs – Crucial for the cheesecake’s structure; avoid overmixing to keep it crack-free.
- Sour Cream – Brings in a tangy creaminess; Greek yogurt works well as a substitute.
- Pistachio Pudding Mix (dry) – Amplifies the pistachio flavor while adding creaminess; almond flour offers a different nutty nuance if preferred.
- Maraschino Cherries – Delivers a sweet-tart balance in each bite; feel free to swap for fresh cherries if prepared to reduce moisture.
- Chopped Pistachios – Provides texture and stunning presentation; can be replaced with almonds, or omitted for a nut-free version.
For the Topping
- Cherry Pie Filling – A delicious finishing touch that enhances sweetness; consider fresh cherries for a lighter option.
Get ready to experience the decadence of this cherry pistachio cheesecake, where every bite is an enticing invitation to savor the flavors!
Step‑by‑Step Instructions for Cherry Pistachio Cheesecake
Step 1: Prep the Oven and Pan
Begin by preheating your oven to 325°F (165°C). While it heats, grease a 9-inch springform pan or line the base with parchment paper for easy removal later. This ensures your Cherry Pistachio Cheesecake will come out smoothly and maintain its beautiful shape.
Step 2: Make the Crust
In a mixing bowl, combine graham cracker crumbs, melted butter, and sugar until the mixture resembles wet sand. Firmly press this crumb mixture into the bottom of your prepared springform pan, creating an even layer. Bake the crust for 8 minutes until golden, then let it cool completely while you prepare the filling.
Step 3: Prepare the Filling
In a large mixing bowl, beat the softened cream cheese until smooth and creamy, about 2 minutes. Gradually add granulated sugar, blending until combined. Incorporate eggs one by one, ensuring each is fully integrated before adding sour cream, pistachio pudding mix, and vanilla extract. Mix until just combined to maintain a creamy texture for the cheesecake.
Step 4: Bake the Cheesecake
Pour the silky filling over the cooled crust, smoothing the top with a spatula. Place the springform pan in the oven and bake for 45–50 minutes. The edges should be set while the center has a slight jiggle—this indicates that your Cherry Pistachio Cheesecake is perfectly baked.
Step 5: Cool Gradually
Once baked, turn off the oven and leave the cheesecake inside with the door slightly ajar for 1 hour. This gradual cooling process helps prevent cracks on the surface. Afterward, allow the cheesecake to cool to room temperature before refrigerating it for at least 4 hours or overnight to fully set.
Step 6: Top & Serve
Remove the cheesecake from the fridge and carefully release it from the springform pan. Spread cherry pie filling generously over the top, creating a vibrant and inviting layer. If desired, sprinkle chopped pistachios around the edges for garnish, then slice your exquisite Cherry Pistachio Cheesecake and serve to your eager guests.
Make Ahead Options
These Cherry Pistachio Cheesecakes are a fantastic choice for meal prep enthusiasts! You can prepare the crust and filling up to 24 hours in advance, making the cheesecake process seamless on the day you plan to serve it. To do this, simply make the crust and press it into the springform pan. Then, prepare the filling as directed, pour it over the crust, and cover it tightly with plastic wrap before refrigerating. This helps it maintain its creamy texture and prevents any odors from seeping in. When you’re ready to serve, bake as instructed, cool gradually, and top with cherry pie filling for a delightful dessert that feels effortless!
How to Store and Freeze Cherry Pistachio Cheesecake
Fridge: Keep leftovers covered with plastic wrap or in an airtight container for up to 5 days to maintain the creamy texture and freshness.
Freezer: For longer storage, wrap the cheesecake tightly in plastic wrap and then aluminum foil; it can be frozen for up to 2 months.
Thawing: To enjoy your stored Cherry Pistachio Cheesecake, thaw it in the fridge overnight before serving it again for the best flavor and texture.
Reheating: While cheesecake is typically enjoyed chilled, if you prefer it slightly warm, reheat individual slices in the microwave for about 10-15 seconds.
Expert Tips for Cherry Pistachio Cheesecake
-
Room Temperature Cheese: Ensure your cream cheese is at room temperature to achieve a smooth and lump-free filling.
-
Gentle Mixing: Fold in the cherries and pistachios delicately to avoid releasing excess juices that can affect texture.
-
Watch the Bake: Avoid overbaking by checking for a slight jiggle in the center; this will keep your cheesecake creamy and free from cracks.
-
Cooling Technique: Cool the cheesecake gradually in the oven with the door ajar to help prevent unsightly cracks from forming on the surface.
-
Moisture Management: If using fresh cherries, pat them dry before adding to minimize moisture content in your Cherry Pistachio Cheesecake.
What to Serve with Cherry Pistachio Cheesecake?
Indulging in a slice of Cherry Pistachio Cheesecake is a delight in itself, but pairing it with the right accompaniments can elevate your dessert experience even further.
-
Whipped Cream: A dollop of freshly whipped cream adds a light, airy touch that complements the rich cheesecake beautifully. Its sweetness balances the tartness of the cherries perfectly.
-
Citrus Slices: Bright lemon or orange slices offer a refreshing contrast, invigorating the palate after the creamy sweetness of the cheesecake. The zestiness helps cleanse the palate for more delicious bites.
-
Nutty Biscotti: A crunchy, nutty biscotti provides a satisfying texture that pairs well with the smooth cheesecake. Dipping in coffee or tea while enjoying your dessert creates a lovely afternoon treat.
-
Chocolate Drizzle: A warm chocolate drizzle transforms each slice into an indulgent masterpiece, adding a touch of decadence and enhancing the flavors of pistachio and cherry.
-
Sparkling Water: Serve your cheesecake with a glass of sparkling water for a refreshing palate cleanser. The bubbles elevate the dessert experience, making it feel extra special.
-
Fruit Compote: A spoonful of berry or cherry compote over the cheesecake adds a vibrant burst of flavor, enhancing the fruits already present. It deepens the fruity notes and adds a fresh element.
-
Vanilla Ice Cream: For those with a sweet tooth, vanilla ice cream is the classic pairing that brings comfort and creaminess, pairing beautifully with the flavors of the cheesecake.
-
Coffee or Espresso: A hot cup of coffee or espresso balances the sweetness and richness of the cheesecake, making for a delightful ending to a meal. The bitterness cuts through the creaminess, creating harmony in every bite.
Cherry Pistachio Cheesecake Variations
Feel free to personalize your Cherry Pistachio Cheesecake and create a delightful twist on this classic dessert!
-
Fresh Cherries: Swap out maraschino cherries for fresh or frozen cherries for a taste that’s brighter and more natural. Their juiciness will add a refreshing note to each slice.
-
Nut-Free Option: Replace pistachios with sunflower seeds or omit nuts entirely for a nut-free cheesecake that’s just as scrumptious. You’ll still enjoy the creamy texture without the crunch.
-
Mini Cheesecakes: Transform this recipe into adorable mini cheesecakes by dividing the crust and filling among muffin tins. Bake for 18-22 minutes for a fun, shareable version perfect for parties!
-
Citrus Twist: Try using only lemon juice instead of both lemon and lime for a zesty kick. This variation really emphasizes the fresh flavor profile of your cheesecake.
-
Chocolate Drizzle: For a decadently sweet touch, drizzle melted dark chocolate over the assembled cheesecake before serving. Chocolate and cherry are a classic combo that’s hard to resist.
-
Dairy-Free Delight: Use dairy-free cream cheese and coconut whipped cream to make this cheesecake suitable for dairy-free diets. You’ll still achieve a deliciously creamy dessert loved by all!
-
Spiced Up: Add a touch of cinnamon or nutmeg to the filling for a warm, spiced flavor that makes every bite feel like a cozy hug. It’ll bring a wonderful twist to the usual cheesecake taste.
-
Lemon Curd Layer: Spread a thin layer of lemon curd over the cooled cheesecake before topping with cherry pie filling. This adds a zesty layer that perfectly complements the sweetness of the cherries.
Don’t forget to explore more tips and ideas on serving suggestions or how to properly store your cheesecake for optimum freshness!
Cherry Pistachio Cheesecake Recipe FAQs
What type of cherries should I use for the Cherry Pistachio Cheesecake?
Absolutely! Maraschino cherries are traditionally used for their sweet-tart flavor and vibrant color. However, you can also use fresh cherries for a fresher taste. If opting for fresh, be sure to dry them thoroughly to minimize moisture, which will help keep your cheesecake from becoming soggy.
How should I store my Cherry Pistachio Cheesecake?
Very good question! After enjoying your delicious cheesecake, store any leftovers in the refrigerator covered tightly with plastic wrap or in an airtight container. It will stay fresh for about 5 days. If you’d like to keep it longer, freezing is a great option! Just wrap the cheesecake tightly in plastic wrap and aluminum foil—the cheesecake will last in the freezer for up to 2 months.
Can I freeze the Cherry Pistachio Cheesecake? If so, how?
Absolutely! To freeze your cheesecake, first allow it to cool and set properly in the fridge. Then, wrap it tightly in plastic wrap followed by aluminum foil to protect it from freezer burn. Ensure it’s well-sealed before placing it in the freezer. When you’re ready to enjoy it, simply transfer it to the fridge to thaw overnight for the best results. Enjoy every decadent bite!
What can I do if my cheesecake cracks?
Very common! If you notice cracks when baking, leave your cheesecake to cool in the oven with the door slightly ajar—that gentle temperature change helps prevent cracks. If cracks do form, don’t worry! You can cover the surface with cherry pie filling or whipped cream. This not only looks beautiful but also hides any imperfections!
Is this cheesecake suitable for those with nut allergies?
I recommend you check the ingredients carefully! While pistachios are a key flavor in this recipe, if you or your guests have nut allergies, you can simply omit the pistachios and substitute them with crushed graham crackers or a nut-free alternative. Just be sure to use a nut-free pudding mix!
Can I make the cheesecake in advance?
Definitely! In fact, making your Cherry Pistachio Cheesecake a day ahead is a great idea as it allows the flavors to meld beautifully. Just be sure to store it in the refrigerator, covered, to keep it fresh and creamy until it’s time to serve.
Creamy Cherry Pistachio Cheesecake for Sweet Indulgence
Ingredients
Equipment
Method
- Preheat your oven to 325°F (165°C) and grease a 9-inch springform pan.
- Combine graham cracker crumbs, melted butter, and sugar in a mixing bowl. Press mixture into the bottom of the pan and bake for 8 minutes. Let it cool.
- Beat softened cream cheese until smooth and creamy, then blend in the granulated sugar. Add eggs one at a time, followed by sour cream, pistachio pudding mix, and vanilla extract until just combined.
- Pour the filling over the cooled crust and bake for 45–50 minutes until edges are set and center jiggles slightly.
- Turn off the oven and leave the cheesecake inside with the door ajar for 1 hour. Then cool to room temperature and refrigerate for at least 4 hours.
- Spread cherry pie filling over the top and sprinkle with chopped pistachios before serving.
Leave a Reply