
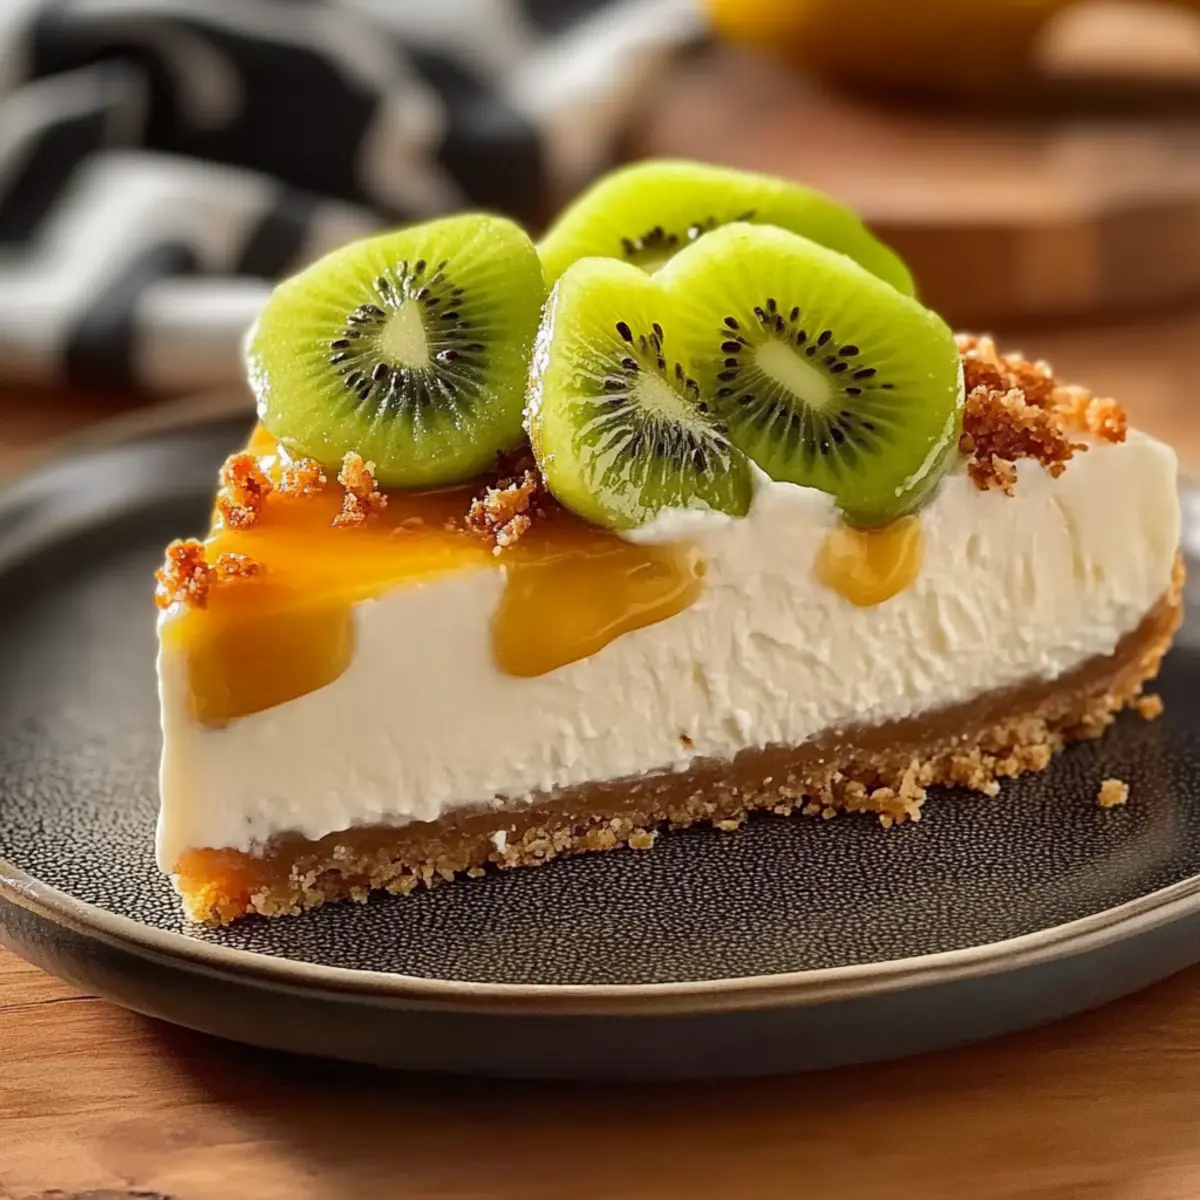
As I carefully sliced into this creamy delight, the vibrant green of the kiwi topping seemed to pop against the smooth, luscious cheesecake beneath. It’s hard to overstate how satisfying it is to create a Flawlessly Easy Creamy Kiwi Cheesecake that dazzles guests without diluting your kitchen joy. This recipe is perfect for anyone looking to ditch the fast food traps and embrace the fresh flavors of homemade desserts. With a prep time that wouldn’t even let you feel flustered, you can indulge in a dessert that feels like a luxurious treat but is simple enough for any weeknight. Let’s dive into making a dessert that not only pleases the palate but will also earn you a round of applause at your next gathering—curious to see what makes this cheesecake so special?
Why is this cheesecake a showstopper?
Velvety Texture: The Creamy Kiwi Cheesecake boasts an incredibly smooth texture that melts in your mouth, making it an instant hit at any gathering.
Stunning Appeal: Its bright kiwi topping not only creates a feast for the eyes but also enhances the refreshing taste that’ll leave everyone wanting more.
Effortless to Make: With straightforward instructions and minimal prep time, you’ll have a delightful dessert ready without the stress of complicated steps, perfect for busy weeknights or impromptu celebrations.
Versatile Variations: Adapt the crust or topping to suit personal tastes—ginger snap or Oreo crusts add delightful twists, while different fruits elevate the dessert experience.
Crowd-Pleasing Delight: Impress family and friends alike, as this dessert combines beloved flavors with homemade charm that fast food simply can’t replicate.
Why not check out our delicious Chicken Spaghetti Comfort as another easy, flavorful dinner to whip up?
Creamy Kiwi Cheesecake Ingredients
For the Crust
- Graham Cracker Crumbs – Provides a crunchy, buttery base; can substitute with digestive biscuits for a different flavor.
- Granulated Sugar – Sweetens both the crust and filling; brown sugar offers a richer taste when used in the crust.
- Unsalted Butter – Binds crust ingredients and adds richness; if you only have salted butter, that works too!
For the Filling
- Cream Cheese – Essential for that luxurious smooth filling; remember to soften it to room temperature for easy mixing.
- Granulated Sugar – This adds sweetness to the filling; you can use powdered sugar for an even smoother texture.
- Vanilla Extract – Enhances the overall flavor profile; for an even bolder taste, opt for pure vanilla extract over imitation.
- Large Eggs – Contributes to the cheesecake structure; ensure they are at room temperature for the best results.
- Sour Cream – Provides tanginess and creaminess, preventing dryness; Greek yogurt is an excellent substitute for a lighter texture.
For the Topping
- Ripe Kiwis – Adds vibrant flavor and visual appeal; fresh kiwis yield the best results for taste and presentation.
- Apricot Jam (or Honey) – Perfect for glazing the kiwi and enhancing sweetness; try using fruit preserves as an alternative for a twist.
Indulge in this delightful Creamy Kiwi Cheesecake, and savor each velvety slice!
Step‑by‑Step Instructions for Creamy Kiwi Cheesecake
Step 1: Preheat the Oven
Begin by preheating your oven to 350°F (175°C). This step is crucial for ensuring your crust bakes evenly. While the oven warms up, gather your ingredients and prepare your springform pan, greasing it lightly to prevent sticking later.
Step 2: Prepare the Crust
In a medium bowl, combine the graham cracker crumbs, granulated sugar, and melted unsalted butter until the mixture resembles wet sand. Press this mixture firmly into the bottom of the springform pan to create a sturdy crust. Bake the crust for 8-10 minutes until it turns lightly golden and fragrant, then remove it from the oven and allow it to cool slightly.
Step 3: Lower the Oven Temperature
After removing the crust, lower the oven temperature to 325°F (160°C). To protect your cheesecake from harsh heat, wrap the outside of the springform pan with aluminum foil, ensuring it creates a water-tight barrier that will help maintain moisture during baking.
Step 4: Mix the Filling
In a large mixing bowl, use an electric mixer to beat the softened cream cheese on medium speed until it achieves a smooth and creamy consistency, which should take about 2-3 minutes. Gradually add granulated sugar and vanilla extract, mixing gently until fully incorporated and well-combined, ensuring no lumps remain.
Step 5: Add Eggs and Sour Cream
Next, add the eggs one at a time to your cream cheese mixture, mixing on low speed just until combined after each addition. Once all the eggs are incorporated, stir in the sour cream until the filling is luxuriously smooth, creating a rich base for your Creamy Kiwi Cheesecake.
Step 6: Assemble for Baking
Pour the creamy cheesecake batter over your cooled graham cracker crust, spreading it evenly with a spatula. To create the perfect baking environment, place the springform pan inside a larger roasting pan and fill it with hot water until it reaches halfway up the sides of your springform pan.
Step 7: Bake the Cheesecake
Carefully place the cheesecake in the preheated oven and bake for 60-70 minutes. You’ll know it’s ready when the edges are set and the center still has a slight wobble. Once done, turn off the oven and leave the cheesecake inside with the door ajar for an hour to cool gradually and prevent cracks.
Step 8: Cool and Refrigerate
After an hour in the oven, remove the cheesecake and allow it to cool completely at room temperature. Then, cover it loosely with plastic wrap and refrigerate for a minimum of 6 hours, or preferably overnight, to let the flavors meld and the texture firm up beautifully.
Step 9: Prepare the Topping
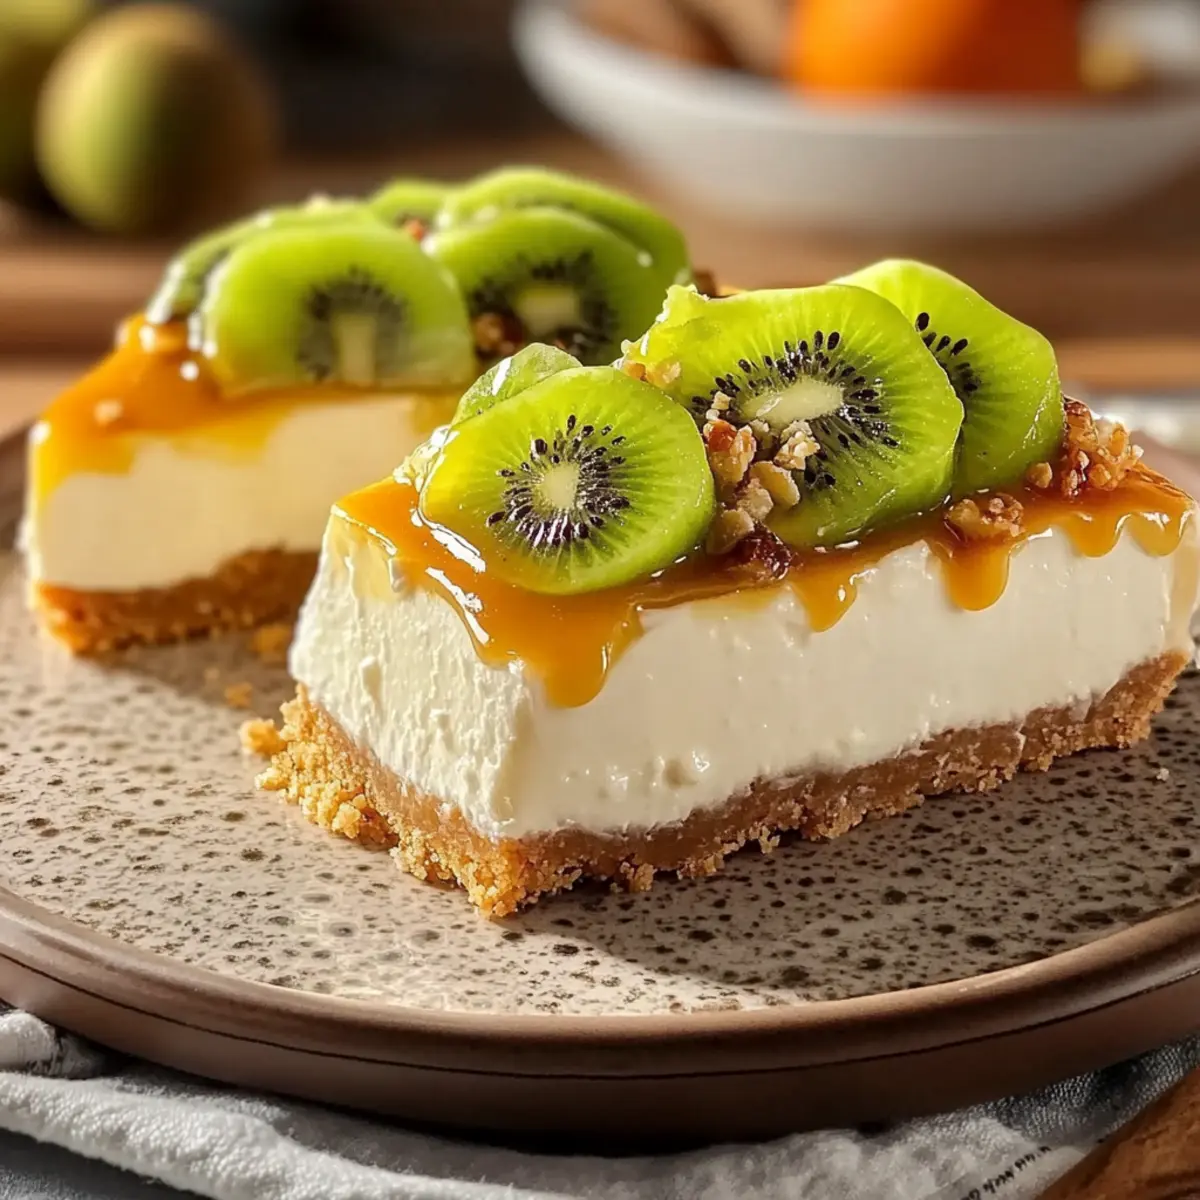
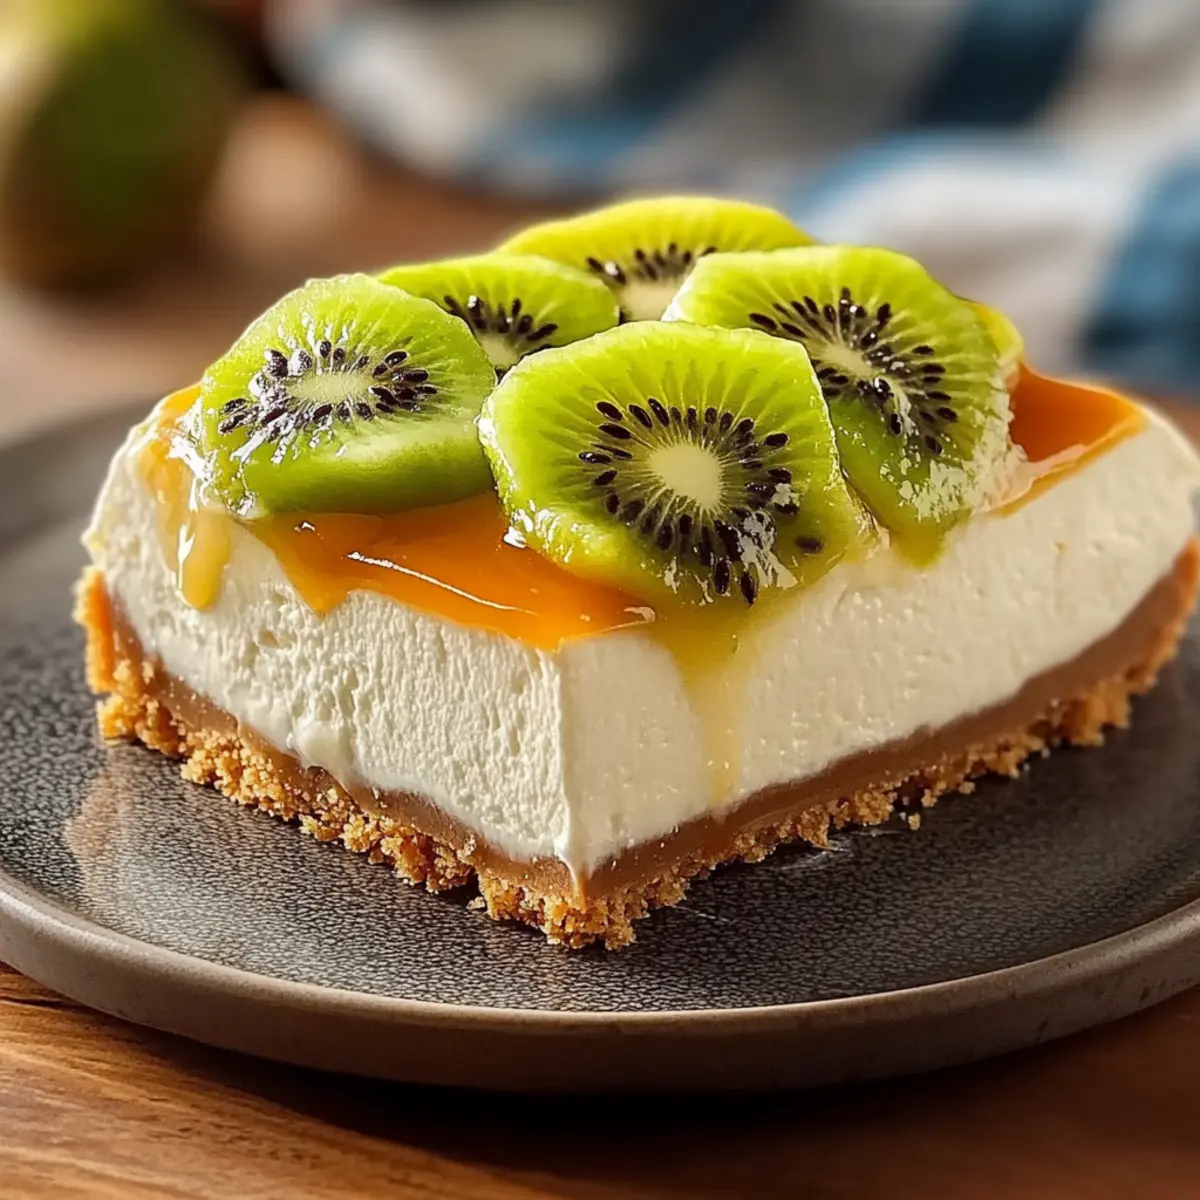
When you’re ready to serve, slice the ripe kiwis and arrange them aesthetically on top of your chilled Creamy Kiwi Cheesecake. For a glossy finish, warm the apricot jam and drizzle it over the kiwi slices for added sweetness and shine just before presenting this delightful dessert to your guests.
How to Store and Freeze Creamy Kiwi Cheesecake
Fridge: Keep your cheesecake in the refrigerator for up to 3-5 days. Cover it loosely with plastic wrap to maintain freshness while allowing it to breathe.
Freezer: If you want to store it longer, slice the Creamy Kiwi Cheesecake and wrap each piece tightly in plastic wrap and foil. It can be frozen for up to 1 month.
Reheating: Thaw frozen cheesecake in the fridge overnight before serving. Avoid microwaving to preserve its creamy texture—enjoy it chilled!
Serving Tip: Garnish with fresh kiwi and a drizzle of warmed apricot jam just before serving to elevate the presentation and flavor.
Make Ahead Options
These Creamy Kiwi Cheesecakes are perfect for meal prep enthusiasts! You can prepare the cheesecake batter and crust up to 24 hours in advance; simply keep them refrigerated in separate airtight containers. To maintain quality, make sure the cheesecake is covered loosely to prevent moisture buildup. When you’re ready to serve, pour the cheesecake filling over the crust and bake it, following the remaining instructions. After baking, let it cool completely, then refrigerate for at least 6 hours or overnight. This means you can easily enjoy restaurant-quality results with minimal effort, making your busy weeknights a little sweeter!
What to Serve with Creamy Kiwi Cheesecake
Imagine the delight of complementing your decadent dessert with tantalizing sides that enhance every moment of enjoyment.
- Fresh Mint Tea: A warm, soothing drink that refreshes the palate, perfectly balancing the richness of the cheesecake.
- Citrus Salad: A medley of oranges, grapefruit, and pomegranate adds a zesty flair, enhancing the tropical notes of the kiwi topping.
- Chocolate Dipped Strawberries: These sweet, juicy treats bring a luscious contrast, creating a romantic touch that’s hard to resist.
- Whipped Cream: A dollop of light, airy whipped cream adds a delightful creaminess, making each slice even more indulgent.
- Almond Biscotti: Crunchy and lightly sweet, these provide a satisfying bite, enhancing the creamy dynamics of the cheesecake.
- Sparkling Water with Lime: Refreshing and crisp, this beverage cuts through the richness while adding a hint of zesty flavor.
- Fruity Sorbet: A scoop of your favorite fruit sorbet serves as a refreshing palate cleanser, perfect after a rich dessert.
- Homemade Vanilla Ice Cream: A scoop of smooth vanilla ice cream complements the cheesecake’s flavors, creating a classic dessert pairing.
Expert Tips for the Best Creamy Kiwi Cheesecake
-
Room Temperature Ingredients: Ensure all your ingredients, especially cream cheese and eggs, are at room temperature for better blending and a smoother batter.
-
Avoid Overmixing: Mix just until combined when adding eggs and sour cream; overmixing introduces air which can lead to cracks in your cheesecake.
-
Water Bath Essential: Using a water bath prevents the cheesecake from drying out and helps achieve that lovely, creamy texture without cracks—be sure to wrap the pan well!
-
Cooling Method: Allow the cheesecake to cool gradually in the oven with the door slightly ajar. This step minimizes drastic temperature changes that can cause cracking.
-
Wobble Test: Trust your instincts with the “slight wobble” test for doneness. If the center has a gentle jiggle, it’s perfect to avoid an overbaked cheesecake.
Enjoy creating your Creamy Kiwi Cheesecake with these helpful tips for a flawless, crowd-pleasing dessert!
Creamy Kiwi Cheesecake Variations
Feel free to put your own spin on this delightful cheesecake and make it truly yours!
- Ginger Snap Crust: Swap graham cracker crumbs for ginger snaps for a spicy zest that pairs beautifully with the kiwi.
- Chocolate Drizzle: Add melted dark or white chocolate on top for a rich, decadent contrast to the fruity tang.
- Fruit Topping Variations: Use strawberries, mangoes, or blueberries instead of kiwi to change the flavor profile while keeping it fruity.
- Non-Dairy Option: Substitute cream cheese with a dairy-free alternative like cashew cream for a vegan version.
- Double the Fruit: Mix some finely chopped kiwi directly into the cheesecake filling for bursts of flavor in every slice.
- Add Citrus Zest: Incorporate lemon or lime zest into the filling for an extra zing that brightens the dessert.
- Extra Creamy: Fold in a bit of whipped cream into the filling for an ultra-luxurious texture that’s yet more velvety.
- Spiced Filling: Add a sprinkle of cinnamon or cardamom for warmth, changing the character of the cheesecake while keeping it comforting.
Why not try these variations to add uniqueness to your beloved recipe? Your Creamy Kiwi Cheesecake can morph into a new family favorite, much like our fun-filled One Pot Skillet or the creamy indulgence of Pot Pie Puff!

Creamy Kiwi Cheesecake Recipe FAQs
How do I choose ripe kiwis for my cheesecake?
Absolutely! Look for kiwis that feel slightly soft to the touch but are not mushy. The skin should be smooth and free of dark spots. I personally recommend letting them ripen at room temperature until they offer a little give, which indicates perfect sweetness.
What’s the best way to store leftover cheesecake?
Very good question! Store your Creamy Kiwi Cheesecake in the refrigerator for up to 3-5 days. Be sure to cover it loosely with plastic wrap to maintain its freshness while allowing it to breathe. This method keeps that smooth texture intact for days to come!
Can I freeze slices of this cheesecake?
Absolutely! To freeze, slice the Creamy Kiwi Cheesecake and wrap each piece tightly in plastic wrap and aluminum foil. This keeps it fresh while avoiding freezer burn. It can be frozen for up to 1 month. When you’re ready to enjoy, simply thaw the slices overnight in the refrigerator before serving!
What should I do if my cheesecake cracks while baking?
Don’t worry, you’re not alone! Cracks are a common issue, usually caused by overmixing or rapid temperature changes. To prevent this, make sure to mix your filling gently just until combined, and utilize a water bath during baking. This provides stable moisture and temperature, promoting a creamy texture without cracks.
Can this cheesecake be made ahead of time?
Yes! I often make my Creamy Kiwi Cheesecake 1-2 days in advance for optimal flavor. The flavors meld beautifully as it sits in the fridge, making it even more delightful by the time you’re ready to serve. Plus, it frees up time on the day of your gathering!
Is this cheesecake suitable for those with food allergies?
Great question! This cheesecake contains dairy and eggs, so it may not be suitable for vegans or those with dairy allergies. However, you can make a vegan version by substituting the cream cheese with a plant-based alternative and using flax or chia eggs to bind the filling. Always double-check alternative ingredient labels if allergies are a concern!
Deliciously Easy Creamy Kiwi Cheesecake for Any Occasion
Ingredients
Equipment
Method
- Preheat your oven to 350°F (175°C) and prepare your springform pan by greasing it lightly.
- Combine graham cracker crumbs, granulated sugar, and melted unsalted butter until resembling wet sand. Press into the bottom of the springform pan. Bake for 8-10 minutes.
- Lower the oven temperature to 325°F (160°C) and wrap the outside of the springform pan with aluminum foil.
- Beat softened cream cheese on medium speed until smooth. Gradually add granulated sugar and vanilla extract, mixing until lump-free.
- Add eggs one at a time, mixing on low speed before stirring in the sour cream.
- Pour the filling over the cooled crust, spreading evenly. Place in a larger roasting pan filled with hot water.
- Bake for 60-70 minutes until edges are set and center has a slight wobble. Leave cheesecake in the oven with the door ajar for an hour.
- Let it cool completely at room temperature, then refrigerate for at least 6 hours or overnight.
- Slice the ripe kiwis and arrange them on top. Warm apricot jam and drizzle over kiwi slices before serving.
Leave a Reply