
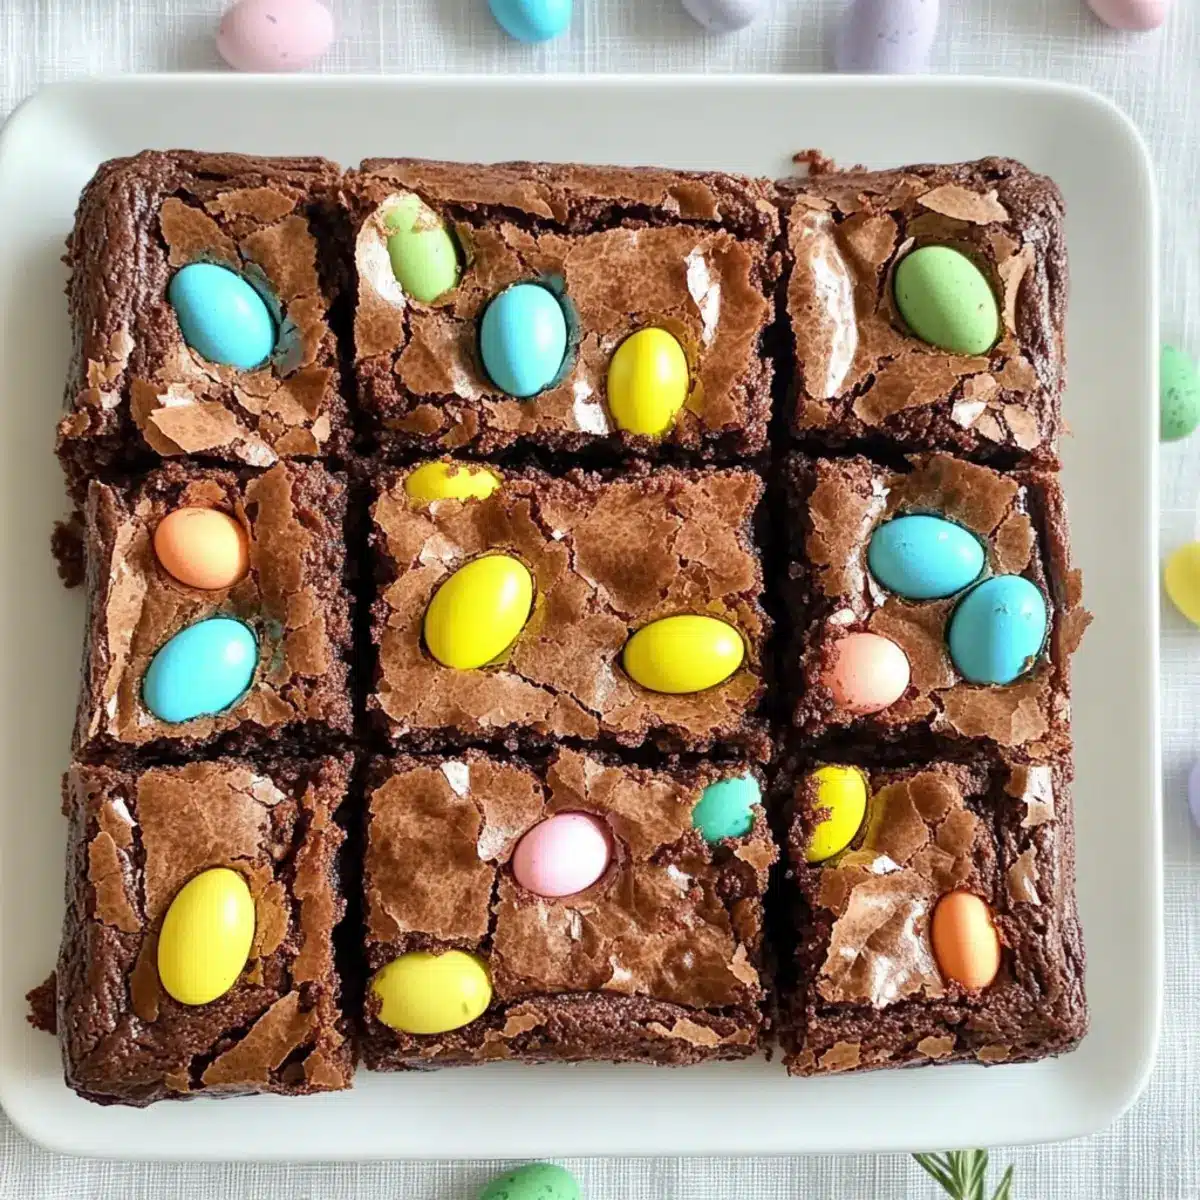
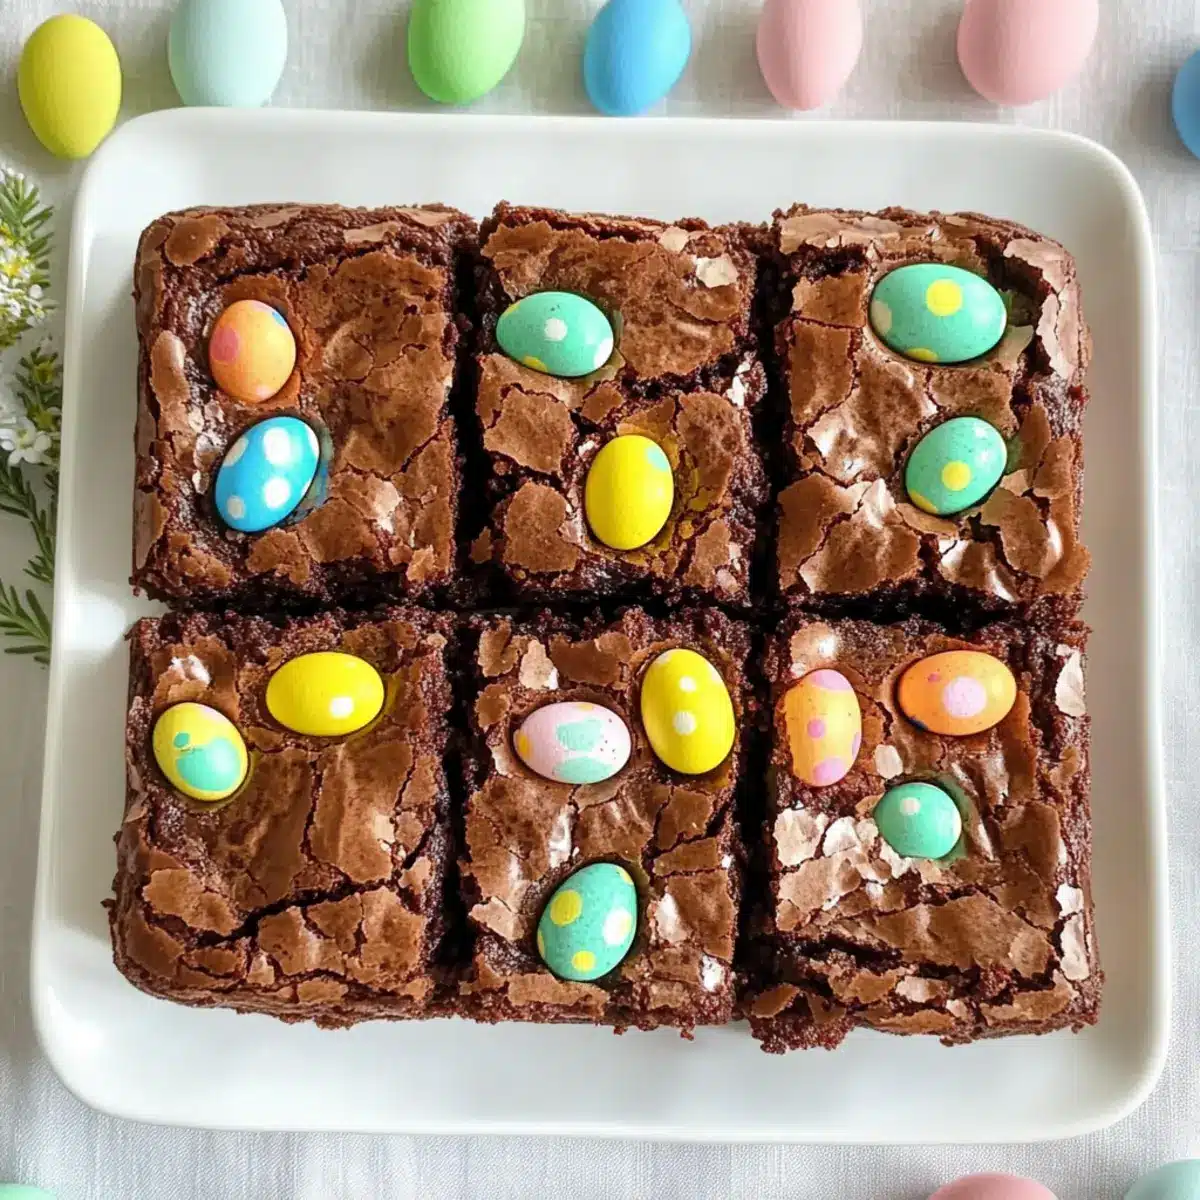
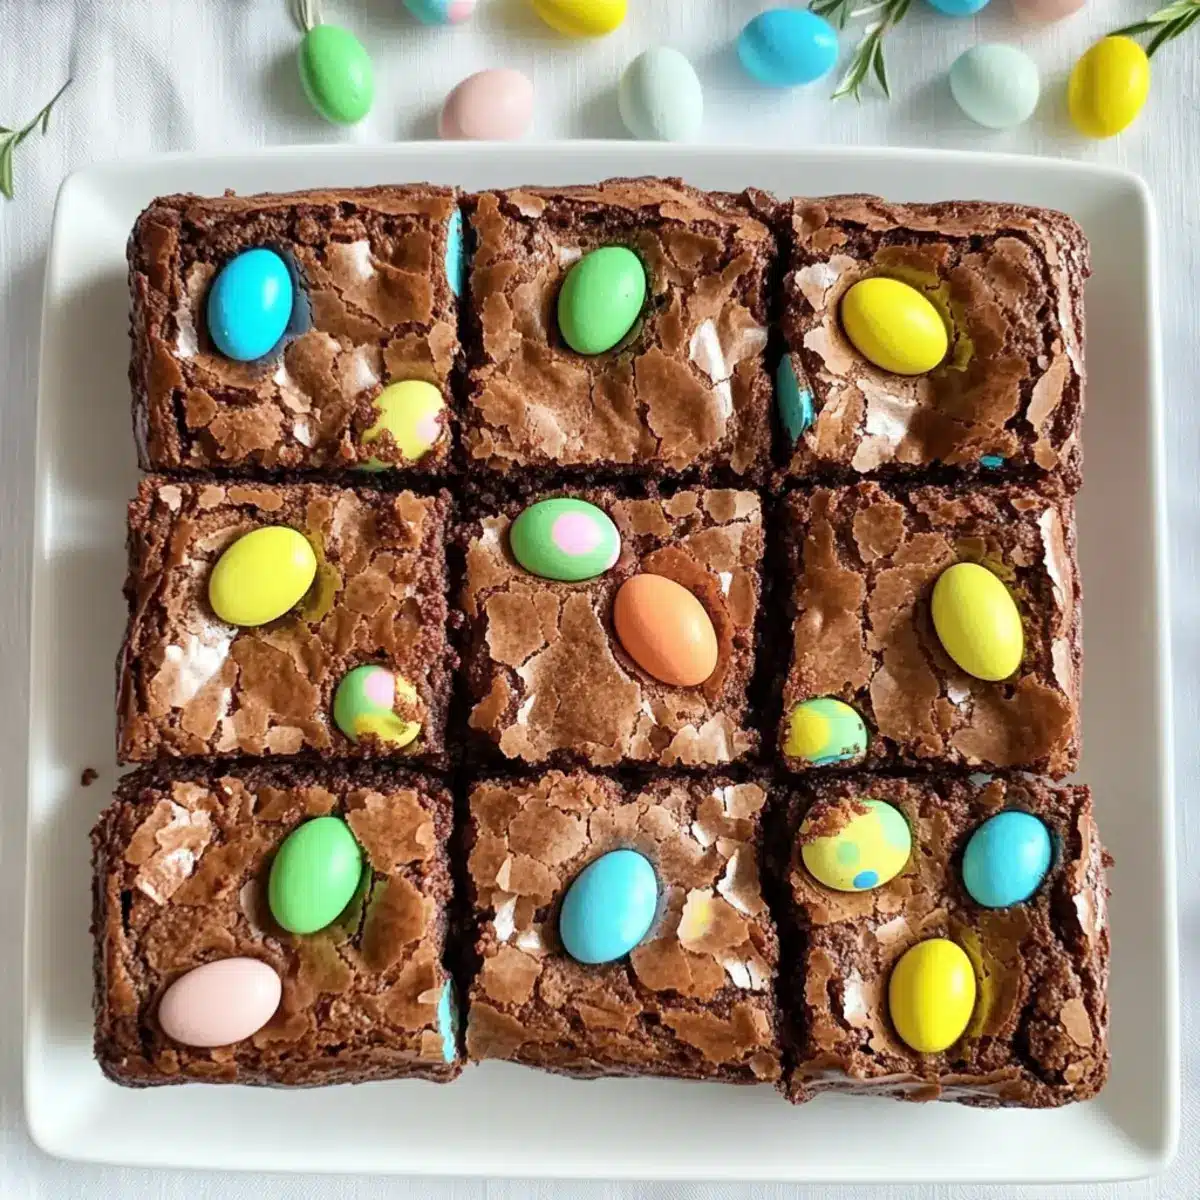
As I sifted through my cupboard for Easter treats, a colorful assortment of mini eggs caught my eye, sparking an idea that would soon transform my kitchen. Enter the Chewy Easter Mini Egg Brownies, a playful and delectable way to celebrate the joy of spring. These brownies, with their shiny crinkle tops and chewy interiors, not only bring a festive flair to your dessert table but are also incredibly easy to whip up—perfect for both novice bakers and seasoned pros alike. Plus, you’ll find they’ve got just the right balance of rich chocolate and the delightful crunch of mini eggs to win everyone’s heart. So, are you ready to create a show-stopping dessert that’ll have your friends and family coming back for seconds?
Why Are These Brownies a Must-Try?
Irresistible Chewy Texture: The secret to these brownies lies in their perfectly chewy interior, balanced with a shiny crinkle top that’s simply mesmerizing. Festive Touch: The addition of mini eggs not only adds a delightful crunch but also brings a vibrant pop of color, making them ideal for any Easter celebration. Quick and Easy: With straightforward instructions, whipping up these brownies is a breeze, making them perfect for both experienced bakers and those just starting out. Crowd-Pleasing Treat: These brownies are sure to impress family and friends, whether at an Easter gathering or as a sweet surprise in lunchboxes. Looking for more ways to celebrate with delicious recipes? Consider trying the Egg Breakfast Casserole for a lovely brunch option or the Greek Eggplant Moussaka for a hearty family dinner!
Easter Mini Egg Brownies Ingredients
For the Brownie Base
• Semi-Sweet Bakers Chocolate – Provides rich chocolate flavor; dark chocolate can be used for a more intense taste.
• Salted Butter (1/2 cup, melted) – Adds richness and moisture; substitute unsalted butter with a pinch of salt if needed.
• White Sugar (1 cup) – Sweetens the brownies and contributes to a chewy texture; no direct substitutions recommended.
• Large Eggs (2, at room temperature) – Binds ingredients and provides structure; make sure they’re at room temperature for a better emulsion.
• Vanilla Extract (1 tsp) – Enhances flavor; opt for pure vanilla for the best result.
• All-Purpose Flour (3/4 cup, spooned and leveled) – Provides structure; gluten-free flour can be used, but results may vary.
• Unsweetened Cocoa Powder (1/4 cup) – Deepens chocolate flavor; dark cocoa can yield a richer taste.
• Salt (1/2 tsp) – Balances sweetness; essential for flavor with no substitutes.
For the Topping
• Mini Eggs (1 cup + extra for topping) – Adds crunch and festive flair; can substitute with chocolate chips or other candies if desired.
Step‑by‑Step Instructions for Easter Mini Egg Brownies
Step 1: Preheat the Oven
Begin by preheating your oven to 350°F (175°C). While it warms up, prepare an 8×8 inch baking pan by lining it with parchment paper, allowing some overhang for easy removal later. This step ensures the brownies will cook evenly and develop that lovely shiny top.
Step 2: Melt the Chocolate
Chop the semi-sweet baker’s chocolate into small pieces and place it in a microwave-safe bowl. Microwave the chocolate in 20-second intervals, stirring in between, until completely melted and smooth. This will create a rich chocolate base for your Easter Mini Egg Brownies, releasing a delightful aroma as it melts.
Step 3: Mix the Wet Ingredients
In a large mixing bowl, combine the melted butter and sugar, whisking vigorously for 2-3 minutes until the mixture is well blended and lightened in color. Next, add the room temperature eggs and vanilla extract, whisking for an additional 5 minutes to incorporate air and achieve a fluffy consistency.
Step 4: Combine the Ingredients
Gently stir in the melted chocolate into the wet mixture, blending until fully incorporated. Then, sift in the all-purpose flour, cocoa powder, and salt, mixing carefully until just combined. It’s important not to overmix at this stage, as you want to maintain the tender texture of your Easter Mini Egg Brownies.
Step 5: Fold in the Mini Eggs
Once the batter is well mixed, fold in the mini eggs, carefully distributing them throughout. This step adds the festive touch that will make your Easter Mini Egg Brownies truly special. Ensure some eggs are reserved for pressing into the top before baking.
Step 6: Bake the Brownies
Pour the brownie batter into the prepared pan, smoothing the top with a spatula for an even bake. Gently press the reserved mini eggs into the top of the batter, ensuring they’re slightly submerged. Bake in the preheated oven for 28 minutes or until the edges start to pull away and the center is set but still fudgy.
Step 7: Cool and Slice the Brownies
Once baked, remove the brownies from the oven and let them cool in the pan for at least 30 minutes. This cooling period helps to firm up the brownies and makes slicing easier. Once sufficiently cooled, carefully lift the brownies out using the parchment overhang and slice them into irresistible squares.
Easter Mini Egg Brownies Customizations
Dive into the world of flavors and textures as you personalize your Easter Mini Egg Brownies with these delightful variations.
-
Dairy-Free: Swap the butter for coconut oil and use dairy-free chocolate. You’ll still achieve that delightful richness without the dairy.
-
Nutty Delight: Add 1/2 cup of chopped walnuts or almonds to your batter for added texture and a nutty flavor. They pair perfectly with chocolate!
-
Chocolate Overload: Instead of mini eggs, replace them with an assortment of chocolate chips for a double chocolate experience that’s sure to please.
-
Fruity Burst: Fold in 1/2 cup of dried cherries or cranberries along with the mini eggs for a pop of tartness that balances the sweetness beautifully.
-
Gluten-Free: Use a 1:1 gluten-free baking blend in lieu of all-purpose flour. Just make sure it includes xanthan gum to maintain the brownie’s chewy texture.
-
Spicy Kick: Add a pinch of cayenne or chili powder to the batter for an unexpectedly delightful kick that complements the chocolate.
-
Caramel Swirl: Drizzle caramel sauce over the brownie batter before baking for a rich, gooey center. It adds a delicious twist and looks gorgeous, too.
-
Frosted Finish: Once cooled, top with a light cream cheese frosting for an indulgent dessert twist. It’s like a brownie meets cake in every delightful bite!
Looking for more sweet treats? Don’t miss out on our Meatloaf Stuffed Mini for a savory-sweet flaky pastry approach or try our Egg Breakfast Casserole for delightful brunch options that keep everyone smiling.
What to Serve with Chewy Easter Mini Egg Brownies
Indulging in these delightful brownies is just the beginning; let’s explore some perfect pairing ideas for a complete Easter feast.
-
Vanilla Ice Cream: A scoop of creamy vanilla ice cream provides a delightful contrast to the rich chocolate, creating a deliciously indulgent treat. Picture warm brownies topped with melting ice cream, a heavenly combination that everyone will love.
-
Fresh Berries: Bright, juicy strawberries or raspberries add a refreshing burst of flavor that balances the sweetness of the brownies, making each bite feel lighter and more vibrant.
-
Mint Chocolate Chip Cookies: These minty delights complement the chocolatey richness of the brownies, offering a refreshing kick that’s perfect for spring celebrations. Serve them alongside for a delightful dessert duo!
-
Whipped Cream: Light and airy whipped cream serves as a gorgeous topping for your brownies, enhancing their visual appeal and adding creaminess that pairs perfectly with the chewy texture.
-
Chocolate Milkshake: A thick and luscious chocolate milkshake elevates the indulgence factor of your dessert spread, making it a fun and nostalgic pairing that both kids and adults will adore.
-
Homemade Lemonade: A refreshing glass of tart lemonade provides a zesty contrast that cuts through the sweetness of the brownies, making for a perfect sunny day pairing.
-
Coffee or Espresso: A rich cup of coffee or espresso beautifully complements the deep chocolate flavor of the brownies, elevating your dessert experience to a gourmet level.
-
Nutty Caramel Sauce: Drizzling a warm, nutty caramel sauce over your brownies adds an extra layer of decadence and flavor that is sure to please the palate.
-
Chocolate Dipped Strawberries: Combining rich chocolate and fresh sweetness, these treats provide an elegant touch to your dessert table and pair beautifully with the brownies.
Storage Tips for Easter Mini Egg Brownies
Room Temperature: Store your Easter Mini Egg Brownies in an airtight container at room temperature for up to 4 days. This keeps them soft and chewy, ready for snacking!
Fridge: If you want to prolong their freshness, you can refrigerate them for up to a week. Just remember to use an airtight container to prevent them from drying out.
Freezer: For longer storage, freeze the brownies in a single layer separated by parchment paper. They can last up to 3 months in the freezer. Thaw overnight in the fridge before enjoying!
Reheating: To enjoy slightly warm brownies, pop them in a microwave for about 10-15 seconds. This will revive the chewy texture and make the chocolate flavors even more pronounced.
Expert Tips for Chewy Easter Mini Egg Brownies
-
Room Temperature Eggs: Ensure eggs are at room temperature for better incorporation, which leads to a smoother mix and light texture.
-
Whisking Technique: Whisk vigorously to achieve that signature light and crinkly top—this step is key for perfectly chewy Easter Mini Egg Brownies.
-
Avoid Overmixing: Mix in the dry ingredients gently; overmixing can lead to tougher brownies, so stop as soon as no flour streaks remain.
-
Cooling Time: Allow brownies to cool completely in the pan for easier cutting; this helps them set and maintain their chewy goodness.
-
Storage Tips: For optimal freshness, store brownies in an airtight container at room temperature for up to 4 days—perfect for sharing or snacking!
Make Ahead Options
These Chewy Easter Mini Egg Brownies are perfect for busy home cooks looking to save time during the holiday hustle! You can prepare the brownie batter up to 24 hours in advance; just store it in an airtight container in the refrigerator to keep it fresh. Alternatively, you can bake the brownies ahead of time and keep them in an airtight container at room temperature for up to 4 days. When ready to serve, simply slice them into squares and garnish with additional mini eggs for that festive touch. This way, you’ll have a delicious dessert ready to impress without any last-minute fuss!

Easter Mini Egg Brownies Recipe FAQs
What kind of chocolate should I use for the brownies?
Absolutely! Semi-sweet bakers chocolate is ideal for these Easter Mini Egg Brownies, providing a rich chocolate flavor. If you prefer a more intense taste, you can easily substitute it with dark chocolate. Just be sure to melt it gently to avoid burning.
How should I store these brownies, and how long do they last?
For the best freshness, keep your Easter Mini Egg Brownies in an airtight container at room temperature for up to 4 days. This helps maintain their chewy texture. If you want them to last longer, you can refrigerate them for up to a week. Just make sure the container is sealed well to prevent them from drying out!
Can I freeze the brownies for later?
Very! To freeze your Easter Mini Egg Brownies, simply place them in a single layer, separated by parchment paper, in an airtight container or freezer bag. They can be stored this way for up to 3 months. When you’re ready to enjoy them, simply thaw overnight in the fridge for the best texture.
What should I do if my brownies turn out dry?
If your brownies are on the dry side, it could be due to overmixing or baking them for too long. To fix this next time, make sure to mix the dry ingredients just until incorporated, and check for doneness at around 25 minutes. A toothpick inserted should come out with a few moist crumbs, but not wet batter.
Are there any dietary concerns with the ingredients?
The main concern would be allergies to gluten, eggs, or dairy due to the ingredients used in these Easter Mini Egg Brownies. You can substitute gluten-free flour for all-purpose flour and use dairy-free chocolate and butter alternatives to make a version suitable for those with dietary restrictions. Always check ingredient labels to ensure they fit your specific dietary needs.
What can I use instead of mini eggs?
If you’re looking for alternatives to mini eggs, don’t fret! Chocolate chips or seasonal candies like M&Ms work perfectly in these brownies as well. You can mix and match based on what’s available or your personal preference. The more the merrier!
Chewy Easter Mini Egg Brownies You Can't Resist!
Ingredients
Equipment
Method
- Preheat your oven to 350°F (175°C). Line an 8×8 inch baking pan with parchment paper for easy removal.
- Chop the semi-sweet baker's chocolate into small pieces and microwave in 20-second intervals until melted and smooth.
- In a large mixing bowl, whisk together melted butter and sugar for 2-3 minutes. Add eggs and vanilla, and whisk for 5 minutes until fluffy.
- Stir in melted chocolate, then sift in flour, cocoa powder, and salt, mixing until just combined.
- Fold in mini eggs, reserving some for the top before baking.
- Pour batter into the prepared pan, pressing reserved mini eggs into the top. Bake for 28 minutes until edges pull away.
- Remove from oven and cool in the pan for at least 30 minutes before lifting out and slicing into squares.
Leave a Reply