
In one quick swoop, I traded the complicated sushi rolls for a vibrant Baked Salmon Sushi Bowl, and it’s been a weeknight game-changer ever since. Juicy salmon baked to perfection pairs effortlessly with fluffy rice and a medley of crisp veggies, all brought together by a spicy mayo I whip up in minutes. What I adore about this recipe is not just its incredible flavor but also its flexibility—feel free to swap in your favorite ingredients! Whether you’re feeding family or whipping up a meal for one, this customizable bowl is perfect for busy nights. Plus, it’s gluten-free and dairy-free, making it a wholesome option that never tastes like a compromise. Curious to uncover your next easy dinner solution? Let’s dive into the delicious details!
Why is this Baked Salmon Sushi Bowl a must-try?
Flavorful and Satisfying: With juicy baked salmon and fluffy sushi rice, this dish brings together the best of flavors and textures, making every bite a delight.
Quick Preparation: Ready in just 30 minutes, this bowl is perfect for those busy weeknights when you crave something homemade.
Customizable: Easily swap ingredients like salmon for chicken or tofu, and choose your favorite toppings to suit your taste!
Health-Conscious: This gluten-free and dairy-free meal packs in protein and healthy fats, ensuring you’re fueling your body the right way.
Crowd-Pleaser: Serve this delicious bowl to family or friends, and watch it disappear—everyone loves a meal that looks as good as it tastes!
If you love versatile meals, you might also enjoy the Grilled Chicken Bowl or the Japanese Katsu Bowls for more creative dinner ideas!
Baked Salmon Sushi Bowl Ingredients
For the Salmon
- Salmon – A rich source of protein and omega-3 fatty acids; excellent baked for flavor and health.
- Soy Sauce – Adds umami to the glaze; swap with tamari for a gluten-free option.
- Chili Garlic Sauce – Provides a nice kick; customize the heat to your liking.
For the Spicy Mayo
- Mayonnaise – Creates a creamy texture; Greek yogurt makes a lighter alternative.
For the Bowl Base
- Sushi Rice – Sticky and soft, the perfect base for your bowl; feel free to use jasmine or brown rice if preferred.
For the Toppings
- Cucumbers – Adds crunch; substitute with bell peppers or shredded carrots for variety.
- Avocado – Offers creaminess and healthy fats; olives can be used for a different twist.
- Furikake – A delightful Japanese seasoning that enhances flavor; use crushed nori or sesame seeds if unavailable.
With these ingredients, you’re just a few steps away from enjoying a scrumptious Baked Salmon Sushi Bowl that’s not only quick to prepare but also bursting with delightful flavors!
Step‑by‑Step Instructions for Baked Salmon Sushi Bowl
Step 1: Preheat the Oven
Begin by preheating your oven to 400°F (200°C). This step ensures that your Baked Salmon Sushi Bowl starts off perfectly. While the oven heats up, gather all your ingredients and equipment, including a baking sheet and a skillet, to streamline your cooking process.
Step 2: Prepare the Salmon
Carefully pat the salmon fillets dry with a paper towel to ensure a nice sear. Season both sides with salt and pepper, then brush a mixture of soy sauce and chili garlic sauce over the fillets for added flavor. The glaze will provide a delightful taste that enhances the overall experience of your Baked Salmon Sushi Bowl.
Step 3: Sear the Salmon
Heat a skillet over medium-high heat and add a touch of oil. Once hot, carefully place the salmon skin-side up in the skillet, allowing them to sear for about 2–4 minutes. Look for a golden brown crust to form on the bottom, signaling it’s time to flip the fillets gently.
Step 4: Bake the Salmon
After flipping the salmon, turn off the heat, and transfer the skillet directly to your preheated oven. Bake for 10–14 minutes, keeping an eye on the internal temperature, which should reach 140°F (60°C) for perfectly flaky salmon. This method ensures the fish remains moist and flavorful, essential for a delicious Baked Salmon Sushi Bowl.
Step 5: Make the Spicy Mayo
While the salmon bakes, prepare the spicy mayo by mixing mayonnaise with additional chili garlic sauce in a small bowl. Adjust the heat to your liking, tasting as you go. This creamy condiment will bring a delightful kick to your Baked Salmon Sushi Bowl, enhancing the overall flavor profile.
Step 6: Assemble the Bowl
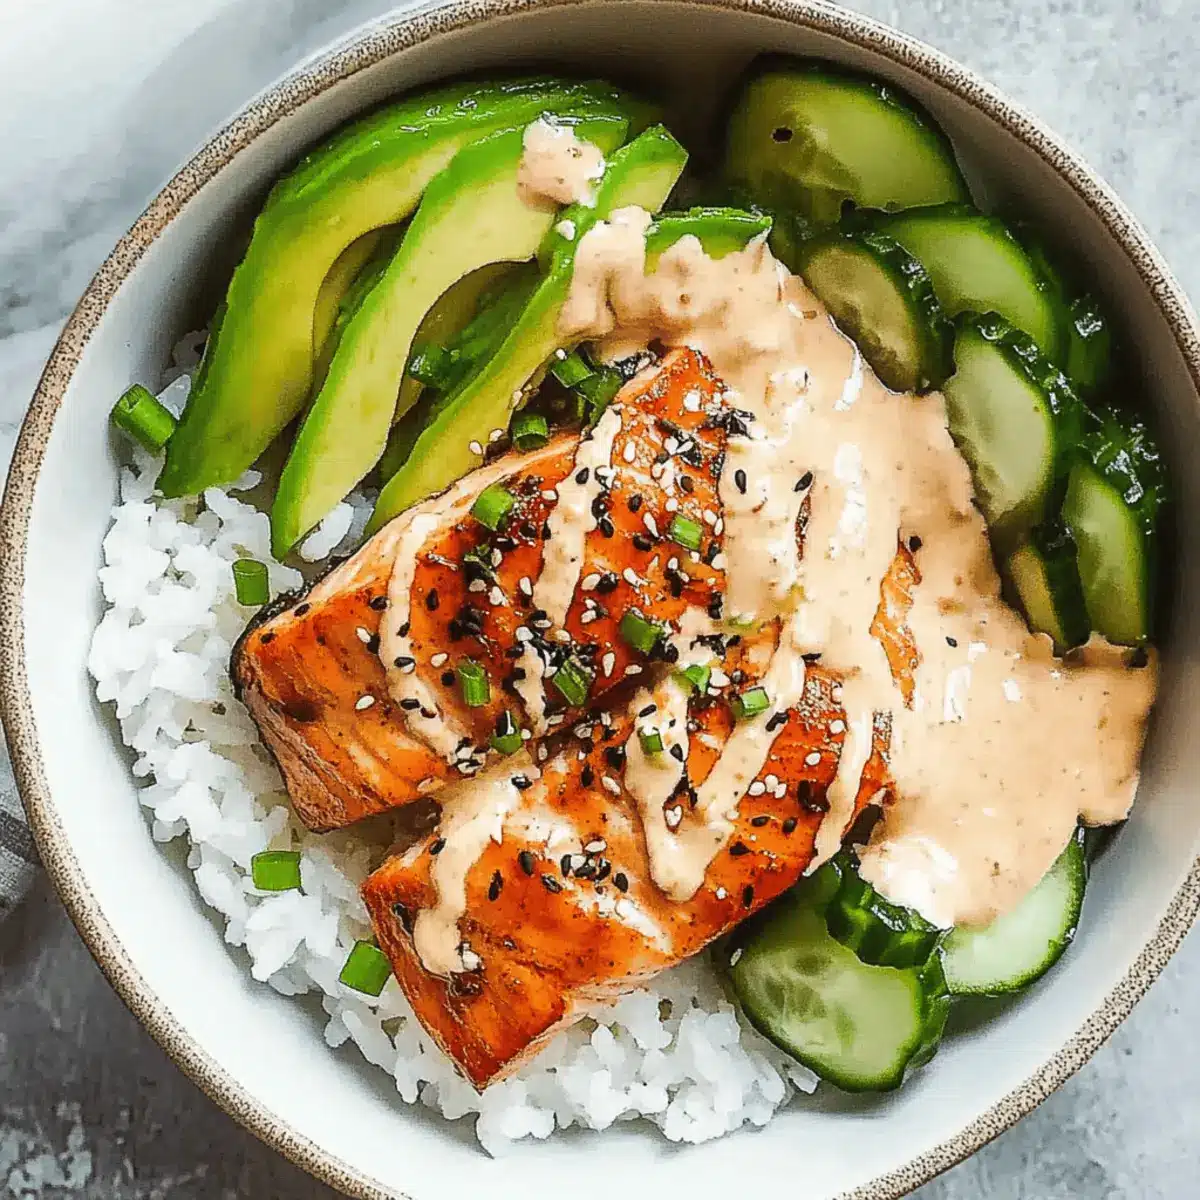
Once the salmon is finished baking, it’s time to assemble your Baked Salmon Sushi Bowl. Start with a base of fluffy sushi rice in a bowl, then layer on the baked salmon, creamy avocado slices, and crunchy cucumbers. Drizzle the spicy mayo over the top and sprinkle with furikake for an added burst of flavor.
Step 7: Serve and Enjoy
Your Baked Salmon Sushi Bowl is now ready to serve! Consider offering additional soy sauce or wasabi on the side for those who enjoy extra flavor. Enjoy this vibrant and customizable meal with family or friends, savoring each delightful bite of color and taste.
How to Store and Freeze Baked Salmon Sushi Bowl
Fridge: Store leftover Baked Salmon Sushi Bowl in an airtight container for up to 3 days, allowing the flavors to meld together while keeping everything fresh.
Freezer: For longer storage, freeze individual components separately in airtight containers. The salmon can be kept frozen for up to 2 months; just thaw it in the fridge before reheating.
Reheating: Gently reheat the salmon in a skillet over low heat or in the microwave to maintain its moisture and prevent dryness.
Separation Tip: If possible, store the spicy mayo and toppings separately to preserve their freshness when you’re ready to enjoy your delicious meal again!
Make Ahead Options
These Baked Salmon Sushi Bowls are perfect for meal prep! You can prepare the sushi rice and chop the cucumbers and avocado up to 24 hours in advance. Store the rice in an airtight container to keep it fresh, and sprinkle a little lemon juice on the avocado to prevent browning. The salmon can also be marinated in the soy and chili garlic sauce up to 3 days before cooking, meaning less work when it’s time to cook. When you’re ready, simply bake the salmon as per the instructions and assemble the bowls with your prepped ingredients. You’ll have a delightful, nutritious meal on the table in no time!
Baked Salmon Sushi Bowl Variations
Feel free to explore and personalize your Baked Salmon Sushi Bowl for an even more delightful experience!
-
Gluten-Free: Use tamari instead of soy sauce to keep this dish gluten-free while enjoying all the same incredible flavors.
-
Dairy-Free: Substitute the mayonnaise in the spicy mayo with silken tofu blended until creamy for a light and delicious option.
-
Spicy Kick: Mix sriracha into the spicy mayo for a bold and fiery twist that will awaken your taste buds in every bite. Adjust the amount based on your spice tolerance!
-
Alternative Proteins: Swap salmon for grilled chicken, shrimp, or even crispy tofu to cater to different dietary preferences without losing the dish’s core essence.
-
Vegetable Varieties: Add in other fresh veggies like shredded carrots, radishes, or bell pepper strips for more crunch and vibrant color. Pairing different textures keeps your meals exciting!
-
Hearty Texture: For a nuttier flavor, try using quinoa instead of sushi rice. This adds interesting texture and elevates the dish’s health factor.
-
Sweetness Boost: Toss in some sliced mango or pineapple for a touch of sweetness that balances the savory elements beautifully.
-
Creative Toppings: Top with pickled ginger, microgreens, or seaweed salad for a gourmet touch that enhances the overall nutty flavor profile of this delightful bowl.
With these variations, you’re well on your way to crafting the perfect personalized Baked Salmon Sushi Bowl. And if you’re looking for more ways to elevate your meal game, don’t miss checking out the tasty Grilled Chicken Bowl or indulge in flavorsome Japanese Katsu Bowls for your next dinner adventure!
What to Serve with Baked Salmon Sushi Bowl
Elevate your Baked Salmon Sushi Bowl experience with these delightful pairings that bring together colors, textures, and flavors.
- Crispy Seaweed Snacks: A crunchy and subtle umami addition that mirrors sushi’s authentic taste, making each bite a flavor adventure.
- Miso Soup: Warm and comforting, this classic Japanese soup adds a savory depth that complements the freshness of your bowl.
- Edamame: Lightly salted and packed with protein, edamame provides a satisfying bite and a dash of green to your meal.
For a refreshing contrast, consider a side of Cucumber Salad. Simply toss sliced cucumbers with rice vinegar, sesame oil, and a sprinkle of sesame seeds for a crisp, tangy crunch.
Finally, don’t forget a glass of Chilled Sake or Green Tea. These beverages enrich the dining experience, balancing the flavors beautifully and creating a more immersive meal.
Expert Tips for the Best Baked Salmon Sushi Bowl
-
Sear for Perfection: Ensure the salmon skin is thoroughly dried before searing. This enhances the crispy texture and prevents sticking—key for a great Baked Salmon Sushi Bowl.
-
Customize Your Bowl: Don’t hesitate to mix and match toppings! Incorporate edamame, pickled ginger, or even shredded carrots for a personal touch that fits your taste.
-
Timing is Key: Watch the clock when baking your salmon. Aim for an internal temperature of 140°F (60°C) to guarantee moistness and flakiness without overcooking.
-
Chill the Mayo: Allow the spicy mayo to sit for a few minutes before serving. This lets the flavors meld beautifully, making each bite of your bowl even more delectable.
-
Leftover Storage: If you have leftovers, store them in an airtight container in the fridge. Reheat gently to keep the salmon moist, ensuring a delightful meal the next day.
Baked Salmon Sushi Bowl Recipe FAQs
How do I know if my salmon is fresh enough?
Absolutely! When selecting salmon, look for firm flesh that bounces back when pressed and a bright, vibrant color. Avoid any that has dark spots all over or a strong fishy smell. Fresh salmon should smell like the ocean, clean and mild.
How should I store leftovers of the Baked Salmon Sushi Bowl?
You can store leftover Baked Salmon Sushi Bowl in an airtight container in the refrigerator for up to 3 days. Make sure to separate the spicy mayo and toppings to keep them fresh. When you’re ready to enjoy it again, reheat the salmon gently in a skillet over low heat or in the microwave, which will help preserve its moisture!
Can I freeze components of the Baked Salmon Sushi Bowl?
Very much! For freezing, place the salmon, rice, and veggies in separate airtight containers. The salmon can be frozen for up to 2 months. To reheat, thaw it in the fridge overnight, then warm it gently. This helps maintain the fish’s moisture and ensures a delicious meal, just like fresh!
What should I do if the salmon ends up overcooked?
If your salmon is overcooked, don’t worry! Flake it into a bowl and mix it with a little bit of your spicy mayo or a drizzle of olive oil to add moisture back in. You can even turn it into salmon salad, adding cucumbers and avocados for a cool touch.
Is this recipe suitable for those with allergies?
Yes! The Baked Salmon Sushi Bowl is customizable, which makes it accommodating for various dietary needs. For those with soy allergies, substitute tamari or coconut aminos in place of soy sauce. Ensure all other ingredients, especially the mayonnaise, are suitable for your dietary restrictions.
Can I make the spicy mayo ahead of time?
Of course! You can prepare the spicy mayo a day in advance and store it in the refrigerator. This allows the flavors to meld beautifully, giving your Baked Salmon Sushi Bowl an extra kick of flavor that’s simply irresistible when you’re checking off your weeknight dinner to-do list!
Baked Salmon Sushi Bowl: Flavorful, Customizable Delight at Home
Ingredients
Equipment
Method
- Preheat your oven to 400°F (200°C). Gather all your ingredients and equipment to streamline your cooking process.
- Pat the salmon fillets dry with a paper towel. Season both sides with salt and pepper, then brush a mixture of soy sauce and chili garlic sauce over the fillets.
- Heat a skillet over medium-high heat and add a touch of oil. Sear the salmon skin-side up for about 2–4 minutes.
- Flip the salmon and transfer the skillet to the preheated oven. Bake for 10–14 minutes, until the internal temperature reaches 140°F (60°C).
- Mix mayonnaise with additional chili garlic sauce to prepare the spicy mayo.
- Assemble the bowl with sushi rice, baked salmon, avocado slices, and cucumbers. Drizzle with spicy mayo and sprinkle with furikake.
- Serve with additional soy sauce or wasabi as desired.
Leave a Reply