
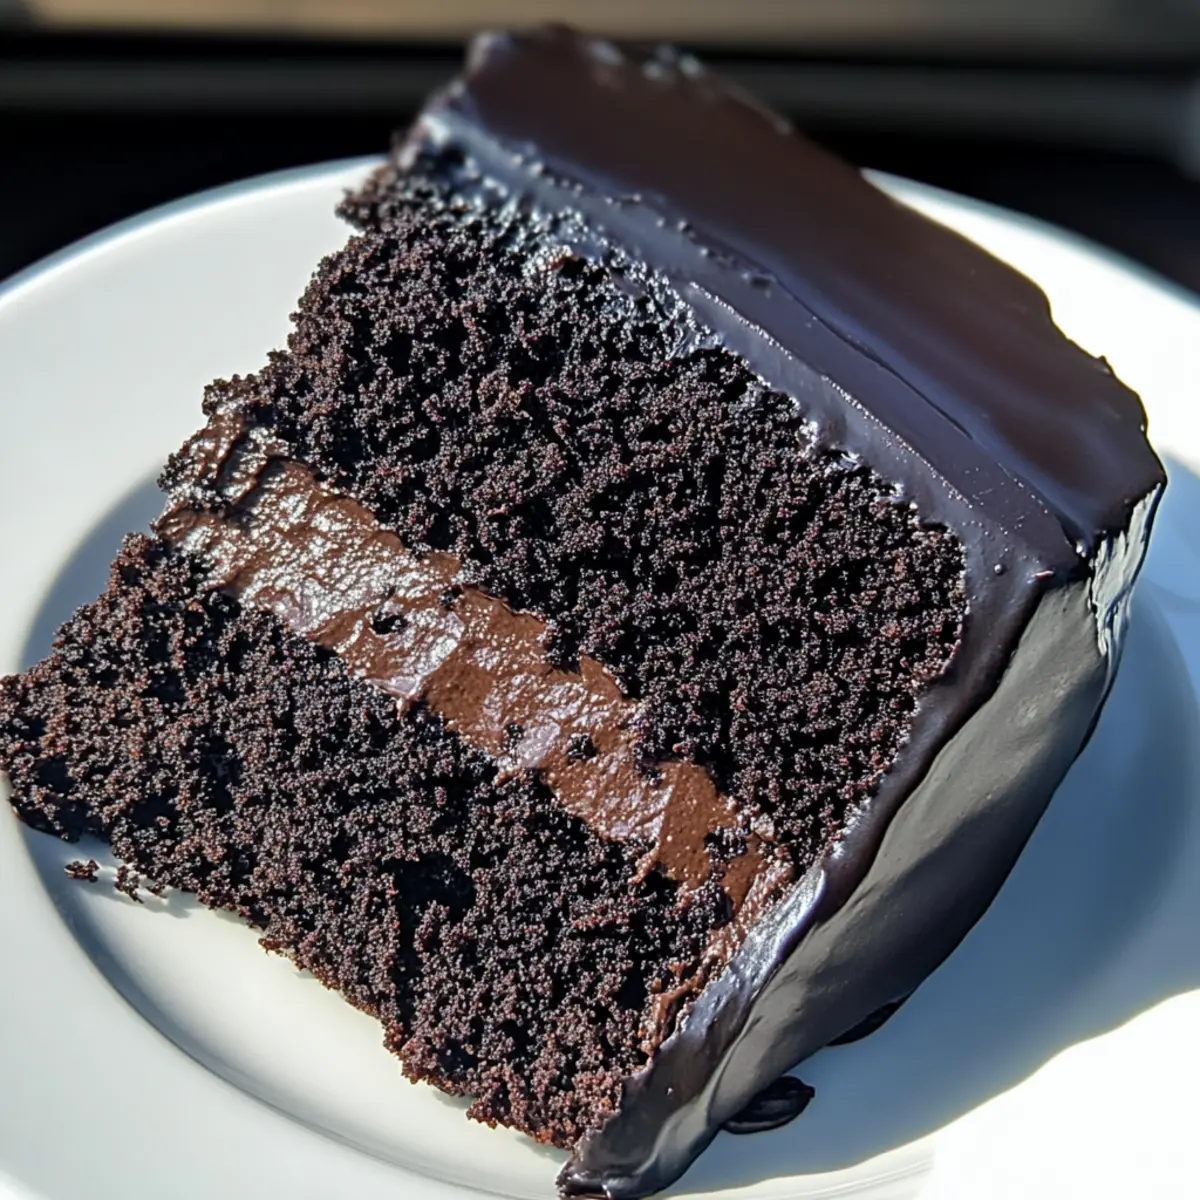
As I sifted through my pantry, the sweet scent of cocoa wafted through the air, sparking a craving for something indulgent. Enter the Brooklyn Blackout Cake, a chocolate lover’s dream that’s as dramatic as it is delicious. This dessert features rich layers of moist chocolate cake paired with luscious chocolate pudding filling and a velvety frosting, making it the star of any gathering or a delightful treat for a cozy night in. Not only is this cake a crowd-pleaser, but it also presents a comforting escape from the usual fast food fare we often find ourselves reaching for. Plus, with a gluten-free adaptation on the horizon, there’s no reason to miss out on this chocolatey wonder! So, are you ready to dive into layers of blissful chocolate goodness?
Why is Brooklyn Blackout Cake so special?
Decadent Layers: Each slice of Brooklyn Blackout Cake is a chocolate lover’s paradise, featuring moist layers wrapped around a rich chocolate pudding filling. Perfectly Balanced flavors ensure every bite strikes a balance between sweetness and depth. Adaptable Options: Going gluten-free? Easy swaps allow anyone to join in on the indulgence. Impressive Appearance: This cake is a showstopper, ideal for celebrations or a cozy night in. Quick to Assemble: With straightforward steps and common ingredients, you’ll have this mesmerizing treat ready in no time. Treat yourself to something extraordinary today—this cake is bound to ignite your passion for homemade desserts!
Brooklyn Blackout Cake Ingredients
For the Cake
- All-Purpose Flour – Essential for structure; substitute with gluten-free flour blend for a gluten-free Brooklyn Blackout Cake.
- Unsweetened Cocoa Powder – Provides a deep chocolate flavor; try Dutch-process cocoa for an even richer taste.
- Baking Powder & Baking Soda – Crucial leavening agents; always check their freshness for the best rise.
- Salt – Enhances overall flavor; use fine sea salt for a smoother blend.
- Granulated Sugar – Sweetens and adds moisture; brown sugar offers a deeper flavor profile, so consider using it!
- Whole Milk – Imparts moisture and richness; almond or oat milk works well for a dairy-free cake.
- Vegetable Oil – Keeps the cake delightfully moist; melted coconut oil adds a hint of flavor if you’re adventurous.
- Eggs – Bind the ingredients for the perfect texture; for a vegan option, applesauce or flaxseed meal can be used.
- Vanilla Extract – Boosts aromas and flavors; pure vanilla is recommended for optimal taste.
- Boiling Water – Enhances cocoa flavor and ensures a moist batter; don’t skip this step!
For the Chocolate Pudding Filling
- Granulated Sugar – Sweetens the filling; feel free to adjust according to your taste preferences.
- Cornstarch – Acts as a thickening agent for a luscious pudding; arrowroot starch is a good alternative if needed.
- Unsweetened Cocoa Powder – Adds rich depth to the pudding; maintain the chocolate theme!
- Salt – Balances out the sweetness for a perfect flavor profile.
- Whole Milk – Creamy base for the pudding; consider any plant-based milk as a substitute.
- Semi-sweet Chocolate – Provides richness; dark chocolate can intensify the pleasure.
- Unsalted Butter – Contributes to creaminess; coconut oil is a dairy-free alternative that works beautifully.
For the Chocolate Frosting
- Unsweetened Cocoa Powder – The key ingredient for that decadent frosting flavor.
- Unsalted Butter – Gives the frosting its creamy texture; ensure it’s softened for easy mixing.
- Powdered Sugar – Sweetness and texture enrich the frosting; coconut sugar is a healthier option.
- Whole Milk – Adjusts frosting consistency; cream can make it even more indulgent.
Get ready to bring this impressive Brooklyn Blackout Cake to life, and treat yourself and your loved ones to a slice of chocolate heaven!
Step‑by‑Step Instructions for Brooklyn Blackout Cake
Step 1: Preheat and Prepare the Pans
Begin by preheating your oven to 350°F (175°C). While it heats, grease and flour two 9-inch round cake pans to prevent sticking. Ensure they’re thoroughly covered, as this will help the Brooklyn Blackout Cake release easily once baked.
Step 2: Mix Dry Ingredients
In a large mixing bowl, whisk together the all-purpose flour, cocoa powder, baking powder, baking soda, and salt. This dry mixture forms the cake’s base and should be combined well to ensure an even distribution of flavors. Set aside while you prepare the wet ingredients.
Step 3: Combine Wet Ingredients
In another bowl, mix the granulated sugar, whole milk, vegetable oil, eggs, and vanilla extract using a whisk until fully combined. This wet mixture adds moisture and sweetness to your Brooklyn Blackout Cake, ensuring a rich flavor.
Step 4: Create the Batter
Gradually pour the wet ingredients into the dry mixture, stirring gently until a smooth batter forms. Be careful not to overmix, as this could lead to a denser cake. The batter will be fairly thick but should have no lumps, indicating it’s ready for the next step.
Step 5: Add Boiling Water
Now, carefully stir in the boiling water, which will thin the batter significantly. This step enhances the chocolate flavor and aids in achieving a moist cake. You’ll know it’s ready when the batter is glossy and well-combined.
Step 6: Bake the Cakes
Divide the batter equally between the prepared cake pans. Place them in the preheated oven and bake for 30-35 minutes. Insert a toothpick into the center of the cakes—if it comes out clean, they’re done. Watch for a slight dome and a firm, set texture on the surface.
Step 7: Cool the Cakes
Once baked, remove the cakes from the oven and let them cool in the pans for about 10 minutes. Then, carefully invert the cakes onto wire racks to cool completely. This cooling process allows for easier assembly and frosting later on.
Step 8: Prepare the Chocolate Pudding Filling
For the filling, combine unsalted butter, granulated sugar, cocoa powder, and whole milk in a saucepan over medium heat. Bring to a boil, stirring continuously. Reduce heat and simmer until thickened, about 5-7 minutes. Once thick, allow the pudding to cool before using it between layers.
Step 9: Assemble the Cake
Once your cakes have cooled completely, place one layer on a serving plate. Spread a generous amount of the chocolate pudding filling on top, creating an even layer. Gently place the second cake layer on top to complete the stacking.
Step 10: Frost the Cake
Using the remaining chocolate pudding, frost the top and sides of your beautifully layered Brooklyn Blackout Cake. Ensure you create a smooth finish for an appealing appearance.
Step 11: Garnish and Serve
Finally, add an optional flourish by decorating the top of the cake with chocolate shavings or sprinkles for an extra touch. Slice, serve, and revel in the decadent bliss of your homemade Brooklyn Blackout Cake!
What to Serve with Brooklyn Blackout Cake?
Who doesn’t crave a sweet complement to a chocolate masterpiece?
-
Fresh Berries: Juicy strawberries or raspberries add a tart contrast, beautifully balancing the rich chocolate flavors. Their vibrant colors bring visual delight and freshness to each slice.
-
Vanilla Ice Cream: A scoop of creamy vanilla ice cream provides a delightful temperature contrast, melting slightly against the warm chocolate cake while enhancing indulgence with every bite.
-
Espresso or Coffee: Serve with a robust espresso or brewed coffee to awaken your palate. The bitterness cuts through the sweetness, making each chocolatey morsel even more delightful.
-
Chocolate Ganache Drizzle: Add an extra layer of luxury with a silky chocolate ganache drizzle on each slice, intensifying the chocolate experience for true aficionados.
-
Whipped Cream: Light and airy whipped cream introduces a cloud-like texture that contrasts with the dense cake, offering a satisfying mouthfeel that enhances the overall enjoyment.
-
Chocolate-Covered Strawberries: Elevate your dessert experience by pairing slices with chocolate-covered strawberries. They provide an elegant flair and a dual chocolate flavor that will wow your guests.
-
Nutty Biscotti: For a satisfying crunch, serve alongside homemade or store-bought biscotti. Their texture adds an encouraging invitation to dip into that luscious chocolate pudding.
-
Mint Tea: A soothing cup of mint tea adds freshness to the experience, cleansing the palate while providing a light and fragrant accompaniment.
-
Lightly Salted Caramel Sauce: Drizzle this sweet and salty sauce to contrast the cake’s richness and excite your taste buds. The combination of flavors thrills chocolate lovers with every bite.
Indulge in these delightful pairings to create a beautiful table setting that complements your Brooklyn Blackout Cake!
Expert Tips for Baking Brooklyn Blackout Cake
-
Room Temperature Ingredients: Start with all ingredients at room temperature to ensure even mixing and better texture in your Brooklyn Blackout Cake.
-
Don’t Overmix Batter: Mix just until combined; overmixing will lead to a dense cake rather than the light, fluffy layers you desire.
-
Use Parchment Paper: Line your cake pans with parchment paper to guarantee the cakes release without sticking, making your assembly much easier.
-
Check Freshness of Leaveners: Ensure your baking powder and baking soda are fresh to avoid a flat cake; old leavening agents won’t rise as expected.
-
Stay Cool Before Assembling: Allow the cakes to cool completely before layering or frosting to prevent melting the pudding filling; patience pays off in perfect presentation!
Make Ahead Options
These Brooklyn Blackout Cake components are perfect for meal prep enthusiasts! You can bake the cake layers up to 3 days in advance and store them, wrapped tightly in plastic wrap, at room temperature to maintain moisture. The chocolate pudding filling can also be prepared up to 24 hours ahead; simply refrigerate it in an airtight container to ensure it doesn’t form a skin. When you’re ready to serve, layer the cooled cakes with the chilled pudding and frost with any remaining pudding. By prepping in advance, you’ll have this indulgent dessert ready with minimal effort on the day of your gathering!
How to Store and Freeze Brooklyn Blackout Cake
Room Temperature: Keep the cake covered at room temperature for up to 3 days. Ensure it’s in an airtight container to maintain its moisture and flavor.
Fridge: Store the Brooklyn Blackout Cake in the fridge, covered, for up to 1 week. This helps preserve its rich taste while providing a refreshing contrast when served chilled.
Freezer: For longer storage, wrap the cake well in plastic wrap and foil, freezing for up to 3 months. Thaw in the fridge overnight before serving.
Reheating: Gently warm individual slices in the microwave for 10-15 seconds to bring back its enticing aroma and gooey texture. Enjoy!
Brooklyn Blackout Cake Variations & Substitutions
Feel free to get creative with your Brooklyn Blackout Cake and explore these delightful variations that provide exciting twists on a classic favorite!
- Gluten-Free: Substitute all-purpose flour for a gluten-free flour blend to accommodate dietary needs without sacrificing flavor.
- Nutty Flavor: Adding a tablespoon of almond or hazelnut extract will infuse a delightful nutty aroma, elevating your chocolate cake experience.
- Dairy-Free: Use almond, coconut, or oat milk in place of whole milk and replace butter with coconut oil for a rich, dairy-free version.
- Fruit Fest: Layer in fresh raspberries or cherries between the chocolate layers, providing a tart and vibrant contrast to the sweetness of the chocolate.
- Different Cocoa: Experiment with Dutch-process cocoa for an even deeper chocolate flavor, or try a mix of dark and semi-sweet chocolates for varied richness.
- Espresso Boost: Add a teaspoon of instant espresso powder to the batter for a coffee-infused chocolate flavor that takes pleasure to new heights.
- Layered Pudding: For a twist, incorporate layers of chocolate and vanilla pudding for a beautiful marbled effect once sliced open.
- Whipped Topping: Top your cake with freshly whipped cream or a dairy-free alternative for an airy finish, perfect for afternoon tea or dessert gatherings.
And if you’re looking for more delicious cakes to try, don’t miss out on my indulgent Chocolate Poke Cake or my seasonal favorite, the Spice Gooey Cake!

Brooklyn Blackout Cake Recipe FAQs
What kind of cocoa powder should I use for the best flavor?
I recommend using unsweetened cocoa powder as it gives your Brooklyn Blackout Cake a deep and rich chocolate flavor. For an even more luxurious taste, consider trying Dutch-process cocoa. It’s slightly milder and results in a more sumptuous cake.
How should I store my Brooklyn Blackout Cake for freshness?
To keep your cake fresh, store it in an airtight container at room temperature for up to 3 days. If you prefer it cold or if it’s warm in your kitchen, refrigerate it, where it will last around a week. Always make sure it’s covered to prevent it from drying out.
Can I freeze Brooklyn Blackout Cake? How?
Absolutely! To freeze this decadent cake, wrap it tightly in plastic wrap and then in foil to prevent freezer burn. It can be stored in the freezer for up to 3 months. When you’re ready to enjoy, just transfer it to the refrigerator the night before to thaw gently. This method preserves both its flavor and moisture.
Are there any common issues when baking this cake?
Yes, one common issue is ending up with a dense cake. This often happens if you overmix the batter or use cold ingredients. Remember to use room temperature ingredients and mix just until combined for a light, fluffy texture. If the cake is domed or cracks, it might be due to overbaking—keep an eye on it and start checking with a toothpick around the 30-minute mark.
Can pets eat chocolate cake?
It’s essential to keep chocolate cakes away from pets, especially dogs. Chocolate contains theobromine, which is toxic to them. If you’re making the Brooklyn Blackout Cake, make sure to enjoy it yourself and keep it out of reach of furry friends!
Can this recipe be made gluten-free?
Absolutely! Just substitute the all-purpose flour with a gluten-free flour blend. This is a fantastic option for those with gluten sensitivities. When doing this, ensure that all other ingredients are also gluten-free to maintain the integrity of your Brooklyn Blackout Cake.
Irresistible Brooklyn Blackout Cake for Chocolate Lovers
Ingredients
Equipment
Method
- Preheat your oven to 350°F (175°C) and grease two 9-inch round cake pans.
- In a large bowl, whisk together the flour, cocoa powder, baking powder, baking soda, and salt.
- In another bowl, mix the sugar, milk, oil, eggs, and vanilla until combined.
- Gradually add the wet ingredients to the dry mixture, stirring gently until smooth.
- Carefully stir in the boiling water until the batter is glossy and well-combined.
- Divide the batter between the pans and bake for 30-35 minutes, checking with a toothpick.
- Let the cakes cool in the pans for 10 minutes, then invert onto wire racks.
- For the filling, combine butter, sugar, cocoa, and milk in a saucepan and bring to a boil. Simmer until thickened.
- Once cooled, layer the first cake on a plate, spread with pudding, then top with the second layer.
- Frost with the remaining pudding, smoothing it out for a finished look.
- Decorate with shavings or sprinkles before slicing and serving.
Leave a Reply