
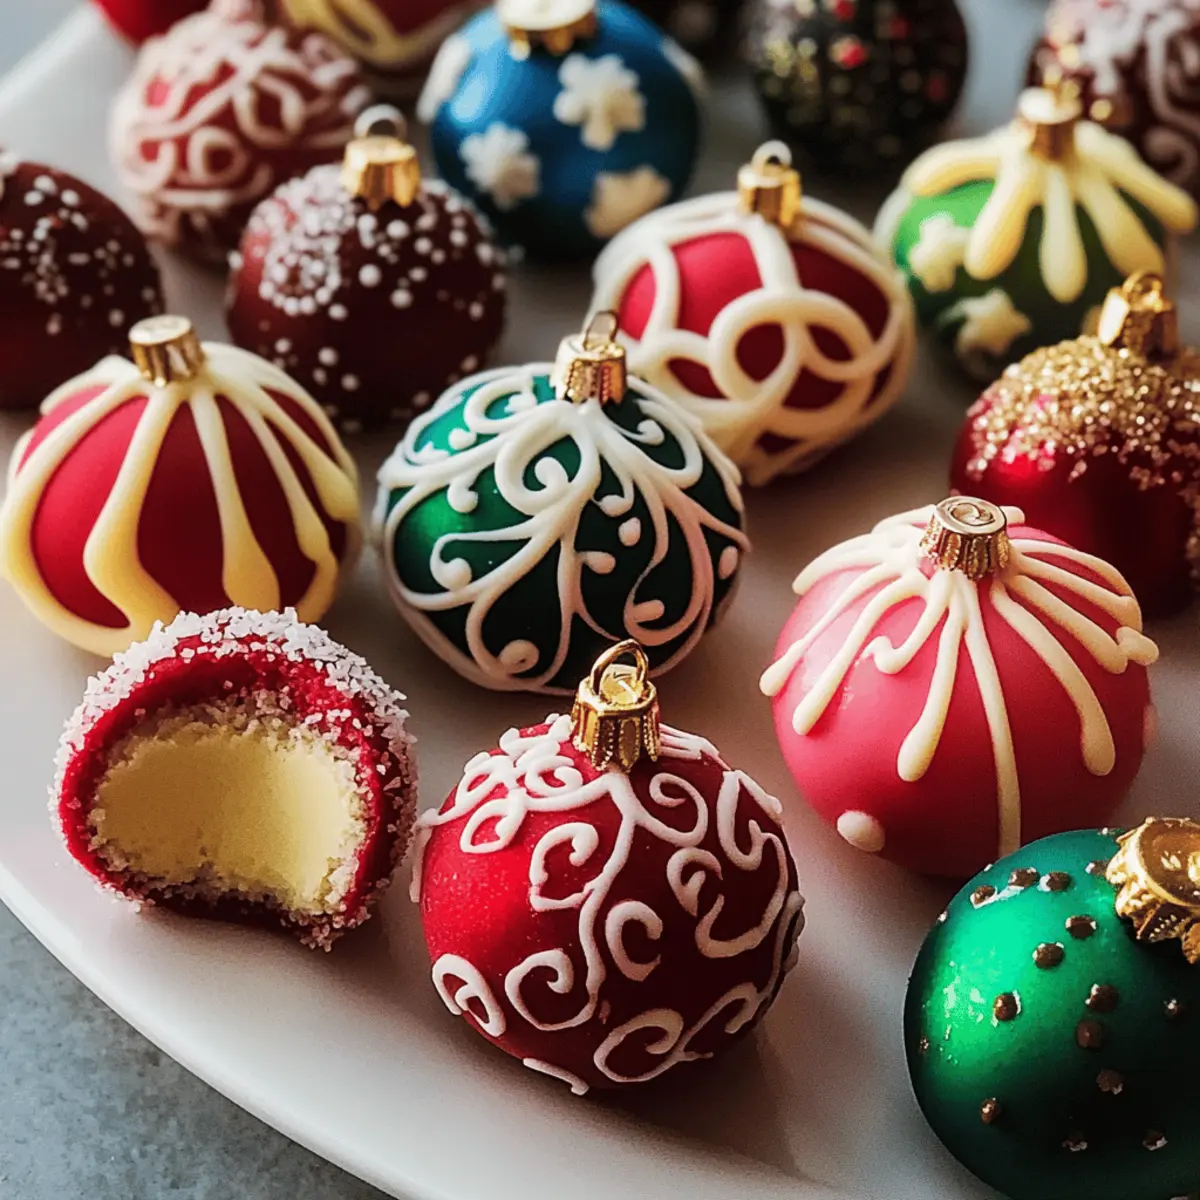
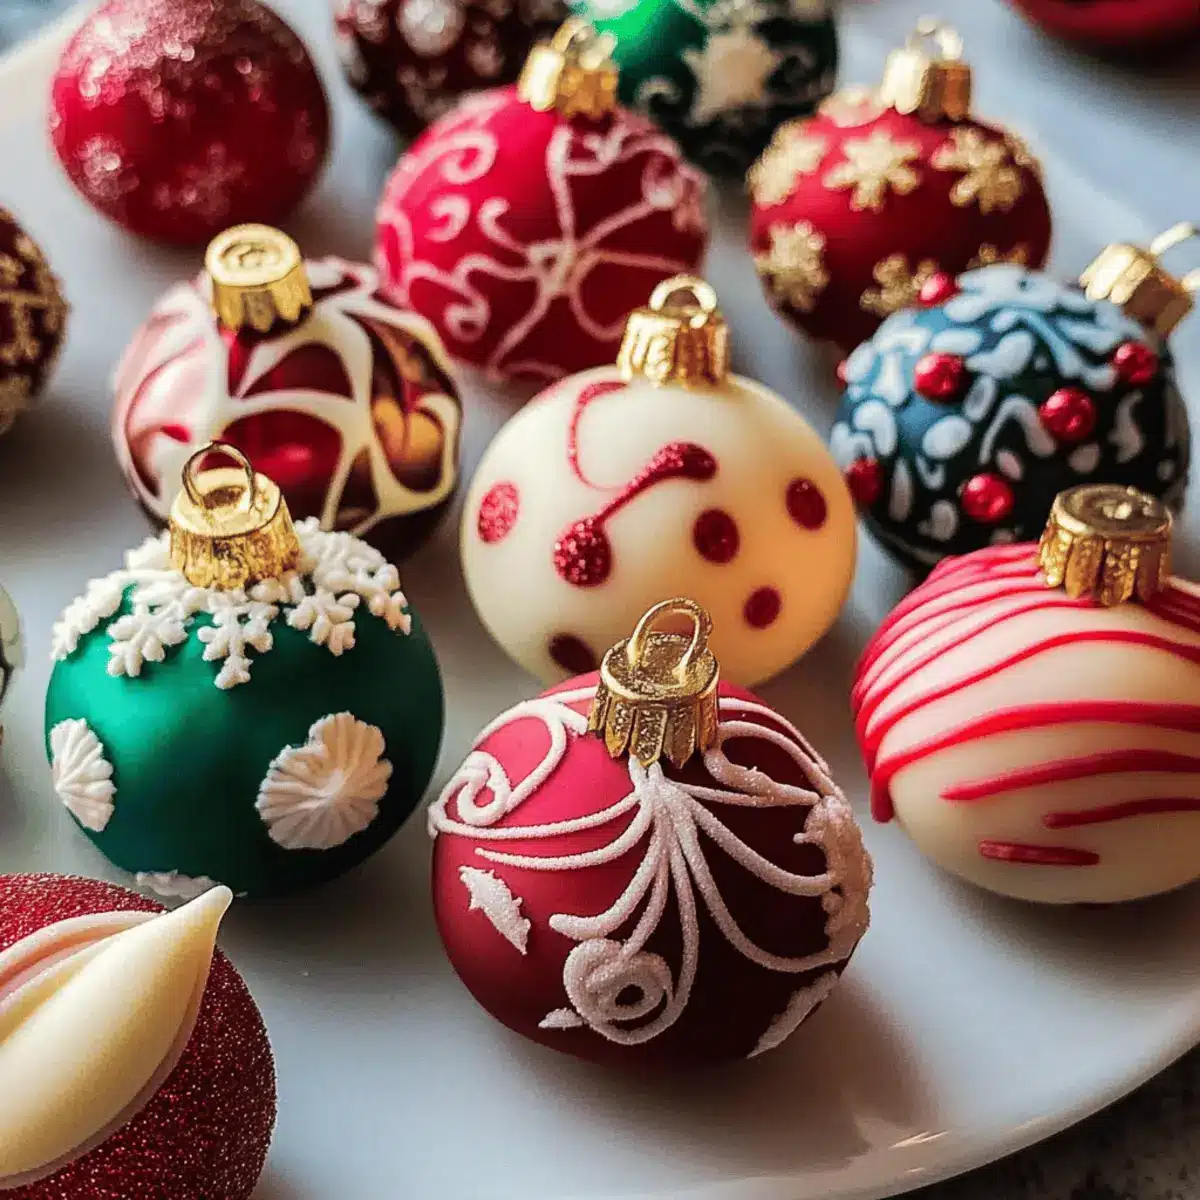
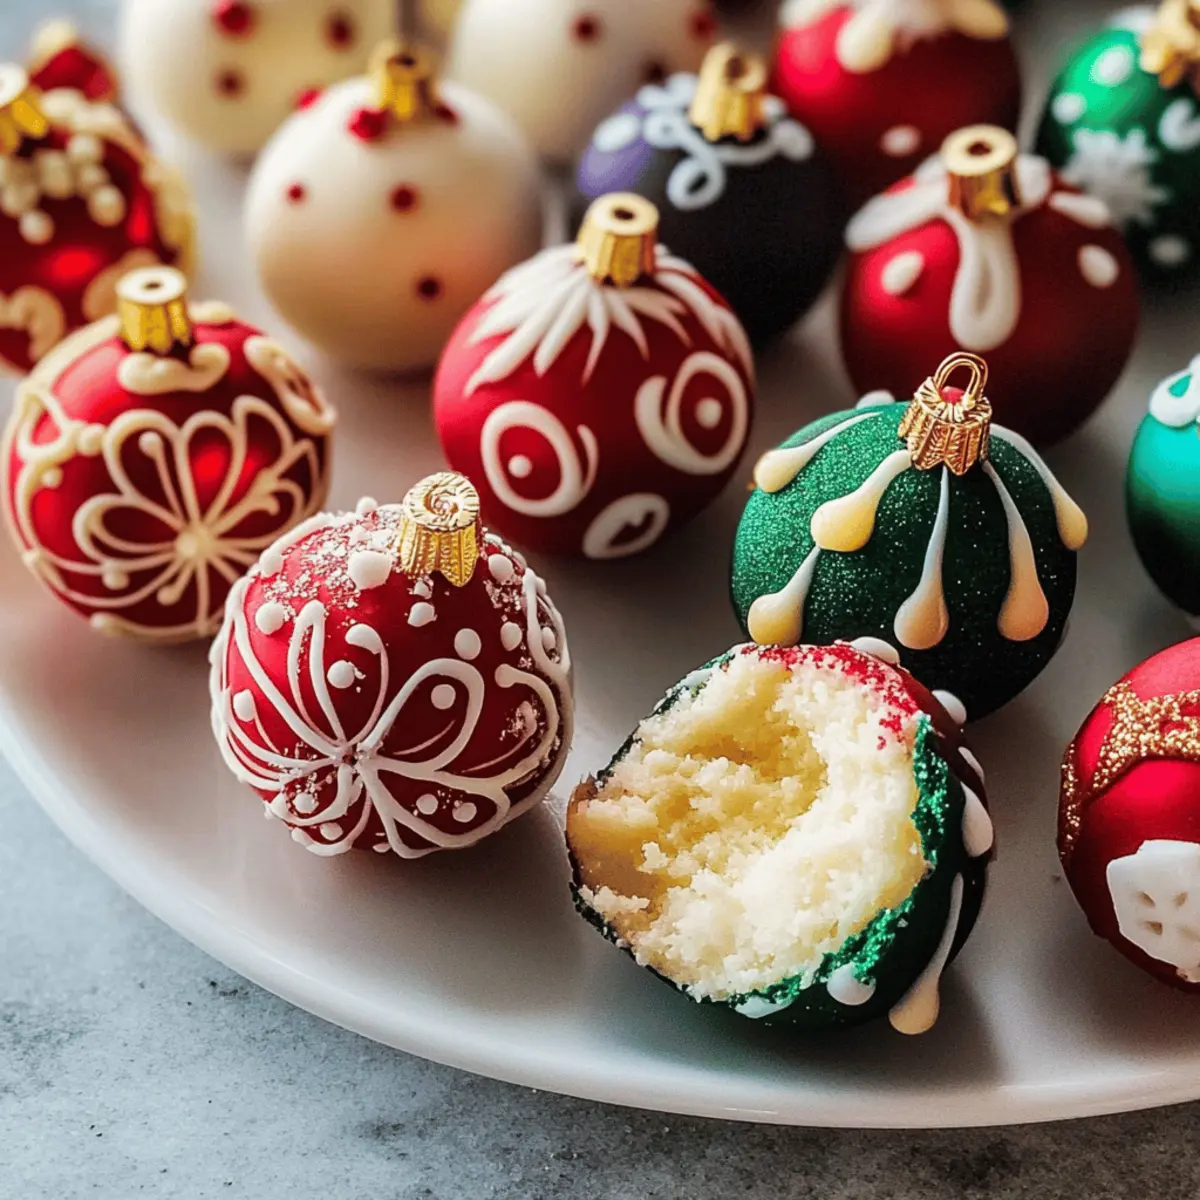
As the holidays approach, I find myself diving into festive recipes that fill my kitchen with warmth and cheer. One of my absolute favorites is Cake Ball Ornaments, a no-bake delight that’s perfect for those who love adding a personal touch to their holiday desserts. Not only are these treats visually stunning—perfect for decorating your table or gifting to loved ones—but they are also incredibly easy to customize with your favorite cake flavors and toppings. Whether you’re looking for an engaging activity with your kids or simply want to impress your guests, Cake Ball Ornaments are a crowd-pleaser that can transform any gathering into a joyful celebration. What flavor combination will you choose for your festive creations?
Why are Cake Ball Ornaments a must-try?
Endless Customization: You can tailor your Cake Ball Ornaments to match any holiday theme or personal preference, making them uniquely yours.
Easy No-Bake Preparation: No need for oven time—simply mix, shape, and decorate!
Fun for All Ages: Perfect for kids and adults alike, these treats can turn into a delightful family activity during the festive season.
Visually Impressive: These colorful ornaments not only taste great but also look stunning on your dessert table, adding a festive flair.
Ideal for Gifting: Wrap them in cute boxes or on tiered platters for a charming gift sure to delight friends and family. Check out more festive ideas like Jack Lantern Pancakes or Halloween Meatballs Spooky to keep your holiday celebrations vibrant!
Cake Ball Ornaments Ingredients
• Perfect for festive creations!
-
For the Cake Mixture
-
Box Cake Mix (Any Flavor) – Use vanilla, chocolate, red velvet, or seasonal flavors for a scrumptious base.
-
Frosting (1/2 cup) – Store-bought or homemade, it creates a rich dough that binds the cake together.
-
For the Coating
-
Candy Melts or Chocolate Chips (2 cups, assorted colors) – These provide a sweet and glossy shell for your Cake Ball Ornaments, perfect for various holiday occasions.
-
Vegetable or Coconut Oil (1 tbsp, optional) – Helps achieve a smooth, shiny coating for that professional touch.
-
For Decorating
-
Sprinkles, Edible Glitter, Candy Cane Bits – Enhance the visual appeal with these festive toppings that make your ornaments pop!
Step‑by‑Step Instructions for Cake Ball Ornaments
Step 1: Bake the Cake
Start by following the instructions on the box cake mix to prepare your favorite flavor. Preheat your oven to the required temperature, usually around 350°F (175°C) for standard cakes. Pour the batter into a greased pan and bake for approximately 25–30 minutes. Once done, check with a toothpick; it should come out clean. Allow the cake to cool completely on a wire rack.
Step 2: Crumble & Mix
Take your completely cooled cake and crumble it into a large mixing bowl using your hands or a fork until it resembles fine crumbs. Add about ½ cup of frosting to the crumbled cake. Mix thoroughly until the mixture forms a dough-like consistency that sticks together when pressed. This step is crucial for achieving your Cake Ball Ornaments’ delectable texture.
Step 3: Shape the Balls
Using a cookie scoop or your hands, take portions of the dough and roll them into 24 equally sized balls. Aim for about 1 inch in diameter to ensure uniformity. Place the shaped balls on a parchment-lined baking tray. Chill them in the refrigerator for about 20 minutes to firm up, making them easier to dip later on.
Step 4: Melt the Coating
In a microwave-safe bowl, add your candy melts or chocolate chips. Heat them in the microwave on high for 30-second intervals, stirring in between, until completely smooth and melted. If desired, mix in 1 tablespoon of vegetable or coconut oil for a glossy finish. Let the melted coating cool slightly before moving on to the next step.
Step 5: Dip & Decorate
Take one chilled cake ball and dip it into the melted coating, ensuring it is fully covered. Allow any excess coating to drip off back into the bowl. While the coating is still wet, sprinkle your choice of festive toppings like sprinkles or candy cane bits. Repeat this process for each ball, placing them back on the parchment-lined tray.
Step 6: Set
Once all the Cake Ball Ornaments are coated and decorated, place the tray in the refrigerator for about 30 minutes to allow the chocolate coating to set completely. The coating should be firm to the touch, giving your cake balls a beautiful, shiny finish. Once set, your delightful Cake Ball Ornaments are ready to bring joy to your holiday celebrations!
Expert Tips for Cake Ball Ornaments
- Chill for Easier Handling: Ensure your cake mixture is well-chilled before shaping; this makes rolling easier and helps maintain form during dipping.
- Uniform Sizes Matter: Use a cookie scoop for consistent sizing. This not only enhances the appearance of your Cake Ball Ornaments but also ensures even coating and drying.
- Extra Smooth Coating: For a polished look, add a splash of vegetable or coconut oil to your melted candy melts or chocolate, ensuring a glossy finish once dried.
- Dressing Up the Decor: Experiment with various toppings like crushed nuts or festive sugar crystals to make your Cake Ball Ornaments even more visually stunning.
- Time-Saving Chilling: Remember to allow enough chilling time between steps. Patience here guarantees the best texture and appearance for your holiday treats!
What to Serve with Cake Ball Ornaments
As the sweetness of your Cake Ball Ornaments fills the air, consider these delightful accompaniments for a truly festive experience.
-
Hot Cocoa: A warm, creamy cup of cocoa enhances the holiday spirit while balancing the sweetness of the cake balls.
-
Vanilla Ice Cream: Cold, creamy ice cream pairs wonderfully with these treats, offering a pleasing contrast in temperature and texture.
-
Coffee: A rich, bold cup of coffee complements the sweetness of the cake balls, making for an excellent afternoon treat or dessert.
-
Fruit Salad: Bright, fresh fruit adds a pop of color and a refreshing contrast, perfect for cutting through the sweetness of the ornaments.
-
Holiday Punch: A fruity, sparkling punch adds festive flair to your gathering, inviting guests to indulge while celebrating with style.
-
Gingerbread Cookies: These spiced cookies create a harmonious flavor profile and bring an additional holiday texture to your dessert table.
-
Petits Fours: These charming, bite-sized pastries offer a sophisticated touch to your spread, diversifying the dessert options for your guests.
Storage Tips for Cake Ball Ornaments
Room Temperature: Store Cake Ball Ornaments in an airtight container for up to 3 days at room temperature to keep them fresh and delicious.
Fridge: If you’re looking to extend their shelf life, refrigerate them in an airtight container for up to 5 days. This helps maintain their creamy texture.
Freezer: For longer storage, freeze undipped cake balls for up to a month. Thaw in the fridge before dipping and decorating to enjoy their delightful flavor.
Reheating: No reheating is necessary; serve these no-bake treats chilled to retain their deliciousness and festive appeal!
Make Ahead Options
These Cake Ball Ornaments are perfect for meal prep, allowing you to enjoy the holidays with less stress! You can prepare the cake mixture and shape the balls up to 24 hours in advance. Simply crumble the cooled cake, mix with frosting, and roll into balls, then chill in the refrigerator. For even longer storage, you can freeze the uncoated balls for up to 1 month; just place them in an airtight container, ensuring they’re well-separated to prevent sticking. When you’re ready to serve, simply thaw in the fridge overnight, then proceed with melting the coating and decorating. This way, you’ll have beautifully crafted Cake Ball Ornaments that are just as delicious and festive, ready to delight your family and friends!
Cake Ball Ornaments: Fun Variations
Feel free to let your creativity shine by customizing these delightful Cake Ball Ornaments to suit your taste and holiday spirit!
- Flavor Twist: Try using lemon or spice cake mixes for a fresh or seasonal take. The zest can brighten up your dessert table beautifully.
- Nutty Surprise: Add chopped walnuts or pecans into the cake mixture for an unexpected crunch that complements the sweetness of the ornaments perfectly.
- Tropical Delight: Substitute vanilla frosting with coconut cream for an exotic flavor that’ll transport you to a sunny beach with every bite.
- Chocolate Lovers: Use dark chocolate coating and add a touch of espresso powder for a mocha flavor that coffee aficionados will absolutely adore.
- Festive Colors: Play around with color themes for your candy melts—think pastels for spring or rich jewel tones for a winter holiday vibe that dazzles.
- Gifting Decor: Create individualized tags for each ornament box, introducing themes like “Minty Christmas” or “Sweet Gratitude.” It adds a personal touch for your loved ones.
- Spice & Heat: Infuse some festive spirit by adding a dash of cinnamon or a hint of chili powder to the chocolate coating for a kick that delights the senses.
- Themed Decorations: Coordinate your sprinkles with your holiday theme, like red and green for Christmas or pastels for Easter, ensuring these treats enhance your festive setting.
These ideas will not only delight your palate but also your visual senses. If you’re looking to continue the festive fun, consider pairing your treats with a cozy cup of hot cocoa or serve them alongside some delightful Jack Lantern Pancakes for a complete holiday experience!

Cake Ball Ornaments Recipe FAQs
What type of cake mix should I use for Cake Ball Ornaments?
You can use any flavor of box cake mix you like! Vanilla, chocolate, and red velvet are classic favorites, but seasonal flavors such as pumpkin spice or lemon can add a festive twist.
How should I store Cake Ball Ornaments?
In an airtight container, Cake Ball Ornaments can be stored at room temperature for up to 3 days or in the refrigerator for approximately 5 days. If you’d like to keep them longer, they freeze beautifully for up to a month. Just remember to thaw them in the fridge before decorating!
Can I freeze the Cake Ball Ornaments?
Absolutely! To freeze, simply shape the undipped cake balls and lay them on a baking sheet lined with parchment paper. Freeze them for about an hour until solid, then transfer to a freezer-safe bag or container. They will stay fresh for up to 3 months. Thaw them in the fridge before dipping.
What should I do if my coating isn’t smooth?
If your melted candy melts or chocolate becomes thick or clumpy while dipping, try adding a tablespoon of vegetable or coconut oil. Stir it in to create a smoother texture. Also, ensure you melt your coating in short intervals, stirring frequently so it doesn’t overheat.
Are Cake Ball Ornaments safe for pets?
It’s best to keep these treats away from your pets. Ingredients like chocolate can be harmful to dogs and cats, as they can lead to serious health issues. Always ensure that your baking ingredients are pet-friendly, especially during the holiday season.
What if my Cake Ball Ornaments are falling apart?
If your cake balls are crumbling and not holding together, it could be due to insufficient frosting. Try adding an extra tablespoon of frosting to the mixture until it forms a cohesive dough. Also, make sure that the cake is completely cooled before mixing in the frosting; too warm can lead to a crumbly texture.
Delightful Cake Ball Ornaments for a Festive Touch
Ingredients
Equipment
Method
- Follow the instructions on the box cake mix to prepare your favorite flavor. Preheat your oven to the required temperature and bake for approximately 25–30 minutes.
- Crumble the cooled cake into a large mixing bowl and add ½ cup of frosting, mixing until it forms a dough-like consistency.
- Shape the mixture into 24 balls, about 1 inch in diameter, and chill them in the refrigerator for about 20 minutes.
- Melt the candy melts or chocolate chips in a microwave-safe bowl and mix in vegetable or coconut oil for a glossy finish.
- Dip each cake ball into the melted coating, allowing excess to drip off, and decorate with festive toppings.
- Chill the tray in the refrigerator for about 30 minutes to set the coating completely.
Leave a Reply