
As I watched my friends devour their takeout containers, it hit me—why settle for fast food when I could create something way more satisfying at home? Enter the Chocolate Peanut Butter Mug Cake, my quick rescue from culinary boredom. In just five minutes, this delight can elevate your dessert game to new heights, bringing the indulgent flavors of rich chocolate and creamy peanut butter right to your mug. Not only is it a comforting, single-serving treat, but it’s also incredibly easy to customize, catering to both gluten-free and dairy-free palates. Perfect for those evenings when a sweet craving strikes and you need an instant fix, this mug cake will have you wondering how something so simple can taste so decadent. Curious about how it all comes together? Let’s dive into this mouthwatering recipe!
Why is this mug cake so amazing?
Quick and Easy: In just five minutes, you can whip up a delicious dessert that satisfies your sweet tooth.
Customizable for Everyone: With options for gluten-free and dairy-free variations, this recipe caters to all dietary needs.
Intense Chocolate Flavor: The rich combination of chocolate and peanut butter creates a heavenly taste that feels indulgent.
No Special Equipment Needed: All you need is a microwave-safe mug and basic ingredients—perfect for busy lives!
Impressive Crowd-Pleaser: Serve it warm, topped with a drizzle of peanut butter or whipped cream, and wow your guests with minimal effort! If you love quick desserts, don’t forget to check out my Decadent Chocolate Strawberry for another treat that’s sure to impress!
Chocolate Peanut Butter Mug Cake Ingredients
For the Cake Base
- All-Purpose Flour – Provides structure; use almond flour for a gluten-free option.
- Granulated Sugar – Adds sweetness; adjust if you plan to use sweeter toppings later.
- Unsweetened Cocoa Powder – Contributes deep chocolate flavor; no substitutions necessary for cocoa flavor.
- Baking Powder – Helps the cake rise; ensure it’s fresh for best results.
- Salt – Enhances flavor; any type of salt works—adjust based on your preference.
For the Wet Ingredients
- Milk (or dairy-free alternative) – Adds moisture; use almond milk or oat milk for a dairy-free option.
- Creamy Peanut Butter – Provides flavor and creaminess; almond butter can replace peanut butter if needed.
- Vegetable Oil – Keeps the cake tender; melted coconut oil makes a great substitute.
- Vanilla Extract – Adds aroma and flavor depth; no direct substitutions.
Optional Toppings
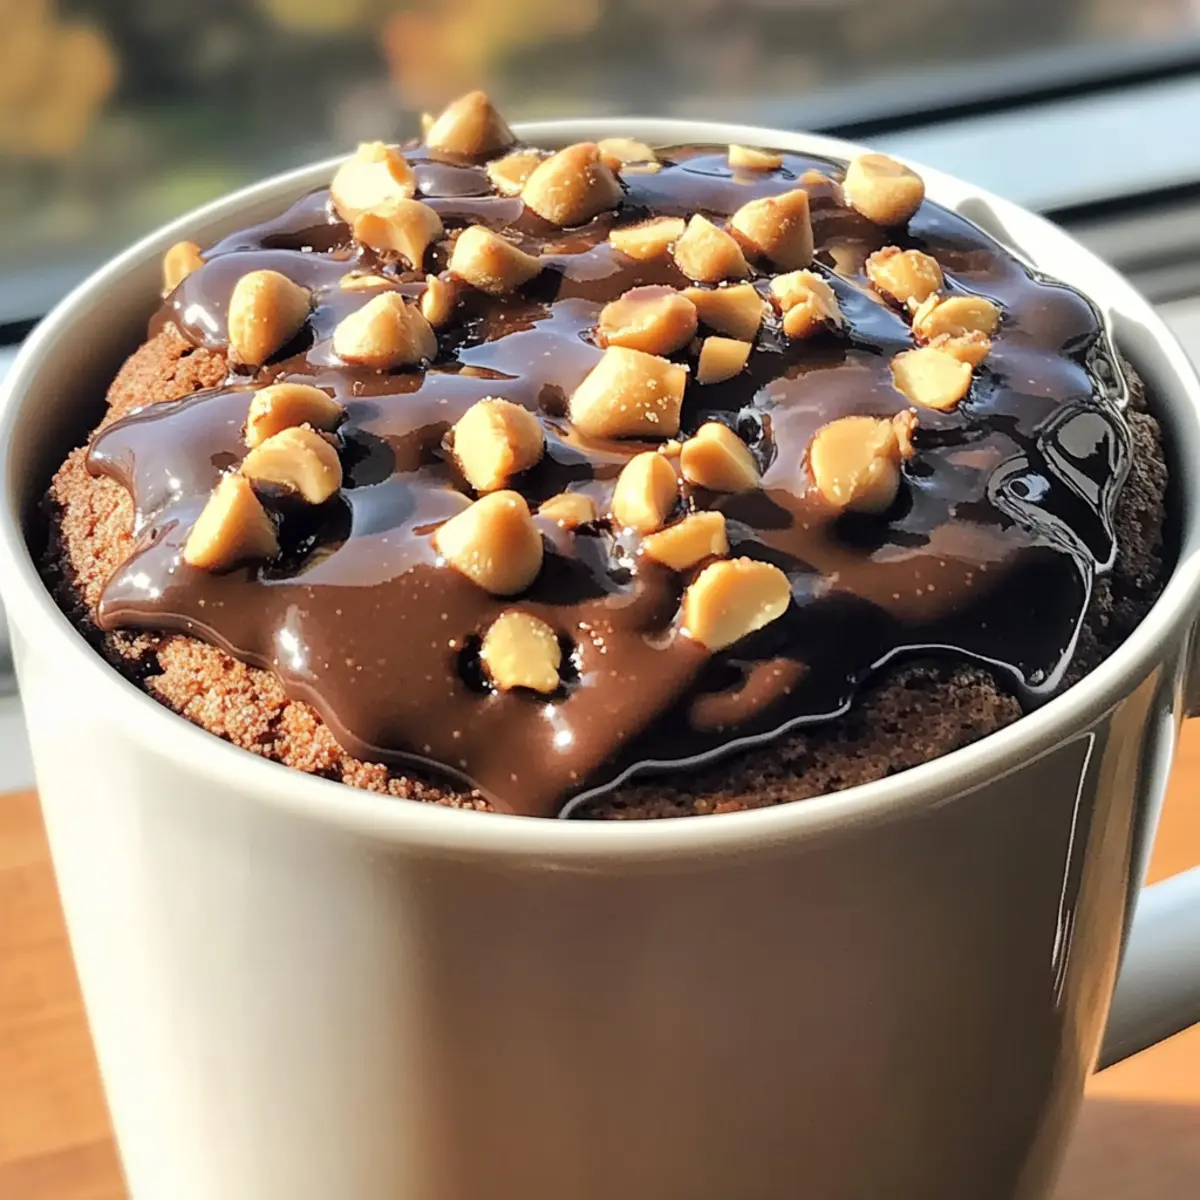
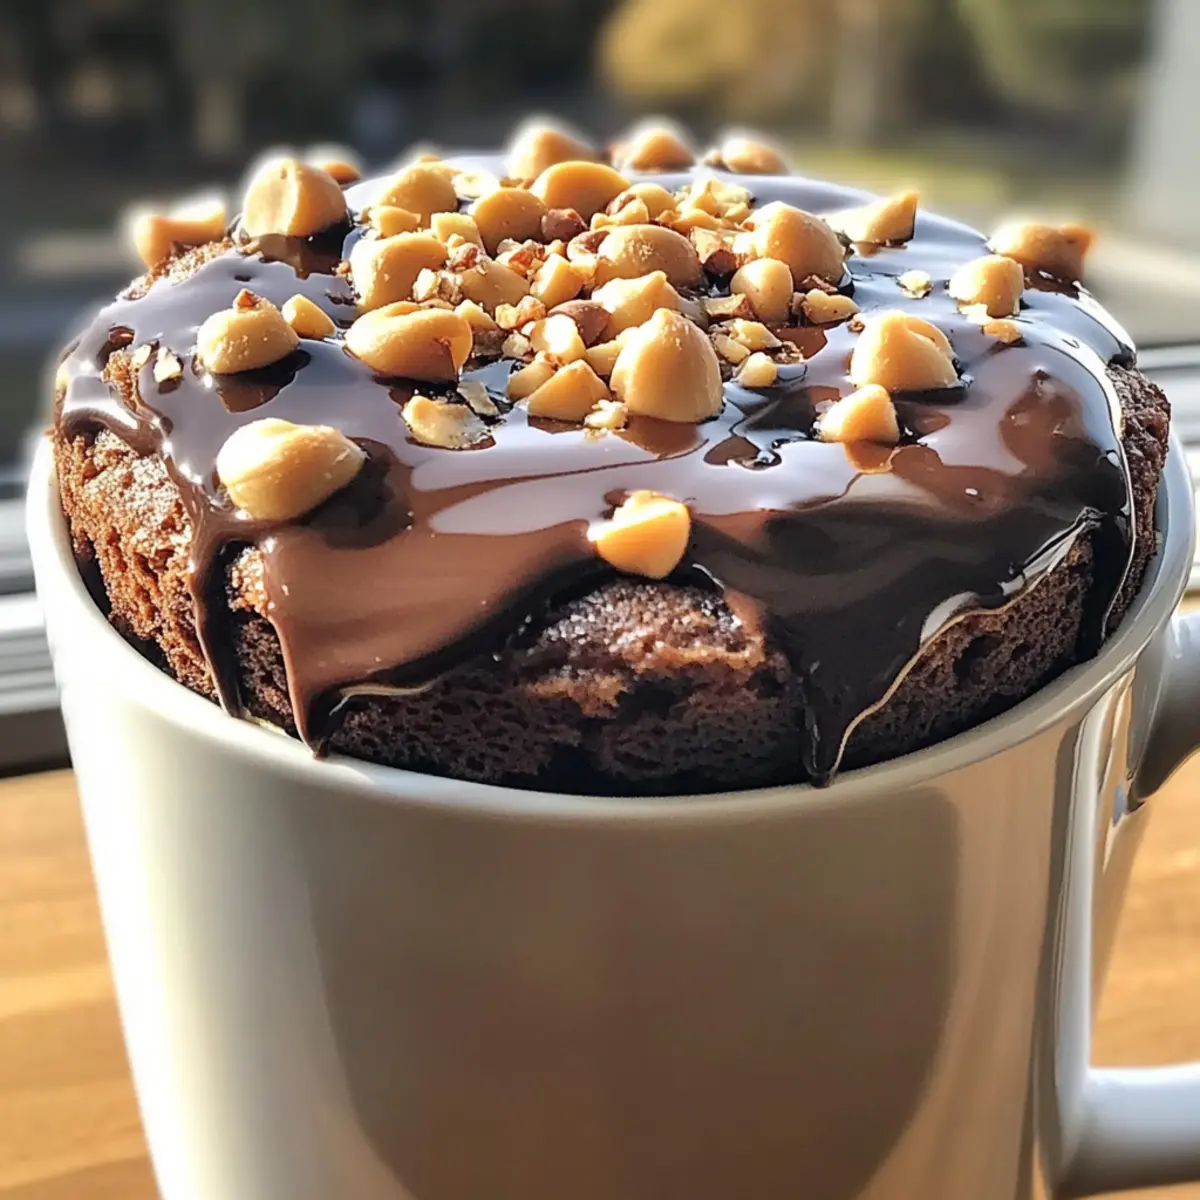
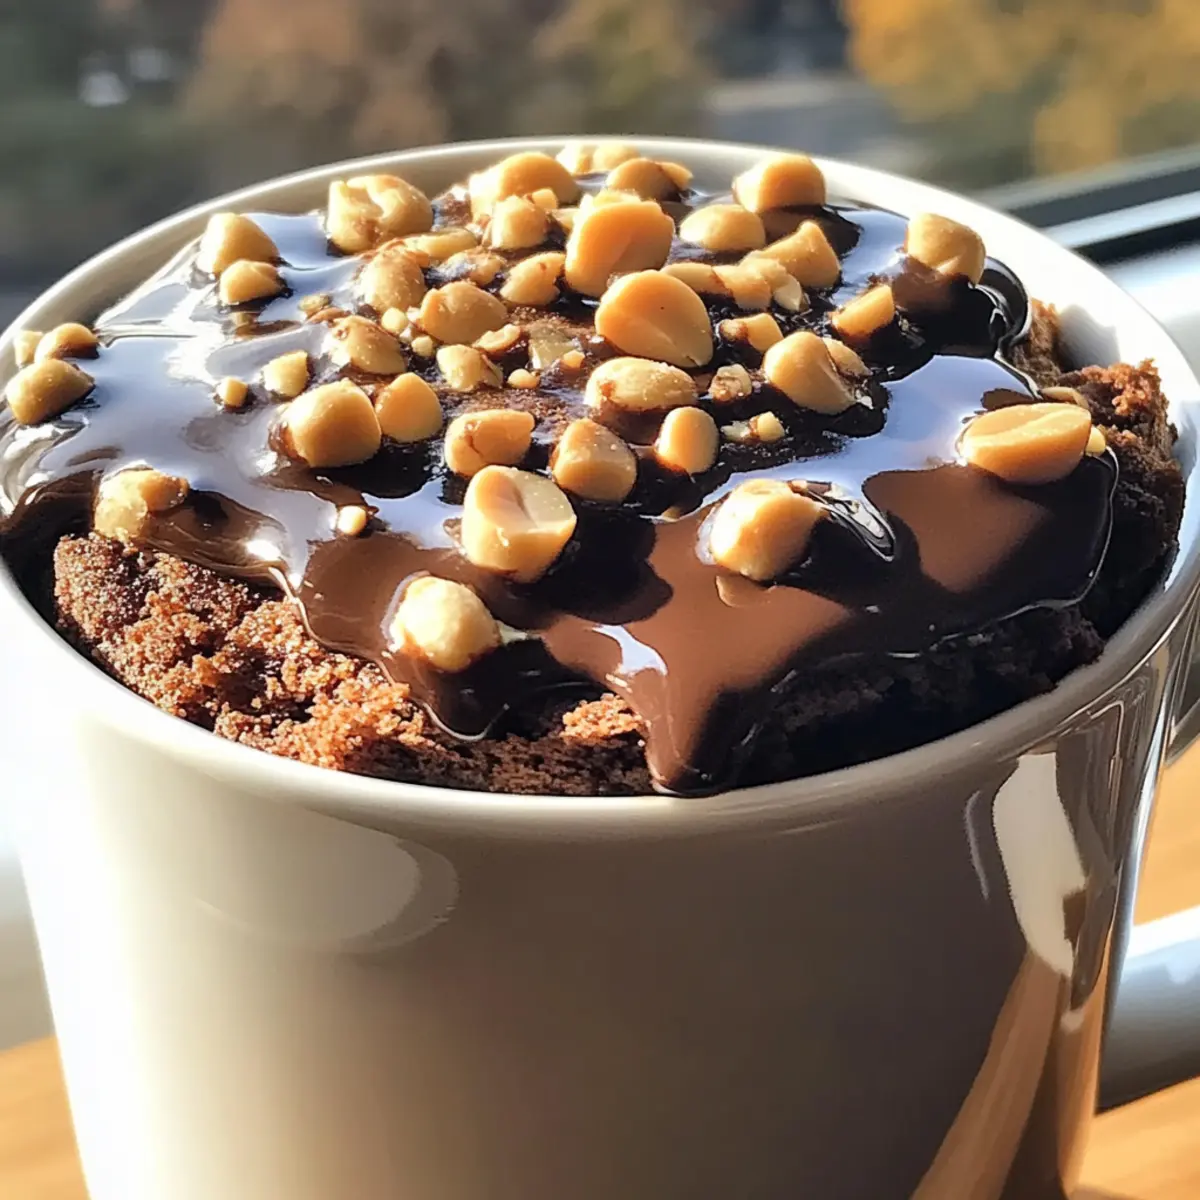
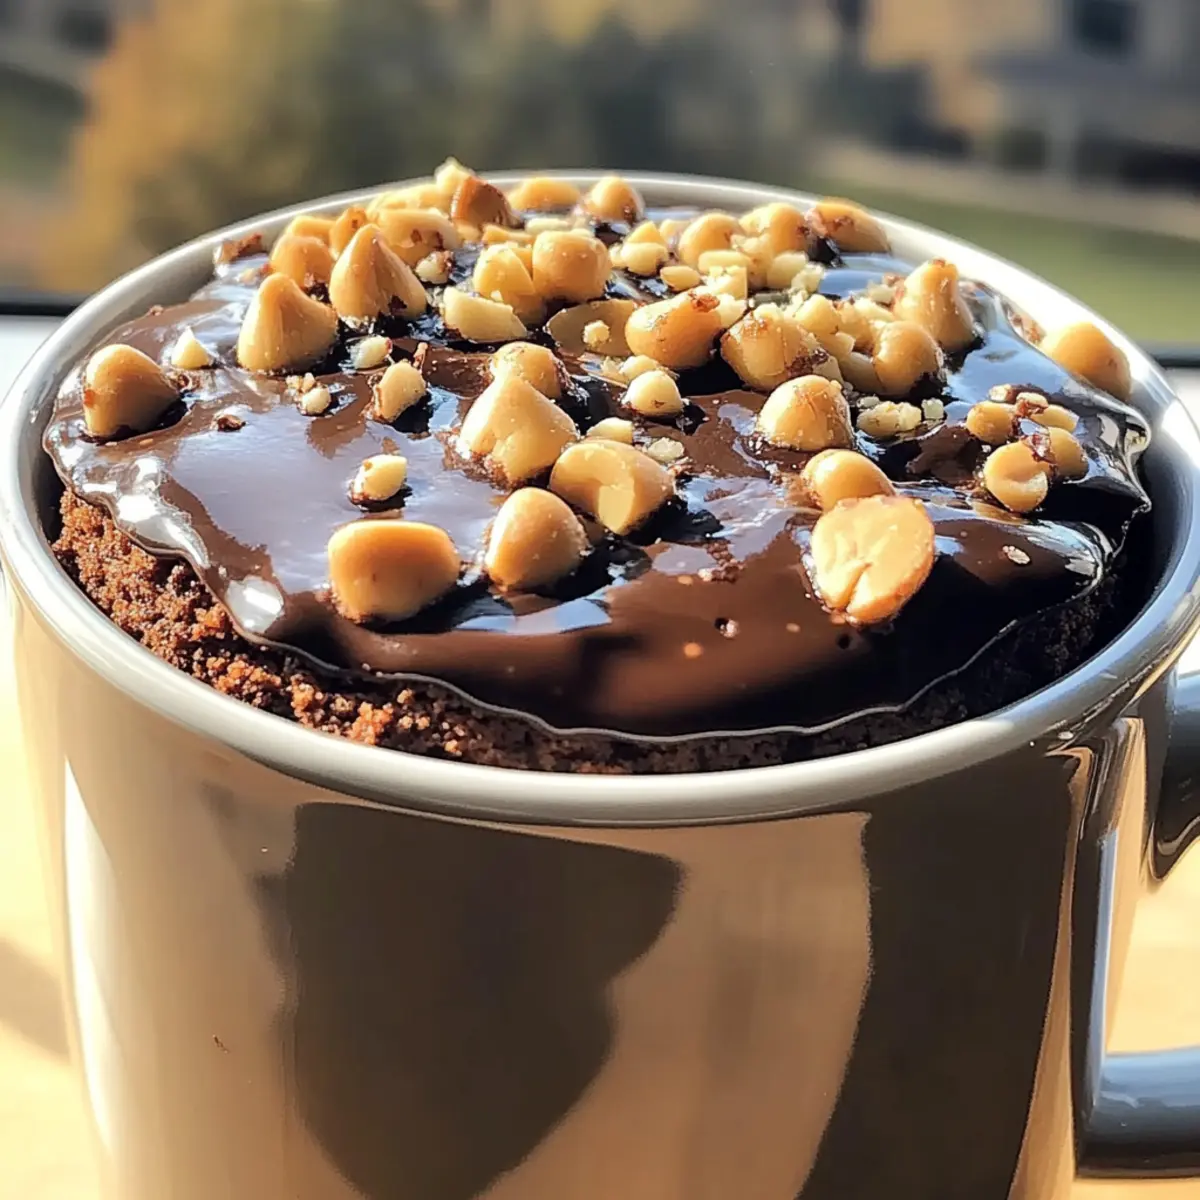
- Chopped Peanuts – Enhances texture and flavor; customizable based on preference.
- Chocolate Chips – Fold into the batter for extra richness; can be omitted for a lighter option.
This Chocolate Peanut Butter Mug Cake is the perfect dose of comfort and indulgence, ready in just minutes!
Step‑by‑Step Instructions for Chocolate Peanut Butter Mug Cake
Step 1: Combine Dry Ingredients
In a microwave-safe mug (at least 12 oz), add the dry ingredients: all-purpose flour, granulated sugar, unsweetened cocoa powder, baking powder, and a pinch of salt. Whisk these together until well combined, ensuring there are no lumps. This dry mixture forms the foundation of your Chocolate Peanut Butter Mug Cake, so take a moment to get it right!
Step 2: Add Wet Ingredients
Now, pour in the wet ingredients: your choice of milk (dairy or dairy-free), creamy peanut butter, vegetable oil, and a splash of vanilla extract. Stir the mixture vigorously until you achieve a smooth and luscious batter. This step is crucial for the delightful texture of the mug cake, so make sure it’s evenly blended without any dry spots.
Step 3: Optional Chocolate Chips
For an extra layer of decadence, fold in a small handful of chocolate chips to the batter, if desired. This is entirely optional, but the melty chocolate adds an indulgent touch to your Chocolate Peanut Butter Mug Cake. Gently mix to distribute the chips without overdoing it, as over-mixing can affect the fluffiness.
Step 4: Microwave the Cake
Place the mug in the microwave and cook on high for 1 minute and 30 seconds. Check the center by gently pressing it with a fork or toothpick; it should be set but slightly moist. If the center is still wet, continue microwaving in 15-20 second intervals until fully cooked, but be careful not to overcook, as the cake can become tough.
Step 5: Cool and Serve
Allow your Chocolate Peanut Butter Mug Cake to cool for about 1 minute once it’s done cooking; this helps the flavors meld and ensures you don’t burn yourself! Ideally, serve it warm straight from the mug, but feel free to add optional toppings such as chopped peanuts or a drizzle of peanut butter to elevate its presentation and flavor.
Storage Tips for Chocolate Peanut Butter Mug Cake
Room Temperature: Enjoy your Chocolate Peanut Butter Mug Cake right away for the best taste and texture; it’s meant to be savored warm!
Fridge: To keep leftovers, store in an airtight container in the refrigerator for up to 3 days. Always allow the cake to cool completely before sealing.
Freezer: If you want to save it for later, freeze the mug cake in an airtight container for up to 1 month. Thaw in the refrigerator overnight before reheating.
Reheating: For the best experience, reheat in the microwave for 15-20 seconds until warmed through, restoring its delightful gooeyness.
Make Ahead Options
These Chocolate Peanut Butter Mug Cakes are perfect for meal prep enthusiasts! You can measure and combine the dry ingredients (flour, sugar, cocoa powder, baking powder, and salt) up to 24 hours in advance and store them in an airtight container to keep them fresh. Additionally, you can pre-portion your wet ingredients (milk, peanut butter, oil, and vanilla) in small containers, ready to mix when you’re craving a sweet treat. To maintain quality, avoid mixing everything until you’re ready to cook. When you’re set to enjoy your mug cake, simply blend the prepped ingredients, microwave for about 1 minute and 30 seconds, and savor a delicious dessert in mere minutes!
Chocolate Peanut Butter Mug Cake Variations
Feel free to customize your mug cake to match your taste buds and dietary needs—let your creativity shine!
-
Gluten-Free: Replace all-purpose flour with almond flour or a gluten-free flour blend for a deliciously fluffy cake.
-
Dairy-Free: Swap out regular milk for almond or oat milk to enjoy a rich, creamy dessert without dairy.
-
Nut-Free: Use sunflower seed butter in place of peanut butter if you’re avoiding nuts. It adds a deliciously unique flavor!
-
Flavor Boost: Add a pinch of cinnamon or a splash of vanilla extract for an aromatic twist that complements the chocolate beautifully.
-
Double Delight: Scale up the recipe by doubling the ingredients and using two mugs; perfect for sharing or satisfying your sweet tooth on a cozy night in.
-
Choco-Explosion: Fold in extra chocolate chips or a sprinkle of cocoa nibs for those who crave a more intense chocolate experience.
-
Warm Toppings: Top your mug cake with a dollop of whipped cream, a drizzle of caramel, or a scoop of ice cream for an indulgent treat.
-
Spicy Kick: Add a pinch of cayenne pepper for a stunning contrast to the sweetness; it’s a bold and unexpected flavor twist!
These variations make this Chocolate Peanut Butter Mug Cake a canvas for your cravings. For even more simple delights, try my Spice Gooey Cake or the delightful Chocolate Poke Cake that will tantalize your taste buds!
What to Serve with Chocolate Peanut Butter Mug Cake?
Indulging in a warm Chocolate Peanut Butter Mug Cake is just the beginning; here are delightful pairings to elevate your dessert experience.
-
Vanilla Ice Cream: The creamy richness of vanilla ice cream creates a heavenly contrast to the warm, gooey cake. It melts slightly, forming a delicious sauce.
-
Whipped Cream: Light and airy, whipped cream adds a touch of elegance and sweetness, enhancing the overall dessert experience.
-
Chopped Nuts: Adding a sprinkle of crunchy chopped peanuts or almonds brings a satisfying crunch and an extra layer of flavor to your mug cake.
-
Fresh Berries: Juicy raspberries or strawberries provide a refreshing tartness that balances the sweetness of the chocolate and peanut butter.
-
Chocolate Sauce: A warm drizzle of chocolate sauce elevates the dessert to decadent heights, perfect for any chocolate lover.
-
Coffee or Tea: A warm beverage, like a bold cup of coffee or herbal tea, enhances the flavors of the cake and makes for a comforting treat.
Delight in this quick dessert and take your enjoyment to new levels with these tasty accompaniments!
Expert Tips for Chocolate Peanut Butter Mug Cake
- Choose the Right Mug: Use a large, microwave-safe mug (at least 12 oz) to prevent overflow while cooking—this keeps your kitchen mess-free!
- Adjust Cooking Time: Microwave wattages vary, so adjust cooking time as needed; keep a close eye to avoid overcooking your mug cake.
- Avoid Over-Mixing: Gently combine the ingredients to aerate the batter for a fluffy texture; over-mixing can lead to a dense cake.
- Customizable Flavor: Feel free to add a pinch of cinnamon or a splash of coffee for an unexpected twist to your Chocolate Peanut Butter Mug Cake.
- Storage Advice: Store leftovers in an airtight container in the fridge for up to three days or freeze for a month, reheating as needed for that fresh taste!
Chocolate Peanut Butter Mug Cake Recipe FAQs
How do I choose the right ingredients for my mug cake?
Absolutely! For the best results, opt for fresh ingredients. Ensure your all-purpose flour is free from clumps, and use fresh baking powder for optimal rise. If you prefer gluten-free, almond flour works beautifully as a substitute. When it comes to peanut butter, a creamy variety mixes best into the batter, while natural brands often yield a richer flavor.
How should I store my leftover mug cake?
Very simple! Allow your Chocolate Peanut Butter Mug Cake to cool completely before storing. Place it in an airtight container in the refrigerator for up to 3 days. If you’d like to keep it longer, you can freeze it for up to 1 month. Just make sure to wrap it tightly to prevent freezer burn!
Can I freeze my mug cake, and how should I do it?
Definitely! To freeze your Chocolate Peanut Butter Mug Cake, first let it cool completely. Then, wrap it tightly in plastic wrap or foil and place it in an airtight container. This helps maintain its moisture and prevents freezer burn. When you’re ready to enjoy it again, simply thaw it in the refrigerator overnight and reheat it in the microwave for about 15-20 seconds.
What should I do if my mug cake turns out rubbery?
Oh no! A rubbery mug cake usually means it was overcooked or over-mixed. To fix this, try microwaving it for shorter intervals next time—start with 1 minute and 30 seconds and add 15-20 seconds more as needed. Additionally, when mixing, avoid vigorous stirring; gently fold the ingredients until just combined to keep that lovely, fluffy texture.
Are there dietary considerations for this recipe?
Yes, indeed! This Chocolate Peanut Butter Mug Cake can easily be adapted to cater to dietary preferences. For gluten-free needs, using almond flour or a gluten-free flour blend is perfect. For dairy-free options, swap regular milk for almond or oat milk. Just be mindful of allergies to peanuts; in such cases, almond butter is a wonderful alternative that still delivers a deliciously creamy texture!
Can I make this recipe nut-free?
Absolutely! If you need to make this mug cake nut-free, simply substitute the creamy peanut butter with sunbutter or soy nut butter. These alternatives still provide the richness and texture you’re looking for without the nuts, making it a worry-free dessert for those with nut allergies.
Irresistible Chocolate Peanut Butter Mug Cake in Minutes
Ingredients
Equipment
Method
- In a microwave-safe mug (at least 12 oz), add the dry ingredients: all-purpose flour, granulated sugar, unsweetened cocoa powder, baking powder, and a pinch of salt. Whisk these together until well combined.
- Pour in the wet ingredients: your choice of milk (dairy or dairy-free), creamy peanut butter, vegetable oil, and a splash of vanilla extract. Stir the mixture vigorously until you achieve a smooth and luscious batter.
- For an extra layer of decadence, fold in a small handful of chocolate chips to the batter, if desired.
- Place the mug in the microwave and cook on high for 1 minute and 30 seconds. Check the center by gently pressing it; it should be set but slightly moist.
- Allow your Chocolate Peanut Butter Mug Cake to cool for about 1 minute once it’s done cooking; serve it warm.
Leave a Reply