
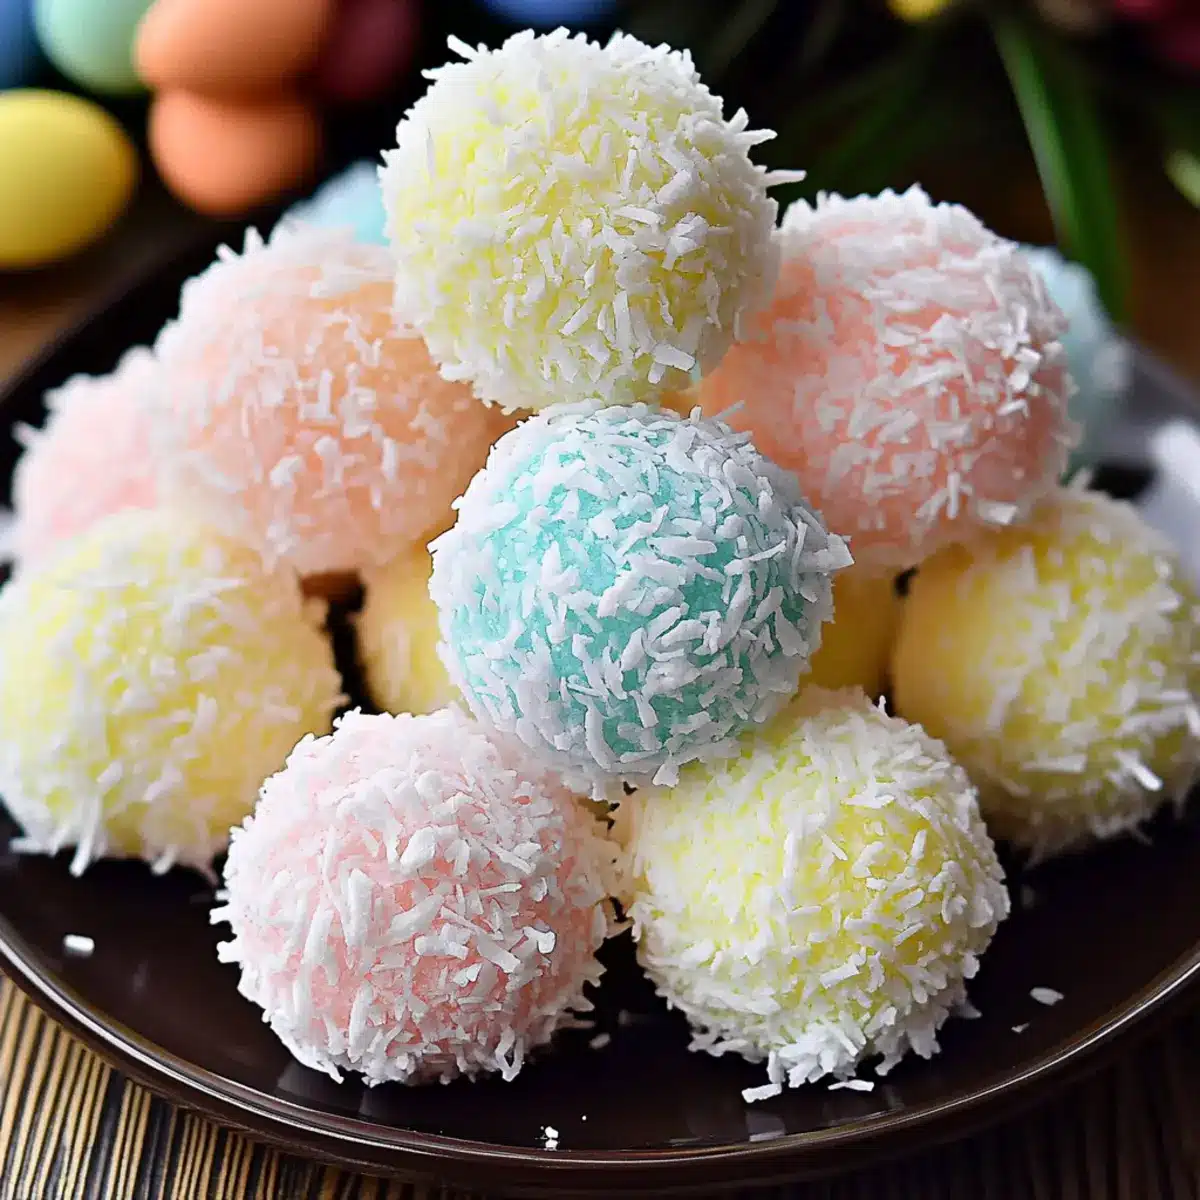
As I rummaged through my kitchen for something festive, the sight of coconut flakes caught my eye, reminding me of the sweet treats I loved as a child. Enter the Easter Bunny Coconut Tails! These no-bake delights are not only a playful addition to any Easter celebration, but they also invite kids to roll up their sleeves and join the fun in the kitchen. Soft, chewy, and beautifully coated in pastel coconut flakes, these treats are a feast for the eyes as well as the taste buds. With such quick prep and customization options that allow for vegan variations, they strike the perfect balance between treats that delight and easy-to-make recipes that fit into our busy lives. Curious about how to make these charming coconut cookies? Let’s hop right in!
Why Will Kids Love These Treats?
Fun to Make: The Easter Bunny Coconut Tails are a fantastic no-bake project that encourages kids to roll and coat their very own treats. Vibrant Colors make these adorable snacks visually appealing, ensuring they catch every eye during Easter gatherings. Customizable with different colors or add-ins like chocolate chips, you can tailor these delights to suit any little one’s preferences. Quick and Easy: With a simple preparation process, you won’t spend hours in the kitchen—just mix, chill, roll, and enjoy! Perfect for busy parents looking for delightful treats without the hassle. These coconut tails are sure to bring smiles all around this Easter! Consider serving alongside other festive delights like Thai Style Mussels with Coconut Lemongrass for a vibrant table.
Easter Bunny Coconut Tails Ingredients
For the Coconut Mixture
• Medium Shredded Coconut – Provides essential texture and bulk; opt for unsweetened to keep sweetness in check.
• Sweetened Condensed Milk – Acts as the binding agent, offering moisture and sweetness; for a vegan version, use dairy-free sweetened condensed milk.
• Butter (melted) – Adds extra richness to the mixture; substitute with plant-based butter for a dairy-free option.
• Vanilla Extract – Enhances the overall flavor, making these no-bake treats more delightful.
• Confectioner’s Sugar – Provides additional sweetness and helps bind the mixture; adjust to your taste preference.
For the Coating
• Fine Shredded Coconut – Perfect for coating and absorbs color well for those lovely pastel hues; ideal for the exterior of the Easter Bunny Coconut Tails.
• Liquid Food Coloring – Lets you create those enchanting pastel colors that make these treats so visually appealing.
Gather these ingredients, and you’re ready to hop into the fun of making your Easter Bunny Coconut Tails! These no-bake delights promise a sweet treat that every kid will love.
Step‑by‑Step Instructions for Easter Bunny Coconut Tails
Step 1: Prepare the Coconut Mixture
In a large mixing bowl, whisk together the sweetened condensed milk, melted butter, and vanilla extract until well combined and smooth—this will take about 1-2 minutes. The mixture should be creamy and slightly thick. Next, add the medium shredded coconut and confectioner’s sugar, stirring until everything is thoroughly mixed, and the mixture becomes sticky.
Step 2: Chill the Mixture
Cover the bowl with plastic wrap and refrigerate the mixture for about 15 minutes. This will help the blend firm up, making it easier to handle as you form the Easter Bunny Coconut Tails. When you remove it from the fridge, it should be slightly set but still manageable for rolling.
Step 3: Prepare Colored Coconut Coating
While the coconut mixture chills, divide the fine shredded coconut into several small bowls. Add a few drops of liquid food coloring to each bowl and mix until the coconut is evenly tinted. Feel free to create a variety of pastel colors to make your Easter Bunny Coconut Tails even more festive and cheerful.
Step 4: Form the Coconut Tails
Once the coconut mixture is ready, scoop out about 1½ teaspoons of the chilled mixture and roll it into a ball using your hands. Aim for a smooth surface—it should easily hold its shape. Repeat this process until you’ve rolled all the mixture into small balls. You should have enough to create a delightful platter of Easter Bunny Coconut Tails!
Step 5: Coat the Balls with Coconut
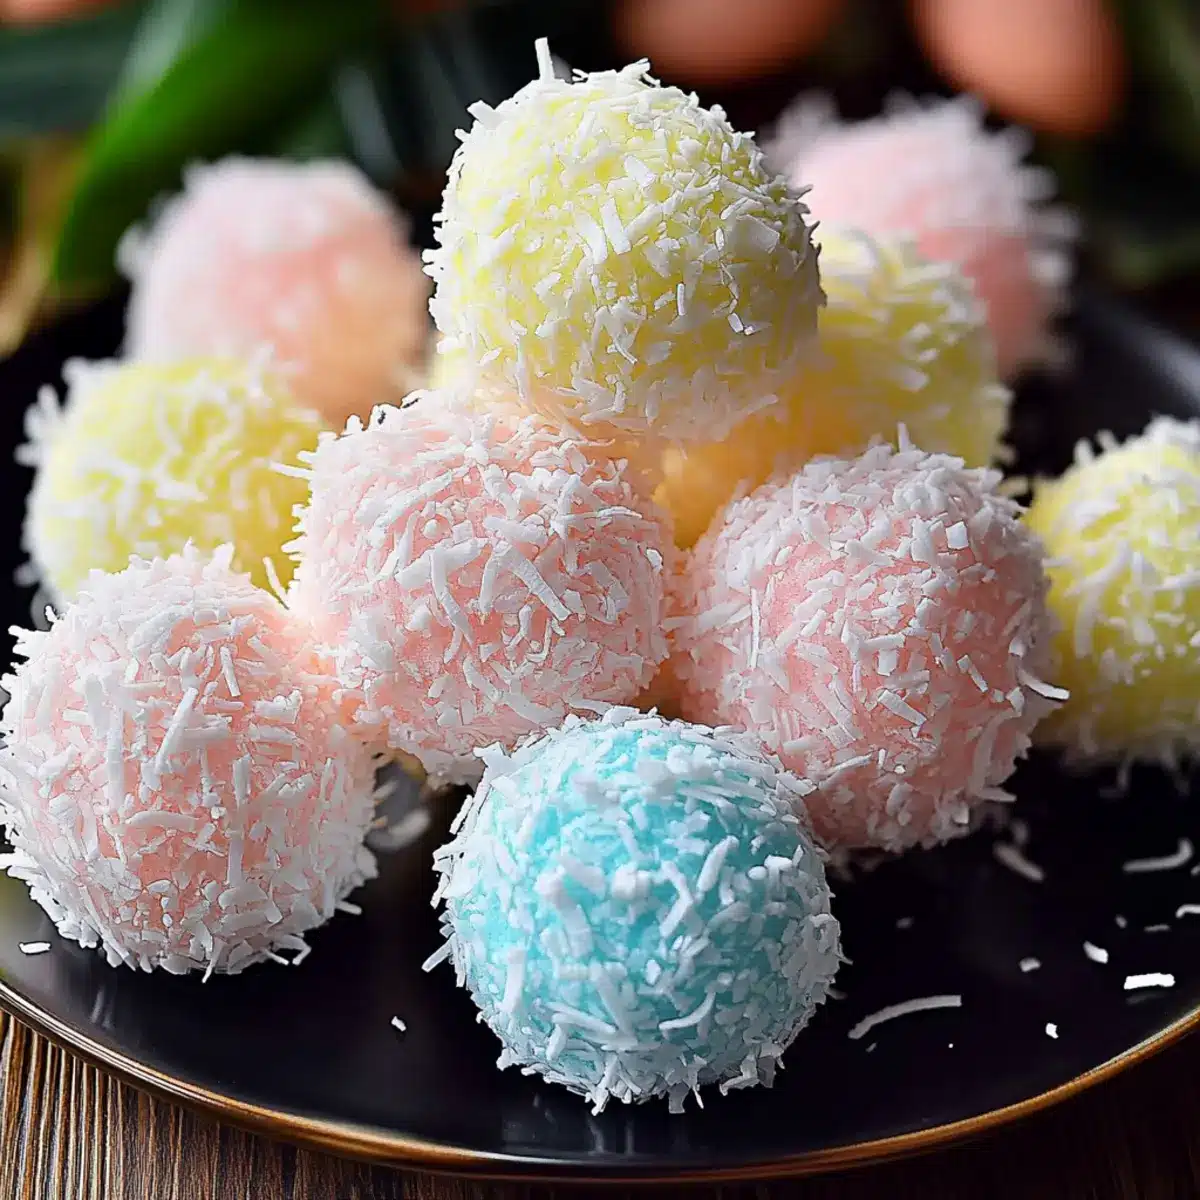
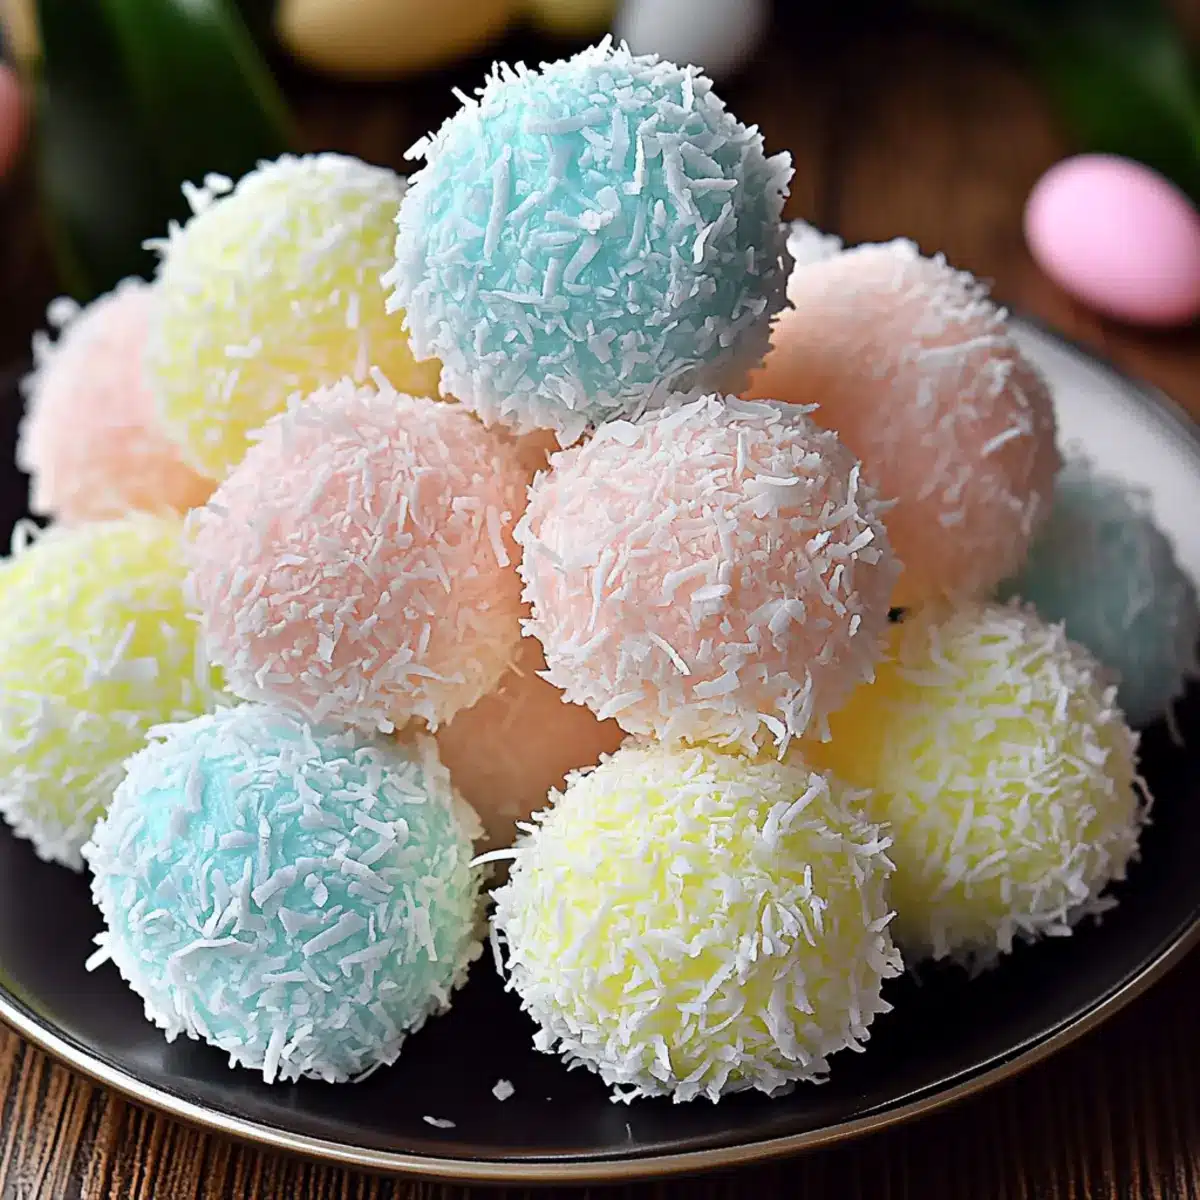
Take each coconut ball and gently roll it in the colored coconut until it is completely coated. Make sure the coconut evenly adheres to add that beautiful pastel look. This step not only adds flavor but also enhances the visual appeal of your Easter Bunny Coconut Tails!
Step 6: Chill to Set
Place each coated Easter Bunny Coconut Tail on a parchment-lined baking sheet, making sure they don’t touch. Once all are arranged, refrigerate them for 1 hour or until they are firm enough to hold their shape. This chilling time helps the treats to set beautifully.
Step 7: Serve and Enjoy
After an hour, your Easter Bunny Coconut Tails are ready to bring joy to your Easter table! Keep them chilled until ready to serve. These colorful, no-bake treats will be a hit with both kids and adults alike, making them perfect for festive celebrations. Enjoy the delightful flavors and the smiles they bring!
Storage Tips for Easter Bunny Coconut Tails
Fridge: Store the Easter Bunny Coconut Tails in an airtight container for up to 1 week. Layer them with parchment paper to prevent sticking.
Freezer: For longer storage, freeze the coconut tails in a single layer on a baking sheet until firm, then transfer to an airtight container, where they can last for up to 2 months.
Thawing: To enjoy, thaw the frozen Easter Bunny Coconut Tails overnight in the fridge before serving for the best texture.
Reheating: These no-bake treats are best enjoyed chilled, so avoid reheating; simply take them out of the fridge before serving!
Expert Tips for Easter Bunny Coconut Tails
• Mixing Technique: Ensure the sweetened condensed milk and melted butter are fully blended before adding coconut for a smooth mixture.
• Chill for Success: Don’t skip the chilling step; it’s crucial for firming up the mixture so the balls hold their shape while rolling.
• Color Blending: For even pastel colors, use a drop of water while mixing your liquid food coloring with the fine shredded coconut to help it adhere properly.
• Texture Watch: If the mixture feels too sticky, add a sprinkle more of confectioner’s sugar to help with rolling. This keeps your Easter Bunny Coconut Tails looking neat!
• Storage Magic: Store your finished treats in the refrigerator and layer them with parchment paper between rows to avoid sticking.
What to Serve with Easter Bunny Coconut Tails?
As you create a magical Easter spread, consider these delightful pairings that enhance the festive spirit and flavor of your coconut treats.
-
Fruit Salad: A colorful medley of fresh fruits adds a refreshing contrast, bringing brightness and a juicy burst to balance the sweetness of the tails.
-
Carrot Cake: Lightly spiced with cinnamon and topped with creamy frosting, this classic dessert harmonizes beautifully with the tropical flavors of the coconut.
-
Chocolate Dipped Strawberries: These sweet, chocolatey delights provide a rich counterpoint, making for a charming and elegant addition to your Easter table.
-
Pineapple Coconut Smoothie: Creamy and delicious, this drink mirrors the coconut flavor of your treats, creating a cohesive and tropical-themed experience.
-
Bunny-Themed Cookies: Playful and fun, these cookies echo the Easter theme while offering a delightful crunch alongside the softness of the Easter Bunny Coconut Tails.
-
Sparkling Lemonade: A bubbly, refreshing drink perfect for celebrations, it cuts through the sweetness and adds a zesty, festive touch to your gathering.
Elevate your Easter gathering with these complementary dishes that create a joyful atmosphere for family and friends to enjoy!
Make Ahead Options
These Easter Bunny Coconut Tails are perfect for meal prep, allowing you to create delightful treats that save you time during the busy Easter week! You can prepare the coconut mixture and form the balls up to 24 hours in advance. Simply follow all the steps until rolling them in the colored coconut, then store the shaped balls in an airtight container in the refrigerator. To maintain their delightful chewiness, keep them chilled until you’re ready to coat them on the day of serving. Just roll them in your pastel coconut coatings right before enjoying to ensure your Easter Bunny Coconut Tails look fresh and vibrant at the celebration!
Easter Bunny Coconut Tails Variations
Feel free to get creative and make these delightful treats your own with these fun twists!
-
Vegan Option: Swap sweetened condensed milk with dairy-free sweetened condensed milk and use plant-based butter to cater to vegan diets.
-
Colorful Coating: Experiment with different food coloring to create a rainbow of pastel shades or add edible glitter for extra sparkle.
-
Chocolate Chip Surprise: Mix in a handful of mini chocolate chips or chopped dark chocolate into the coconut mixture for a deliciously sweet surprise inside.
-
Nutty Crunch: Fold in finely chopped nuts like almonds or pecans to add a lovely crunch and nutty flavor to each tail.
-
Tropical Twist: Incorporate a spoonful of crushed pineapple or mango into the coconut mixture for a fruity flavor that transports you straight to the tropics.
-
Coconut Cream: For an extra creamy texture, try adding a tablespoon of coconut cream before chilling the mixture. This will give your tails a rich coconut flavor.
-
Fun Shapes: Instead of rolling balls, shape the mixture into little bunny figures or other fun shapes to make them even more festive.
-
S’mores Style: Add crushed graham crackers to the mixture for a delightful s’mores-inspired twist, bringing a delicious campfire flavor to these coconut tails.
These variations allow you to enjoy the versatility of the Easter Bunny Coconut Tails while also introducing exciting new flavors and textures for your family. Don’t forget to serve them alongside festive goodies like Thai Style Mussels with Coconut Lemongrass for a fun culinary experience!
Easter Bunny Coconut Tails Recipe FAQs
How do I choose the best coconut for my Easter Bunny Coconut Tails?
Absolutely! For the medium shredded coconut, I recommend using unsweetened, as it provides the best texture without making the treats overly sweet. When it comes to fine shredded coconut for coating, look for brands that absorb color well—this will make your pastel coating vibrant and pleasing to the eye.
How should I store my Easter Bunny Coconut Tails?
For optimal freshness, store your Easter Bunny Coconut Tails in an airtight container in the refrigerator for up to 1 week. I always layer them with parchment paper to prevent sticking. If you have leftovers, you’ll still enjoy a delightful treat!
Can I freeze the Easter Bunny Coconut Tails?
Yes, you can freeze them! For the best results, place the finished coconut tails in a single layer on a baking sheet until firm, then transfer them to an airtight container. They can be stored in the freezer for up to 2 months. When you’re ready to enjoy, simply thaw them overnight in the fridge.
What if the coconut mixture is too sticky to roll?
Very! If you find that the mixture is too sticky to roll into balls, don’t worry! Just sprinkle in a bit more confectioner’s sugar until it reaches a manageable consistency. This little tweak can work wonders in helping you shape those adorable coconut tails.
Are there any allergens I should consider for these treats?
Great question! If you’re making these for a group, be aware of common allergens like dairy and nuts. For a vegan option, be sure to use dairy-free sweetened condensed milk and plant-based butter. You can also avoid any mix-ins like chocolate chips if allergies are a concern. Always take care to label when serving—it’s better to be safe!
How long should I chill the mixture before rolling?
Perfectly timed! Chilling the coconut mixture for about 15 minutes is essential. This gives it a chance to firm up, making it easier to handle when rolling into balls. I often find this quick step saves a lot of hassle later on!

Easter Bunny Coconut Tails: No-Bake Treats Kids Will Love
Ingredients
Equipment
Method
- In a large mixing bowl, whisk together the sweetened condensed milk, melted butter, and vanilla extract until well combined and smooth—this will take about 1-2 minutes.
- Add the medium shredded coconut and confectioner’s sugar to the mixture, stirring until everything is thoroughly mixed and sticky.
- Cover the bowl with plastic wrap and refrigerate the mixture for about 15 minutes to help it firm up.
- Divide the fine shredded coconut into several small bowls and add a few drops of liquid food coloring to each bowl, mixing until evenly tinted.
- Scoop out about 1½ teaspoons of the chilled mixture and roll it into a ball using your hands. Repeat until all the mixture is rolled into small balls.
- Gently roll each coconut ball in the colored coconut until completely coated.
- Place each coated ball on a parchment-lined baking sheet, ensuring they don’t touch, and refrigerate for 1 hour or until firm.
- Keep chilled until ready to serve. Enjoy the delightful flavors and smiles they bring!
Leave a Reply