
As the sizzling sound of chicken meeting the hot skillet fills the kitchen, the aromatic blend of garlic and ginger wafts through the air, instantly reminiscent of my favorite takeout joint. Today, I’m sharing my go-to recipe for Easy Homemade Teriyaki Chicken, a delightful fusion of sweet and savory goodness that’s ready in just 30 minutes! This dish not only serves as a fast and budget-friendly alternative to takeout, but it also allows you to customize flavors with options like honey or various sweeteners. Family dinner is about to get an upgrade, and I can’t wait for you to create your own version at home. What twist will you add to make it your signature dish?
Why is this Teriyaki Chicken special?
Quick Preparation: This dish comes together in just 30 minutes, making it a lifesaver for busy weeknights.
Healthier Option: Say goodbye to takeout and enjoy a lighter, homemade alternative that’s loaded with fresh ingredients.
Easily Customizable: Whether you prefer a sweet or savory kick, options like honey or maple syrup let you tailor the flavors to your taste.
Kid-Friendly: Perfect for families, this Teriyaki Chicken pleases even the pickiest eaters, ensuring everyone leaves the table happy. Pair it with some delicious Grilled Chicken Pasta or Colombian Chicken Stew for even more variety on your dinner table!
Flavor Explosion: The sticky, glossy sauce clings to juicy chicken pieces, creating an irresistible sweet-savory explosion in every bite.
Teriyaki Chicken Ingredients
• Everything you need to make this delightful dish!
For the Sauce
- Soy Sauce – Adds salty depth and umami; substitution: Coconut aminos for a gluten-free option.
- Brown Sugar – Provides a caramel sweetness that enhances the sauce.
- Honey – Elevates glaze quality while adding subtle sweetness.
- Rice Vinegar – Contributes a touch of tanginess to the mix.
- Garlic – Minced for that aromatic love we’re all craving.
- Ginger – Freshly grated adds warmth and a gentle spice.
- Sesame Oil – Optional, but it introduces delicious nutty depth.
- Cornstarch – Essential for thickening the sauce to the perfect consistency.
- Water – Helps create a slurry with cornstarch for effective thickening.
- Mirin – Optional addition for extra sweetness and a lovely glaze.
For the Chicken
- Boneless Chicken (Thighs or Breasts) – Our main protein, cut into bite-sized pieces for even cooking.
- Vegetable Oil – Used for frying the chicken to golden perfection.
For Serving
- Steamed Rice – A fluffy base that soaks up all that delicious sauce!
- Sesame Seeds & Green Onions – Perfect for garnishing and adding texture.
- Steamed Broccoli – An optional side, great for adding nutrients and color to your meal.
With these ingredients, you’ll be on your way to creating a mouthwatering Teriyaki Chicken that your family will adore. Don’t forget to unleash your creativity with different variations!
Step‑by‑Step Instructions for Quick & Easy Teriyaki Chicken
Step 1: Prepare the Teriyaki Sauce
In a small saucepan, combine soy sauce, brown sugar, honey, rice vinegar, minced garlic, and freshly grated ginger. Heat the mixture over medium heat, whisking continuously for 3-4 minutes until the sugars dissolve completely and the sauce is fragrant. Look for a harmonious blend of sweet and savory before removing it from the heat.
Step 2: Thicken the Sauce
In a small bowl, mix together cornstarch and water to create a slurry. Gradually pour this slurry into the warm Teriyaki sauce, stirring constantly. Return the saucepan to medium heat and simmer for another 3-4 minutes, allowing the sauce to thicken and become glossy. Keep an eye on it; it should coat the back of your spoon nicely.
Step 3: Prepare the Chicken
While the sauce simmers, cut boneless chicken thighs or breasts into bite-sized pieces, ensuring they are uniform for even cooking. Season the chicken pieces generously with salt and pepper. To enhance flavor, let them sit for a few minutes while you heat the skillet, allowing the seasoning to permeate the meat.
Step 4: Cook the Chicken
Heat a tablespoon of vegetable oil in a heavy-bottomed skillet over medium-high heat. Once the oil is shimmering, add the seasoned chicken pieces in a single layer. Cook each side for 6-7 minutes, or until the chicken is golden brown and reaches an internal temperature of 165°F. This step ensures the chicken is juicy and flavorful.
Step 5: Combine Chicken and Sauce
Reduce the heat to low and pour the thickened Teriyaki sauce over the cooked chicken in the skillet. Gently stir to coat each piece with the sauce, allowing the flavors to meld together. Simmer for an additional 2-3 minutes, creating a shiny, sticky glaze that clings beautifully to the chicken.
Step 6: Serve and Garnish
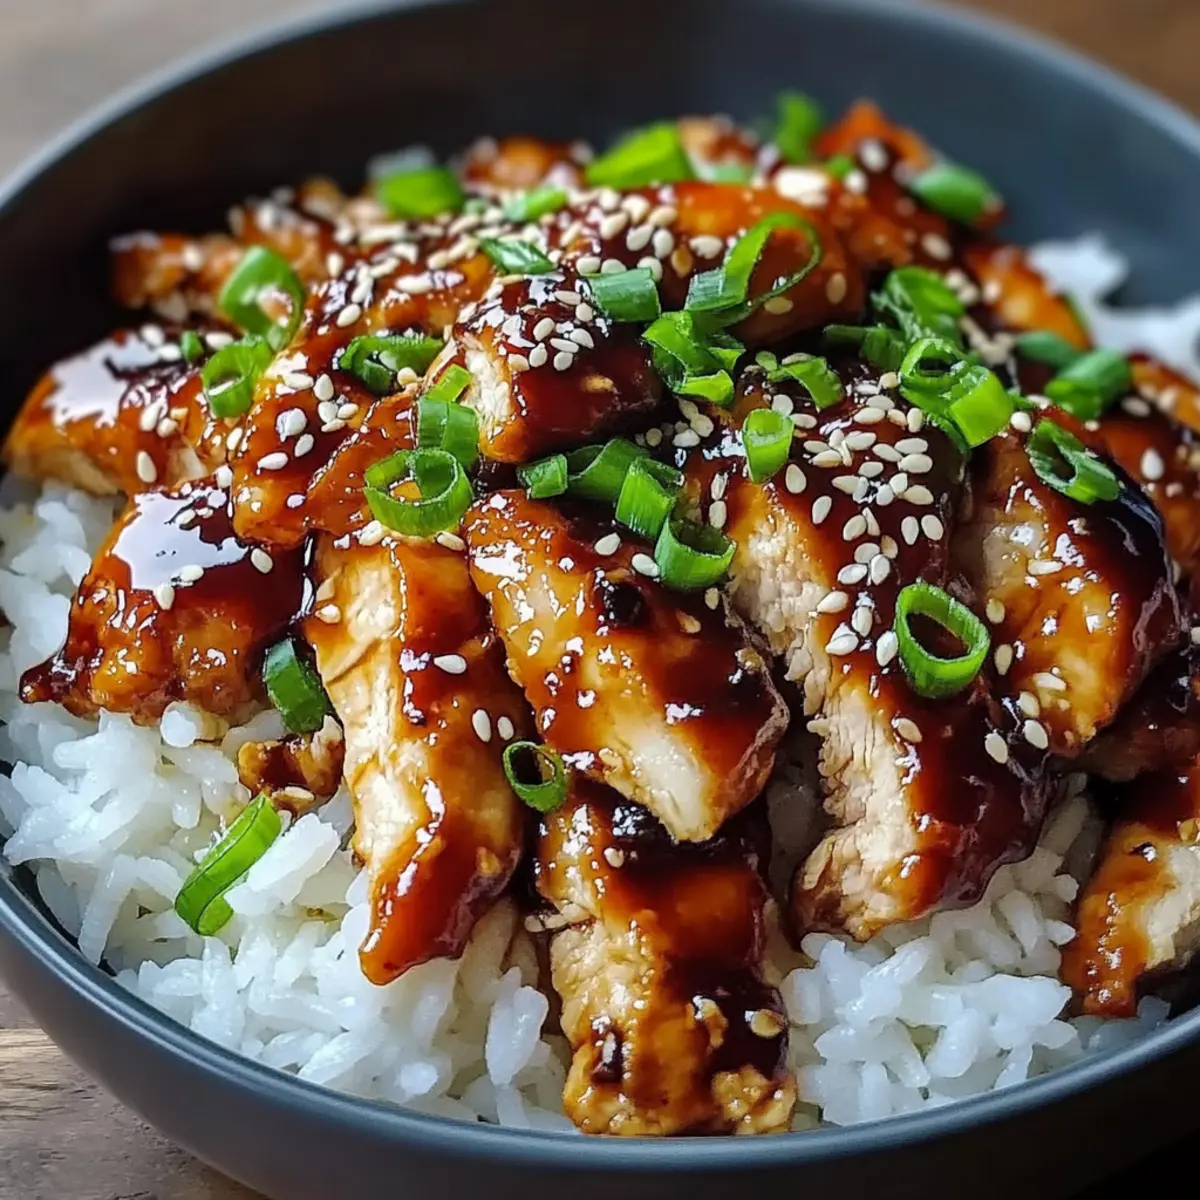
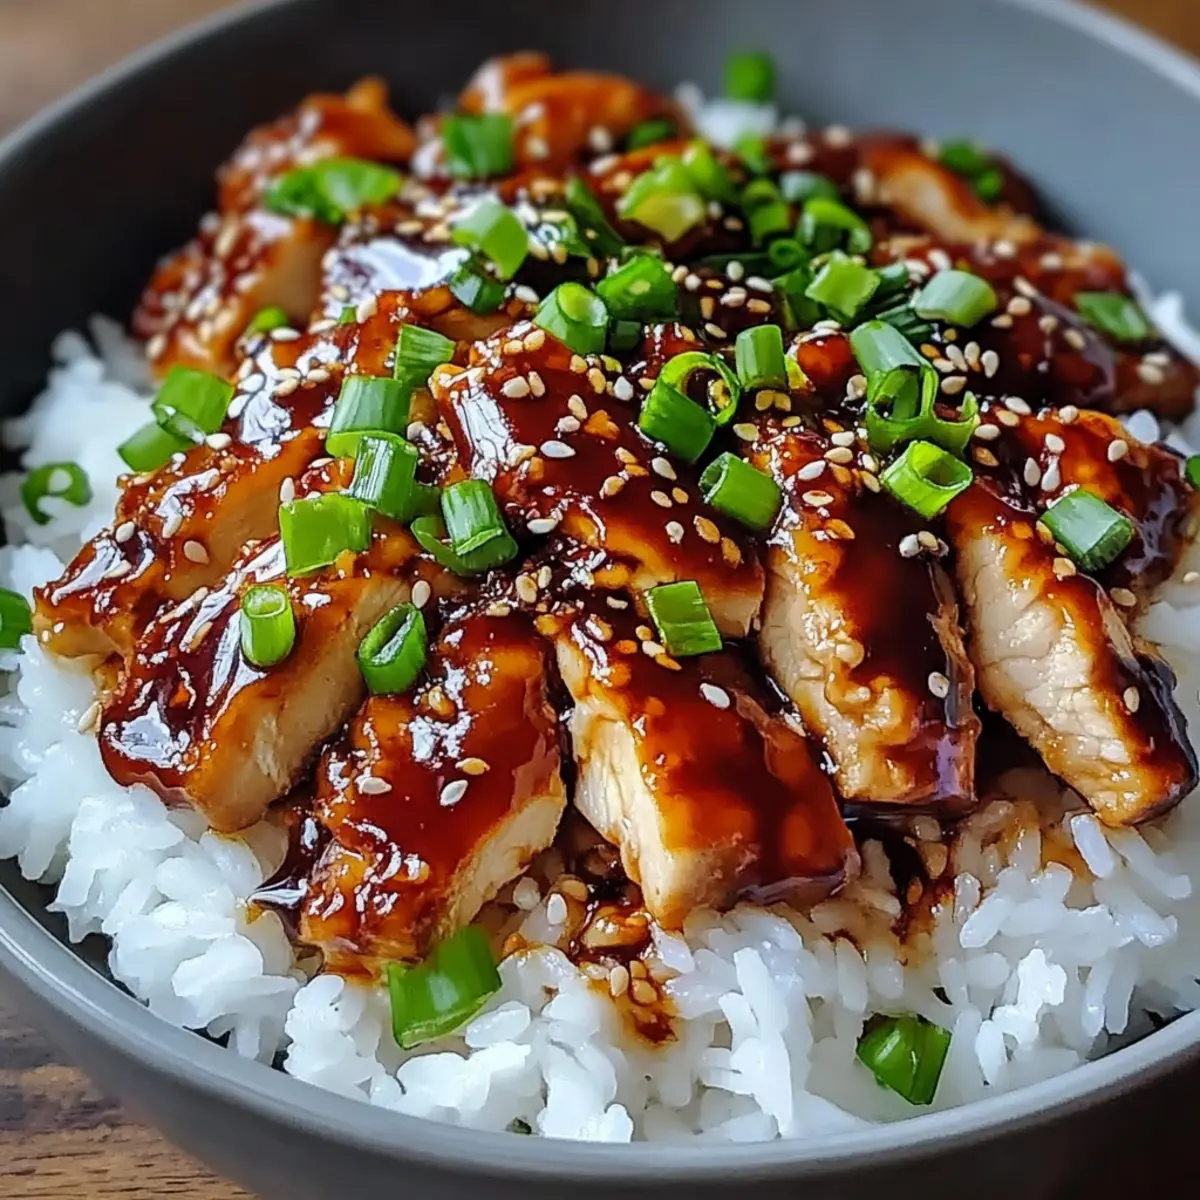
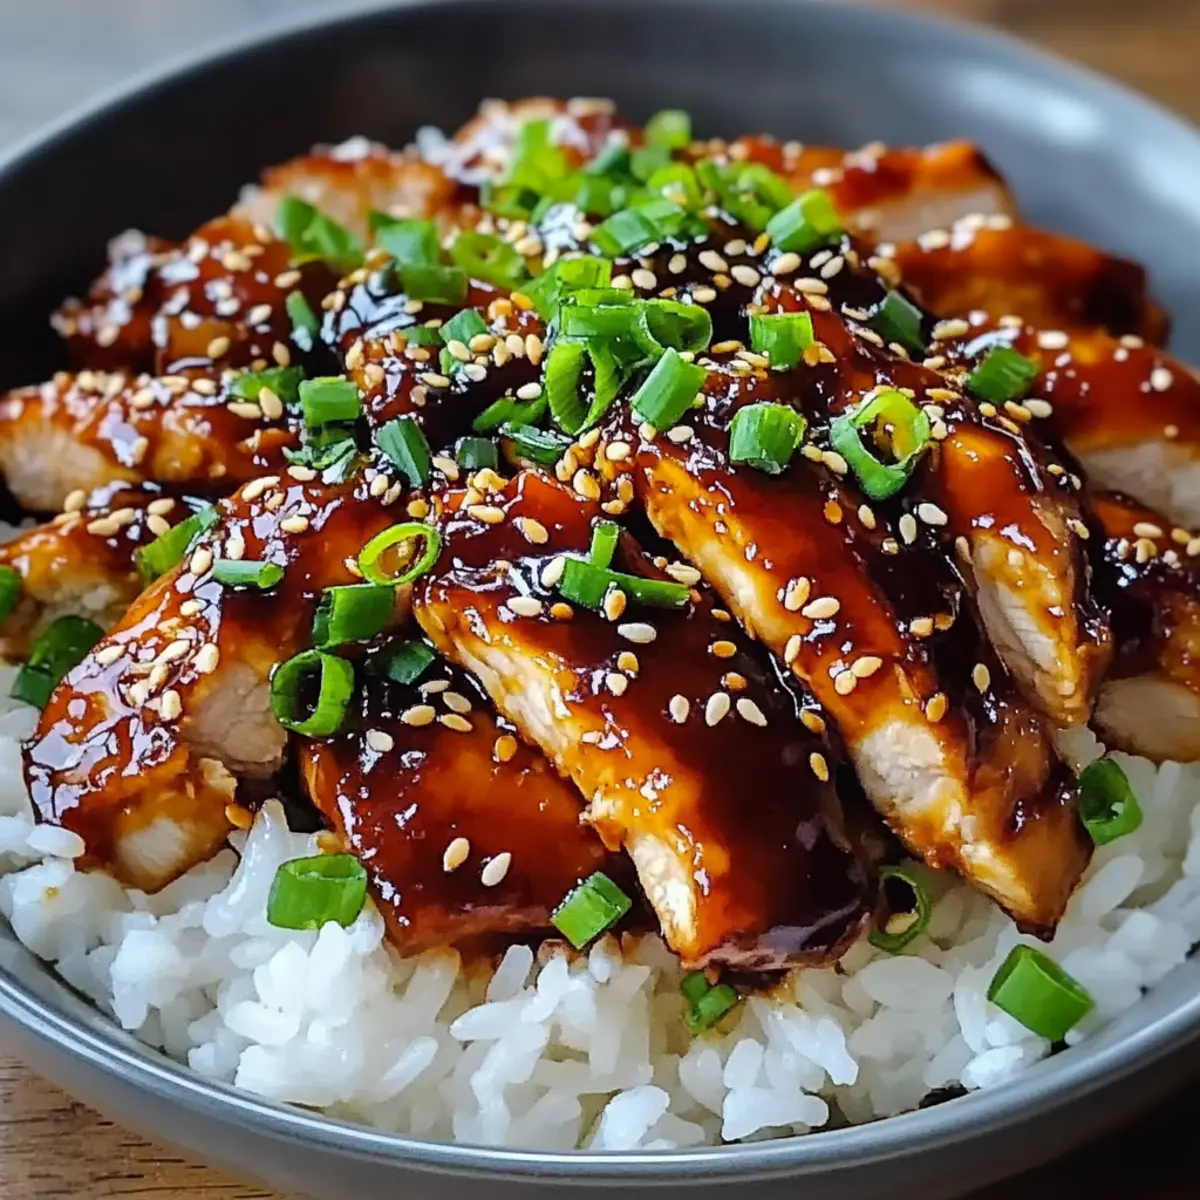
Remove the skillet from the heat once the sauce has adhered to the chicken. Serve the luscious Teriyaki Chicken over a bed of steamed rice for the perfect balance. Garnish with sesame seeds and chopped green onions for an added crunch, and consider pairing with steamed broccoli for a delicious, nutritious meal that’s ready to enjoy!
How to Store and Freeze Teriyaki Chicken
Fridge: Store your Teriyaki Chicken in an airtight container for up to 3 days. This keeps the chicken flavorful and juicy while waiting for a yummy meal!
Freezer: For longer storage, freeze the Teriyaki Chicken in portions for up to 3 months. Ensure each portion is well-wrapped to prevent freezer burn.
Reheating: To reheat, thaw overnight in the fridge. Warm it in a skillet over low heat, stirring gently, until heated through. You may add a splash of water or soy sauce for moisture.
Room Temperature: Avoid leaving Teriyaki Chicken out at room temperature for more than 2 hours. This helps prevent any food safety issues.
What to Serve with Easy Homemade Teriyaki Chicken
Transform your dinner table into a delightful feast with these perfect pairings that will elevate your homemade creation.
-
Steamed Rice: The fluffy texture of rice complements the sticky, sweet-savory sauce perfectly, creating a comforting base for your meal.
-
Roasted Vegetables: Crisp-tender veggies like bell peppers and carrots add vibrant color and a nutritious crunch, balancing the dish beautifully. Roasting enhances their natural sweetness, marrying flavors in an extraordinary way.
-
Sesame Noodles: Tossed with sesame oil and fresh herbs, these noodles provide a delightful twist and a touch of creaminess that pairs wonderfully with the bold flavors of teriyaki.
-
Asian Slaw: A refreshing mix of cabbage, carrots, and a tangy dressing brings a satisfying crunch and brightens the whole plate, making each bite a burst of flavor.
-
Miso Soup: Warm and savory, miso soup serves as a light starter, setting the stage for your teriyaki chicken while welcoming umami notes that dance on your palate.
-
Chilled Sake: The crisp, clean flavors of sake enhance your dining experience, offering a delightful contrast to the rich, savory chicken.
-
Chocolate Mochi: For a sweet finale, these chewy treats provide a unique dessert option that balances the savory aspects of your meal with a delightful sweetness.
Tips for the Best Teriyaki Chicken
Prevent Burning: Ensure to add the Teriyaki sauce in the last few minutes of cooking to minimize burning.
Pat Dry: Make sure your chicken pieces are patted dry before cooking for optimal browning and a crispy crust.
Use Heavy Skillet: A heavy-bottomed skillet is key for even cooking and achieving that luscious glaze on your Teriyaki Chicken.
Flavor Boost: Marinating the chicken beforehand adds depth of flavor, but you can skip this step if short on time.
Watch Consistency: Stir the cornstarch slurry into the sauce gradually; this helps avoid lumps and gives you that perfect glossy finish.
Teriyaki Chicken Variations & Substitutions
Feel free to make this Teriyaki Chicken your own with delightful twists and substitutions. Each variation invites you to explore new flavors!
-
Gluten-Free: Use tamari instead of soy sauce to maintain that rich umami flavor without gluten.
-
Sweetener Swap: Replace brown sugar with maple syrup for a unique depth. The warm notes of maple will add a lovely twist!
-
Vegetable Medley: Toss in bell peppers, snap peas, or carrots during cooking for a colorful, nutrient-rich stir-fry. This creates a visually appealing and satisfying meal.
-
Spicy Kick: Add a pinch of red pepper flakes or a swirl of sriracha to the sauce for a fiery touch. This twist is perfect for those craving a little heat!
-
Citrus Zest: For a refreshing aroma, add a splash of orange or lime juice to the sauce before serving. It brightens up the flavors beautifully!
-
Honey Hot Chicken: Drizzle some chili honey over the chicken for sweet heat. This combination will tantalize your taste buds, leading to a dish you can’t resist!
-
Air Fryer Option: Cook the chicken in an air fryer for a healthier, crispy finish. Enjoy all the flavors with less oil and a fraction of the time – why not give it a try?
-
Protein Variety: Swap chicken for tofu or shrimp to cater to different tastes and dietary needs. Both options bring their own delicious qualities to the table.
Focusing on unique variants will make your Teriyaki Chicken even more exciting. Plus, pairing this dish with 30-Minute Crispy Chicken Cutlets or Honey Hot Chicken will ensure your family gets a taste of variety for dinner, leaving everyone satisfied!
Make Ahead Options
These Easy Homemade Teriyaki Chicken are perfect for meal prep! You can marinate the chicken in the Teriyaki sauce up to 24 hours in advance, which not only saves time but also intensifies the flavors. Simply cut the chicken, season it, and place it in a resealable bag with the sauce in the refrigerator. For an additional prep step, you can prepare the sauce ahead of time and store it in an airtight container for up to 3 days. When you’re ready to cook, just heat the oil and follow the remaining steps. This ensures your Teriyaki Chicken will be just as delicious, allowing for quick, stress-free dinners during busy weeknights!
Teriyaki Chicken Recipe FAQs
What is the best way to select ripe ingredients for this Teriyaki Chicken?
Absolutely! When choosing chicken, look for boneless thighs or breasts that are pink in color and have a fresh smell. For garlic and ginger, select firm, unblemished pieces without sprouts or dark spots. Fresh vegetables like broccoli should be bright green with no yellowing or wilting, ensuring maximum flavor and texture in your dish.
How should I store leftover Teriyaki Chicken?
Very simple! Store your Teriyaki Chicken in an airtight container in the refrigerator for up to 3 days. Make sure it’s cooled to room temperature before sealing, to preserve its moisture and flavor while preventing any bacteria growth. If you plan to eat more later, the freezer is your best friend!
Can I freeze Teriyaki Chicken, and how should I do it?
Definitely! To freeze, let your Teriyaki Chicken cool completely, then portion it into freezer-safe bags or containers, making sure to remove as much air as possible. It can be stored like this for up to 3 months. When you’re ready to enjoy it, simply thaw overnight in the fridge and heat gently in a skillet, adding a splash of water to maintain moisture.
What should I do if the Teriyaki sauce is too thin?
If your sauce doesn’t thicken as desired, no worries! In a separate bowl, mix 1 tablespoon of cornstarch with 2 tablespoons of cold water to create a slurry. Gradually whisk this mixture into your simmering sauce; allow it to cook for another 1-2 minutes until it reaches that glossy, thick consistency you’re looking for. Keeping the heat low during this process helps to avoid burning.
Are there any dietary considerations I should keep in mind for this Teriyaki Chicken?
Absolutely! If you’re cooking for someone with gluten intolerance, simply swap soy sauce for coconut aminos or tamari. For those watching their sugar intake, try using alternative sweeteners like stevia or agave syrup for a healthier option. Always check the labels of any products you use, ensuring they align with dietary needs, especially for allergies.
How long can Teriyaki Chicken be left out at room temperature?
You should aim to avoid leaving Teriyaki Chicken out for more than 2 hours at room temperature. Food safety is important, and keeping it stored properly helps prevent any health risks. If it’s a warm day, it’s best to lessen that time to just 1 hour. Always prioritize your health!

Homemade Teriyaki Chicken: Sweet & Savory in 30 Minutes
Ingredients
Equipment
Method
- In a small saucepan, combine soy sauce, brown sugar, honey, rice vinegar, minced garlic, and freshly grated ginger. Heat over medium heat, whisking for 3-4 minutes until sugars dissolve and sauce is fragrant.
- In a small bowl, mix cornstarch and water to create a slurry. Gradually pour this into the Teriyaki sauce, stirring constantly. Return to medium heat and simmer for another 3-4 minutes until thickened.
- Cut boneless chicken into bite-sized pieces. Season generously with salt and pepper. Let them sit for a few minutes while heating the skillet.
- Heat vegetable oil in a skillet over medium-high heat. Add the chicken in a single layer and cook for 6-7 minutes on each side until golden brown and fully cooked.
- Reduce heat to low and pour the thickened Teriyaki sauce over the chicken. Gently stir to coat each piece and simmer for 2-3 minutes.
- Serve over steamed rice, garnishing with sesame seeds and green onions. Pair with steamed broccoli if desired.
Leave a Reply