
As I stared at a colorful array of chocolates lining the store shelves, I couldn’t help but crave something homemade and whimsical. That’s when the idea struck me: No-Bake Peanut Butter Easter Eggs! With a creamy peanut butter center cradled in a smooth, vibrant chocolate shell, these delightful treats are perfect for Easter gatherings or quiet afternoons at home. The best part? They’re simply easy to whip up, gluten-free, and require no baking at all! Imagine the joy of crafting these beauties together with loved ones, creating unique variations with diverse coatings and fillings to match everyone’s taste. Ready to dive into a delicious adventure in your kitchen? Let’s make some scrumptiously festive Peanut Butter Easter Eggs together!
Why Make Peanut Butter Easter Eggs?
Deliciousness at Its Best: The creamy peanut butter center is perfectly complemented by a smooth chocolate shell, making each bite a delight.
No-Bake Simplicity: This recipe is incredibly easy, requiring minimal effort and no baking—just mix, chill, and coat!
Customizable Fun: With options for different chocolate coatings and fillings, everyone can create their own unique treat.
Crowd Pleaser: These vibrant eggs not only please the eyes but also satisfy taste buds, making them a hit at any gathering, whether it’s Easter or just a family treat night.
Make-Ahead Friendly: Prepare these delightful morsels in advance—store them in the fridge or freezer for ready-to-enjoy snacks whenever the craving strikes!
Try pairing these eggs with your favorite Easter dishes or desserts for the ultimate festive spread. Embrace the joy of homemade sweets that you can easily share with loved ones!
Peanut Butter Easter Eggs Ingredients
For the Filling
• Natural Peanut Butter – Provides a rich, creamy flavor; ensure it’s runny with no added sugars for the best results.
• Almond Flour – Adds structure and a slight nutty taste; can be substituted with another nut flour, but measure carefully to prevent crumbliness.
• Powdered Sugar – Sweetens the filling while providing a smooth texture; essential for those delightful Peanut Butter Easter Eggs.
• Maple Syrup – Enhances sweetness and adds depth; feel free to swap with honey for a different flavor.
• Vanilla Extract – Infuses aromatic flavor, elevating the overall taste.
• Salt – Enhances all flavors in the filling, bringing everything together.
For the Coating
• White Chocolate Wafers – Create the beautiful outer shell; consider dark or milk chocolate for a richer flavor.
• Coconut Oil – Helps melt the chocolate for a smooth and glossy coating.
• Blue Spirulina & Matcha Powders – Natural colorants for a vibrant appearance; suitable alternatives include food-grade colors for varied hues.
• Cocoa Powder – Adds decoration with charming speckles for that festive touch.
Step‑by‑Step Instructions for Peanut Butter Easter Eggs
Step 1: Prepare Filling
In a large mixing bowl, combine 1 cup of natural peanut butter, ½ cup of maple syrup, 1 cup of powdered sugar, ½ cup of almond flour, 1 teaspoon of vanilla extract, and a pinch of salt. Using a hand mixer, beat the mixture on medium speed for about 2–3 minutes, or until it is smooth and well combined. This delightful filling will serve as the creamy center for your Peanut Butter Easter Eggs.
Step 2: Shape Eggs
Once the filling is ready, scoop out 2-tablespoon portions and roll them into balls. Gently press each ball into an egg shape with your hands for a more festive look. Arrange the shaped eggs on a lined baking sheet, ensuring they are spaced apart. This process should take about 10 minutes, and you’ll end up with beautifully formed Peanut Butter Easter Eggs that are ready for chilling.
Step 3: Chill
Transfer the baking sheet with the shaped eggs to the freezer and chill them for about 20-30 minutes. This chilling step is crucial—it firms up the filling, making the eggs easier to coat. After 30 minutes, check for firmness; they should be solid enough to hold their shapes when dipped in chocolate.
Step 4: Prepare Coating
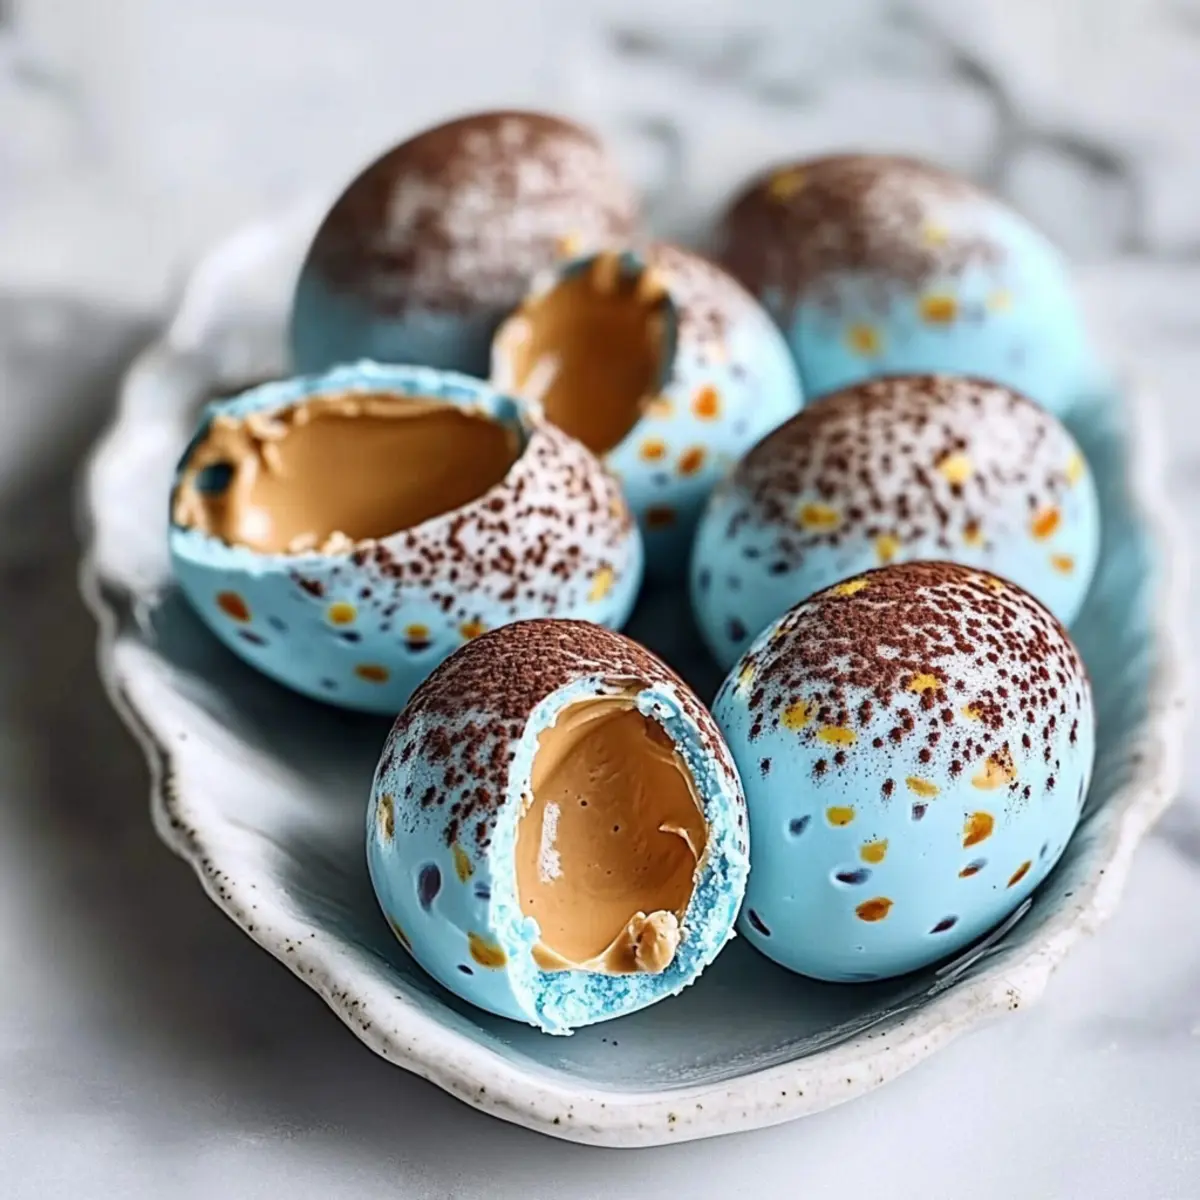
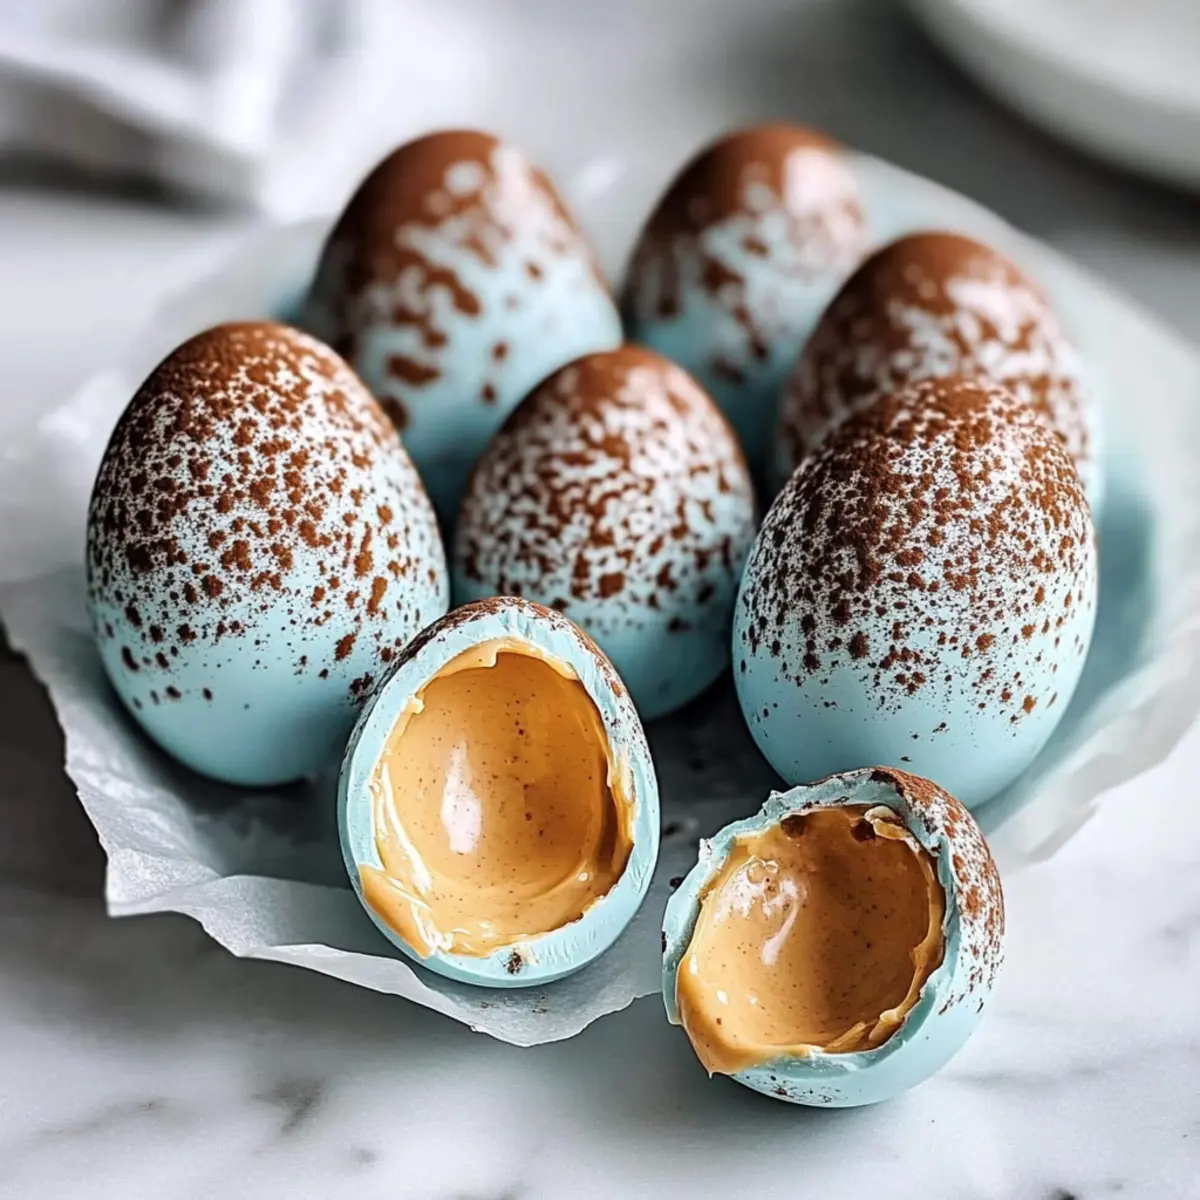
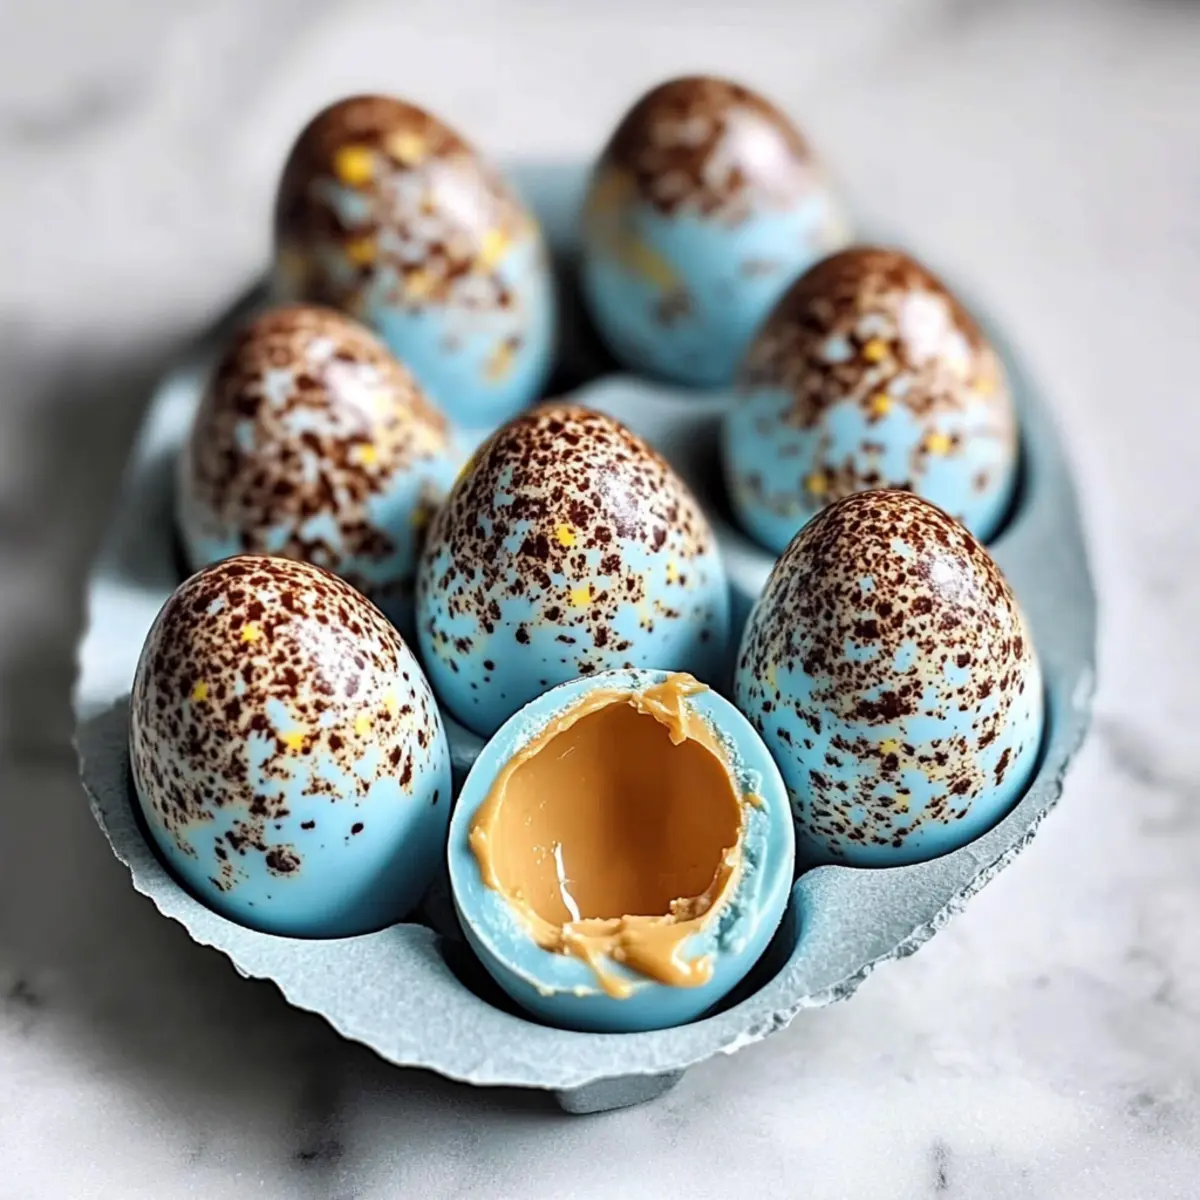
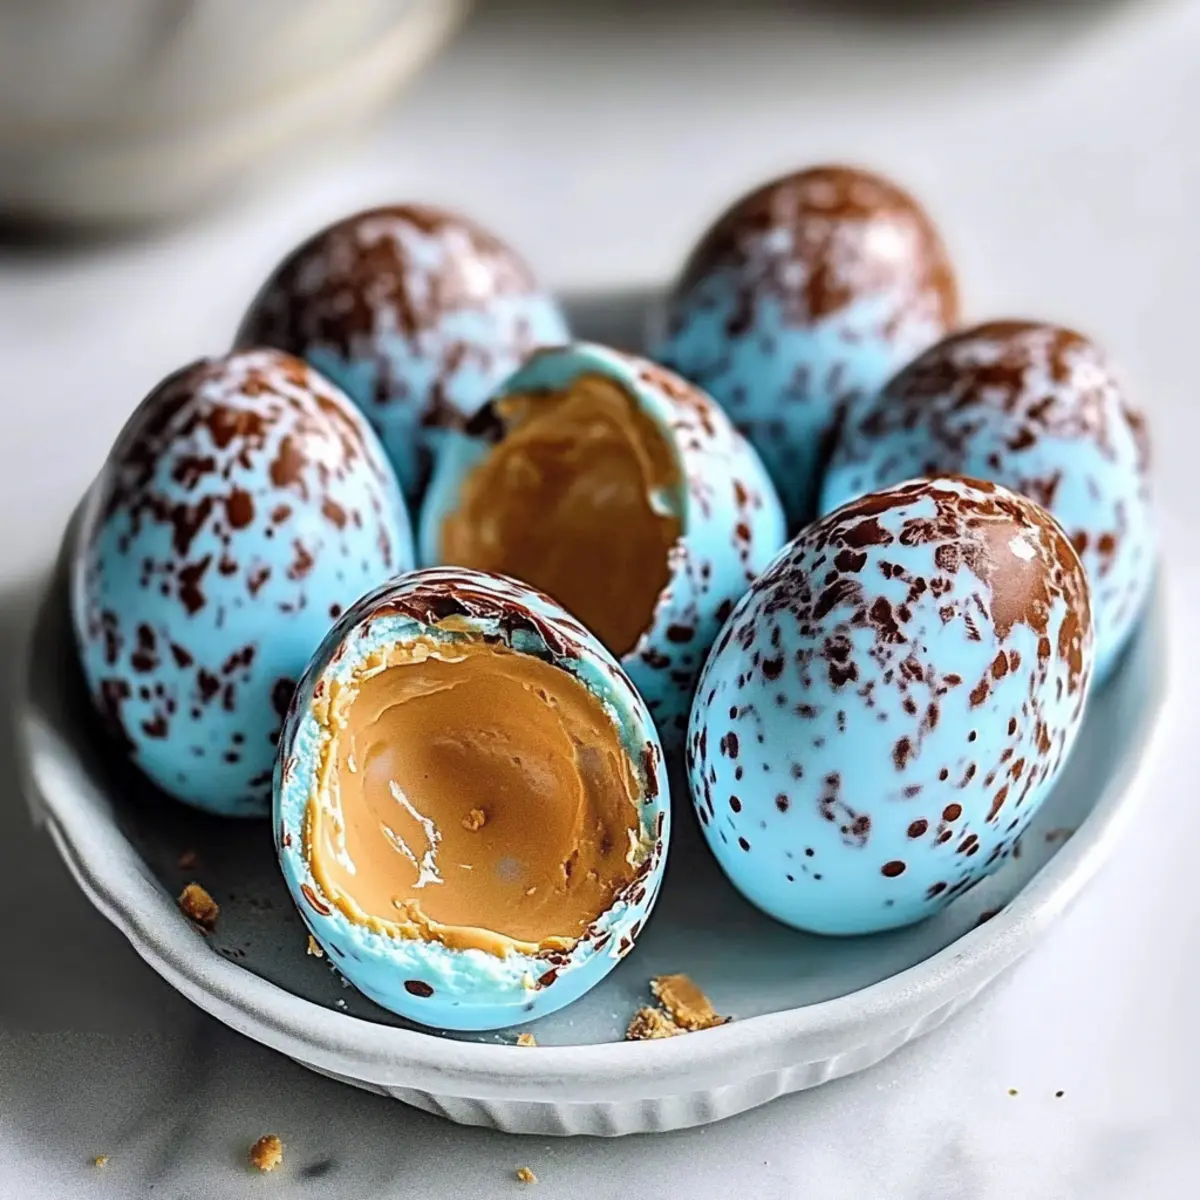
In a microwave-safe bowl, combine 1 cup of white chocolate wafers and 2 teaspoons of coconut oil. Heat the mixture in the microwave in 30-second intervals, stirring after each interval, until melted and smooth, which usually takes about 1-2 minutes. Once smooth, mix in blue spirulina and matcha powders for vibrant colors. Your chocolate coating should be glossy and ready for dipping!
Step 5: Dip Eggs
Using a toothpick, carefully dip each chilled egg into the melted chocolate, ensuring the egg is fully covered. Allow any excess chocolate to drip back into the bowl. This process requires about 1-2 minutes per egg, and you’ll want to work quickly to maintain the temperature of the chocolate coating for even coverage.
Step 6: Decorate
After dipping each Peanut Butter Easter Egg, use a stiff brush to flick cocoa powder over the coated eggs, creating charming speckles. This step adds a delightful visual appeal to your treats! Set the decorated eggs back on the lined baking sheet, and take a moment to admire their colorful transformation before moving on to the next step.
Step 7: Set
Place the decorated eggs in the refrigerator for about 10 minutes to fully set the chocolate coating. Once firm, check the bottoms of the eggs to ensure they look nice and polished. Once completely cooled and set, your Peanut Butter Easter Eggs are ready to be enjoyed or beautifully presented at your Easter gathering!
What to Serve with Peanut Butter Easter Eggs
These colorful and creamy delights are perfect for elevating your Easter spread into a festive feast that captures that warm, joyous spirit.
-
Fresh Berries: Bright strawberries or blueberries add freshness and a touch of tartness that balances the sweetness of the eggs.
-
Carrot Cake: The warm spices and moist texture of carrot cake harmonize beautifully with the rich peanut butter filling, making for a classic Easter pairing.
-
Spring Salad: A light salad featuring mixed greens, radishes, and a citrus vinaigrette offers a crisp contrast that keeps your palate refreshed.
-
Chocolate Milk: Indulgent and nostalgic, rich, chocolatey milk complements the peanut butter flavor while enhancing the festive experience of your treat.
-
Coconut Macaroons: These chewy coconut treats bring an extra sweetness to the table, along with a delightful texture that complements the creamy peanut butter eggs.
-
Lemonade or Iced Tea: The refreshing zing of lemonade or the brewed aroma of iced tea acts to cleanse your palate, ensuring each bite is just as delightful as the last.
-
Gourmet Coffee: For the adults, a nice cup of gourmet coffee pairs well with the sweet richness of these eggs, enhancing your dessert experience.
-
Almond Flour Cookies: Nutty and slightly sweet, these cookies echo the flavors in the filling, making them a perfect companion.
Expert Tips for Peanut Butter Easter Eggs
-
Smooth Filling: Use a hand mixer to achieve a creamy, lump-free filling. This ensures your Peanut Butter Easter Eggs have a delightful, velvety texture.
-
Cool Hands: Keep your hands cool when shaping the eggs. Warm hands can cause the filling to become sticky, making shaping a bit messy.
-
Chill After Dipping: After dipping the eggs in chocolate, chill them again to help the coating set better. Remove toothpicks carefully to avoid cracking the chocolate shell.
-
Experiment with Colors: Test different ratios of blue spirulina and matcha for pastel shades. Too much can make colors overly dark; add gradually for the best results.
-
Storage Tips: These treats can be stored for up to a week in the refrigerator or for a month in the freezer, making them a fantastic make-ahead option for festivity!
Make Ahead Options
These delightful Peanut Butter Easter Eggs are perfect for busy home cooks looking to save time while still indulging in something sweet! You can prepare the filling and shape the eggs up to 24 hours in advance. Simply store the shaped eggs in an airtight container in the refrigerator, ensuring they are well-spaced to prevent sticking. When you’re ready to add the chocolate coating, simply melt the white chocolate and dip the chilled eggs, followed by a quick chill in the fridge for about 10 minutes to set. This way, you’ll enjoy the same melt-in-your-mouth texture of the Peanut Butter Easter Eggs, just as delicious and convenient for your festive gatherings!
Peanut Butter Easter Eggs Variations
Feel free to get creative and make these delightful treats your own! The possibilities to customize are endless.
-
Dark Chocolate: Swap white chocolate for dark chocolate to give your eggs a richer flavor and a slightly more intense experience.
-
Coconut Delight: Incorporate shredded coconut into the filling for a tropical twist, or roll the finished eggs in coconut flakes for added texture.
-
Nutty Switch: Replace peanut butter with almond or cashew butter for a unique twist on flavor—each nut butter brings its own charm.
-
Festive Sprinkles: Decorate your eggs with colorful sugar sprinkles or drizzle additional chocolate on top for an eye-catching finish.
-
Mint Infusion: Add a few drops of peppermint extract to the filling for a refreshing flavor kick that pairs beautifully with chocolate.
-
Chili Heat: For a daring adventure, mix in a pinch of cayenne pepper or chili powder into the filling for a surprising heat that contrasts with the sweetness.
-
Savory Surprise: Experiment by adding a sprinkle of sea salt on top of the chocolate coating for a sweet and salty combination that heightens the flavor.
-
Fruit Fusion: Fold in finely chopped dried fruit like cranberries or cherries to the filling for a delightful tanginess that complements the peanut butter.
These variations can turn a simple recipe into an extraordinary treat! While exploring flavors, consider pairing these eggs with your favorite festive dishes or even alongside a batch of Buttermilk Fried Chicken for a perfect sweet and savory combo. Enjoy crafting your custom Peanut Butter Easter Eggs!
How to Store and Freeze Peanut Butter Easter Eggs
Fridge: Store your Peanut Butter Easter Eggs in an airtight container for up to one week. This keeps them fresh and ready to enjoy on a sweet whim!
Freezer: For longer storage, freeze the eggs in a single layer on a baking sheet before transferring them to a freezer-safe bag or container. They can last up to one month frozen.
Thawing: When you’re ready to indulge, simply remove the desired number of eggs from the freezer and let them sit at room temperature for about 15-20 minutes. This ensures they regain their perfect creamy texture.
Reheating: There’s no need to reheat these gems; they’re best enjoyed chilled or at room temperature, letting the flavors shine through with each bite!
Peanut Butter Easter Eggs Recipe FAQs
What type of peanut butter should I use?
Absolutely! For the best results, choose a natural peanut butter that is smooth and runny without added sugars. This ensures that your filling remains creamy and delicious.
How long can I store the Peanut Butter Easter Eggs?
You can keep these delightful treats in an airtight container in the refrigerator for up to one week. For longer-lasting treats, freeze them for up to one month. Just ensure they are well-wrapped to prevent freezer burn!
Can I freeze Peanut Butter Easter Eggs?
Very! To freeze, place the shaped and coated eggs on a baking sheet in a single layer. Once they are fully frozen, transfer them to a freezer-safe bag, making sure to label the date. When ready to enjoy, simply let them sit at room temperature for 15-20 minutes to soften a bit.
What if my filling is too sticky to shape?
No worries! If your filling turns out too sticky, chill it in the refrigerator for 10-15 minutes until it firms up. This will make it easier to shape into eggs without a mess. Remember to keep your hands cool to prevent further stickiness!
Are these Peanut Butter Easter Eggs suitable for people with allergies?
It depends on the specific allergies. The recipe is naturally gluten-free, but those with nut allergies should avoid peanut butter. You can substitute with sunflower seed butter for a nut-free option. Always check your ingredient labels to ensure safety for everyone!
How do I customize the colors for the chocolate coating?
To create colorful coatings, start with a small amount of blue spirulina or matcha powder, gradually adding more until you reach your desired shade. It’s best to add these colorants once your chocolate is melted and smooth. Just remember, a little goes a long way, so test it out!
Delicious No-Bake Peanut Butter Easter Eggs for Sweet Joy
Ingredients
Equipment
Method
- In a large mixing bowl, combine the filling ingredients and mix until smooth using a hand mixer.
- Scoop out portions and shape them into egg shapes, arranging on a lined baking sheet.
- Chill in the freezer for 20-30 minutes until firm.
- Melt the chocolate coating ingredients in a microwave-safe bowl in intervals, then mix in coloring powders.
- Dip each chilled egg into the melted chocolate using a toothpick, allowing excess to drip off.
- Flick cocoa powder over the dipped eggs for decoration, then let them set on the baking sheet.
- Refrigerate for 10 minutes until the chocolate coating is set.
Leave a Reply