
On a sweltering summer afternoon, I found myself yearning for the cozy delights of hot chocolate, but my thoughts swiftly turned to something cooler. Enter the No Churn Hot Chocolate Ice Cream—my delightful answer to that craving! This recipe transforms the classic comfort of hot chocolate into a creamy, frozen treat, perfect for those sun-soaked days. With just a handful of ingredients, you’ll be whipping up this luscious dessert in no time, delighting friends and family with its rich cocoa flavor and fluffy mini marshmallows. It’s an easy recipe that guarantees satisfaction without the fuss of an ice cream maker, making it a must-have in your summer dessert arsenal. Are you ready to discover how to cool off while indulging in decadent dreaminess?
Why Will You Love This Ice Cream?
Irresistible Flavor: This No Churn Hot Chocolate Ice Cream captures the essence of your favorite warm drink in a cool, creamy treat.
Simplicity Rule: With just a few pantry staples, you can create a delicious dessert without an ice cream maker.
Endless Fun: Customize with your choice of mix-ins like crushed peppermint or swirls of peanut butter for a unique twist—just like in my Creamy Vegetable Pot Pie with Puff Pastry Crust!
Family Favorite: Kids and adults alike will adore this sweet indulgence, perfect for gatherings or a quiet night in.
Quick Freeze: Enjoy your frozen delight in as little as 4-6 hours, making it a fantastic last-minute dessert solution. Perfect to beat the heat!
No Churn Hot Chocolate Ice Cream Ingredients
• Get ready to gather your essentials for a creamy adventure!
For the Ice Cream Base
- Heavy Whipping Cream – This rich cream creates a luxurious base; whip until stiff peaks form for the perfect texture.
- Sweetened Condensed Milk – Adds the sweetness and helps achieve that creamy consistency—don’t substitute with regular milk for best results.
- Hot Cocoa Mix – Infuses the ice cream with that classic chocolate flavor; use two packets for maximum deliciousness.
For Added Texture
- Mini Marshmallows – These chewy delights replicate the classic hot chocolate experience; feel free to swap with crushed graham crackers if desired.
With these simple ingredients, you’ll be on your way to creating the ultimate No Churn Hot Chocolate Ice Cream!
Step‑by‑Step Instructions for No Churn Hot Chocolate Ice Cream
Step 1: Whip the Cream
Begin by pouring the heavy whipping cream into a chilled stand mixer bowl. Using the whisk attachment, whip the cream on medium-high speed until it reaches stiff peaks, about 3 to 5 minutes. Keep an eye on it—you want a fluffy texture that holds its shape without turning grainy. This step is crucial for achieving the light and creamy base of your No Churn Hot Chocolate Ice Cream.
Step 2: Combine the Ingredients
In a separate mixing bowl, gently fold together the sweetened condensed milk and hot cocoa mix until fully combined. Take care to mix without deflating the whipped cream. Once smooth, gradually fold in the whipped cream in batches, alternating between the two mixtures until the consistency is uniform. The airy texture is essential for your ice cream to be creamy and rich.
Step 3: Add the Marshmallows
Next, it’s time to add those chewy mini marshmallows! Gently fold them into the mixture until evenly distributed. This will provide a delightful texture that enhances the nostalgic hot chocolate experience. Be gentle during this step to maintain the lightness you’ve created in the ice cream mixture.
Step 4: Prepare for Freezing
Transfer the combined mixture into a metal loaf pan for freezing. Use a spatula to smooth the top, ensuring an even layer. To release any trapped air bubbles, tap the pan gently on the countertop a few times. This step will help create a smooth texture throughout your No Churn Hot Chocolate Ice Cream.
Step 5: Freeze the Mixture
Cover the loaf pan tightly with plastic wrap or a lid to prevent freezer burn. Place it in the freezer for at least 4 to 6 hours, or until the ice cream is fully frozen and firm. The longer it sits, the better the flavors will meld—a tempting treat for those summer days.
Step 6: Soften Before Serving
Once frozen, allow the No Churn Hot Chocolate Ice Cream to sit out at room temperature for about 5 minutes before scooping. This will help soften the ice cream just enough for an easier and more enjoyable serving experience. The creamy texture will be perfect for scooping into bowls or cones!
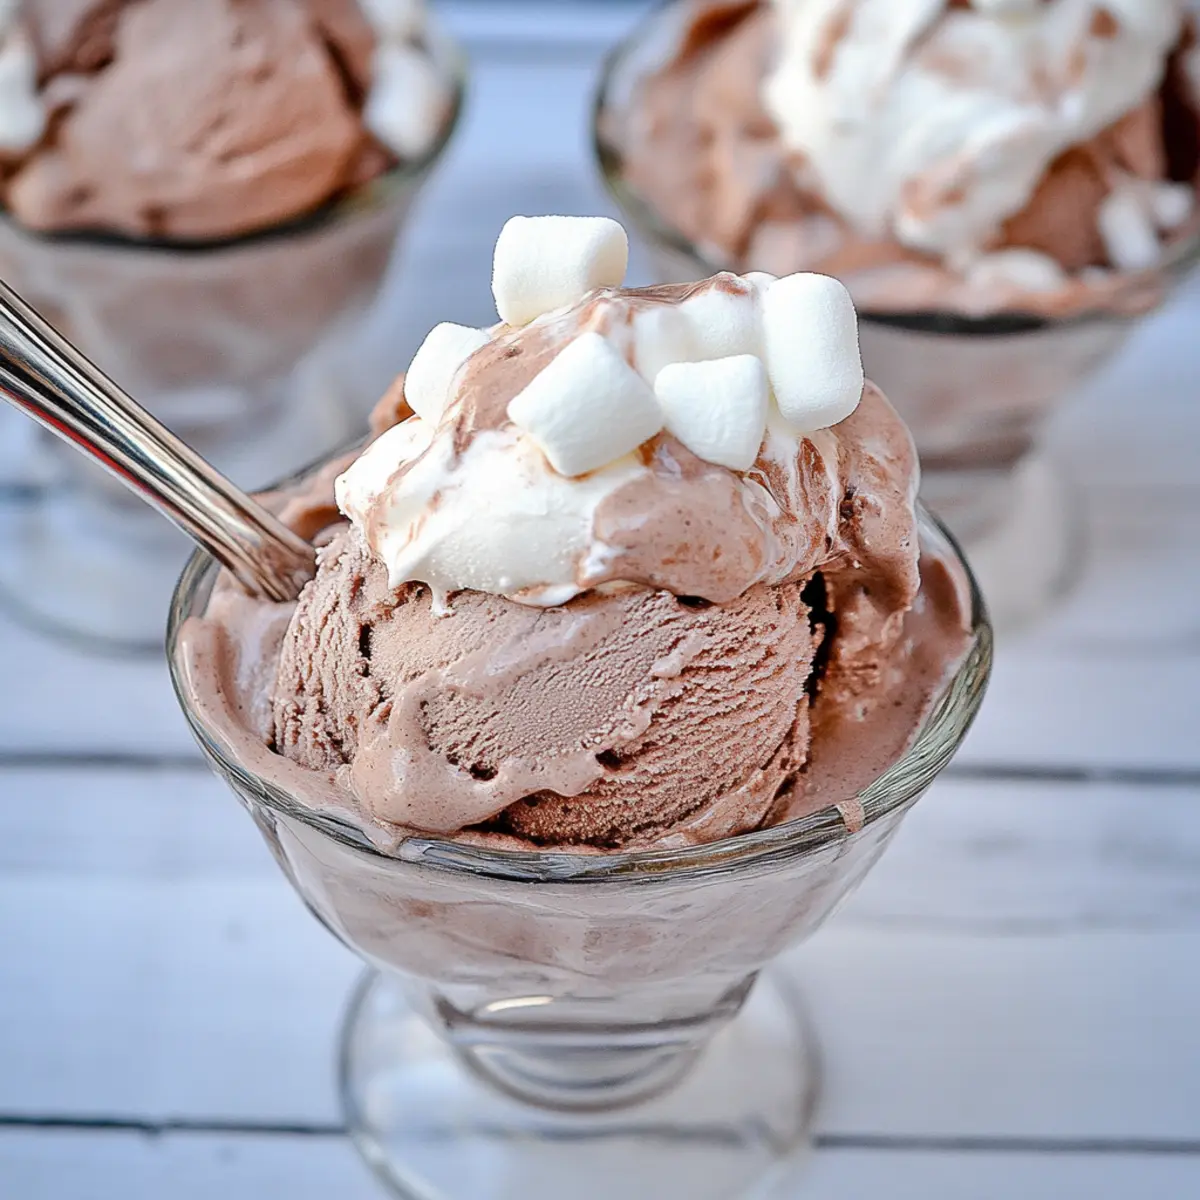
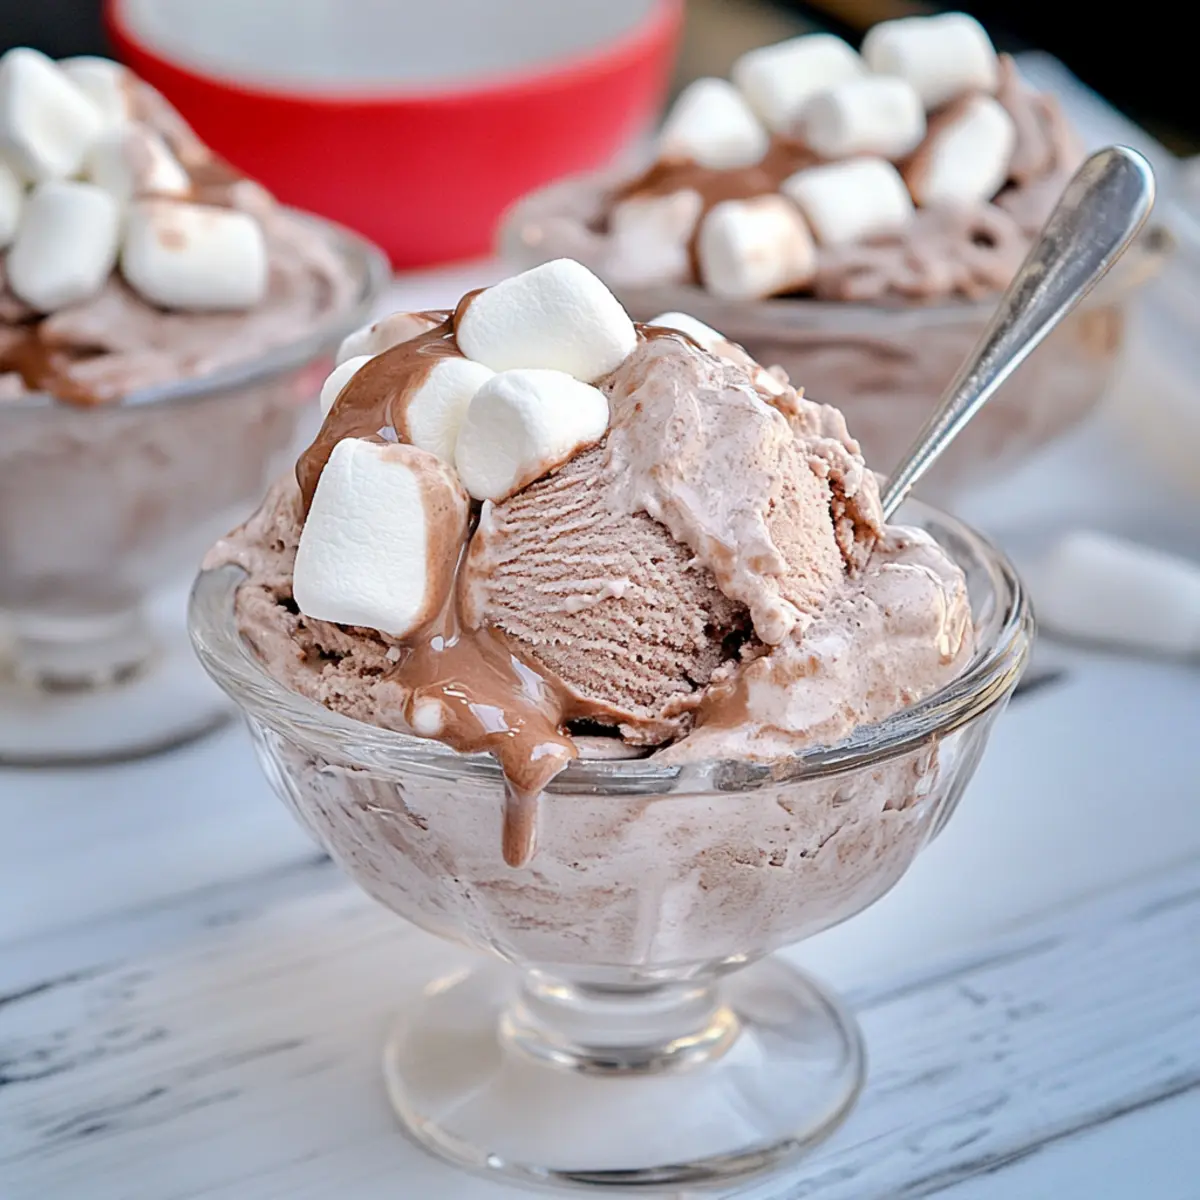
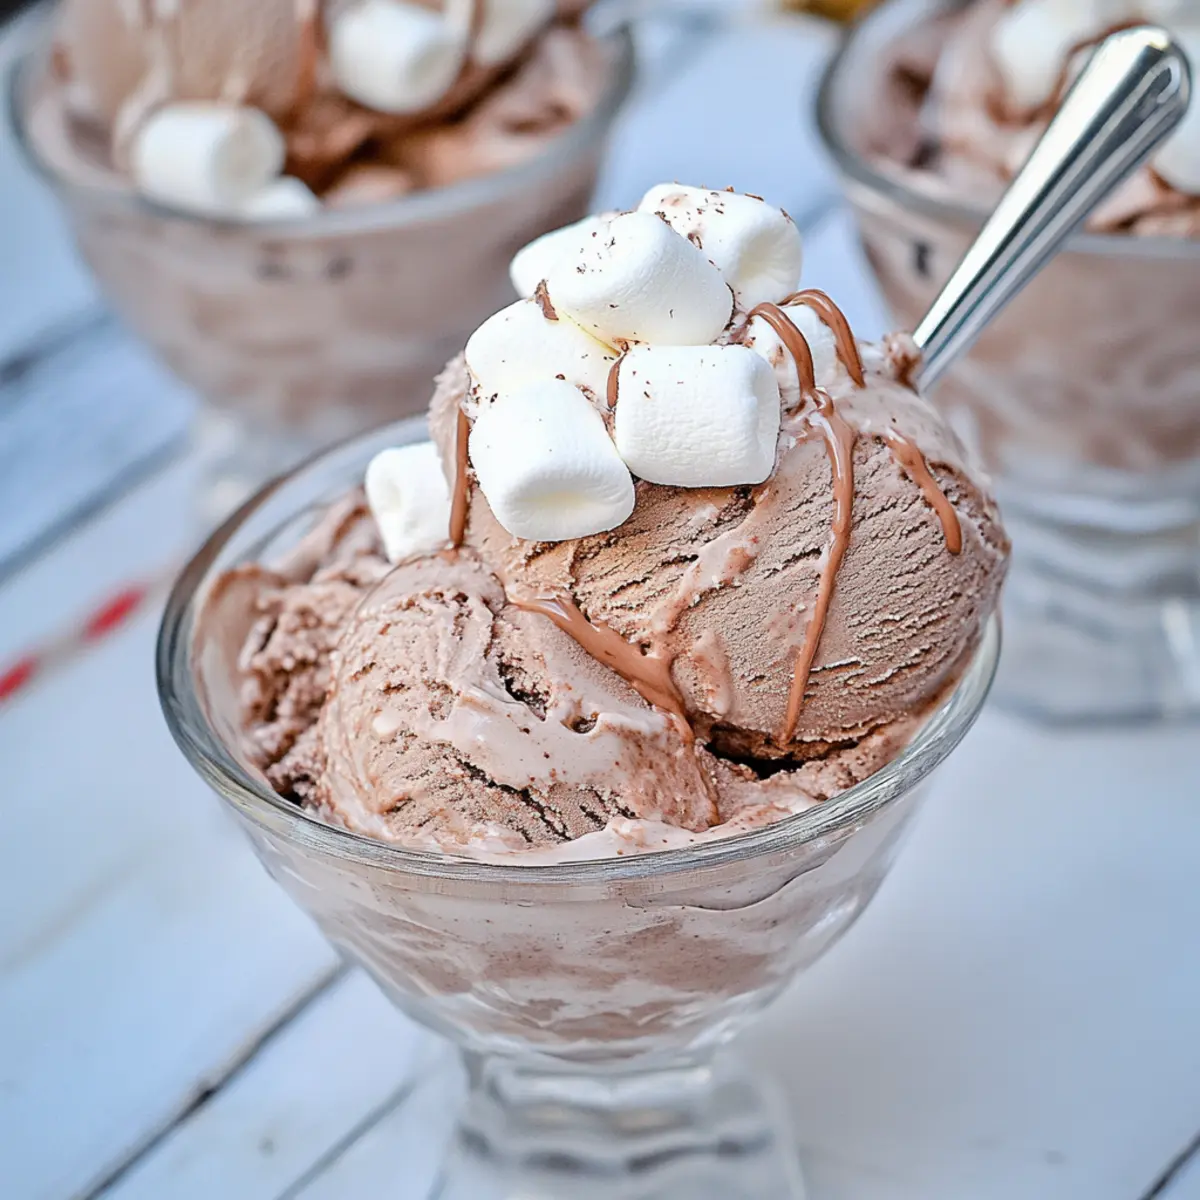
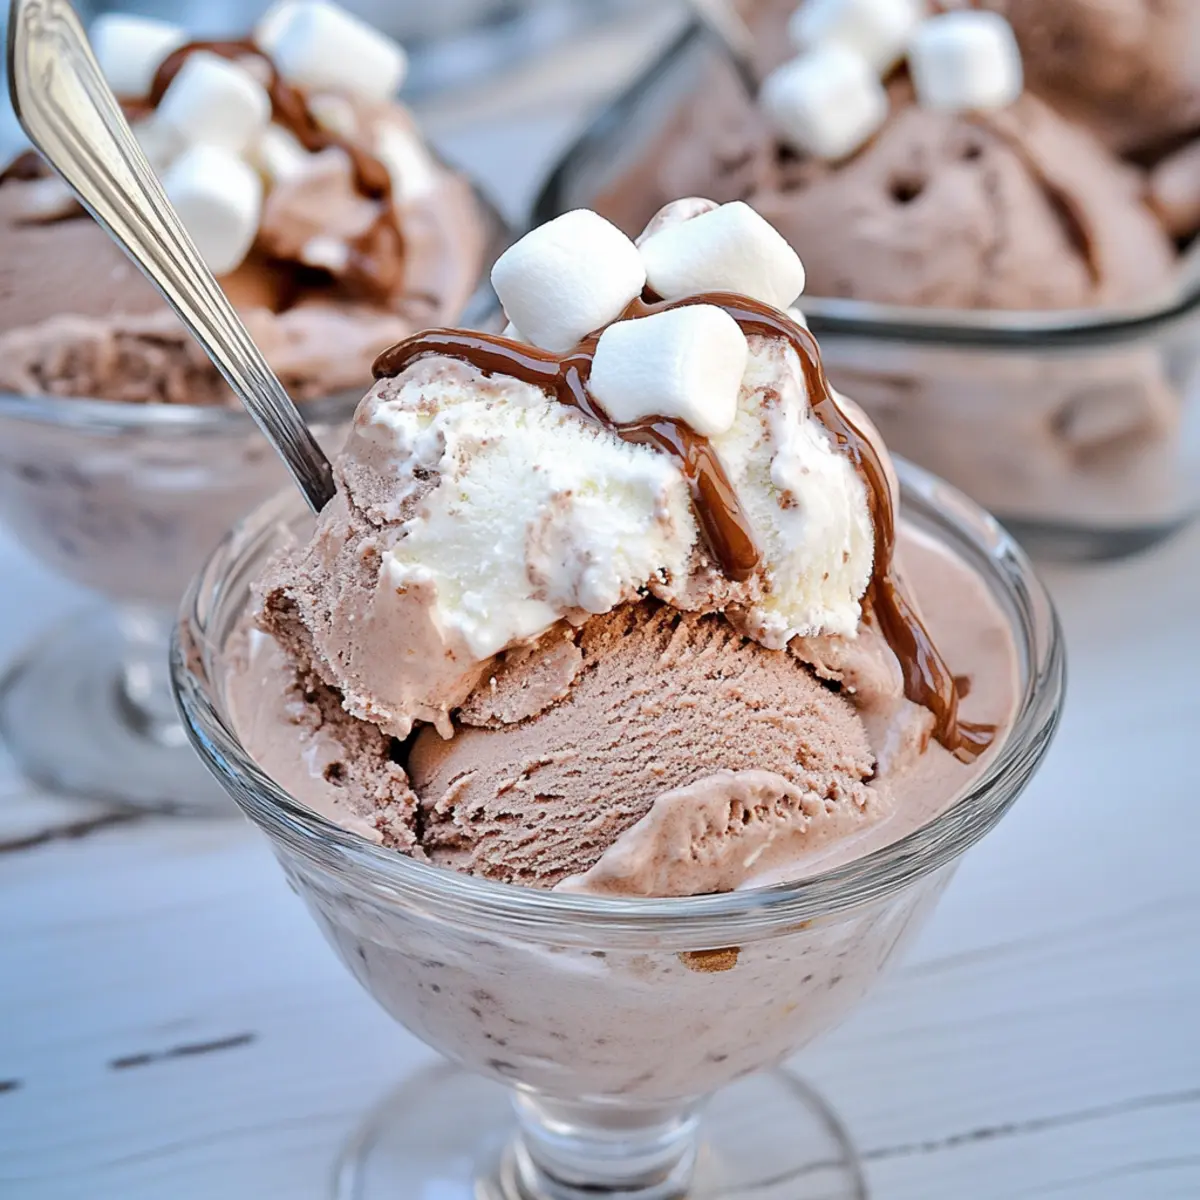
Step 7: Serve and Delight
Scoop the ice cream into your favorite bowls or cones, perhaps adding a drizzle of chocolate syrup or extra marshmallows for a fun twist. Share with family and friends on a hot day or indulge in a quiet moment to savor its rich, chocolatey goodness. Every bite will remind you of cozy winter nights with a warm cup of hot chocolate!
Make Ahead Options
These No Churn Hot Chocolate Ice Cream delights are perfect for meal prep enthusiasts! You can prepare the ice cream mixture up to 24 hours in advance by following the usual steps until you place the mixture in the loaf pan. After smoothing and tapping the pan to remove air bubbles, securely cover it with plastic wrap or a lid to prevent freezer burn. When you’re ready to serve, simply freeze the prepared mixture solid for at least 4-6 hours or until firm. This way, you’ll have a stunning and creamy dessert ready to please your guests, boasting that irresistible chocolatey flavor, all with minimal last-minute effort!
Expert Tips for No Churn Hot Chocolate Ice Cream
Chill Your Tools: Ensure that your bowl and beaters are chilled before whipping the cream for the best texture.
Mind the Mixing: Avoid overmixing when folding in the whipped cream and other ingredients; this helps maintain the airy lightness of your No Churn Hot Chocolate Ice Cream.
Cover Properly: Always cover the mixture with plastic wrap or a tight lid before freezing to prevent freezer burn and preserve its creamy texture.
Let It Rest: Don’t skip the 5-minute softening step before scooping; this allows for effortless serving and enhances the overall experience.
Customize Your Flavor: Feel free to add your favorite mix-ins or variations; experimenting is what makes homemade ice cream fun and unique!
No Churn Hot Chocolate Ice Cream Variations
Feel free to let your creativity shine as you customize this luscious ice cream recipe to suit your taste buds!
- Minty Fresh: Swap the hot cocoa mix for mint chocolate cocoa for a refreshing twist. Add crushed peppermint candies for that extra holiday flair.
- Berry Bliss: Replace mini marshmallows with fresh raspberries or strawberries for a delightful fruity surprise. The tangy sweetness of berries pairs beautifully with chocolate.
- Nutty Delight: Mix in chopped nuts, like pecans or almonds, for added crunch and flavor. The contrast in texture elevates your creamy dessert to a gourmet experience.
- Peanut Butter Swirl: Fold in creamy peanut butter for a decadent blend that’s irresistible. Just a dollop can transform your ice cream into a rich, nutty treat.
- Spicy Kick: Add a pinch of cayenne pepper or cinnamon for an unexpected warmth in your chocolate ice cream. This fiery twist will surely surprise and delight your taste buds!
- Caramel Bliss: Drizzle swirls of caramel sauce throughout the ice cream mixture before freezing. The combination of chocolate and caramel is a classic favorite.
- Chocolate Hazelnut: Swap the hot cocoa mix for chocolate hazelnut spread, like Nutella. This rich flavor will transport you straight to dessert heaven.
- S’mores Style: Fold in crushed graham crackers and chocolate chunks, then top with toasted mini marshmallows after scooping. This variation brings the campfire classic to your freezer!
Each of these variations opens the door to a new flavor experience. Once you’ve perfected your No Churn Hot Chocolate Ice Cream, why not try it alongside my delicious Hot Chocolate Poke for an ultimate dessert spread? You’ll be creating memories—one scoop at a time!
Storage Tips for No Churn Hot Chocolate Ice Cream
Fridge: Keep any leftover ice cream in the fridge for up to 2 days if you can resist finishing it all! However, for best flavor and texture, store it in the freezer.
Freezer: Store the No Churn Hot Chocolate Ice Cream in an airtight container in the freezer for up to 2 weeks. Make sure it’s tightly sealed to prevent freezer burn.
Reheating: If you find it too hard to scoop, let the ice cream sit at room temperature for about 5 minutes to soften before serving. This makes for easier and more enjoyable scooping!
Tip for Long-Term Storage: For longer periods, you can freeze it for up to a month. Just make sure it’s wrapped well to maintain its rich, creamy taste!
What to Serve with No Churn Hot Chocolate Ice Cream
On a sunny day, nothing pairs better with a scoop of this indulgent dessert than delightful companions that amplify its richness.
- Warm Chocolate Cake: The deep chocolate goodness enhances the ice cream’s flavor and creates a sumptuous dessert experience that’s pure decadence.
- Fresh Berries: Juicy strawberries or raspberries bring a refreshing, tart contrast, balancing the sweetness of the ice cream perfectly.
- Crunchy Waffle Cones: These add a delightful crunch and texture, making each bite an enjoyable mix of creamy and crispy feelings.
- Whipped Cream: A dollop of light, airy whipped cream elevates the indulgence, making every scoop even more irresistible.
- Peanut Butter Drizzle: The rich, nutty flavor complements the chocolate, adding a new layer of mouthwatering goodness with each bite.
- Chocolate Syrup: For the ultimate chocolate lover, this addition makes it extra special, creating a lava flow of sweetness that matches the ice cream bliss.
- Frozen Fruit Salad: A colorful mix of frozen tropical fruits adds a cooling touch and a burst of vibrancy to the dessert table.
- Milkshakes: Serve alongside chocolate or vanilla milkshakes for a nostalgic and fun twist, perfect for hot summer days.
With these delicious accompaniments, your No Churn Hot Chocolate Ice Cream will shine even brighter!
No Churn Hot Chocolate Ice Cream Recipe FAQs
How do I know if my heavy whipping cream is fresh?
To ensure your heavy whipping cream is fresh, check the expiration date on the carton and look for any signs of spoilage, such as an off smell or lumps. The cream should be thick and smooth when poured; avoid using if it has dark spots or a sour odor.
What’s the best way to store leftover No Churn Hot Chocolate Ice Cream?
Store your No Churn Hot Chocolate Ice Cream in an airtight container in the freezer for up to 2 weeks for optimal texture and flavor. If you’re saving it for longer, you can keep it for up to a month—just be sure to seal it tightly to prevent freezer burn.
Can I freeze No Churn Hot Chocolate Ice Cream in a different container?
Absolutely! You can freeze the ice cream in any container, such as plastic Tupperware or muffin tins for individual portions. Just remember to cover the container well to keep air out! If using muffin tins, once frozen, pop them out and transfer to a zip-top bag for easy snacking.
What should I do if my ice cream is too hard to scoop?
If your No Churn Hot Chocolate Ice Cream is too hard after freezing, simply let it sit at room temperature for about 5 minutes before scooping. This will soften it just enough for easy serving while maintaining its creamy deliciousness. Always cover it again after serving to preserve the remaining ice cream!
Is this recipe suitable for people with dietary restrictions?
This recipe contains dairy, so it’s not suitable for individuals with lactose intolerance or dairy allergies. If you’re looking for a dairy-free alternative, try substituting coconut cream for the heavy cream and using a dairy-free condensed milk option. Just keep in mind the flavor and texture might differ slightly from the traditional recipe.
Can I use homemade hot cocoa mix in this recipe?
Yes, using homemade hot cocoa mix is a great idea! Just make sure it contains a good balance of cocoa powder and sugar so that it can provide the rich flavor you want in your No Churn Hot Chocolate Ice Cream. Adjust the quantity to your taste—you might want to test it first!
No Churn Hot Chocolate Ice Cream for Ultimate Summer Bliss
Ingredients
Equipment
Method
- Whip the cream until stiff peaks form, about 3 to 5 minutes.
- Combine sweetened condensed milk and hot cocoa mix; fold in whipped cream gradually.
- Fold in mini marshmallows until evenly distributed.
- Transfer mixture to a metal loaf pan and smooth the top.
- Cover tightly and freeze for at least 4 to 6 hours.
- Let sit at room temperature for about 5 minutes before serving.
- Scoop into bowls or cones and enjoy!
Leave a Reply