
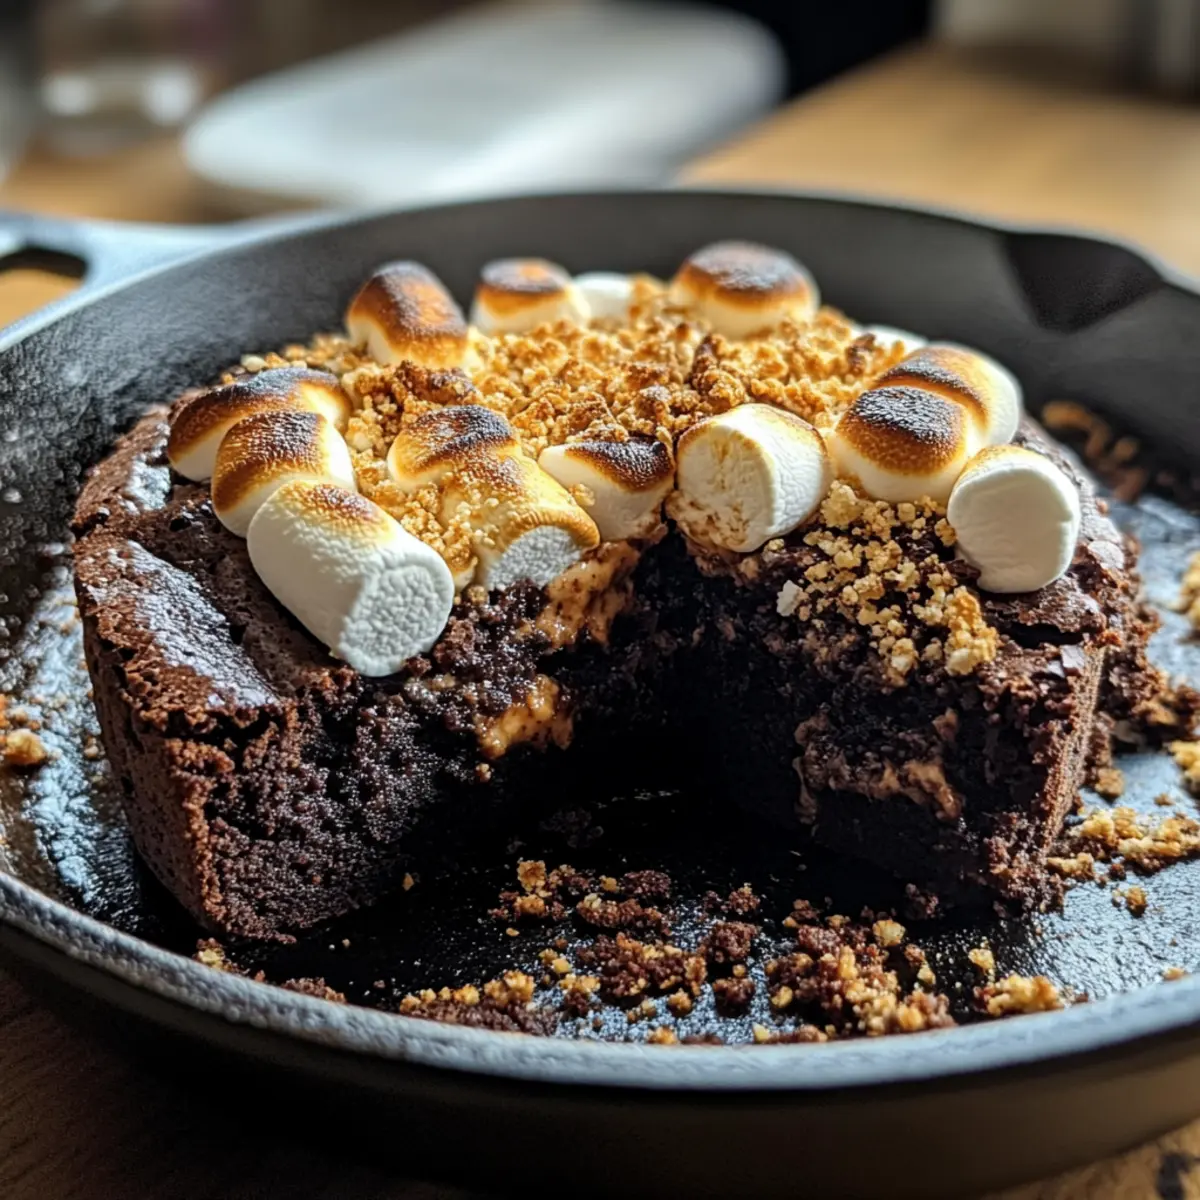
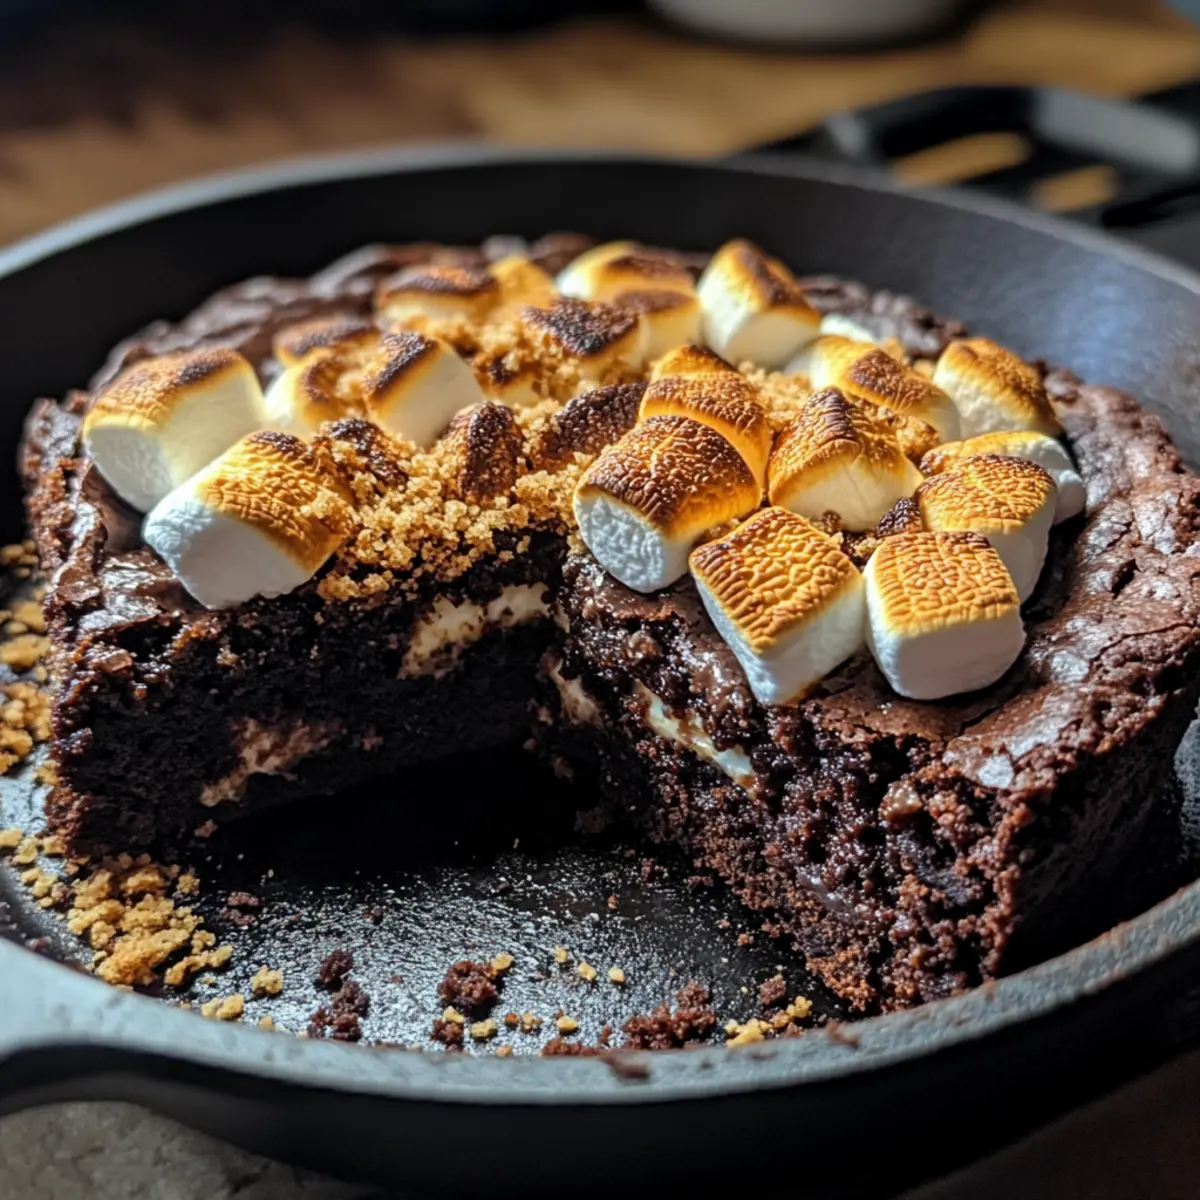
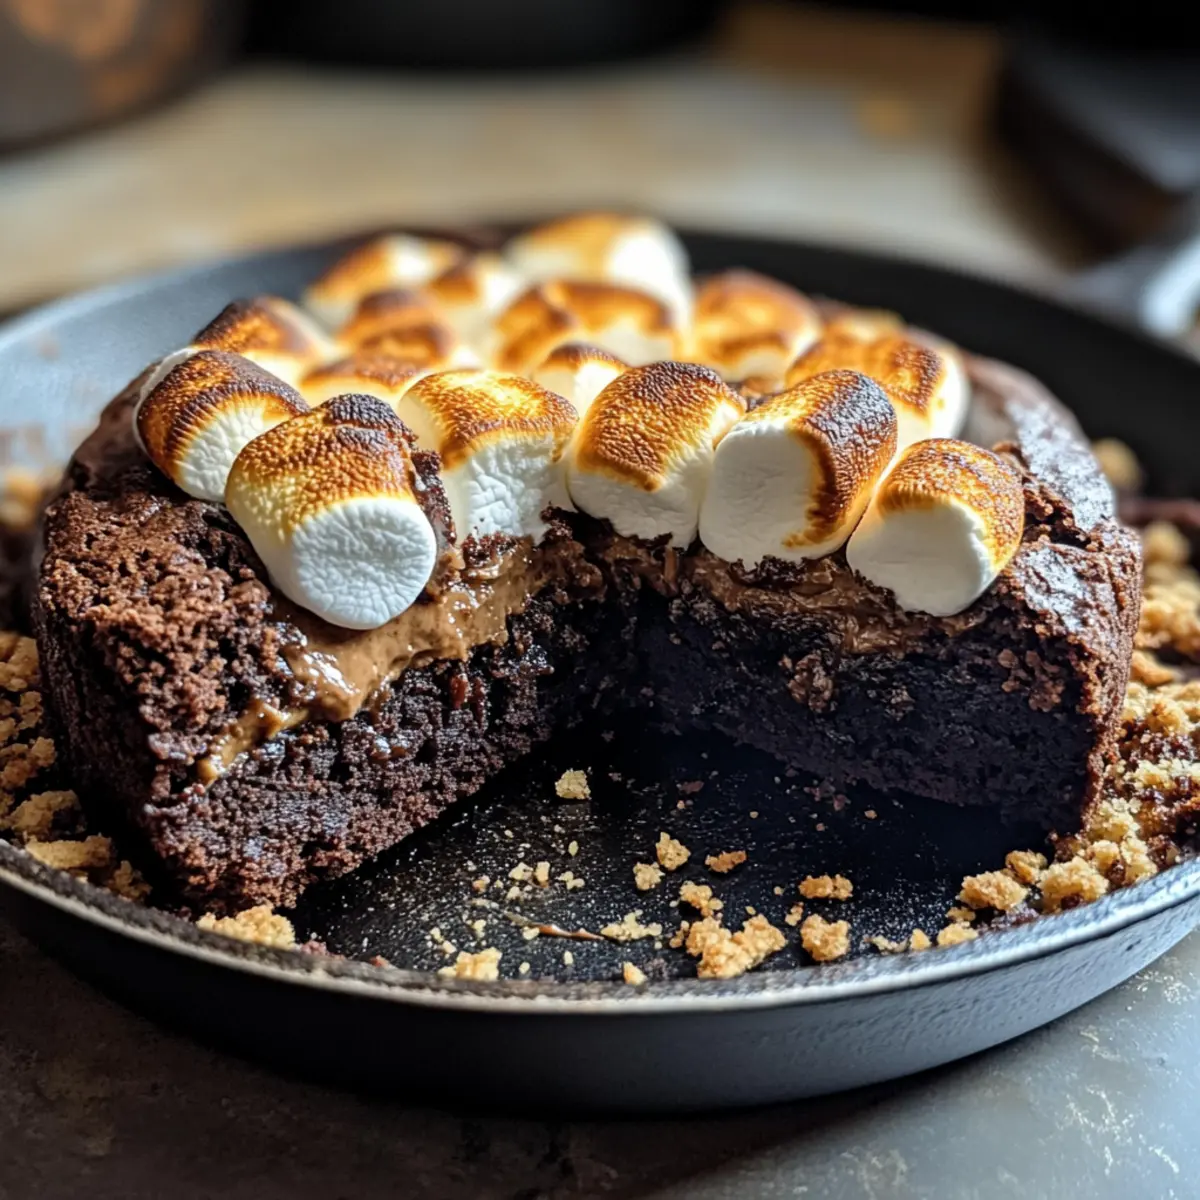
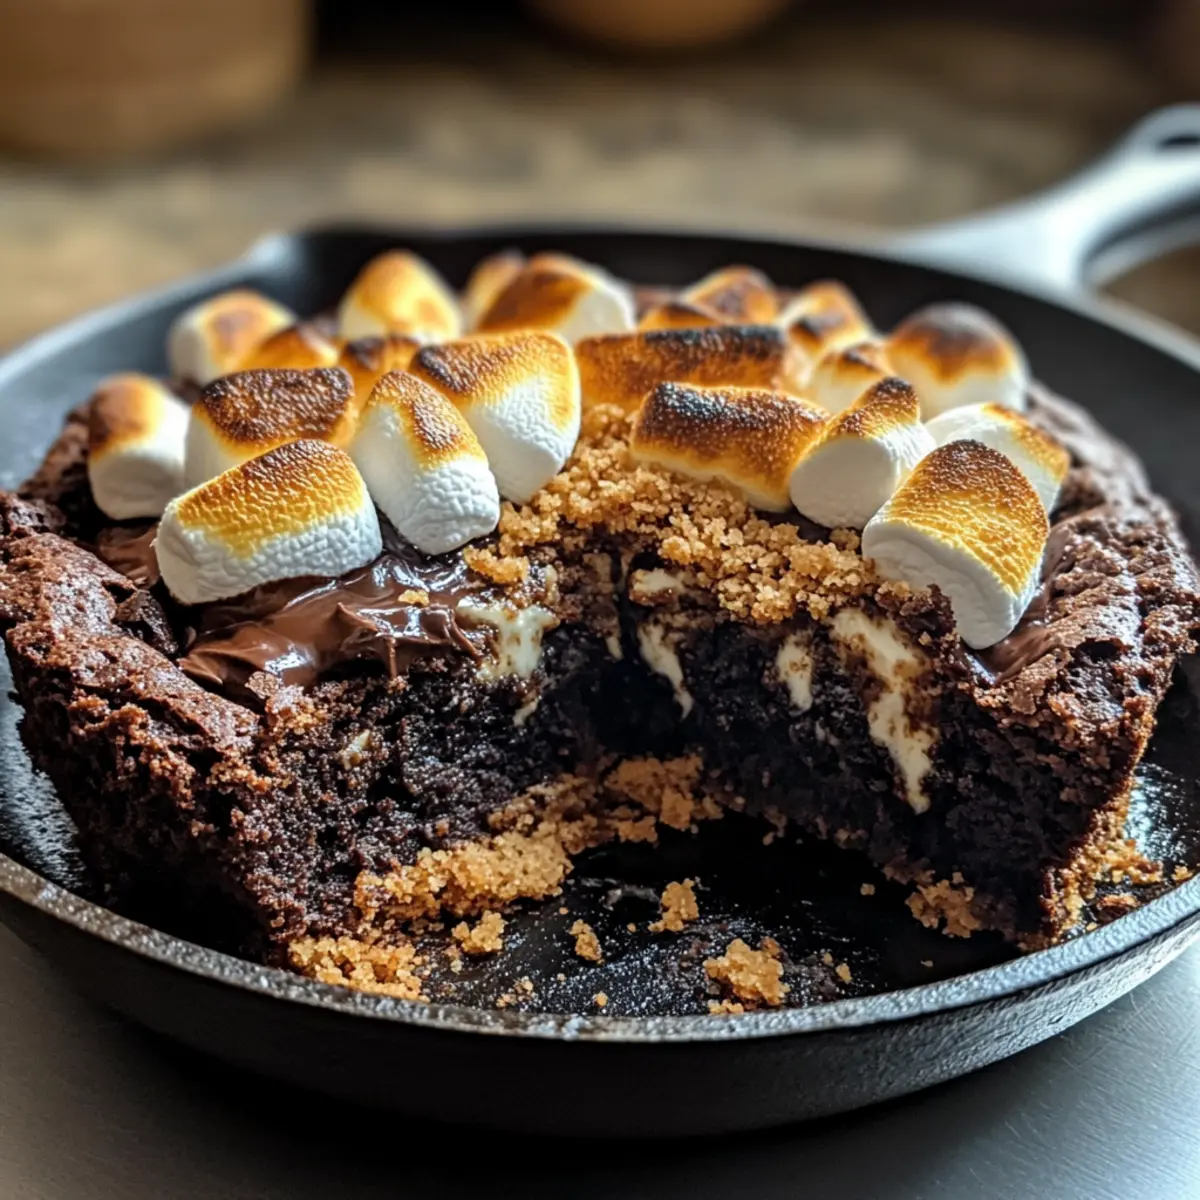
As I pulled the warm, fragrant Skillet S’mores Brownie from the oven, my heart danced with a mix of nostalgia and excitement. This delightful creation brings the essence of campfire s’mores right into your kitchen while offering the fudgy richness of brownies topped with gooey marshmallows and crunchy graham crackers. What I love most about this recipe is that it’s not only a breeze to whip up—requiring just a trusty cast-iron skillet—but also a guaranteed crowd-pleaser that will leave everyone asking for seconds. Plus, with easy variations for gluten-free options, it’s perfect for every gathering. So, are you ready to turn your evening into a sweet celebration? Let’s dive into this delicious adventure together!
Why is this Skillet S’mores Brownie a Must-Try?
Decadent Layers: This Skillet S’mores Brownie boasts five indulgent layers of chocolatey goodness and fluffy marshmallows, offering a blissful twist on a beloved classic.
Effortless Baking: With just your trusty cast-iron skillet, you can whip this up quickly and easily, making it a perfect choice for spontaneous cravings or gatherings.
Gluten-Free Adaptable: You don’t need to compromise on flavor—substituting gluten-free flour keeps this dessert accessible for everyone, ensuring nobody feels left out at your next gathering.
Crowd Favorite: The warm, gooey texture and crispy edges are sure to impress both family and friends, making it a showstopper dessert worthy of any occasion.
Perfectly Nostalgic: Evoking memories of summer nights, this brownie captures the true essence of campfire s’mores, transporting you back to those joyful moments with every bite.
Whether you’re adding a scoop of ice cream or serving it warm, this dessert will leave everyone raving about its deliciousness—just like our Pumpkin Spice Gooey cake or Stuffed Shells Ground for your next meal!
Skillet S’mores Brownie Ingredients
For the Brownie Base
- Flour – Provides structure; substitute with gluten-free flour for a delicious alternative that still holds well.
- Sugar – Adds sweetness and moisture; avoid substitutions for the best texture.
- Cocoa Powder – Imparts rich chocolate flavor; opt for unsweetened cocoa for an intense taste.
- Salt – Enhances the flavors beautifully; use either sea salt or table salt as preferred.
- Baking Powder – Helps the brownies rise slightly for a tender texture.
- Butter (melted) – Adds richness; for a dairy-free version, use dairy-free butter instead.
For the Wet Ingredients
- Eggs – Bind the mixture and add moisture; recommend no substitutes unless using flax eggs for a vegan option.
- Vanilla Extract – Adds depth to the flavor; no substitutes needed for this essential ingredient.
For the Toppings
- Chocolate Chips – Intensifies the chocolate experience and provides delightful texture; dark chocolate chips work great as a substitute for a richer taste.
- Mini Marshmallows – Essential for that gooey s’mores effect; chop large marshmallows if you only have those available.
- Graham Crackers (crushed) – Adds the classic crunch and flavor; no substitutes recommended for that authentic s’mores experience.
This Skillet S’mores Brownie is all set to bring joy to your next dessert occasion!
Step‑by‑Step Instructions for Crave-Worthy Skillet S’mores Brownie with 5 Gooey Layers
Step 1: Preheat the Oven
Begin by preheating your oven to 350°F (175°C). Lightly grease a 10-inch cast-iron skillet with butter or non-stick spray to ensure your Skillet S’mores Brownie releases easily after baking. While the oven heats, gather your ingredients for a smooth baking experience.
Step 2: Mix Dry Ingredients
In a large mixing bowl, whisk together the flour, sugar, cocoa powder, salt, and baking powder until well combined. This mixture is the foundation for your brownie base, so make sure it’s evenly blended to ensure consistent flavor and texture throughout your Skillet S’mores Brownie. Set aside once mixed.
Step 3: Combine Wet Ingredients
In a separate bowl, mix the melted butter, eggs, and vanilla extract until smooth and fully combined. Pour the wet ingredients into the bowl with the dry mixture, and gently fold them together using a spatula. Be careful not to overmix; you want to achieve a perfect, fudgy consistency for your brownie layer.
Step 4: Stir in Chocolate Chips
Once the batter is combined, fold in the chocolate chips for an extra layer of chocolatey goodness. The chocolate chips will melt slightly during baking, enhancing the flavor and texture of your Skillet S’mores Brownie. Ensure they are evenly distributed before moving on to the next step.
Step 5: Bake the Brownie Base
Pour the brownie batter into the prepared skillet, spreading it out evenly with your spatula. Bake in the preheated oven for 20 minutes, allowing the base to set but not overbake. You’ll know it’s ready when the edges start to firm up but the center remains slightly soft to ensure that gooey texture.
Step 6: Add Marshmallows and Graham Crackers
Carefully remove the skillet from the oven and top the warm brownie with a generous layer of mini marshmallows and crushed graham crackers. Press them gently into the brownie to ensure they adhere well. This step transforms your simple brownie into a decadent S’mores masterpiece.
Step 7: Broil Until Golden
Return the skillet to the oven and broil for an additional 5 minutes, or until the marshmallows puff up and turn golden brown. Keep a close eye on them to prevent burning, as broiling can happen quickly. The puffy marshmallows will add a beautiful touch to your Skillet S’mores Brownie.
Step 8: Cool and Serve
Once the marshmallows are perfectly toasted, remove the skillet from the oven and allow it to cool for about 10 minutes. This short cooling period helps set the layers without losing the gooey center. Serve warm, either plain or topped with a scoop of ice cream for an indulgent finishing touch.
Skillet S’mores Brownie Variations
Feel free to get creative and customize this Skillet S’mores Brownie to suit your taste buds and dietary needs!
-
Gluten-Free: Use a gluten-free flour blend to keep everyone included and savoring every bite without worry. Just remember, the texture might differ slightly.
-
Dairy-Free: Swap melted butter with dairy-free butter for a luscious brownie that caters to those avoiding dairy. The rich flavor remains intact!
-
Vegan: For a vegan twist, replace eggs with flax eggs made of ground flaxseed mixed with water. This retains the structure and moisture, creating a delicious brownie.
-
Dark Chocolate Boost: Opt for dark chocolate chips instead of milk chocolate for a deeper, more intense chocolate flavor that elevates the overall taste experience.
-
Nutty Crunch: Add chopped nuts like walnuts or pecans for a delightful crunch that contrasts beautifully with the gooey layers. It adds texture and richness to every bite.
-
Minty Freshness: Incorporate a few drops of peppermint extract into the batter for a refreshing minty flavor that pairs perfectly with the chocolate and marshmallows.
-
Extra Marshmallow Surprise: If you’re a marshmallow lover, consider doubling the amount of mini marshmallows for an indulgent, gooey topping that brings extra sweetness.
-
Spicy Kick: For those seeking a bit of heat, sprinkle a dash of cayenne pepper or chili powder into the batter to give your brownies a surprising kick that complements the sweetness beautifully.
Whether you’re in the mood for a classic flavor or something surprisingly unique, these variations will undoubtedly elevate your Skillet S’mores Brownie experience! And if you love this dessert, check out our delicious Grilled Chicken Pasta salad for a satisfying meal after your sweet indulgence!
What to Serve with Skillet S’mores Brownie
Indulging in a slice of warm, gooey Skillet S’mores Brownie is a moment meant to be savored, especially when paired with delightful accompaniments that elevate the experience.
-
Vanilla Ice Cream: The classic pairing that adds a creamy contrast to the rich brownie, balancing sweetness with its coolness.
-
Whipped Cream: Light and airy, whipped cream complements the dense texture, offering a delightful finish to every bite.
-
Fresh Berries: Juicy strawberries or raspberries introduce a burst of freshness, cutting through the brownie’s richness and adding a pop of color.
-
Chocolate Sauce: Drizzle warm chocolate sauce over the top for a double dose of chocolate—a true treat for chocolate lovers!
-
Espresso or Coffee: The robust flavor of coffee perfectly enhances chocolate desserts, providing balance and depth to the indulgence.
-
Mint Tea: Fresh, herbal notes from mint tea create a refreshing contrast that cleanses the palate after each decadent bite.
-
Graham Cracker Crumble: Adding a bit of crunch, crushed graham crackers sprinkled atop the brownie mimic the s’mores experience and add texture.
-
Caramel Sauce: Rich, buttery caramel drizzles offer a luxurious touch that complements the s’mores flavors beautifully, making it extra special.
Elevate your dessert experience with these satisfying combinations, turning your Skillet S’mores Brownie into a homemade masterpiece worth sharing!
Make Ahead Options
These Skillet S’mores Brownies are a fantastic option for busy home cooks looking to save time! You can prepare the brownie base up to 24 hours in advance. Simply bake the base following the instructions, allow it to cool, and then cover it tightly with plastic wrap or foil before refrigerating. If you want to add the marshmallows and graham crackers later, do so just before serving, as this will ensure they stay puffy and delicious. When ready to finish, reheat the brownie in the oven at 350°F (175°C) for about 10 minutes, then add your toppings and broil for 5 minutes until the marshmallows are golden. This way, your Skillet S’mores Brownies will be just as delectable and warm as if they had just come out of the oven!
How to Store and Freeze Skillet S’mores Brownie
Room Temperature: Store the brownie in the skillet covered with foil or transfer slices to an airtight container for up to 2 days. This keeps them fresh and ready to nibble!
Fridge: For longer preservation, refrigerate the brownies in an airtight container for up to 5 days. They’ll stay delicious, though the texture might change slightly.
Freezer: If you want to extend your indulgence, freeze individual slices wrapped in plastic wrap and then in aluminum foil for up to 2 months. Thaw in the fridge before enjoying.
Reheating: To revive the fudgy goodness, reheat in a preheated oven at 350°F (175°C) for about 10 minutes. This will help restore the gooey charm of your Skillet S’mores Brownie!
Expert Tips for the Best Skillet S’mores Brownie
-
Ingredient Prep: Measure ingredients accurately before starting. This ensures smooth preparation and helps avoid common mistakes like dry or crumbly brownies.
-
Watch the Marshmallows: Keep an eye on marshmallows while broiling to prevent burning. If they brown too quickly, tent the skillet with foil to shield them.
-
Cooling Time: Allow the Skillet S’mores Brownie to cool for at least 10 minutes before serving. This helps firm up the gooey layers and makes slicing easier.
-
Serve Warm: Enjoy your brownies warm for the ultimate indulgent experience. Consider pairing with ice cream or whipped cream for an extra treat.
-
Storage Tips: If you have leftovers, cover the skillet with foil or transfer slices to an airtight container. They can last up to 2 days at room temperature or 5 days in the fridge.
Skillet S’mores Brownie Recipe FAQs
What type of flour should I use for the Skillet S’mores Brownie?
For the Skillet S’mores Brownie, all-purpose flour is ideal as it provides the right structure. If you’re looking for a gluten-free option, you can substitute it with a gluten-free flour blend, though the texture may be a little different.
How should I store the leftovers?
To keep your Skillet S’mores Brownies fresh, cover the skillet tightly with foil or transfer any leftover slices to an airtight container. They can stay at room temperature for up to 2 days or be refrigerated for up to 5 days. Just make sure they are sealed well to maintain their gooeyness!
Can I freeze the Skillet S’mores Brownie?
Absolutely! For freezing, wrap individual slices tightly in plastic wrap followed by aluminum foil to protect them from freezer burn. They can be stored this way for up to 2 months. When you’re ready to enjoy, thaw them in the fridge and then reheat in a preheated oven at 350°F (175°C) for about 10 minutes to restore their delightful texture.
What if my marshmallows burn while baking?
If you’re concerned about the marshmallows burning under the broiler, simply keep an eye on them during the last few minutes of baking. If they start browning too quickly, you can tent the skillet with aluminum foil to shield them while still allowing your Skillet S’mores Brownie to bake perfectly underneath.
Are there any dietary considerations I should keep in mind?
Yes! If you’re making this for someone with dietary restrictions, you can use dairy-free butter for a dairy-free version or substitute flax eggs for vegan options. Make sure to double-check any store-bought ingredients, like graham crackers and chocolate chips, as some may contain allergens!
How can I ensure my brownies turn out perfectly fudgy?
For the ultimate fudgy texture, be careful not to overmix your batter once you combine the wet and dry ingredients. Gently fold them together until just combined, and remember that baking time is crucial—take them out when the edges are firm but the center is still slightly soft! Following these tips can guarantee a deliciously moist Skillet S’mores Brownie.
S’mores Brownie with 5 Gooey Layers for Ultimate Indulgence
Ingredients
Equipment
Method
- Preheat your oven to 350°F (175°C) and lightly grease a 10-inch cast-iron skillet.
- In a large mixing bowl, whisk together the flour, sugar, cocoa powder, salt, and baking powder until well combined.
- In a separate bowl, mix the melted butter, eggs, and vanilla extract until smooth, then combine with the dry ingredients and fold them together.
- Fold in chocolate chips to the batter, then pour into the prepared skillet and spread evenly.
- Bake the brownie base for 20 minutes until the edges firm up and the center remains slightly soft.
- Top the warm brownie with mini marshmallows and crushed graham crackers, pressing gently into the brownie.
- Broil for an additional 5 minutes until the marshmallows puff up and turn golden brown.
- Let cool for about 10 minutes before serving warm, optionally with ice cream.
Leave a Reply