
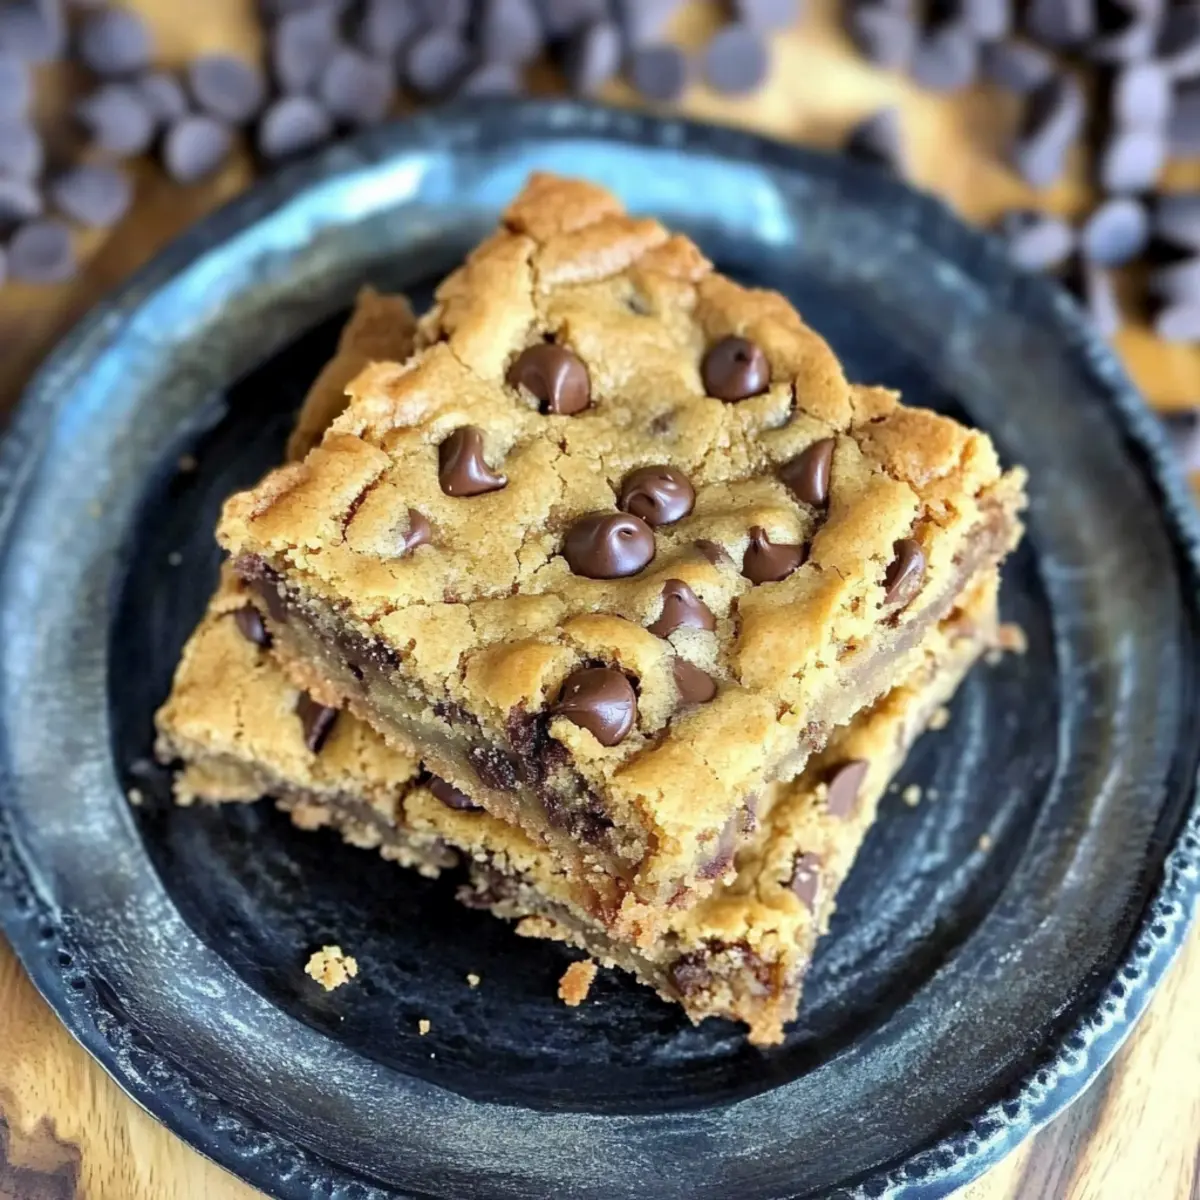
As I rummaged through my pantry, a hidden treasure emerged: a half bag of chocolate chips that surely whispered sweet promises. This unexpected find inspired me to whip up a batch of Perfect Chocolate Chip Cookie Bars—comforting, soft, and irresistibly chewy bars that are always a crowd-pleaser. Not only are they easy to make, but they also transform a simple gathering into a memorable celebration. Just grab a sheet pan—whether you prefer the classic 9×13 or the spacious sheet size—and you’re on your way to baking bliss! You’ll find that with minimal effort, these bars deliver maximum delight, perfect for satisfying your sweet cravings or sharing with friends. Curious about how to whip up this delectable dessert? Let’s dive into the recipe!
Why Are These Cookie Bars So Perfect?
Irresistible Chocolate Flavor: Each bite is loaded with rich, melty chocolate chips that create a delightful flavor explosion.
Ultra-Chewy Texture: These cookie bars are incredibly soft and chewy, reminiscent of fresh cookies, but in a shareable form.
Super Easy to Make: With a simple mixing method and straightforward ingredients, baking becomes a breeze.
Versatile Options: Adapt the recipe for gluten-free or add your favorite mix-ins like nuts or dried fruit for a personal touch.
Crowd-Pleasing Goodness: Whether it’s a party or a family movie night, these bars are guaranteed to satisfy everyone’s sweet tooth—a surefire hit alongside treats like Soft Pumpkin Cookies with Cinnamon Frosting or Hot Chocolate Poke Cake!
Chocolate Chip Cookie Bars Ingredients
For the Cookie Dough
- All-Purpose Flour – Provides structure; substituting whole wheat flour will alter texture.
- Baking Soda – A leavening agent essential for helping cookie bars rise; ensure it’s fresh for best results.
- Salt – Enhances the overall flavor of the cookie bars; don’t omit, as it balances the sweetness.
- Unsalted Butter – Adds richness and moisture; use room temperature for easy mixing.
- Light Brown Sugar – Contributes sweetness and moisture, crucial for those chewy cookie bars; can substitute with dark brown sugar for a richer flavor.
- Granulated Sugar (Zulka Sugar) – Adds sweetness and supports texture; feel free to use any granulated sugar.
- Large Eggs – Binds ingredients and adds moisture; best if at room temperature for even mixing.
- Vanilla Extract – Brings depth of flavor; opt for pure vanilla extract to enhance taste.
- Ghirardelli Semisweet Chocolate Chips – The key ingredient, adding richness; can substitute with milk or dark chocolate chips if preferred.
- Ghirardelli Mini Chocolate Chips – Provides extra bursts of chocolatey goodness; optional, but delightful for added texture.
Optional Variations
- Nuts (e.g., walnuts or pecans) – Adds crunch and flavor; use your favorite kind or mix in a variety.
- Dried Fruit (e.g., cranberries or raisins) – For a chewy texture and tangy flavor; consider pairing with chocolate for a sweet-tart combo.
- Gluten-Free Flour – For a gluten-free version; keep an eye on consistency as it will differ from standard flour.
Step‑by‑Step Instructions for Perfect Chocolate Chip Cookie Bars
Step 1: Preheat and Prepare
Begin by preheating your oven to 350°F (175°C). While the oven warms up, grab a 13×18 sheet pan and line it with parchment paper. You can also lightly coat the paper with non-stick spray to ensure the cookie bars slide out easily once baked. This preparation is crucial for achieving that delightful golden-brown exterior.
Step 2: Cream the Butter and Sugars
In a large mixing bowl, beat together room temperature unsalted butter, light brown sugar, and granulated sugar using an electric mixer on medium speed. Continue to mix for about 2 minutes until the mixture is smooth and creamy. This step creates a fluffy base that adds richness to your Perfect Chocolate Chip Cookie Bars.
Step 3: Mix in Eggs and Vanilla
Now it’s time to incorporate the wet ingredients! Add two large eggs and a splash of pure vanilla extract to the bowl. Mix on low speed until everything is just combined, taking care not to overmix. You want to keep that airiness and flavor in the dough.
Step 4: Combine the Dry Ingredients
In a separate bowl, sift together the all-purpose flour, baking soda, and salt. Gradually add this dry mix to your wet ingredients, stirring gently with a wooden spoon until just incorporated. Be cautious not to overmix, as that can lead to dense bars instead of the soft, chewy perfection you’re aiming for with your chocolate chip cookie bars.
Step 5: Fold in the Chocolate Chips
With the dough nearly complete, fold in the Ghirardelli semisweet chocolate chips using the wooden spoon, ensuring they are evenly distributed throughout the dough. If you’re using mini chocolate chips, you can add them in now for an extra chocolatey bite. This step makes your cookie bars irresistibly rich and packed with chocolate flavor.
Step 6: Spread the Dough in the Pan
Transfer the thick cookie dough into your prepared sheet pan, using either your fingers or a non-stick spatula to spread it evenly across the base. Press it down gently to create a uniform layer. This ensures that every bite of your Perfect Chocolate Chip Cookie Bars has that perfect chewy texture.
Step 7: Add Toppings and Bake
Sprinkle extra mini chocolate chips on top to enhance the visual appeal and chocolate flavor. Place the sheet pan in the preheated oven and bake for 20 to 25 minutes. Keep an eye on them, and they are done when they turn golden brown around the edges and the center is set but slightly soft.
Step 8: Cool and Slice
Once baked, remove the sheet pan from the oven and let the cookie bars cool in the pan on a wire rack. Allow them to cool completely before slicing them into bars. This cooling period is essential as it helps set their structure and makes them easier to cut into those delicious, shareable treats you’ve been dreaming about.
Expert Tips for Chocolate Chip Cookie Bars
- Avoid Overmixing: Mixing too much can lead to tough cookie bars. Stir until just combined for that melt-in-your-mouth texture.
- Check Egg Temperature: Room temperature eggs help create a smoother dough and incorporate better with other ingredients, ensuring even baking.
- Pan Size Matters: Using a different pan size can affect baking time. If using a 9×13 pan, adjust the baking time accordingly for perfect chocolate chip cookie bars.
- Cool Completely: Allow the cookie bars to cool completely before slicing; this will ensure cleaner cuts and the right texture.
- Experiment with Mix-Ins: Consider adding nuts or dried fruits for added flavor and texture, but ensure not to overload the dough, which can affect baking.
Make Ahead Options
These Perfect Chocolate Chip Cookie Bars are an excellent choice for meal prep! You can prepare the dough up to 24 hours in advance by mixing all the ingredients up to the point of spreading it into the pan, then covering it tightly and refrigerating. To maintain the bars’ chewy texture, ensure the dough is well-wrapped to prevent moisture loss. When you’re ready to bake, simply spread the dough in your prepared pan, sprinkle the mini chocolate chips on top, and bake as directed. Optional toppings like extra chocolate chips can also be prepped ahead; just add them right before placing the pan in the oven for warm, gooey perfection!
Chocolate Chip Cookie Bars Variations
Feel free to put your personal spin on these delightful cookie bars to make them truly your own!
- Gluten-Free: Substitute all-purpose flour with a gluten-free flour blend and monitor the consistency for perfect texture.
- Nutty Delight: Add chopped walnuts or pecans for a crunchy contrast to the chewy bars. The nutty flavor will complement the chocolate beautifully.
- Fruity Twist: Incorporate dried cranberries or cherries for a tangy-sweet flavor. They add a nice chewiness alongside the rich chocolate.
- Spiced Up: Add a pinch of cinnamon or a dash of nutmeg for a warm, aromatic touch. It elevates the flavor profile and creates a lovely scent while baking.
- Chocolate Lover’s Dream: Swap out semisweet chocolate chips for dark chocolate or a mix of both for double the indulgence. You won’t regret this chocolatey upgrade!
- Healthier Option: Use coconut oil instead of butter for a lighter version that maintains moisture and brings a hint of tropical flavor.
- Caramel Drizzle: After baking, drizzle some caramel sauce over the bars for an extra layer of sweetness and gooeyness. It’s simple yet luxurious!
- Banana Boost: For a fruity base, consider adding mashed ripe bananas to the dough. They lend natural sweetness and a moist texture similar to brownies.
These variations can turn your chocolate chip cookie bars into unique treats that cater to your cravings or dietary needs. If you’re in the mood for more delicious treats, check out my Strawberry Crunch Cookies or the decadent Decadent Chocolate Strawberry for more baking inspiration!
How to Store and Freeze Chocolate Chip Cookie Bars
Room Temperature: Keep the cookie bars in an airtight container at room temperature for up to 1 week; they stay deliciously chewy and ready to enjoy.
Fridge: If you prefer a colder treat, store them in the fridge for up to 2 weeks; just make sure they’re well-covered to avoid absorbing any fridge odors.
Freezer: For long-term storage, freeze the cookie bars in a tightly wrapped container or plastic wrap for up to 3 months; thaw in the fridge or at room temperature before serving.
Reheating: To enjoy warm, pop a cookie bar in the microwave for about 10-15 seconds; enjoy that melty chocolate goodness!
What to Serve with Perfect Chocolate Chip Cookie Bars?
Looking to elevate your cookie bar experience into a delightful dessert feast?
- Vanilla Ice Cream: A scoop of vanilla ice cream creates a creamy contrast to the soft, chewy cookie bars, making every bite heavenly.
- Salted Caramel Sauce: Drizzle warm salted caramel over the bars for a decadent touch—a perfect blend of sweet and salty that enhances your dessert.
- Fresh Berries: Bright and tart berries, like raspberries or strawberries, provide a refreshing contrast that adds a burst of color and flavor to your plate.
- Milk or Hot Chocolate: Enjoy a glass of cold milk or a warm mug of hot chocolate alongside these bars to amplify the chocolatey indulgence.
- Chocolate Ganache: For the true chocolate lovers, an extra layer of chocolate ganache poured over the bars elevates them to new decadent heights. This rich topping transforms them into an unforgettable dessert.
- Whipped Cream: Light, fluffy whipped cream on the side lends a silky texture that beautifully complements the thick chewiness of the bars.
- Peanut Butter Swirls: If you adore peanut butter, swirl in some creamy peanut butter on top before baking for a rich, nutty flavor that pairs beautifully with chocolate.
- Coffee: A hot cup of coffee creates a warm and inviting pairing, enhancing the chocolate flavors while adding a delightful depth to your dessert experience.
- Brownie Sundae: Turn your cookie bars into a brownie sundae by layering them with brownies, ice cream, and fudge sauce—perfect for special occasions!
Perfect Chocolate Chip Cookie Bars Recipe FAQs
How do I know if my chocolate chips are fresh?
Absolutely! Look for any signs of discoloration or a chalky appearance. If they smell off or have clumped together, it’s best to toss them. Fresh chocolate chips will have a smooth texture and a pleasant aroma.
What’s the best way to store leftover cookie bars?
For optimal freshness, place your cookie bars in an airtight container at room temperature for up to 1 week. If you want to extend their shelf life, store them in the refrigerator for up to 2 weeks. Be sure to keep them well-covered to prevent them from absorbing other fridge odors.
Can I freeze these chocolate chip cookie bars? If so, how?
Absolutely! To freeze your cookie bars, wrap them tightly in plastic wrap or place them in a resealable freezer bag for up to 3 months. For best results, cut them into individual bars before freezing. Thaw them overnight in the fridge or at room temperature before enjoying!
What should I do if my cookie bars turn out too dense?
Very good question! If your bars come out dense, it might be due to overmixing the dough or adding too much flour. To avoid this, carefully measure your flour using the spoon-and-aerate method: spoon flour into your measuring cup and level it off with a knife. Always mix just until combined.
Can I make these cookie bars gluten-free?
Yes, you can! Substitute all-purpose flour with a good-quality gluten-free flour blend. Keep an eye on the dough’s consistency; it might require slight adjustments in liquid. It’s a fun way to enjoy the same delicious flavors without the gluten!
Are these cookie bars safe for pets?
No, please keep these cookie bars away from pets! They contain chocolate and sugar, both of which can be harmful to animals. If you’re looking for dog-friendly treats, consider making special recipes designed just for them.
Irresistible Chocolate Chip Cookie Bars That Melt in Your Mouth
Ingredients
Equipment
Method
- Preheat your oven to 350°F (175°C) and prepare a 13x18 sheet pan with parchment paper.
- In a large mixing bowl, beat together unsalted butter, light brown sugar, and granulated sugar for about 2 minutes until smooth.
- Add large eggs and vanilla extract, mixing on low speed until just combined.
- Sift together flour, baking soda, and salt in a separate bowl; gradually add to wet ingredients, stirring gently.
- Fold in Ghirardelli semisweet chocolate chips and mini chocolate chips if using.
- Spread the dough evenly in the prepared sheet pan, pressing it down gently.
- Sprinkle extra mini chocolate chips on top and bake for 20 to 25 minutes until golden brown.
- Allow to cool in the pan before slicing into bars.
Leave a Reply