
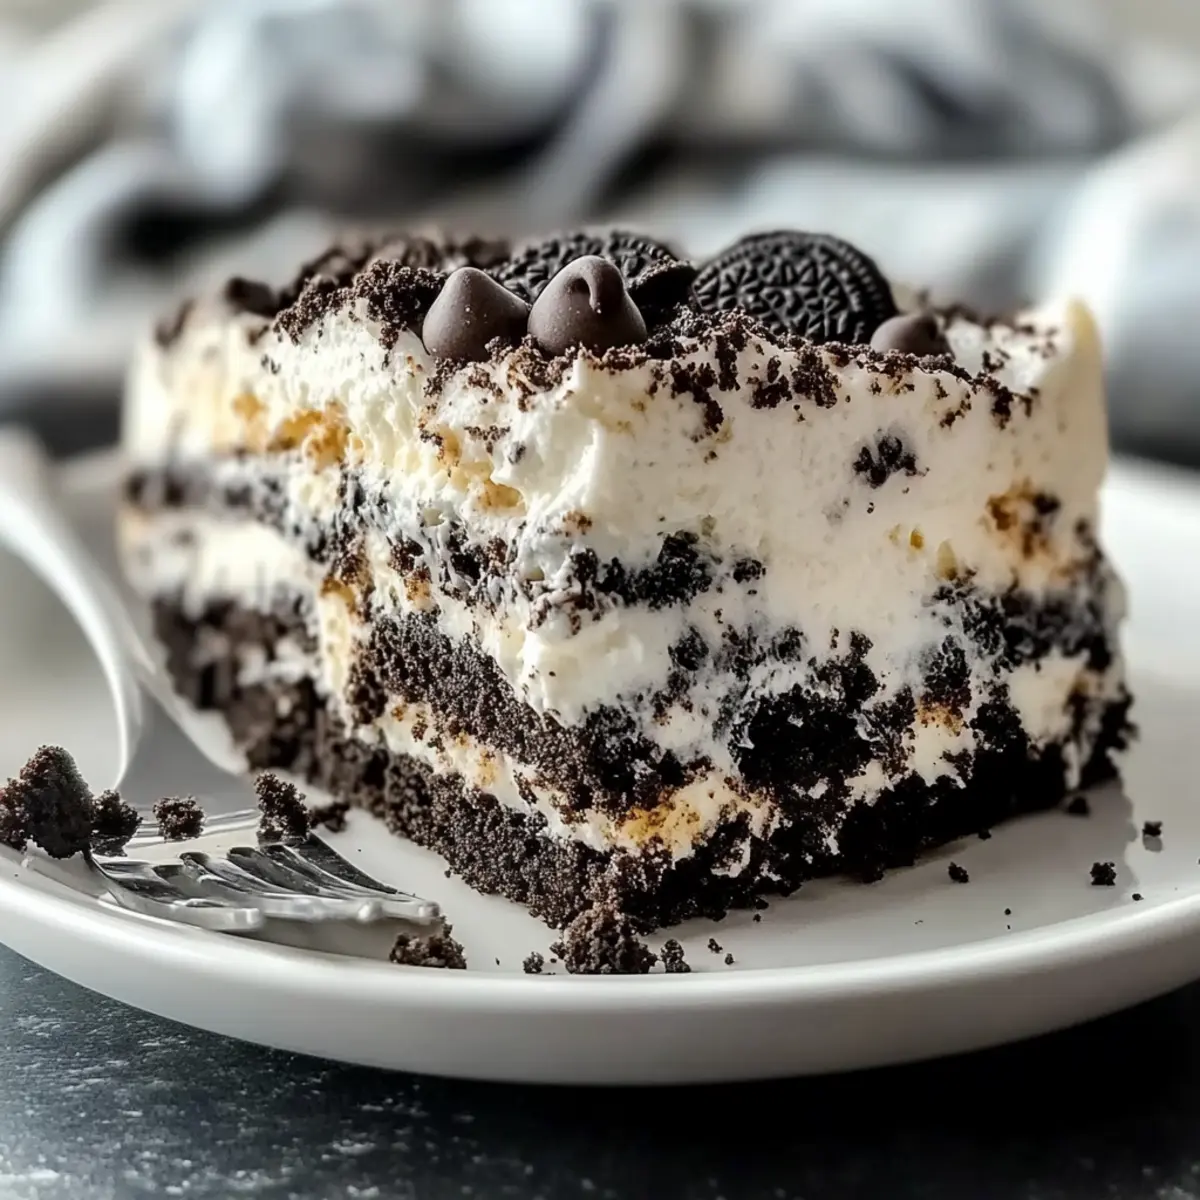
“Did you hear about that new dessert everyone’s raving about?” It seems like chocolate lovers all around are discovering the magic of the Oreo Dump Cake! This delightful treat combines the rich, chocolatey goodness of cake with the irresistible crunch of Oreos, making it the perfect five-ingredient dessert that fits seamlessly into even the busiest of lives. Whether it’s a last-minute gathering or a cozy weekend treat, this recipe not only offers quick prep but is also a guaranteed crowd-pleaser. Imagine serving it warm and decadent, topped with a scoop of vanilla ice cream or a dollop of whipped cream for an extra festive touch. Aren’t you curious to whip up this delightful dish and impress your friends and family? Let’s dive in!
Why is Oreo Dump Cake a Must-Try?
Simplicity: With just five ingredients, this Oreo Dump Cake makes baking feel effortless.
Decadent Flavor: The rich chocolate pairs beautifully with crunchy Oreos, delivering an indulgent treat that’s hard to resist.
Quick Preparation: Perfect for hectic days, this recipe comes together in a flash—ideal for unexpected guests.
Crowd-Pleaser: Kids and adults alike can’t get enough of this delightful dessert—it’s guaranteed to impress!
Versatile: Mix it up by adding fruits or nuts, or pair it with vanilla ice cream for a mouthwatering finish. Try serving it alongside your favorite recipes like Jack Lantern Pancakes for a festive spread!
Oreo Dump Cake Ingredients
For the Base
- Oreo Cookies – These create the delicious, crunchy foundation; feel free to use gluten-free Oreos for dietary needs.
- Instant Chocolate Pudding Mix – This adds creaminess and intensifies the chocolate flavor; choose sugar-free if you’re looking for a lighter option.
- Cold Milk – Essential for hydrating the pudding mix; any type works, including almond or oat milk for a dairy-free alternative.
For the Cake Mix Layer
- Chocolate Cake Mix – This provides the main structure of your dessert; substitute with a gluten-free mix if necessary.
- Unsalted Butter – Adds richness and binds the cake together; can be replaced with coconut oil for a dairy-free twist.
For Topping
- Whipped Topping (Cool Whip) – This creamy topping is perfect for finishing off your dessert; homemade whipped cream is a lovely alternative.
- Mini Chocolate Chips (Optional) – Sprinkle these on for an extra chocolatey layer; feel free to skip them if you’re looking for simplicity.
- Extra Oreo Cookies (Optional) – Great for garnishing and a burst of Oreo goodness; use them crumbled on top for added texture.
Step‑by‑Step Instructions for Oreo Dump Cake
Step 1: Preheat and Prepare
Begin by preheating your oven to 350°F (175°C). While the oven is heating up, lightly grease a 9×13-inch baking dish with cooking spray or butter to ensure easy removal of the finished cake. This step is crucial for achieving a perfect Oreo Dump Cake that won’t stick to the pan.
Step 2: Layer the Oreos
Once your dish is prepped, take roughly chopped Oreo cookies and spread them evenly across the bottom of the baking dish. This layer serves as the foundation of your cake, providing a delightful crunch. Make sure to cover the base generously for maximum flavor.
Step 3: Mix the Pudding
In a medium bowl, whisk together the instant chocolate pudding mix and cold milk until the mixture thickens, which should take about 2 minutes. The pudding will create a creamy layer that complements the crunchy Oreos. Pour this thickened pudding evenly over the layer of Oreos, ensuring complete coverage.
Step 4: Add the Cake Mix
Next, sprinkle the dry chocolate cake mix evenly over the pudding layer, creating a nice, even coat. This cake mix will form the main structure of your Oreo Dump Cake. Drizzle melted unsalted butter evenly over the top, allowing it to soak into the cake mix and enhance richness.
Step 5: Bake to Perfection
Place the baking dish in the preheated oven and bake for 35 minutes, or until the top is set and has a slightly crispy appearance. You’ll know it’s done when the edges start to pull away from the pan and a toothpick inserted in the center comes out mostly clean.
Step 6: Cool and Serve
After baking, allow the Oreo Dump Cake to cool for about 10 minutes before serving. This helps in setting the layers and prevents burns. Once cooled slightly, top with whipped topping and sprinkle mini chocolate chips and extra Oreo pieces if desired, serving it warm or at room temperature for the ultimate treat.
Storage Tips for Oreo Dump Cake
-
Fridge: Keep any leftover Oreo Dump Cake in an airtight container in the refrigerator for up to 4 days. This helps maintain its texture and flavor.
-
Freezer: For longer storage, freeze individual portions wrapped tightly in plastic wrap or aluminum foil, then place in a freezer-safe bag. Enjoy within 2 months for optimal taste.
-
Reheating: Reheat slices in the microwave for about 20-30 seconds to revive that warm, gooey texture, or pop it in the oven at 350°F (175°C) for 10-15 minutes.
-
Serving Note: Serve warm or at room temperature, and consider adding a fresh dollop of whipped cream or a scoop of ice cream when ready to enjoy your Oreo Dump Cake!
Make Ahead Options
These Oreo Dump Cake layers are perfect for busy home cooks looking to save time! You can prepare the chopped Oreos and the pudding mix up to 24 hours in advance. Simply store the chopped Oreos in an airtight container to maintain their crunch and mix the pudding with milk, refrigerating it until you’re ready to assemble. When you’re ready to serve, layer the chilled pudding over the Oreos, add the dry cake mix and melted butter, and bake it fresh for about 35 minutes. This method ensures you get that warm, delicious Oreo Dump Cake with minimal effort on the day you plan to enjoy it, making it a fantastic option for last-minute gatherings or busy weeknights!
What to Serve with Oreo Dump Cake?
Imagine a dessert so delightful that it deserves a special companion—what could enhance the gooey, chocolatey delight of Oreo Dump Cake even further?
- Vanilla Ice Cream: The perfect contrast to the warm cake, adding a creamy, cool element that melts beautifully on top.
- Whipped Cream: A fluffy topping that adds lightness and balances the rich flavors; a classic pairing that never disappoints!
- Fresh Berries: The tartness of strawberries or raspberries provides a refreshing contrast to the sweetness of the cake; a colorful touch makes for a stunning presentation.
- Chocolate Syrup: For true chocolate lovers, a drizzle over the top intensifies the dessert’s richness; it’s decadence at its finest!
- Caramel Sauce: A sweet addition that brings a delightful chewiness and depth, creating an indulgent flavor profile that’s hard to resist.
- Nutty Crumble: A mix of crushed nuts sprinkled over the top adds texture and a hint of earthiness; consider pecans or walnuts for an extra crunch.
- Coffee: A hot cup balances the sweet cake with a bitter note, highly recommended for adults enjoying this dessert after dinner.
- Milkshake: A chocolate or vanilla milkshake makes for a fun, nostalgic pairing that can turn dessert into a full experience; a fantastic way to impress guests.
Expert Tips for Oreo Dump Cake
-
Prepare the Pan Correctly: Grease the baking dish well to avoid any sticking; this way, your Oreo Dump Cake comes out easily and looks beautiful.
-
Pudding Consistency: Whisk the pudding mix and milk until thickened, avoiding overmixing. This ensures a creamy layer that perfectly complements the crunch of Oreos.
-
Baking Time is Key: Keep an eye on the cake as it bakes. If you’re using a smaller pan, adjust the baking time to prevent overcooking.
-
Temperature Matters: Serve the cake warm for the best texture and flavor. Letting it cool slightly helps the layers meld together beautifully.
-
Layer Choices: Experiment by incorporating different cookies or flavors into your Oreo Dump Cake for a unique twist—don’t be afraid to get creative!
Oreo Dump Cake Variations & Substitutions
Feel free to customize your Oreo Dump Cake experience with these fun and delicious variations!
- Alternative Cookies: Swap Oreos for graham crackers for a s’mores twist, or use peanut butter cookies for a unique flavor experience. Each alternative brings a special taste that can transport your dessert to new heights.
- Fruit Infusion: Add berries or mashed bananas between the layers for a fruity surprise that lightens up the rich chocolate flavor. This delightful change creates a beautiful balance of sweetness and acidity.
- Nutty Crunch: Incorporate chopped nuts such as pecans or walnuts for extra texture. The crunch complements the soft layers and offers a satisfying bite that enhances the overall dessert experience.
- Flavored Pudding: Use vanilla or butterscotch pudding mix instead of chocolate to switch up the flavor profile. These creamy alternatives can brighten the dish while still keeping it indulgent and rich.
- Dairy-Free Delight: Substitute the milk with almond or oat milk and use coconut oil in place of butter for a completely dairy-free version. This means everyone can enjoy the treat without compromise.
- Spice it Up: Add a sprinkle of cinnamon or a splash of espresso to the cake mix for a delightful warm spice that elevates the cake’s flavor. This small addition can create depth and warmth in every bite.
- Chocolate Lovers: For an extra chocolate hit, fold in mini chocolate chips into the pudding or sprinkle them on top before baking. The more, the merrier when it comes to chocolate, right?
- Decadent Layers: Layer in crushed Oreo cookies as a topping in addition to the whipped cream for a beautiful and crunchy finish that satisfies any sweet tooth. The visual appeal will make it a showstopper at any gathering.
Feeling inspired? For more delightful recipes, check out our Chocolate Poke Cake or indulge in our Spice Gooey Cake. Whichever variation you choose, your crowd-pleasing Oreo Dump Cake is bound to become a new favorite!
Oreo Dump Cake Recipe FAQs
What type of Oreos should I use?
I recommend using regular Oreos for the best flavor and texture, but feel free to use gluten-free Oreos if dietary needs require it. Look for ones that aren’t past their expiration date; fresh cookies yield the best crunch and flavor.
How should I store Oreo Dump Cake, and how long will it last?
Store leftover Oreo Dump Cake in an airtight container in the refrigerator for up to 4 days. This helps keep the cake moist and ensures the flavors remain vibrant. Make sure to seal it well to prevent it from absorbing any other odors from the fridge!
Can I freeze Oreo Dump Cake? If so, how?
Absolutely! To freeze, cut the cake into individual portions and wrap each slice tightly in plastic wrap or aluminum foil. Then, place the wrapped portions in a freezer-safe bag. The Oreo Dump Cake should keep well for up to 3 months. When you’re ready to enjoy it, simply thaw in the fridge overnight and reheat!
What can I do if my pudding mixture is too runny?
If your pudding is too runny, it may be due to overwhisking the mix or not allowing it to set properly. To salvage, you can create a thicker layer by sprinkling some additional cake mix over the pudding before baking—this helps absorb excess moisture while enhancing the cake’s structure.
Is this recipe suitable for those with allergies?
This recipe contains common allergens including gluten (from the cake mix and Oreos) and dairy (from the pudding mix and butter). For those with dietary restrictions, consider substituting with gluten-free cake mix and dairy alternatives like almond milk or coconut oil to make it suitable for different needs. Always double-check ingredient labels to ensure they meet your specific dietary requirements!
Can I add other ingredients to the Oreo Dump Cake?
Very much! You can customize your Oreo Dump Cake by mixing in diced fruits like strawberries or bananas for a refreshing twist. Additionally, you could incorporate different types of cookies or sprinkle in some chopped nuts to enhance flavor and texture. Get creative and make it your own!
Decadent Oreo Dump Cake in Just 5 Simple Ingredients
Ingredients
Equipment
Method
- Preheat your oven to 350°F (175°C) and lightly grease a 9x13-inch baking dish.
- Spread roughly chopped Oreo cookies evenly across the bottom of the baking dish.
- Whisk together the instant chocolate pudding mix and cold milk until thickened, about 2 minutes. Pour over the Oreos.
- Sprinkle the dry chocolate cake mix evenly over the pudding layer and drizzle melted butter on top.
- Bake for 35 minutes or until the top is set and slightly crispy.
- Allow to cool for 10 minutes before serving. Top with whipped topping, chocolate chips, and extra Oreo pieces.
Leave a Reply