
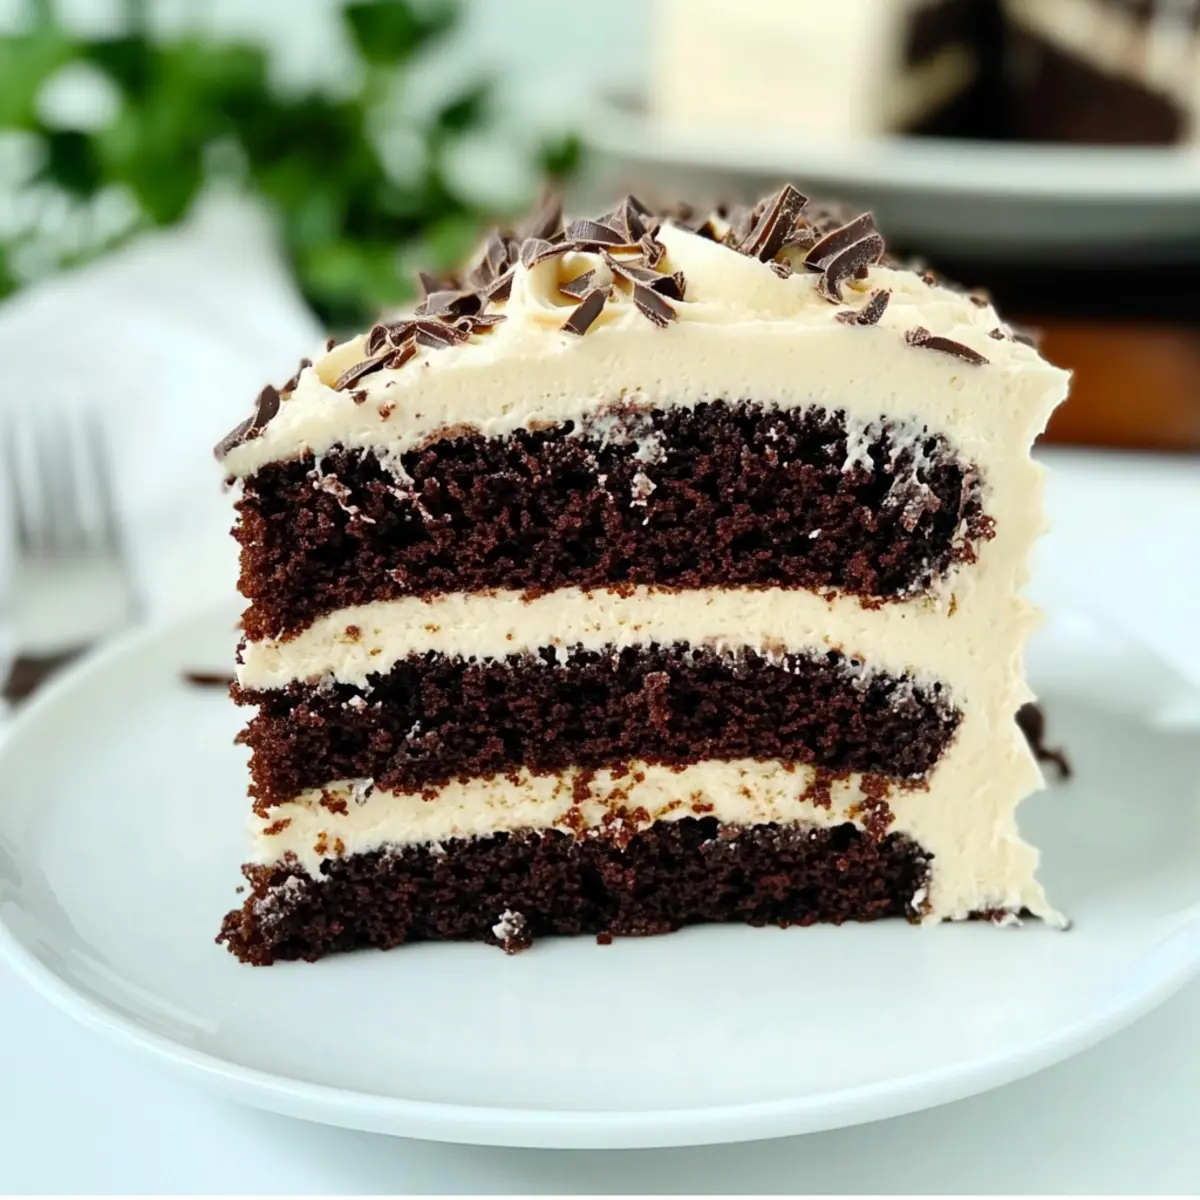
Every cup of coffee tells a story, but what if I told you that your next slice of Chocolate Coffee Cake could take it to a whole new level? This rich and moist chocolate creation is not just a cake; it’s a delightful symphony of flavor that sings with each bite. Enhanced by hot coffee and a creamy vanilla buttercream frosting, it’s the ultimate treat that feels indulgent yet incredibly easy to whip up. Whether you’re celebrating a special occasion or simply need a sweet reward after a long day, this cake promises to be a crowd-pleaser. Plus, it’s perfect for sharing—or keeping all to yourself! Are you ready to elevate your dessert game? Let’s dive into this delicious recipe together.
Why is Chocolate Coffee Cake irresistible?
Indulgent Taste: Each bite combines the deep richness of chocolate with the subtle notes of coffee, creating a flavor explosion that is simply unmatched.
Moist and Tender: Thanks to the buttermilk and hot coffee, this cake stays incredibly moist and has a melt-in-your-mouth texture that will leave everyone craving more.
Easy to Make: With just a few ingredients and straightforward steps, you can whip this up even on your busiest days.
Versatile Delight: Perfect for any occasion—be it a birthday or a quiet afternoon treat with coffee.
Crowd-Pleasing: This Chocolate Coffee Cake is sure to impress your guests, making it a fabulous centerpiece at potlucks or gatherings. Don’t forget to check out our easy Jack-o-Lantern Pancakes for another fun dessert idea!
Chocolate Coffee Cake Ingredients
For the Cake
• Granulated Sugar – Provides sweetness and moisture for a delightful cake.
• All-Purpose Flour – Acts as the main structure, ensuring a sturdy base for your Chocolate Coffee Cake.
• Unsweetened Cocoa Powder – Contributes that rich chocolate flavor that every chocolate lover craves.
• Baking Powder & Baking Soda – These leavening agents work together for perfect rising and texture.
• Salt – Enhances flavor and balances the sweetness beautifully.
• Large Eggs – Binds the mixture and adds moisture, helping the cake rise.
• Buttermilk – Brings a tender texture and a slight tang that elevates the cake.
• Canola or Vegetable Oil – Keeps the cake incredibly moist; you can swap it for melted butter for a richer taste.
• Pure Vanilla Extract – Adds depth and warmth to the overall flavor.
• Hot Coffee – Intensifies the chocolate notes; consider brewed espresso for an extra kick.
• Instant Espresso Powder (optional) – Boosts both coffee and chocolate flavors for a more pronounced experience.
For the Icing
• Unsalted Butter – Contributes to a creamy, fluffy frosting; ensure it’s at room temperature for best results.
• Powdered Sugar – Sweetens and stabilizes the frosting, creating that luscious texture.
• Heavy Whipping Cream (or Kahlua) – Provides creaminess; Kahlua adds a delightful coffee flavor twist.
• Salt (for icing) – Balances the sweetness in the frosting for perfect harmony.
This Chocolate Coffee Cake is simple yet decadent, making it a pleasure to bake and an even greater joy to taste!
Step‑by‑Step Instructions for Chocolate Coffee Cake
Step 1: Preheat the Oven
Start by preheating your oven to 350°F (175°C). While the oven warms up, grease three 9-inch round baking pans and line them with parchment paper to ensure your Chocolate Coffee Cake releases easily after baking. This step is crucial for achieving a perfect cake structure that won’t stick.
Step 2: Mix the Dry Ingredients
In a large mixing bowl, combine granulated sugar, all-purpose flour, unsweetened cocoa powder, baking powder, baking soda, and salt. Whisk these dry ingredients together until well blended, creating a uniform mixture, which plays a key role in the texture of your chocolate coffee cake. This process should take about 1-2 minutes.
Step 3: Combine Wet Ingredients
Make a well in the center of your dry ingredients and add in the large eggs, buttermilk, canola oil, and pure vanilla extract. Use an electric mixer on medium speed to mix these components until fully combined, which should take around 2-3 minutes. This smooth base is essential for a luscious cake batter.
Step 4: Incorporate the Coffee
Pour the hot coffee (and instant espresso powder if using) into the batter. Mix on medium-low speed until all ingredients are just blended. Be careful not to overmix—this should only take about 30 seconds. The warm coffee deepens the chocolate flavor and creates an irresistible aroma, setting the stage for your Chocolate Coffee Cake.
Step 5: Bake the Cake
Divide the batter evenly among the prepared pans, smoothing the tops with a spatula. Place the pans in the preheated oven and bake for 26-30 minutes. Check for doneness by inserting a toothpick in the center; it should come out with a few moist crumbs. This is when your kitchen will smell heavenly!
Step 6: Cool the Cakes
Once baked, remove the pans from the oven and let them cool for about 10-15 minutes. After that, carefully transfer the cakes onto wire racks to cool completely. This cooling process is vital, as frosting warm cakes can cause melting and make the frosting runny.
Step 7: Prepare the Frosting
In a mixing bowl, beat the unsalted butter until creamy, about 3 minutes. Gradually add in the powdered sugar, followed by heavy whipping cream (or Kahlua), vanilla extract, and a pinch of salt. Beat this mixture until fluffy—this should take around 5 minutes. The frosting will be light and airy, perfect for your Chocolate Coffee Cake.
Step 8: Frost the Cake
Level your cooled cake layers with a serrated knife to create an even surface. Spread a generous layer of frosting between each layer and then smooth it over the top and sides of the cake. The thick, luscious frosting pairs beautifully with the moist layers, completing your delicious Chocolate Coffee Cake masterpiece.
What to Serve with Chocolate Coffee Cake
Every slice of this indulgent cake pairs beautifully with accompaniments that enhance its rich, chocolatey goodness, making your dessert experience unforgettable.
- Silky Vanilla Ice Cream: The creamy, cold texture contrasts with the moist cake, creating a delightful temperature and flavor balance.
- Fresh Berries: Strawberries or raspberries add a refreshing tartness, cutting through the sweetness and enhancing the chocolate flavor.
- Whipped Cream: Light and fluffy, it adds an elegant twist that complements the richness of the cake without overwhelming it.
- Espresso or Coffee: A warm cup enhances the coffee flavors woven throughout the cake, creating a perfect pairing for a cozy afternoon treat.
- Chocolate Ganache Drizzle: For chocolate lovers, a drizzle of rich ganache adds a decadence that makes each bite even more memorable.
- Nutty Toppings: Toasted walnuts or hazelnuts provide a satisfying crunch, adding texture and a delightful nutty flavor that complements the chocolate.
- Chocolate-Covered Espresso Beans: For an extra coffee kick, these treats are a fun way to finish off the meal and keep the energy going!
- Sweet Dessert Wine: A glass of sweet dessert wine pairs beautifully, as its fruity notes enhance the cake’s flavors while adding a sophisticated touch.
Make Ahead Options
These Chocolate Coffee Cake layers are perfect for meal prep enthusiasts! You can bake the cake layers up to 3 days in advance, allowing them to cool completely before wrapping each layer tightly in plastic wrap to maintain moisture. For the frosting, it can also be made ahead up to 2 days in advance; just store it in an airtight container in the fridge. When you’re ready to serve, take the layers and frosting out of the fridge. Allow the frosting to come to room temperature and re-whip it for lightness before assembling. This way, you’ll have a delicious, homemade Chocolate Coffee Cake ready to impress with minimal last-minute effort—just as delightful as if freshly baked!
How to Store and Freeze Chocolate Coffee Cake
Room Temperature: Keep the cake covered at room temperature for up to 5 days. Use a cake dome or airtight container to maintain freshness.
Fridge: For longer storage, you can refrigerate slices in an airtight container for up to a week. Just be sure to separate layers with parchment paper to prevent sticking.
Freezer: Freeze individual slices wrapped in parchment paper and then foil for up to 2 months. This will help preserve the cake’s moist texture even in the freezer.
Reheating: To enjoy frozen slices, thaw them in the refrigerator overnight or at room temperature for a few hours. If desired, warm in the microwave for 10-15 seconds for that freshly-baked feel.
Chocolate Coffee Cake Variations
Feel free to get creative and tailor the Chocolate Coffee Cake to your liking with these fun twists!
-
Dairy-Free: Substitute buttermilk with almond milk or any plant-based milk for a dairy-free version that still tastes delicious. Just add a splash of vinegar to mimic buttermilk’s tang.
-
Extra Chocolatey: Fold in 1 cup of semi-sweet or dark chocolate chips into the batter for added gooeyness. These nuggets of chocolate will add bursts of flavor that every chocolate lover craves.
-
Flavorful Frosting: Swap vanilla extract for almond or peppermint extract in the frosting to add unique flavor notes. This simple change can create a delightful surprise for your taste buds.
-
Kahlua Kick: For a sophisticated twist, use Kahlua in the frosting instead of heavy cream. This will not only add a velvety texture but also an inviting coffee flavor that pairs beautifully with the cake.
-
Nutty Crunch: Sprinkle chopped walnuts or pecans between the cake layers or on top of the frosting. This adds a delightful crunch that complements the soft cake perfectly.
-
Mocha Twist: Add a tablespoon of instant espresso powder to the dry ingredients for an even bolder coffee flavor. It enhances the chocolate notes and brings out a rich mocha experience.
-
Seasonal Flair: Incorporate spices like cinnamon or pumpkin spice to add warmth, especially around the holidays. This gives a cozy touch that makes the cake feel even more special.
-
Syrupy Drizzle: Drizzle a chocolate ganache over the frosted cake for an ultra-decadent finish. You can create a ganache by melting equal parts chocolate and heavy cream together, which adds a luscious layer of richness.
Explore these variations, and don’t forget to enjoy each slice with a steaming cup of your favorite coffee or tea! And if you’re in the mood for more sweetness, check out our delightful Decadent Chocolate Strawberry Overnight Oats for a quick and tasty treat!
Expert Tips for Chocolate Coffee Cake
-
Room Temperature Ingredients: Ensure your eggs, buttermilk, and butter are at room temperature. This helps to create a smoother batter and a more tender Chocolate Coffee Cake.
-
Hot Coffee Magic: Use hot coffee to enhance the chocolate flavor. Avoid letting it cool, as this can diminish the richness of the cake.
-
Don’t Overmix: Mix the batter gently after adding the wet ingredients. Overmixing can lead to a dense cake instead of the light, fluffy texture you want.
-
Use Parchment Paper: Don’t skip lining your pans with parchment paper. This step ensures that your Chocolate Coffee Cake comes out easily without any crumbles sticking to the pan.
-
Flavor Variations: Consider adding a splash of Kahlua in the frosting for an extra hint of coffee flavor. It takes the cake to a whole new level!
Chocolate Coffee Cake Recipe FAQs
What kind of coffee should I use in the recipe?
I recommend using hot brewed coffee as it enhances the rich chocolate flavor of the cake. For a bolder taste, feel free to substitute it with brewed espresso; just make sure it’s still hot when adding it to the batter to ensure the best flavor infusion.
How should I store the Chocolate Coffee Cake?
Store the cake covered at room temperature for up to 5 days. If you desire longer storage, refrigerate slices in an airtight container for up to a week, using parchment paper between layers to prevent sticking. This helps maintain its moistness and flavor over time!
Can I freeze the Chocolate Coffee Cake?
Absolutely! For freezing, wrap individual slices in parchment paper, then foil, and store them in the freezer for up to 2 months. When you’re ready to enjoy them, simply thaw the slices in the refrigerator overnight or leave them at room temperature for a few hours. For a warm touch, microwave for about 10-15 seconds once thawed.
How can I tell if my cake is done baking?
To check for doneness, insert a toothpick into the center of the cake; it should come out with a few moist crumbs attached, not wet batter. This indicates that your Chocolate Coffee Cake is perfectly baked and ready to be cooled and decorated with frosting.
Is this Chocolate Coffee Cake suitable for people with allergies?
This recipe contains common allergens such as eggs and wheat (gluten). If you’re baking for someone with allergies, substitutions can be made. For a gluten-free version, you could use a 1:1 gluten-free all-purpose flour mix as a substitute, and consider using aquafaba or flaxseed meal as an egg replacement for those with egg allergies. Always check the labels of your ingredients to ensure they meet dietary needs.
What if I want to make the cake ahead of time?
You can prepare the cake layers a day in advance. Simply bake, cool, wrap securely in plastic wrap, and store in the refrigerator until you’re ready to frost. This can actually improve the texture as the flavors meld together! Frost just before serving for the best results.
Irresistibly Moist Chocolate Coffee Cake for Every Occasion
Ingredients
Equipment
Method
- Preheat your oven to 350°F (175°C). Grease three 9-inch round baking pans and line with parchment paper.
- In a large bowl, mix granulated sugar, all-purpose flour, cocoa powder, baking powder, baking soda, and salt until well blended.
- Make a well in the dry ingredients. Add eggs, buttermilk, oil, and vanilla extract, then mix until fully combined.
- Pour in hot coffee (and instant espresso if using) and mix until just blended.
- Divide the batter among prepared pans and bake for 26-30 minutes. Check for doneness with a toothpick.
- Let the cakes cool in the pans for 10-15 minutes, then transfer to wire racks to cool completely.
- Beat butter until creamy, then gradually add powdered sugar, cream, vanilla, and salt, beating until fluffy.
- Level the cooled cakes and spread frosting between each layer, then frost the top and sides.
Leave a Reply