
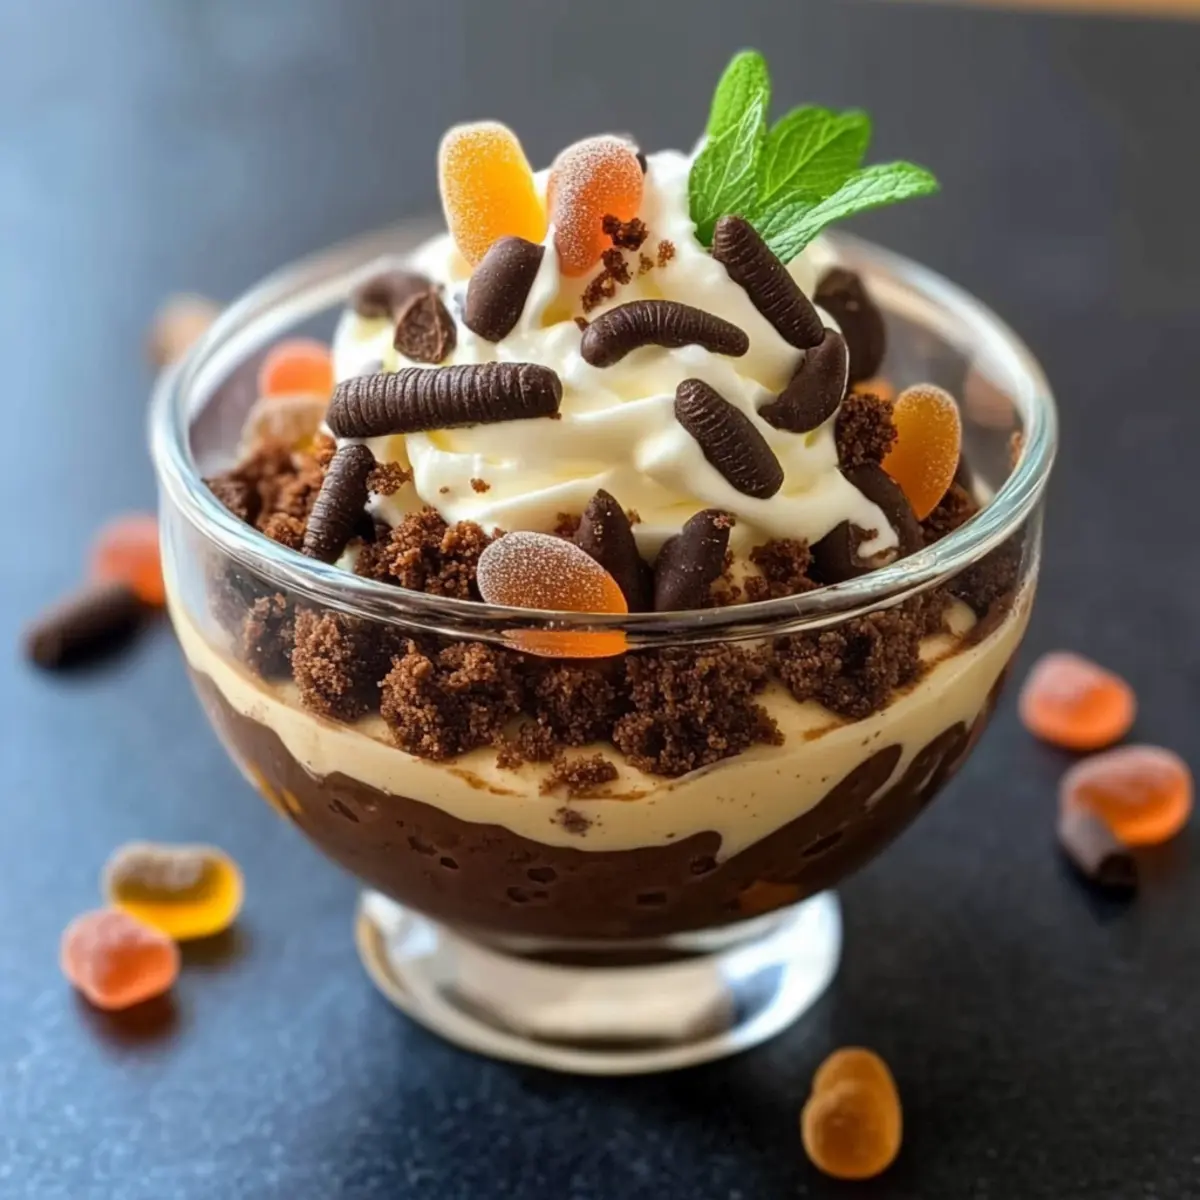
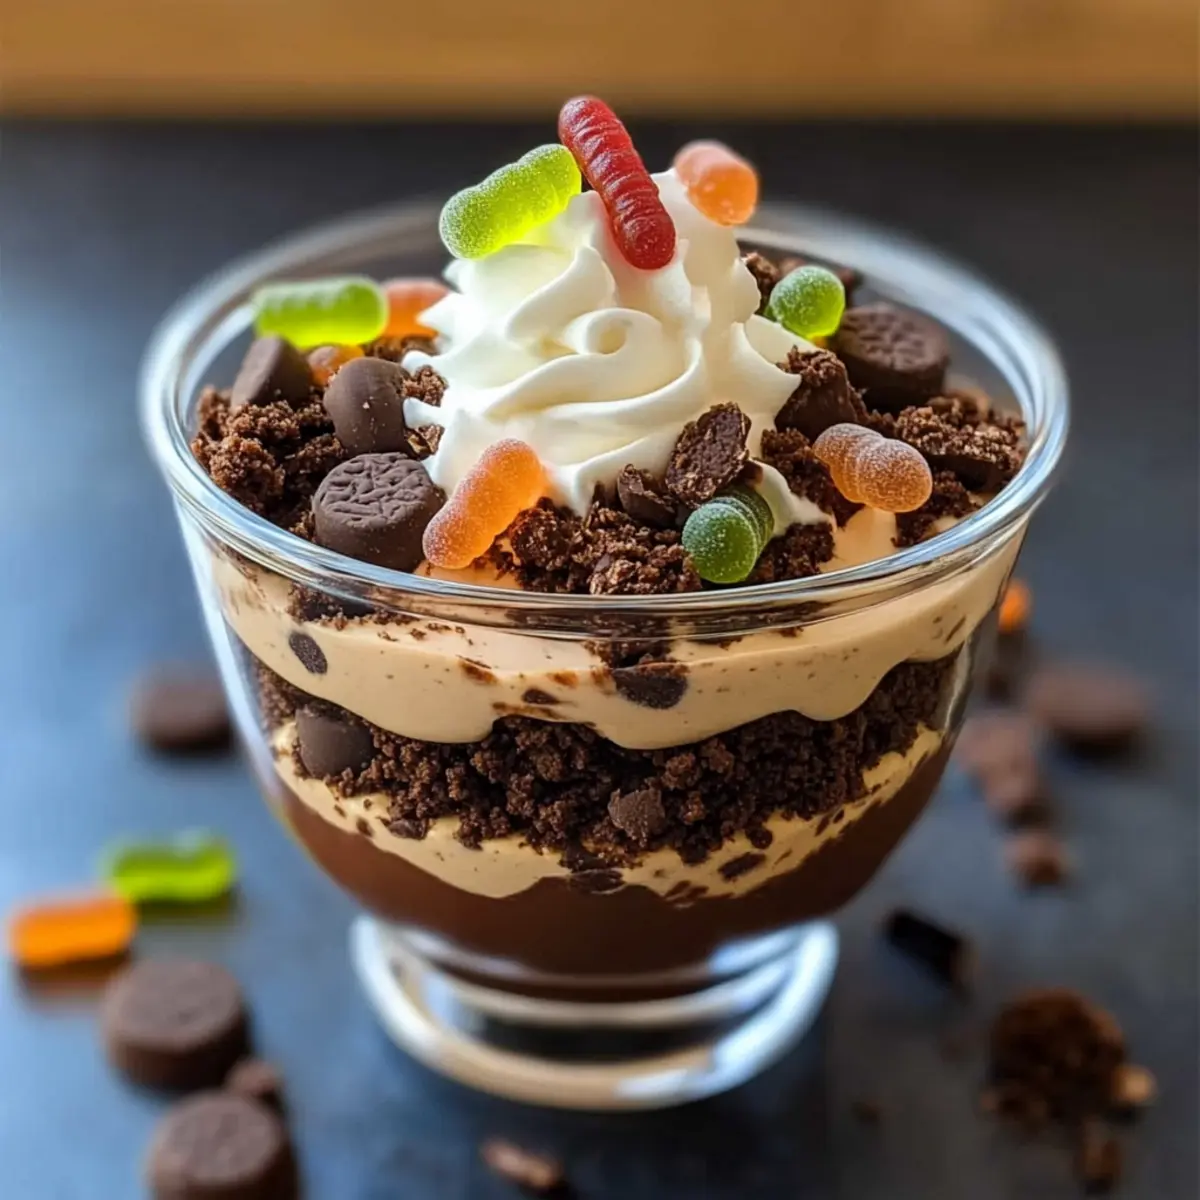
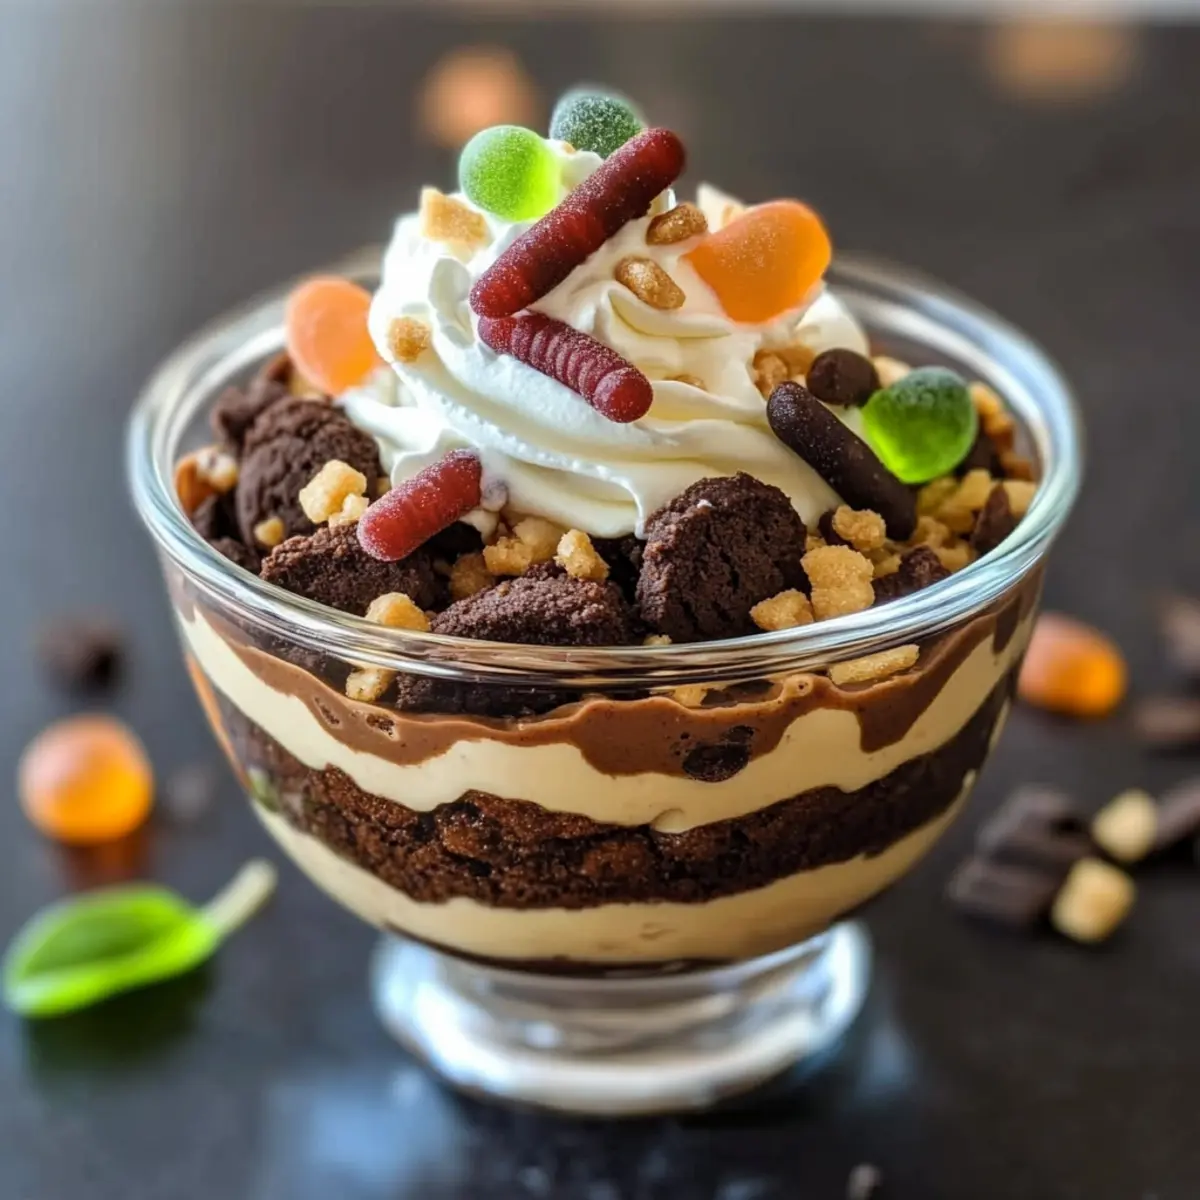
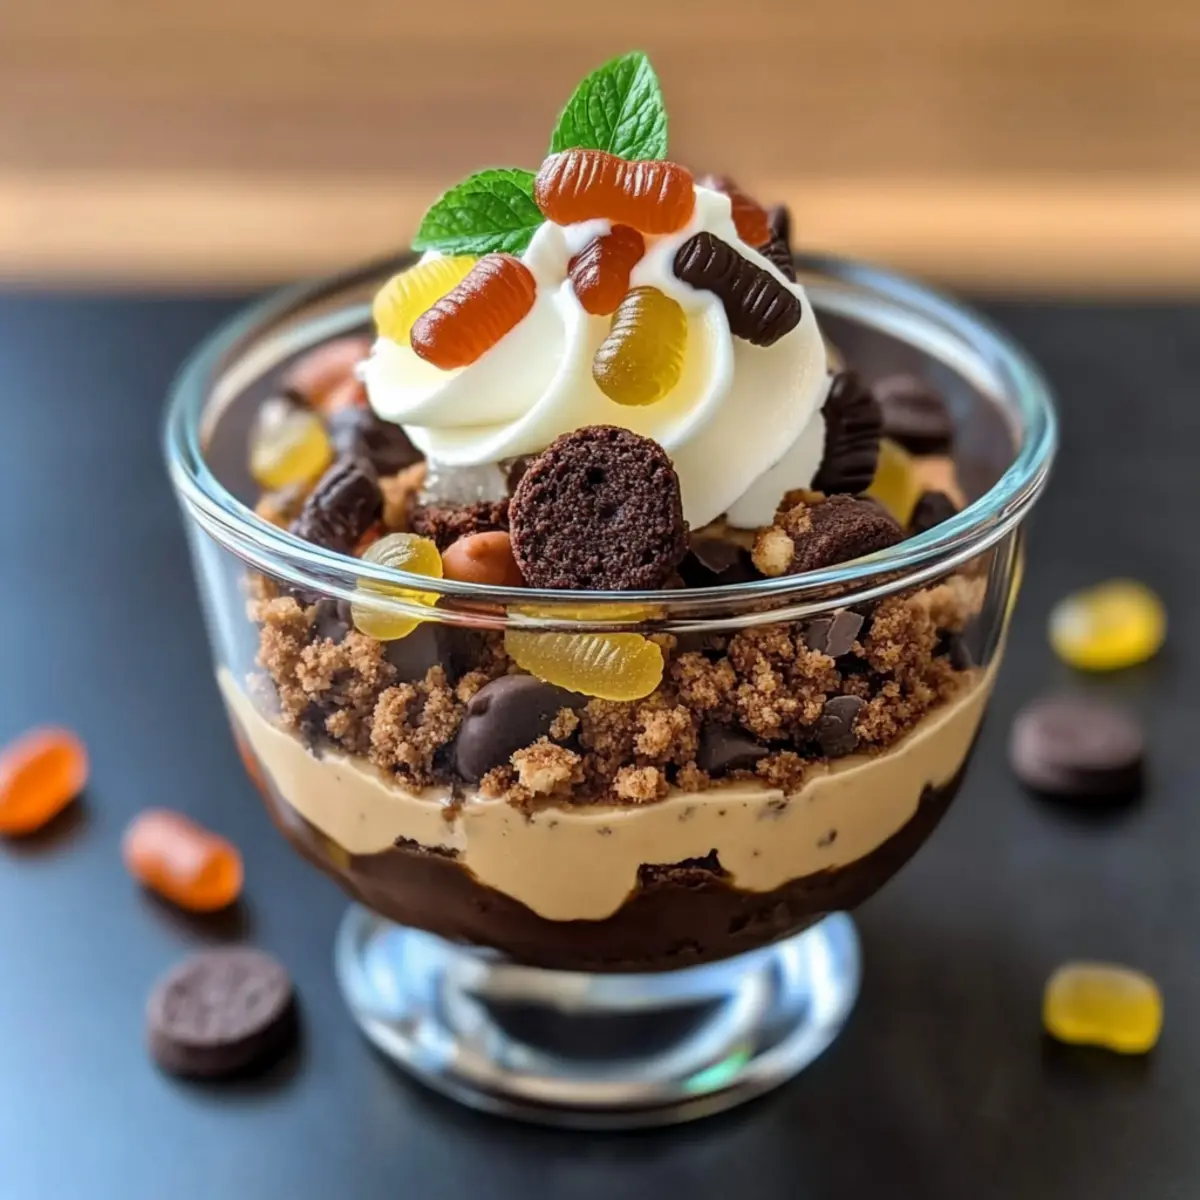
As I scooped out the last bit of creamy delight from the bowl, I couldn’t help but smile at the sheer joy this Dirt Pudding brings to my kitchen. This whimsical no-bake dessert combines the rich flavors of chocolate with a playful presentation, featuring layers of crushed cookies and fluffy whipped topping. With just 15 minutes of prep time, this Dirt Pudding is the perfect solution for busy weeknights or kid-friendly gatherings—it’s an easy dessert that guarantees laughter and happy faces. The addition of gummy worms not only adds an adorable touch but also reawakens the child inside all of us. Curious to see how you can whip up this fun confection with minimal effort? Let’s dive into the recipe!
Why is Dirt Pudding So Fun?
Whimsical Appeal: Dirt Pudding is not just a dessert; it brings out the kid in everyone with its charming presentation! Quick and Easy: You can whip it up in just 15 minutes, making it a perfect choice for busy days or spontaneous gatherings. Rich Chocolate Flavor: The layers of chocolate pudding and crushed cookies create a decadent experience that indulges your sweet tooth. Versatile Toppings: Feel free to swap the gummy worms for your favorite candies or experiment with different cookie bases. Crowd-Pleasing Treat: Whether for parties or family dinners, this delightful no-bake dessert is sure to be a hit! Don’t forget to explore more fun dessert ideas or even easy no-bake recipes to keep the sweetness coming!
Dirt Pudding Ingredients
• Get ready for a fun dessert!
For the Pudding Layer
- Chocolate Pudding Mix – Provides a rich, creamy base for your Dirt Pudding; opt for instant for a super quick prep.
- Milk – Needed to prepare the pudding mix; whole milk will give you a creamier texture.
For the Cookie Layer
- Crushed Chocolate Cookies – Delivers a delightful crunch; Oreos are a fabulous choice for their chocolaty goodness.
- Whipped Topping – Adds a light and airy texture; feel free to use homemade whipped cream for a fresher taste.
For the Garnish
- Gummy Worms – These whimsical candies enhance the fun presentation; replace with any gummy candy for a different twist.
- Chocolate Sprinkles – Optional, but they add an extra layer of chocolatey fun to your Dirt Pudding!
With these ingredients, you’ll be well on your way to creating a charming and indulgent Dirt Pudding that’s perfect for any occasion!
Step‑by‑Step Instructions for Dirt Pudding
Step 1: Prepare the Pudding
In a mixing bowl, combine the chocolate pudding mix with 2 cups of cold milk, whisking vigorously for about 2 minutes until the mixture thickens and becomes smooth. You’ll know it’s ready when it forms a silky texture and gently holds its shape. Set it aside for a few minutes to firm up even more, while you gather your other ingredients for the Dirt Pudding.
Step 2: Mix the Cookie Layer
In a separate large bowl, fold together the crushed chocolate cookies and whipped topping using a spatula. Mix until all the cookie pieces are well coated, and the mixture is creamy with a delightful crunch. This will create the cookie layer that contrasts perfectly with the rich pudding. Set this aside, ready to layer into your charming Dirt Pudding.
Step 3: Start Layering the Pudding
Grab a serving dish or individual cups to assemble your Dirt Pudding. Begin by spooning a thick layer of the prepared chocolate pudding into the bottom of the dish, spreading it out evenly with a spatula to ensure every inch is covered. This thick layer should look smooth and glossy, setting the stage for the delightful textures to come.
Step 4: Add the Cookie Mixture
Next, gently spoon the cookie mixture over the chocolate pudding layer, using the spatula to spread it out evenly. The combination of textures will be visually appealing, and you want this layer to sit snugly atop the pudding. The whipped topping and crushed cookies should blend beautifully, creating that signature “dirt” look in your Dirt Pudding.
Step 5: Repeat the Layers
Continue the layering process by adding another layer of chocolate pudding on top of the cookie layer. Be generous and smooth it out again for a lovely finish. Then, repeat with another layer of the cookie mixture. Aim for two or three layers to achieve a delightful contrast in your Dirt Pudding, alternating until you’ve used all the ingredients and leaving the whipped topping for the final layer.
Step 6: Top with Whipped Topping
Once you have completed the layering, top your Dirt Pudding with a generous dollop of whipped topping. Spread it evenly across the top for a smooth, fluffy finish. This layer creates a beautiful, cloud-like appearance that enhances the dessert’s charm and prepares it for the fun decorations to come.
Step 7: Garnish with Gummy Worms
Now it’s time to get playful! Decorate the top of your Dirt Pudding with gummy worms, placing them artfully as if they’re crawling through the “dirt.” This whimsical touch not only makes the dessert visually appealing but also adds a fun element that both kids and adults will adore.
Step 8: Chill Before Serving
Cover your assembled Dirt Pudding with plastic wrap and refrigerate it for at least 1 hour. This chilling time allows the flavors to meld and the layers to set, making it easier to serve. The anticipation will build as you wait for the dessert to reach its perfect creamy consistency, ready to be enjoyed by all.
Expert Tips for Dirt Pudding
- Layering Technique: Ensure even layers: Take your time to spread each layer evenly for the best visual appeal and consistent flavors.
- Chill Time: Patience is key: Allow at least 1 hour in the fridge to let your Dirt Pudding set properly—rushing will lead to a messy dessert!
- Cookie Choice: Pick wisely: Use chocolate wafer cookies or Oreos for the crunch; avoid soft cookies, which can lead to a soggy texture.
- Whipped Topping: Make it fresh: If using homemade whipped cream, whip to stiff peaks for added stability. Store-bought options can collapse over time.
- Gummy Worm Fun: Get creative: Don’t hesitate to swap gummy worms with other fun candies like chocolate rocks or jelly beans for a unique twist on your Dirt Pudding!
How to Store and Freeze Dirt Pudding
Fridge: Keep your Dirt Pudding covered in an airtight container in the refrigerator for up to 3 days. This will ensure it stays fresh and creamy for everyone to enjoy.
Freezer: While not recommended for long-term storage due to texture changes, you can freeze Dirt Pudding for up to 1 month. To do so, place it in a freezer-safe, airtight container. Thaw in the fridge before serving.
Make-Ahead Tips: Feel free to prepare your Dirt Pudding a day in advance. Just store it covered in the fridge, and it will be ready to serve whenever you are!
Reheating: There’s no need to reheat; simply enjoy your chilled Dirt Pudding straight from the fridge!
What to Serve with Delicious No-Bake Dirt Pudding
Imagine a fun-filled gathering where this whimsical dessert takes center stage, perfectly complemented by delightful sides and treats.
-
Creamy Vanilla Ice Cream: A scoop of vanilla ice cream adds a delightful creaminess that pairs beautifully with the rich chocolate flavors of Dirt Pudding. It’s a classic combination that’s always a hit!
-
Fresh Berries: Juicy strawberries or raspberries provide a burst of freshness and a vibrant color contrast to the rich chocolate layers. Their tartness balances the sweetness beautifully, making each bite refreshing.
-
Chocolate Chip Cookies: Another layer of indulgence, chocolate chip cookies offer a chewy texture that complements the creamy Dirt Pudding. Serve them warm for a comforting treat that everyone will love!
-
Crunchy Snack Mix: A light and crunchy snack mix can add an unexpected element. Combining pretzels, nuts, and a sprinkle of candy makes for a fun, salty-sweet contrast that enhances the overall dessert experience.
-
Fruit Pizzas: These colorful treats bring a delightful mix of flavors and textures, making them a perfect addition alongside Dirt Pudding. Their fruity, creamy bases pair wonderfully with the chocolatey delight.
-
Iced Lemonade or Fruit Punch: Refreshing beverages like iced lemonade or fruit punch create a vibrant atmosphere and are perfect for cleansing the palate after each rich spoonful of Dirt Pudding.
-
Cookie Decorating Station: Set up a fun cookie decorating station! Guests can personalize their cookies with frosting, sprinkles, and candies, creating a playful, interactive experience.
These pairings will not only enhance the enjoyment of your Dirt Pudding but also create a memorable feast that the whole family can cherish!
Dirt Pudding Variations & Substitutions
Feel free to get creative and tailor this delightful dessert to your taste and occasion!
-
Vanilla Version: Swap chocolate pudding for vanilla pudding to create a lighter, equally delicious flavor. It’s a lovely twist that still delights!
-
Nutty Crunch: Add chopped nuts to the cookie layer for a crunchy contrast. Walnuts or pecans bring richness and texture that complements the chocolate beautifully.
-
Dairy-Free: Use almond or coconut milk for the pudding and coconut whipped cream for a vegan-friendly delight. This way, everyone can enjoy the fun!
-
Add Spice: Sprinkle a pinch of cinnamon or nutmeg into the pudding mixture for a warm, aromatic twist. It adds unexpected depth to the classic flavors!
-
Fruit Layers: Incorporate layers of sliced bananas or strawberries between the pudding and cookie layers. The fruit brings a refreshing brightness that balances the richness.
-
Gummy Variations: Instead of gummy worms, try chocolate-covered raisins or fruity sour candies for a different look and flavor profile. Let your candy choice express your creativity!
-
Choco-Mint Delight: Mix crushed mint candies into the cookie layer for a fresh minty surprise. Chocolate and mint are always a winning combination!
Curious to try more fun desserts? You might enjoy exploring easy no-bake recipes or diving into more whimsical treats that excite the senses!
Make Ahead Options
Dirt Pudding is an excellent choice for those busy home cooks looking to save time! You can prepare the chocolate pudding layer up to 24 hours in advance; simply cover it tightly in the refrigerator to prevent it from setting too thick or developing a skin. Additionally, you can mix the crushed chocolate cookies with the whipped topping ahead of time and store that mixture separately for up to 3 days. When you’re ready to serve, layer the pudding and cookie mixtures together, finish with whipped topping, and garnish with gummy worms. With this approach, you’ll have a fun, crowd-pleasing dessert that’s just as delicious, ready to delight everyone without the last-minute rush!
Dirt Pudding Recipe FAQs
What type of chocolate cookies should I use for Dirt Pudding?
I recommend using crushed chocolate wafer cookies or Oreos for the best flavor and texture. These choices add a satisfying crunch and enhance the overall chocolate richness of the dessert. Feel free to experiment with different brands to find your favorite!
How should I store leftover Dirt Pudding?
Store your Dirt Pudding in an airtight container in the refrigerator for up to 3 days. Cover it tightly to maintain its creamy consistency and keep it fresh. It’s always delightful to have a sweet treat waiting for you!
Can I freeze Dirt Pudding? How?
Absolutely! You can freeze Dirt Pudding for up to 1 month. To do this, place it in a freezer-safe container with an airtight seal. When you’re ready to enjoy it, thaw the pudding in the refrigerator for several hours or overnight before serving. Note that the texture may change slightly after freezing, but it will still be delicious!
What if my pudding layers are lumpy?
If your pudding mixture is lumpy, it could be that it wasn’t mixed properly or allowed sufficient time to thicken. To fix this, whisk the pudding vigorously for at least 2-3 minutes, ensuring no dry mix remains. If lumps persist, you can strain the mixture through a fine mesh sieve, which will give you a silky smooth texture that’s perfect for layering.
Is Dirt Pudding suitable for people with allergies?
Keep in mind that Dirt Pudding traditionally contains milk, wheat, and possibly nuts, depending on the cookie brand used. If you’re making it for someone with food allergies, always check ingredient labels and consider using allergen-free cookie options or alternatives, like nut-free whipped toppings. Personalization makes this dessert even more enjoyable!
Can I prepare Dirt Pudding in advance?
Yes, you can! Prepare your Dirt Pudding a day ahead of when you plan to serve it. Just cover it tightly with plastic wrap or store it in a covered container in the fridge. This will allow the flavors to blend beautifully while saving you time on the day of your event!
Decadent Dirt Pudding: The Ultimate No-Bake Fun Dessert
Ingredients
Equipment
Method
- In a mixing bowl, combine the chocolate pudding mix with 2 cups of cold milk, whisking for about 2 minutes until smooth.
- In a separate bowl, fold together crushed chocolate cookies and whipped topping until well coated.
- Spoon a layer of pudding into the bottom of a dish, ensuring it's even.
- Add the cookie mixture evenly over the pudding layer.
- Repeat layering with another layer of pudding and then cookie mixture until all ingredients are used.
- Top with a dollop of whipped topping and spread evenly.
- Decorate with gummy worms on top.
- Cover with plastic wrap and refrigerate for at least 1 hour before serving.
Leave a Reply