
As I rummaged through my pantry, desperately seeking inspiration for an upcoming Easter gathering, I stumbled upon a box of banana pudding mix nestled between the flour and sprinkles. That’s when the idea hit me: why not turn this classic favorite into something fun and festive? Enter my Creamy No-Bake Banana Pudding Easter Truffles! With a nostalgic banana flavor wrapped in a luscious white chocolate coating, these truffles are an absolute breeze to whip up. They’re not just quick to make but also provide a delightful twist to your dessert table, making them an unforgettable hit among family and friends. Plus, their no-bake nature means you can spend more time enjoying the festivities and less time stuck in the kitchen. Curious how you can customize them for your own celebrations? Let’s dive into this sweet adventure!
Why are these Easter truffles a must-try?
Creamy, Decadent Taste: Each truffle bursts with the rich flavor of banana pudding, encased in a silky white chocolate layer that makes every bite indulgently sweet.
No-Bake Simplicity: With minimal effort, you can whip up these delightful treats, perfect for busy schedules or last-minute dessert needs.
Versatile Options: Get creative! Substitute ingredients or add toppings to craft a version that fits your style, making them truly your own.
Crowd-Pleasing Delight: Their playful appearance and nostalgic flavor are sure to impress guests, whether at an Easter gathering or a simple family dinner.
Quick Assembly: Spend less time in the kitchen and more enjoying the festivities—these truffles chill in just 30 minutes!
Perfect for Gifting: Dress them up with fun decorations, and you have a thoughtful homemade gift for friends or family!
Banana Pudding Easter Truffles Ingredients
For the Truffles
• Crushed Vanilla Wafer Cookies – Provides classic banana pudding crunch; substituting with graham crackers adds an intriguing flavor twist.
• Cream Cheese (½ cup, softened) – Creates a smooth, creamy texture that binds the truffles; for a richer taste, feel free to use Mascarpone cheese.
• Dry Banana Pudding Mix (1 package, 3.4 oz) – Essential for that authentic banana flavor; vanilla pudding mix can work in a pinch!
• Milk (2 tablespoons) – Helps blend the mixture smoothly; switch it for almond milk to make it dairy-free if desired.
• Vanilla Extract (1 teaspoon) – Enhances flavor depth; it can be omitted if trying a different pudding flavor.
For the Coating
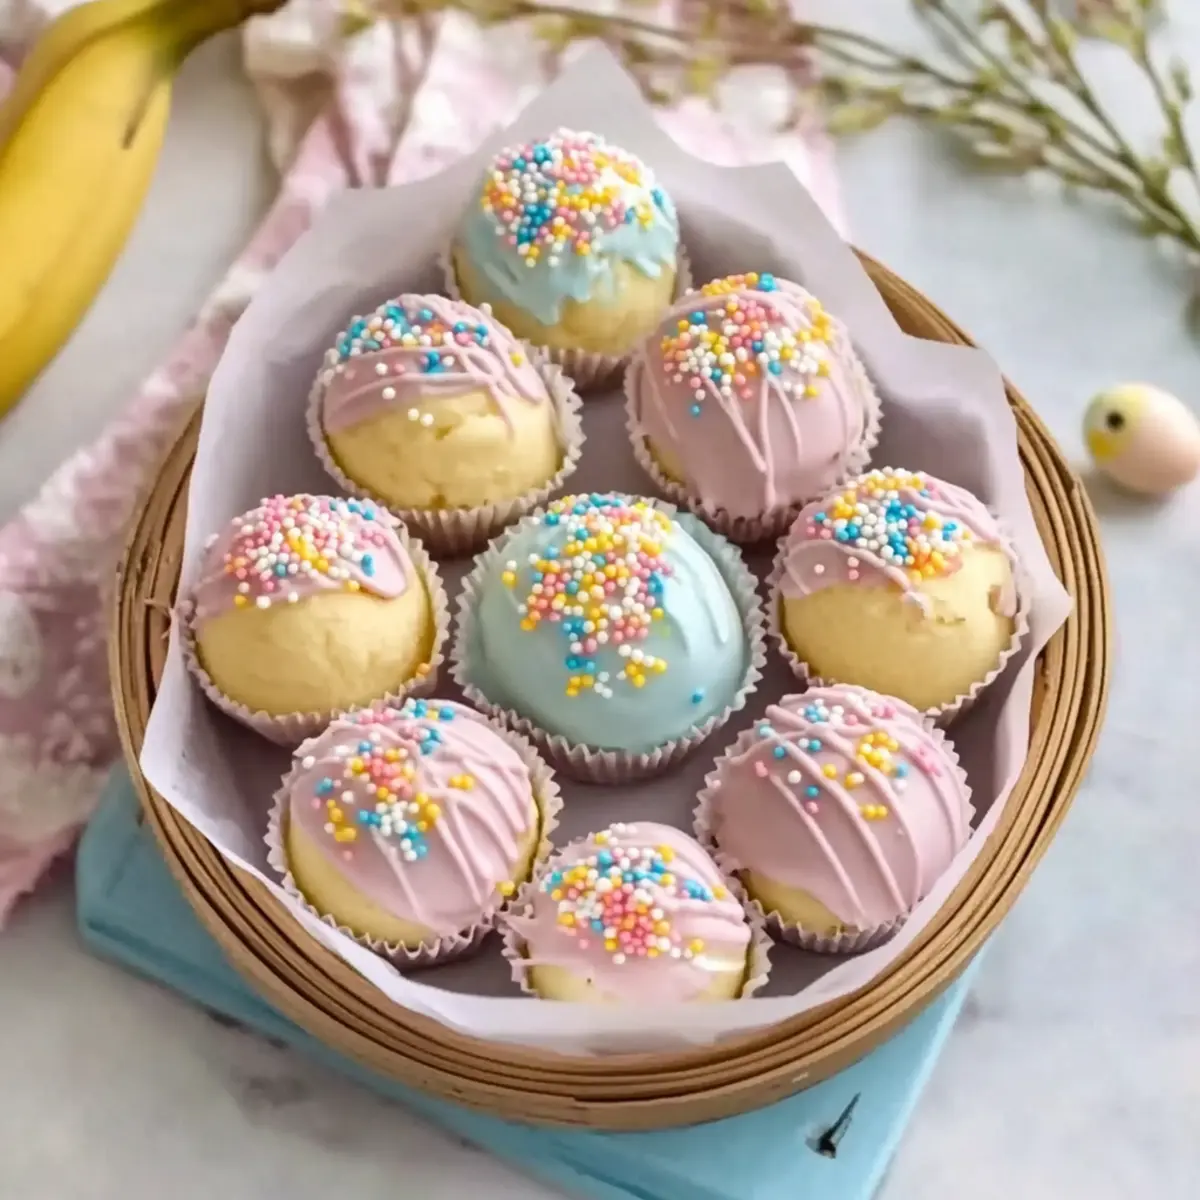
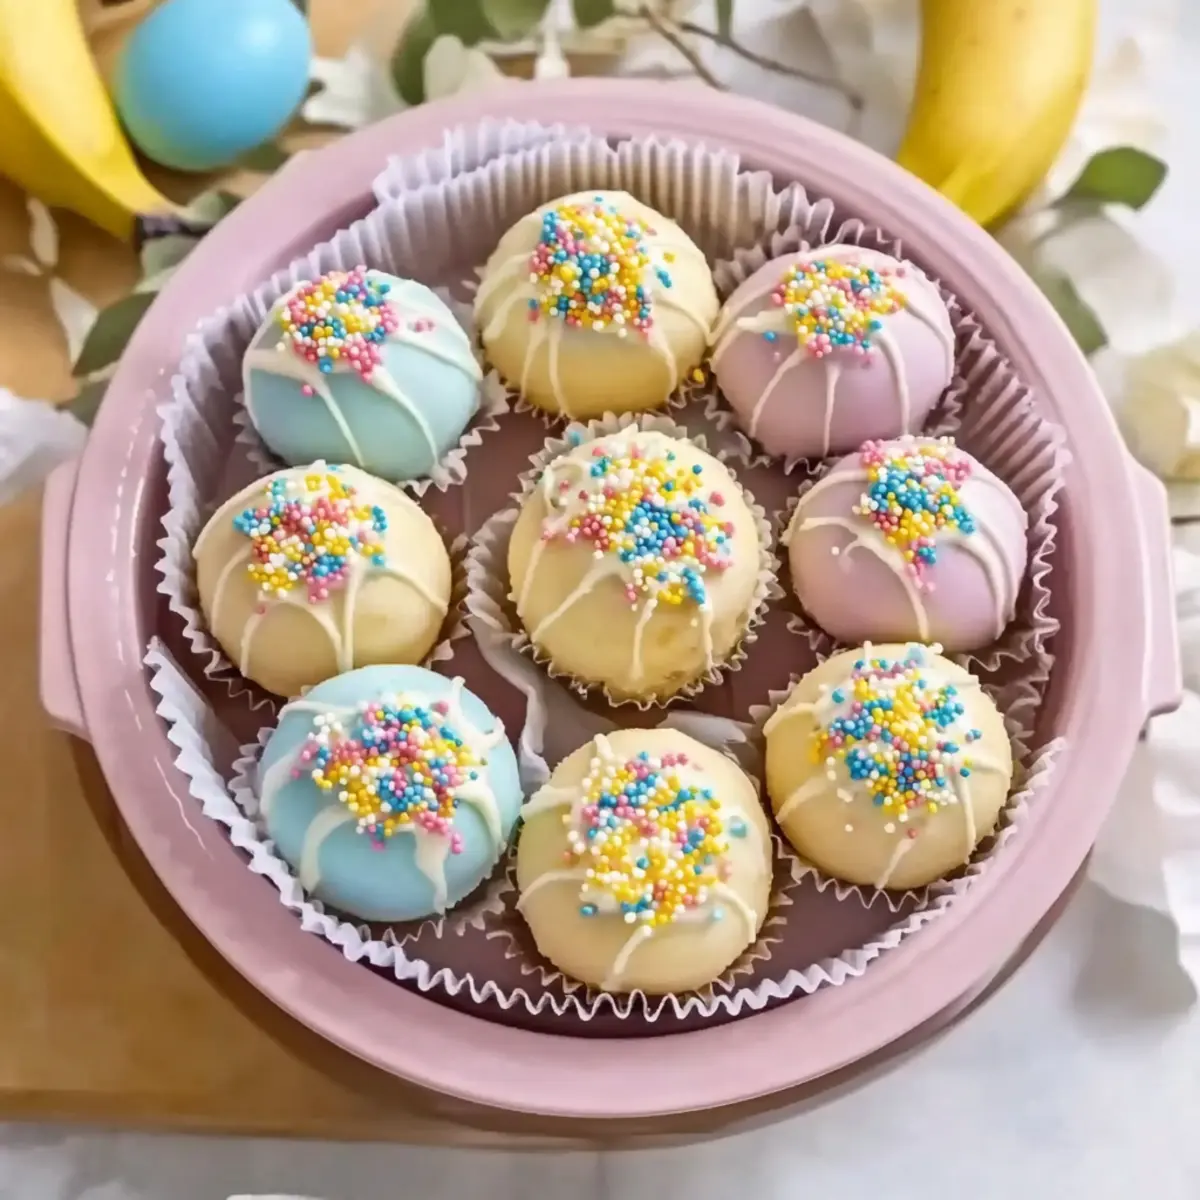
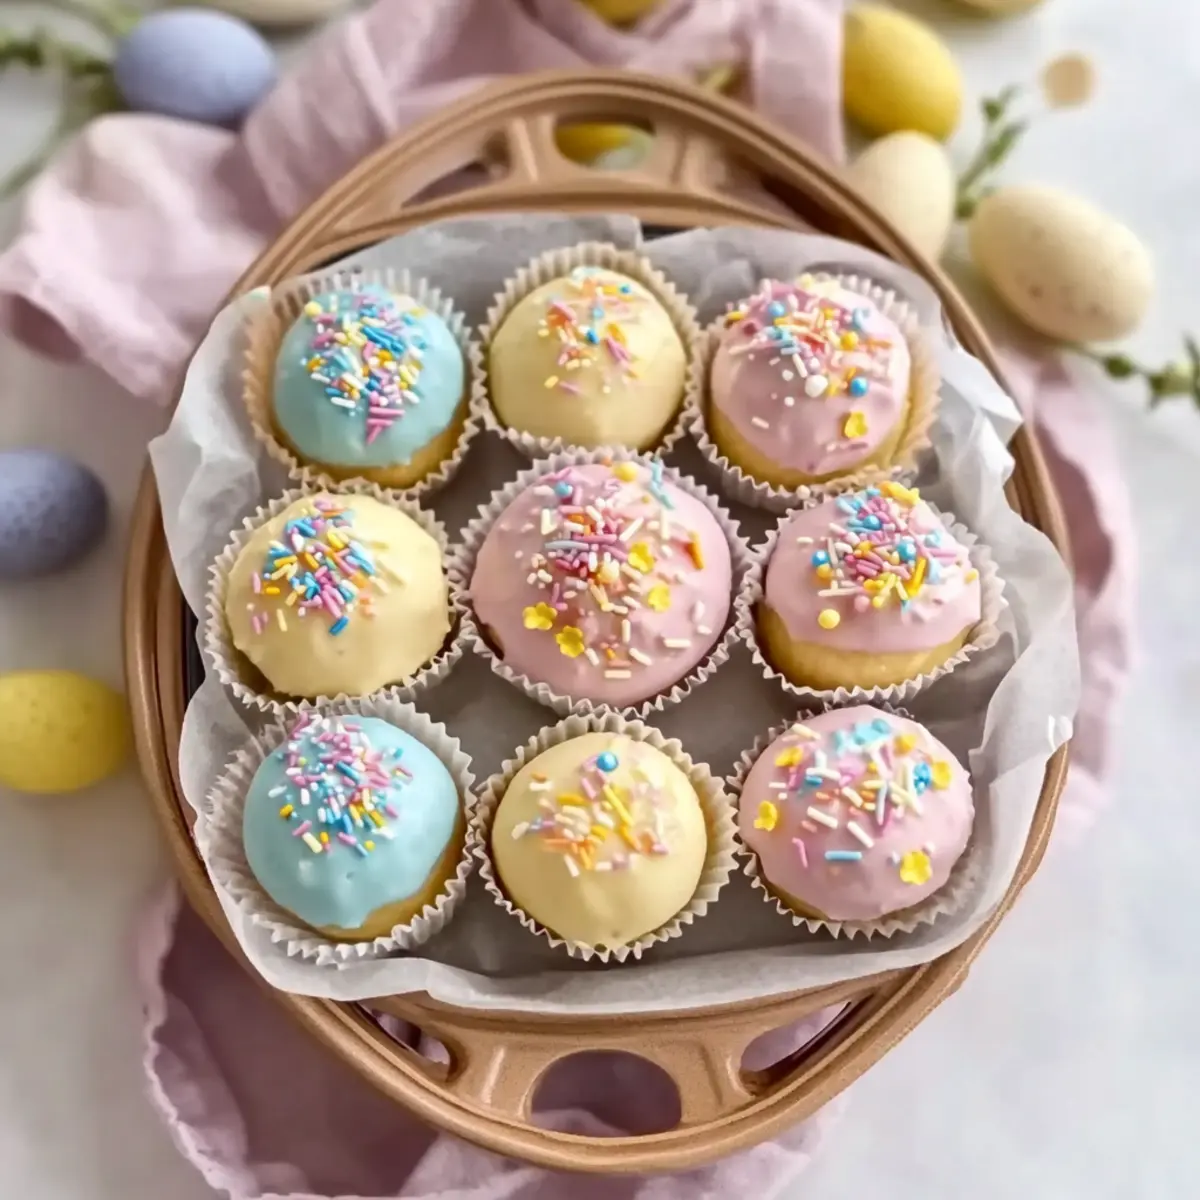
• White Chocolate or Candy Melts (1 cup, for coating) – Provides a sweet, glossy finish; pastel-colored candy melts are fun for that seasonal touch!
For Decoration (optional)
• Easter Sprinkles or Colored Drizzle – Adds a festive flair; you can use any colorful sprinkles to match your theme.
These Banana Pudding Easter Truffles are a fun twist on a beloved classic, perfect for adding a sweet touch to your spring celebrations!
Step‑by‑Step Instructions for Banana Pudding Easter Truffles
Step 1: Prep the Mixture
In a mixing bowl, combine the crushed vanilla wafer cookies, softened cream cheese, dry banana pudding mix, milk, and vanilla extract. Use a spatula or mixer to blend until a thick, sticky dough forms—this may take about 3-5 minutes. The mixture should be creamy and manageable, embodying the dreamy essence of your Banana Pudding Easter Truffles.
Step 2: Shape Truffles
Scoop small spoonfuls of the mixture and roll them into bite-sized balls, about one inch in diameter. Place the shaped truffles on a parchment-lined baking sheet, ensuring they don’t touch each other. The dough should hold its shape well, making this step quick and fun.
Step 3: Chill
Cover the baking sheet with plastic wrap and refrigerate the truffles for 30 minutes. This chilling period will help firm up the truffles, making them easier to coat with chocolate and giving them the ideal texture when you bite into your Banana Pudding Easter Truffles.
Step 4: Melt Coating
While the truffles chill, melt the white chocolate or candy melts in either a microwave-safe bowl or a double boiler. If using the microwave, heat in 30-second intervals, stirring in between, until the mixture is fully smooth and glossy. This should take about 1-2 minutes.
Step 5: Dip and Decorate
Once the truffles have chilled and the coating is melted, dip each chilled truffle into the melted chocolate. Allow any excess chocolate to drip off before placing them back on the parchment. Immediately decorate with Easter sprinkles or a colorful drizzle, ensuring the toppings stick before the chocolate hardens.
Step 6: Final Chill
After dipping and decorating, return the truffles to the refrigerator for an additional 15-20 minutes, allowing the chocolate coating to firm up completely. This final chill ensures your Banana Pudding Easter Truffles have a delightful crunch and tempting finish, ready to impress at your Easter gathering.
How to Store and Freeze Banana Pudding Easter Truffles
Fridge: Store your prepared Banana Pudding Easter Truffles in an airtight container for up to 5 days. This keeps them fresh and creamy, ready for joyful bites!
Freezer: For longer storage, freeze uncoated truffles on a baking sheet for 1 hour, then transfer to an airtight container. They can be frozen for up to 2 months.
Reheating: When you’re ready to enjoy frozen truffles, allow them to thaw in the refrigerator for several hours or overnight before serving. This keeps their delightful texture intact!
Make-Ahead: Prepare truffle centers up to 2 days ahead, storing them in the fridge. Once coated, aim to consume within 5 days for the best flavor and texture!
Expert Tips for Banana Pudding Easter Truffles
-
Cream Cheese Consistency: Always ensure your cream cheese is fully softened to avoid lumps. This guarantees a smooth, creamy texture in your truffles.
-
Chill for Shape: Don’t skip the chilling step! Refrigerate the truffles for at least 30 minutes to help maintain their shape while dipping.
-
Small Batches: Work in small batches when coating to keep the remaining dough cool. This will make your truffles easier to shape and dip.
-
Decorate Promptly: To avoid melted chocolate hardening too quickly, sprinkle or drizzle your toppings immediately after dipping. This ensures they adhere well, adding a pop of color to your Banana Pudding Easter Truffles.
-
Versatile Ingredient Swaps: Feel free to substitute the banana pudding mix with vanilla or cheesecake pudding for a twist, helping you cater to varied tastes!
-
Keep Cool for Storage: Once you’ve made your truffles, store them in an airtight container in the fridge. They’ll stay fresh for up to five days, maintaining their creamy goodness!
Make Ahead Options
These Banana Pudding Easter Truffles are perfect for meal prep, making your holiday gatherings stress-free! You can prepare the truffle centers up to two days in advance by following the first three steps: mix, shape, and chill the truffles. Simply store them in an airtight container in the refrigerator to maintain their freshness. Then, when you’re ready to serve, melt the white chocolate or candy melts and dip the chilled truffles, decorating them immediately with sprinkles. This way, you’ll enjoy the delightful taste of these truffles without the rush, providing you with just as delicious results!
Banana Pudding Easter Truffles Variations
Feel free to get creative with these delightful truffles and make them your own!
-
Cheesecake Twist: Swap out banana pudding mix for cheesecake pudding for a rich and creamy flavor burst. This change brings in a tangy sweetness that’s simply irresistible.
-
Graham Cracker Crunch: Replace crushed vanilla wafers with graham cracker crumbs to introduce a different texture and flavor profile. The caramel notes combined with banana will leave you craving more!
-
Nutty Delight: Add finely chopped nuts, such as pecans or walnuts, into the truffle mixture for a satisfying crunch. The nutty flavor will enhance the overall richness of the truffles, taking them to the next level.
-
Almond Milk Swap: Use almond milk instead of regular milk for a delicious dairy-free option that still keeps things creamy and delightful. This simple change ensures everyone can indulge, regardless of dietary restrictions.
-
Flavor Boost: Enhance the flavor by incorporating a dash of cinnamon or nutmeg into the mixture. These warm spices complement the sweet banana notes beautifully and can remind you of cozy baking days.
-
Colorful Coating: Go beyond white chocolate and use colorful candy melts for coating. Use vibrant pastels to match the Easter theme, making your truffles eye-catching and festive!
-
Fruity Surprise: Toss in a handful of mini chocolate chips or dried banana pieces into the mixture for an exciting texture twist. These additions create delightful surprises with each bite, perfect for adventurous eaters.
-
Spicy Kick: For an unexpected twist, consider sprinkling a pinch of cayenne pepper into the truffle mix. Just a hint will add a surprising warmth that complements the sweetness of the banana wonderfully.
These variations can elevate your Banana Pudding Easter Truffles to new heights, ensuring they cater to every taste and occasion. If you’re up for a classic yet whimsical pairing, enjoy them with a side of Classic Banana Pudding or a slice of your favorite Easter cake!
What to Serve with Banana Pudding Easter Truffles
These charming treats are perfect companions for a delightful Easter gathering or a cozy dessert night at home.
-
Classic Banana Pudding: The traditional dessert brings familiarity and comfort, making it a must-have alongside the truffles to enhance the banana flavor.
-
Mini Cheesecakes: Their creamy, rich taste pairs beautifully with the lightness of the truffles, offering a decadent contrast that will impress your guests.
-
Fruit Skewers: Vibrant, fresh fruits add a refreshing element, balancing the sweetness of the truffles and providing a colorful presentation.
-
Chocolate-Covered Strawberries: These indulgent bites complement the creamy truffles perfectly, sharing that delightful chocolatey element while enhancing the festive vibe.
-
Lemonade or Iced Tea: Refreshing beverages like these will cleanse the palate, making each bite of truffle feel as enticing as the first.
-
Coconut Macaroons: These chewy, sweet delights offer another layer of texture and taste, further elevating your dessert table’s allure.
Each pairing not only amplifies the joy of your Banana Pudding Easter Truffles but brings a delightful variety of flavors and textures to your festive get-together!

Banana Pudding Easter Truffles Recipe FAQs
What kind of cookies work best for the truffles?
You should use crushed vanilla wafer cookies for that classic banana pudding crunch. If you’re looking to mix things up, graham crackers are a delicious alternative, providing a hint of sweetness and different texture.
How should I store my Banana Pudding Easter Truffles?
Store your truffles in an airtight container in the fridge for up to 5 days. This keeps them fresh and ready for enjoyment! If you want to savor them for later, follow the freezing instructions below for best results.
Can I freeze Banana Pudding Easter Truffles?
Absolutely! To freeze your truffles, first freeze the uncoated truffles on a baking sheet for about 1 hour. Once firm, transfer them to an airtight container. They can be frozen for up to 2 months! When you’re ready to enjoy them, simply thaw in the refrigerator for several hours or overnight. This ensures they retain their delightful texture.
What if my truffle mixture is too sticky?
Should the mixture become overly sticky, you can add a touch more crushed vanilla wafers, about 1-2 tablespoons at a time, until it reaches a manageable consistency. Ensure your cream cheese is well softened as this helps to achieve the right texture more easily.
Are there any dietary considerations I should keep in mind?
Yes! If you have any allergies, be wary of the cream cheese and cookies, as they may contain gluten or dairy. For a dairy-free option, use almond milk instead of regular milk and consider substituting the cream cheese with a plant-based alternative. Always read labels to safely enjoy these sweet treats!
Can I use a different type of pudding mix?
Absolutely! If you’re feeling adventurous, substitute the banana pudding mix with vanilla or cheesecake pudding mix for an exciting twist. This allows you to customize the flavor and still create a festive treat!
Creamy Banana Pudding Easter Truffles for Sweet Spring Celebrations
Ingredients
Equipment
Method
- In a mixing bowl, combine the crushed vanilla wafer cookies, softened cream cheese, dry banana pudding mix, milk, and vanilla extract. Blend until a thick, sticky dough forms.
- Scoop small spoonfuls of the mixture and roll them into balls, about one inch in diameter. Place on a parchment-lined baking sheet.
- Cover the baking sheet with plastic wrap and refrigerate the truffles for 30 minutes.
- Melt the white chocolate or candy melts in a microwave-safe bowl or double boiler, stirring until smooth.
- Dip each truffle into the melted chocolate, allowing excess to drip off. Decorate with sprinkles or drizzle immediately.
- Return the truffles to the refrigerator for an additional 15-20 minutes to firm up.
Leave a Reply