
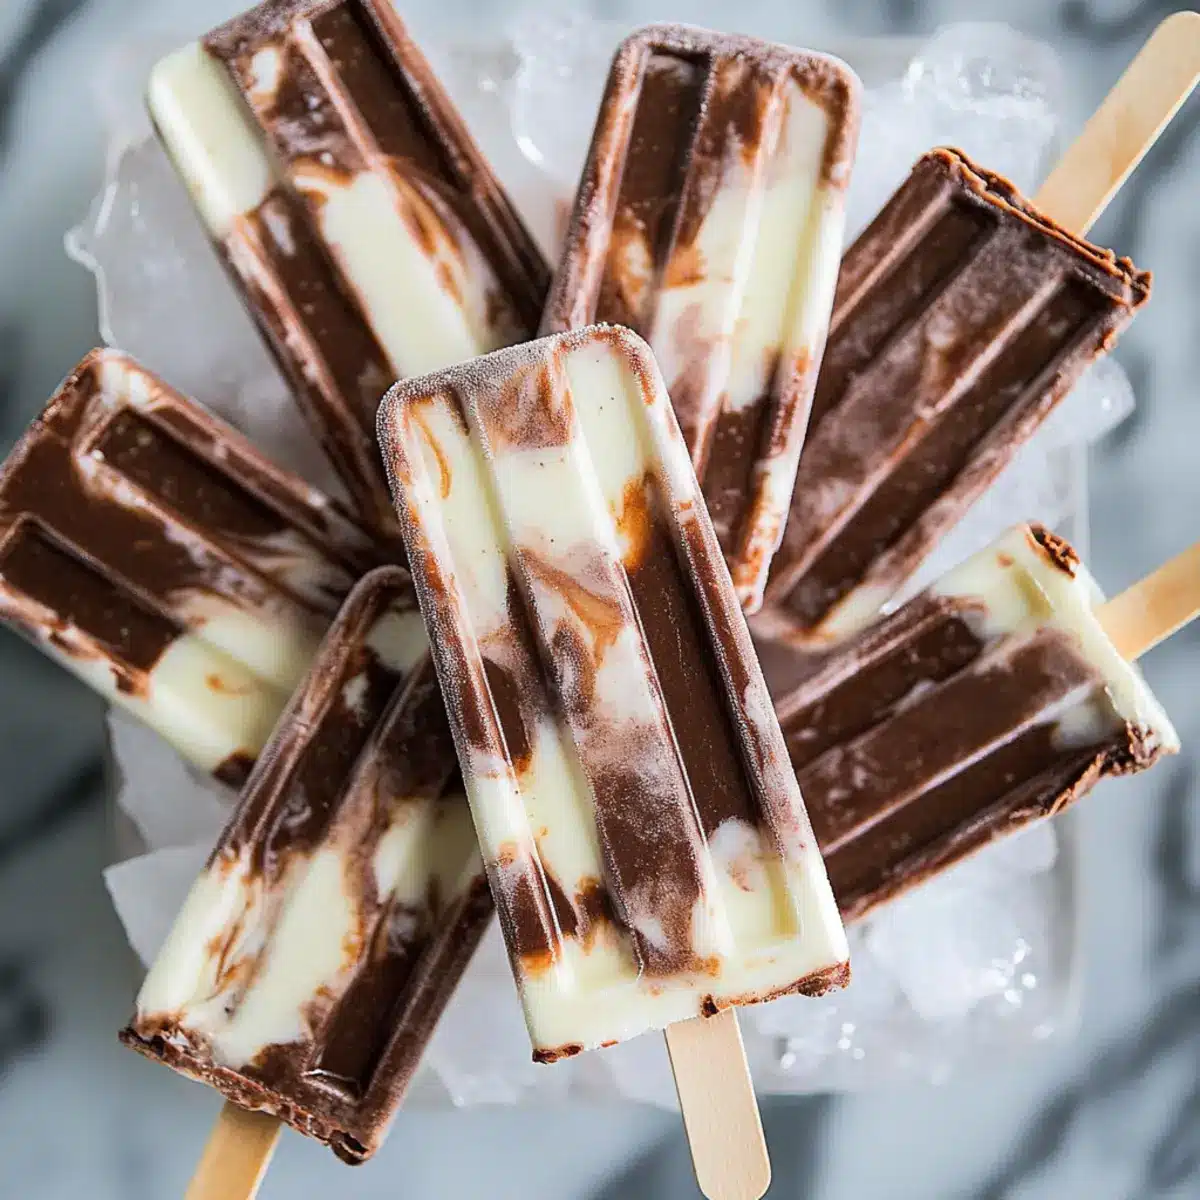
As I stood in my kitchen, the sun streaming through the window, I felt a nostalgic tug from my childhood: the gentle warmth of summer afternoons spent relishing homemade treats. That’s when I decided to whip up some delightful Jello Pudding Pops. These creamy frozen desserts are not just a blast from the past; they are incredibly easy to prepare and can be customized in flavors. Imagine delighting your family with luscious layers of vanilla and chocolate, or even adding a sprinkle of crushed Oreos for a fun twist! Best of all, these pops are a fantastic way to beat the heat while savoring a delightful taste of nostalgia. Isn’t it time we rediscovered that joyful blend of flavors and memories? Let’s dive in and make some creamy Jello Pudding Pops together!
Why are Jello Pudding Pops so amazing?
Nostalgic Flavors: Dive back into your childhood with these creamy treats that bring back sunny memories.
Quick and Simple: In just minutes, you can create a delightful dessert without any complicated steps.
Customizable Delight: Mix it up! Whether you prefer chocolate, vanilla, or an Oreo twist, you can tailor these pops to your taste.
Perfect for Any Occasion: These pops are not just for summer; they make a fun treat for any gathering or celebration. Try serving them chilled alongside fresh fruit for a refreshing combo!
Guilt-free Indulgence: At around 102 calories per pop, indulge without the worry, making them a lighter alternative to traditional frozen goodies. Rediscover the joy and flavor of homemade desserts with these delightful Jello Pudding Pops!
Jello Pudding Pops Ingredients
• Ready to create a delicious dessert that takes you back to childhood?
For the Pudding
• White Chocolate Instant Jell-O Pudding Mix – Adds a creamy, sweet base; feel free to swap in Vanilla Instant Jell-O Pudding Mix if you prefer.
• Chocolate Instant Jell-O Pudding Mix – Provides rich chocolatey goodness for a delightful contrast.
• Whole Milk – Ensures a smooth and creamy texture; 1% milk can be used, but it may be slightly less rich.
For the Mix-ins (Optional)
• Crushed Oreo Cookies – Great for an added crunch in your chocolate pudding; perfect for making Oreo Pudding Pops!
Enjoy whipping up these nostalgic Jello Pudding Pops and savor every creamy bite!
Step‑by‑Step Instructions for Jello Pudding Pops
Step 1: Prepare the White Chocolate Pudding
In a medium bowl, combine 1 package of white chocolate instant Jell-O pudding mix with 1 3/4 cups of whole milk. Whisk vigorously for about 2 minutes until the mixture is smooth and starts to thicken slightly. You’ll know it’s ready when it gently holds its shape. Set the bowl aside while you prepare the chocolate pudding, letting it set further.
Step 2: Make the Chocolate Pudding
Next, in another medium bowl, mix together 1 package of chocolate instant Jell-O pudding mix with the remaining 1 3/4 cups of cold whole milk. Whisk this mixture for about 2 minutes as well, ensuring it thickens adequately. Similar to the white chocolate pudding, it should maintain a thick consistency. Once both puddings have set, you’re ready to create the pops!
Step 3: Swirl the Puddings Together
Grab a clean plastic gallon-sized bag, and carefully spoon alternating layers of the white chocolate and chocolate pudding into the bag. Aim for a fun swirl effect by layering them side by side, allowing each flavor to peek through. Once filled, gently press out excess air and seal the bag tightly to prevent leaks.
Step 4: Pipe into Molds
Using scissors, snip off the corner of the plastic bag to create a small opening. Hold it over your popsicle molds, and begin piping the pudding mixture into each mold, alternating between the white chocolate and chocolate pudding for a vibrant swirl. Fill each mold to the top, leaving a small space for expansion during freezing.
Step 5: Freeze the Pops
Transfer the filled molds to the freezer, placing them in a flat and level position. Freeze for at least 3 hours, or for the best results, overnight. Keep an eye on them to ensure they freeze evenly, turning into creamy Jello Pudding Pops that are perfectly formed and ready to enjoy.
Step 6: Remove the Pudding Pops
Once frozen solid, it’s time to release your delightful Jello Pudding Pops. Take the molds out of the freezer and dip the bottoms of each mold into a bowl of hot water for about 10 seconds. This will help loosen the pops. Gently pull on the sticks to slide them out smoothly, and admire those beautiful swirls you created!
Jello Pudding Pops Variations & Substitutions
Feel free to unleash your creativity and customize these delightful frozen treats to suit your taste!
- Vanilla Twist: Substitute the white chocolate pudding mix with a classic vanilla instant Jell-O pudding mix for a simple yet delicious variation.
- Nutty Delight: Add a handful of finely chopped nuts for a crunch factor, enhancing both flavor and texture—a delightful surprise in each bite!
- Fruit Infusion: Mix in pureed fruit, such as strawberries or bananas, into one of the pudding layers for a fruity flavor burst that complements the creaminess beautifully.
- Oreo Pudding Pops: Sprinkle crushed Oreos into the chocolate pudding mix for a fun and familiar treat that adds a delightful crunch with every lick. What’s better than reliving childhood with these beloved flavors?
- Non-Dairy Option: Use almond milk or coconut milk instead of whole milk, alongside dairy-free pudding mixes, for a refreshing and lactose-free treat. Perfect for those with dietary restrictions!
- Chocolate Mint Bliss: Incorporate a few drops of peppermint extract into the chocolate pudding for a refreshing minty twist that balances beautifully with the sweetness.
- Spicy Surprise: Add a pinch of cayenne pepper to the chocolate pudding for an unexpected kick that contrasts perfectly with the sweetness—your guests will love this secret twist!
- Colorful Layers: Mix and layer different food colors into your puds—think rainbow swirls for a festive occasion! Everyone loves a visually striking dessert, especially kids.
Explore these fun variations, and don’t hesitate to craft your own delicious stories with every batch of Jello Pudding Pops!
Expert Tips for Jello Pudding Pops
-
Mix Thoroughly: Ensuring that both pudding mixes are whisked well helps avoid lumps, resulting in smoother, creamier Jello Pudding Pops.
-
Right Consistency: Allow both puddings to set slightly; this will help them hold shape when you pipe them into molds, preventing a messy swirl.
-
Layering Technique: For a beautiful presentation, alternate the layering of the pudding, ensuring each layer is visible. Experiment with colors by adding food coloring!
-
Handle with Care: When dipping molds in hot water, be cautious to only submerge the bottoms; too much water can oversaturate and ruin your pops.
-
Flavor Variations: Don’t hesitate to mix in crushed cookies or different flavored pudding mixes to create fun variations of your Jello Pudding Pops!
Make Ahead Options
These Jello Pudding Pops are perfect for busy home cooks looking to save time! You can prepare both the white chocolate and chocolate pudding mixtures up to 24 hours in advance. Simply follow the initial steps of mixing the pudding with milk, then cover and refrigerate to maintain their creamy texture. When you’re ready to serve, just scoop the prepared puddings into a plastic bag for piping and swirl them into molds. Freeze overnight for the best results, and enjoy these nostalgic frozen treats any day of the week. With this make-ahead option, you’ll have delicious, homemade Jello Pudding Pops on hand, ready to delight your family!
What to Serve with Jello Pudding Pops
Indulging in creamy dessert bliss is only part of the joy; let’s explore delightful pairings for a truly memorable treat.
-
Fresh Fruit Salad: A colorful mix of berries and melons offers a refreshing contrast to the creamy pudding pops. The natural sweetness enhances their flavor beautifully.
-
Chocolate Dipping Sauce: Drizzling warm chocolate over these pops creates a decadent twist, adding an extra layer of indulgence that chocolate lovers will adore.
-
Whipped Cream: A dollop of fluffy whipped cream on the side enriches each bite and brings a light, airy texture that balances the creaminess of the pudding.
-
Ice Cream Sandwiches: Combine the pops with soft cookies to make delightful ice cream sandwiches. This playful twist transforms one dessert into another entirely!
-
Iced Tea or Lemonade: A chilled glass of iced tea or lemonade refreshes the palate, complementing the sweetness of the pudding pops with a zesty kick.
-
Chocolate-Covered Pretzels: The salty crunch of chocolate-covered pretzels adds a delightful contrast to the creamy Jello Pudding Pops, creating a satisfying sweet-and-salty balance.
Creating a whimsical dessert experience is easy! Pair these creamy Jello Pudding Pops with fresh elements, decadent treats, or refreshing beverages the whole family will enjoy.
How to Store and Freeze Jello Pudding Pops
Fridge: Store Jello Pudding Pops in an airtight container for up to 2 days after freezing. However, freezing is recommended for the best taste and texture.
Freezer: These delicious treats can be stored in the freezer for up to 2 weeks. Ensure they are tightly sealed in their molds or placed in a freezer-safe bag to prevent freezer burn.
Releasing Pops: When ready to enjoy, dip the molds in warm water for about 10 seconds before pulling the pops out. This method helps to maintain their delightful shape.
Make-Ahead: Perfect for planning ahead! Prepare your Jello Pudding Pops in advance and surprise your family with a refreshing treat whenever they need to cool down.
Jello Pudding Pops Recipe FAQs
What is the best way to select Jell-O pudding mixes?
Absolutely! When choosing your Jell-O pudding mixes, opt for the ones with a well-sealed package. Check the expiration date to ensure freshness. For the creamiest texture, I recommend using Instant Jell-O pudding mixes rather than cook & serve for a quick prepare-and-enjoy experience!
How should I store leftover Jello Pudding Pops?
To maintain their delightful flavor, keep your Jello Pudding Pops stored in an airtight container in the freezer. They can last up to 2 weeks. If they need to be stored longer, make sure they are tightly sealed in their molds or wrapped in plastic wrap to prevent freezer burn. Slide some parchment paper between each pop to avoid sticking!
Can I freeze Jello Pudding Pops for longer than 2 weeks?
While it’s best to enjoy Jello Pudding Pops within 2 weeks for optimal taste and texture, they can technically stay frozen for up to 3 months. Just remember to tightly seal them in an airtight container or freezer bag to prevent any odors or freezer burn during that extended time.
What should I do if my pudding mixture is too runny before freezing?
Very! If you discover that your pudding mixture is too runny, give it a bit more time to set before piping it into molds. Make sure to whisk thoroughly, and if necessary, allow it to chill in the refrigerator for 10-15 minutes until it thickens to the desired consistency. This step ensures your pops will hold their shape beautifully when frozen.
Are Jello Pudding Pops safe for my family with allergies?
It’s always wise to check for allergens! The core ingredients in Jello Pudding Pops include milk and pudding mixes, so those with dairy allergies should proceed with caution. You can substitute non-dairy milk to create a lactose-free version. Always read the labels of your pudding packs to ensure they meet your dietary needs—your loved ones will appreciate the conscientiousness!
Delightful Jello Pudding Pops – A Nostalgic Frozen Treat
Ingredients
Equipment
Method
- In a medium bowl, combine 1 package of white chocolate instant Jell-O pudding mix with 1 3/4 cups of whole milk. Whisk vigorously for about 2 minutes until smooth.
- In another medium bowl, mix together 1 package of chocolate instant Jell-O pudding mix with the remaining 1 3/4 cups of cold whole milk. Whisk for about 2 minutes.
- Grab a clean plastic gallon-sized bag and layer spoonfuls of the white chocolate and chocolate pudding to create a swirl effect.
- Snip off the corner of the plastic bag and pipe the pudding mixture into each popsicle mold, alternating flavors.
- Transfer the filled molds to the freezer and freeze for at least 3 hours or overnight for best results.
- Once frozen, dip the bottoms of the molds in hot water for about 10 seconds, then gently pull on the sticks to remove the pops.
Leave a Reply