
As I stood in my kitchen, the scent of fresh berries filled the air, instantly transporting me to sunny summer picnics. This is the moment I knew it was time to whip up my favorite dessert: Layered Angel Food Cake with Stabilized Whipped Cream. This light summer dessert is not just a feast for the eyes but also a crowd-pleaser that transforms any gathering into a celebration. With its fluffy texture and delightful combination of sweet, juicy berries, every slice brings a refreshing burst of flavor that simply melts in your mouth. Plus, it’s a breeze to prepare, allowing you to spend more time enjoying the company of friends and family. Want to learn how to create this dreamy cake that will have everyone asking for seconds? Let’s dive into the recipe!
Why Is This Cake So Irresistible?
Lightness, this cake is the epitome of airy bliss—each bite feels like floating on clouds! Freshness, the burst of seasonal berries not only adds vibrant color but also contributes a refreshing zing that perfectly balances the sweetness. Simplicity, the straightforward steps make it easy to impress, even if you’re an amateur baker. Versatility, you can swap in any favorite fruits, like peaches or kiwis, depending on what’s in season. Plus, this gorgeous dessert is perfect for summer gatherings, where it’s sure to be the star of the table—everyone will be clamoring for a taste!
Layered Angel Food Cake Ingredients
• A light and fluffy dessert!
For the Cake
- 10 large egg whites – Provides structure and aeration for a light texture; use fresh, room temperature whites for the best results.
- 2 Tbsp fresh lemon juice – Enhances flavor and stabilizes egg whites; no substitutes needed, though vinegar can work in a pinch.
- 1 Tbsp warm water – Helps to stabilize egg whites during whipping; avoid substitutes for optimal results.
- 1 ½ tsp cream of tartar – Stabilizes beaten egg whites and increases volume; no substitutes recommended.
- 1 tsp lemon zest – Adds a fresh citrus aroma; feel free to use lime zest for a different twist.
- ½ cup granulated sugar – Sweetens the cake while aiding in aerating egg whites; no substitutes without affecting texture.
- 1 cup cake flour – Contributes to the light texture; all-purpose flour can be used if cake flour isn’t on hand.
- 1 tsp fine salt – Balances flavors in the cake; no substitutes necessary.
For the Frosting
- 1 cup (8 oz) cold cream cheese – Adds richness and stability to the frosting; substitute mascarpone cheese for a lighter option.
- 2 ½ cups heavy whipping cream – Creates a fluffy frosting; avoid low-fat alternatives for best results.
- 1 ¼ cup powdered sugar – Provides sweetness and stability; can be substituted with an equal amount of granulated sugar in a pinch, but results may vary.
For the Topping
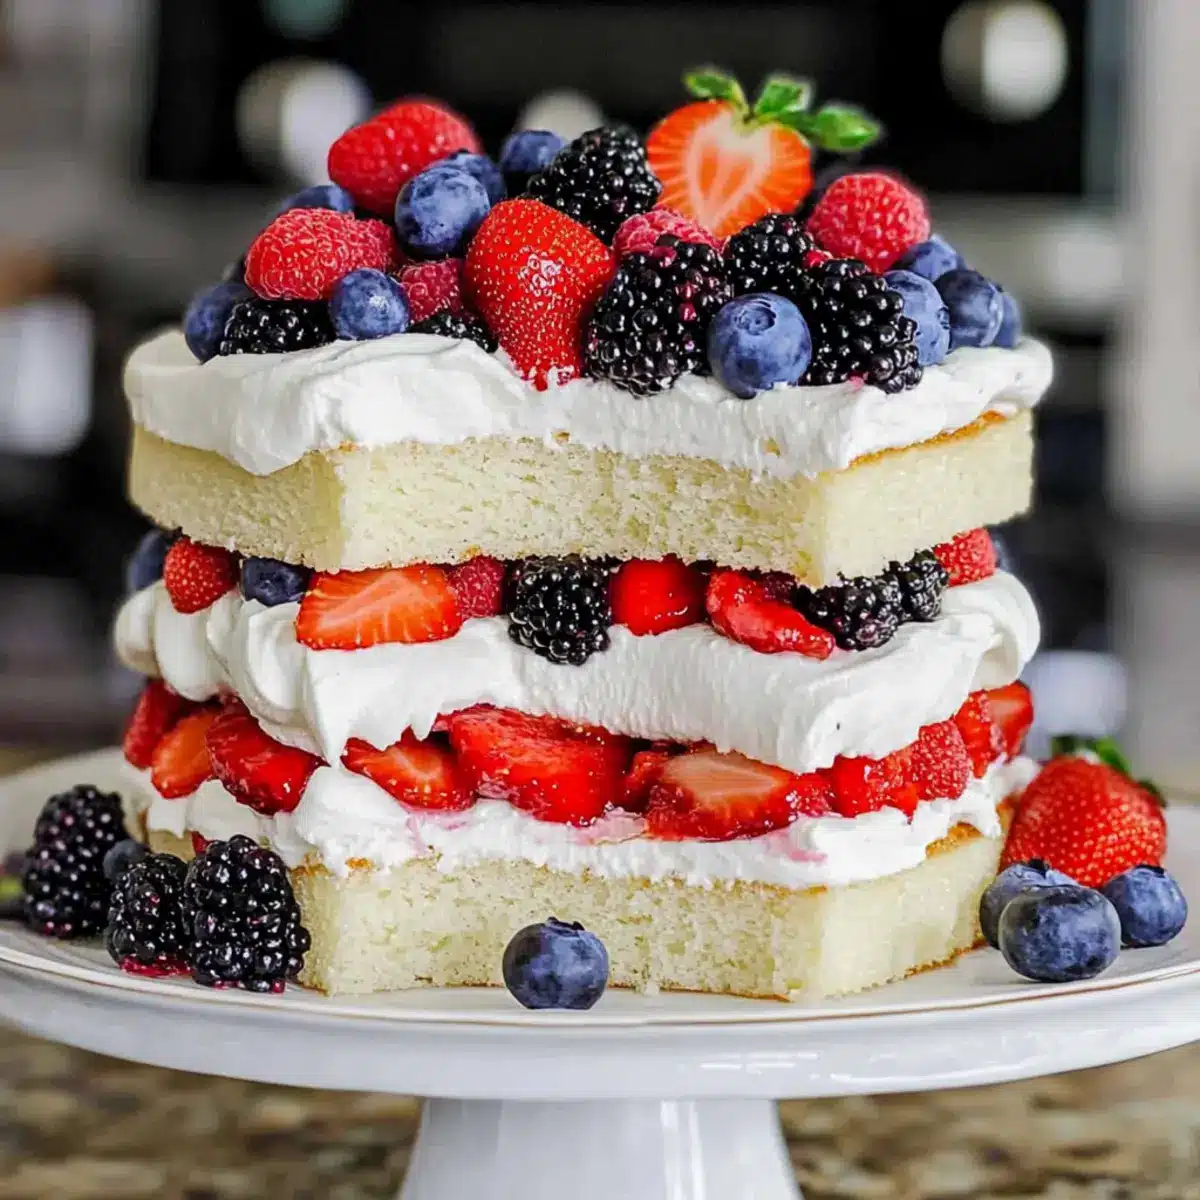
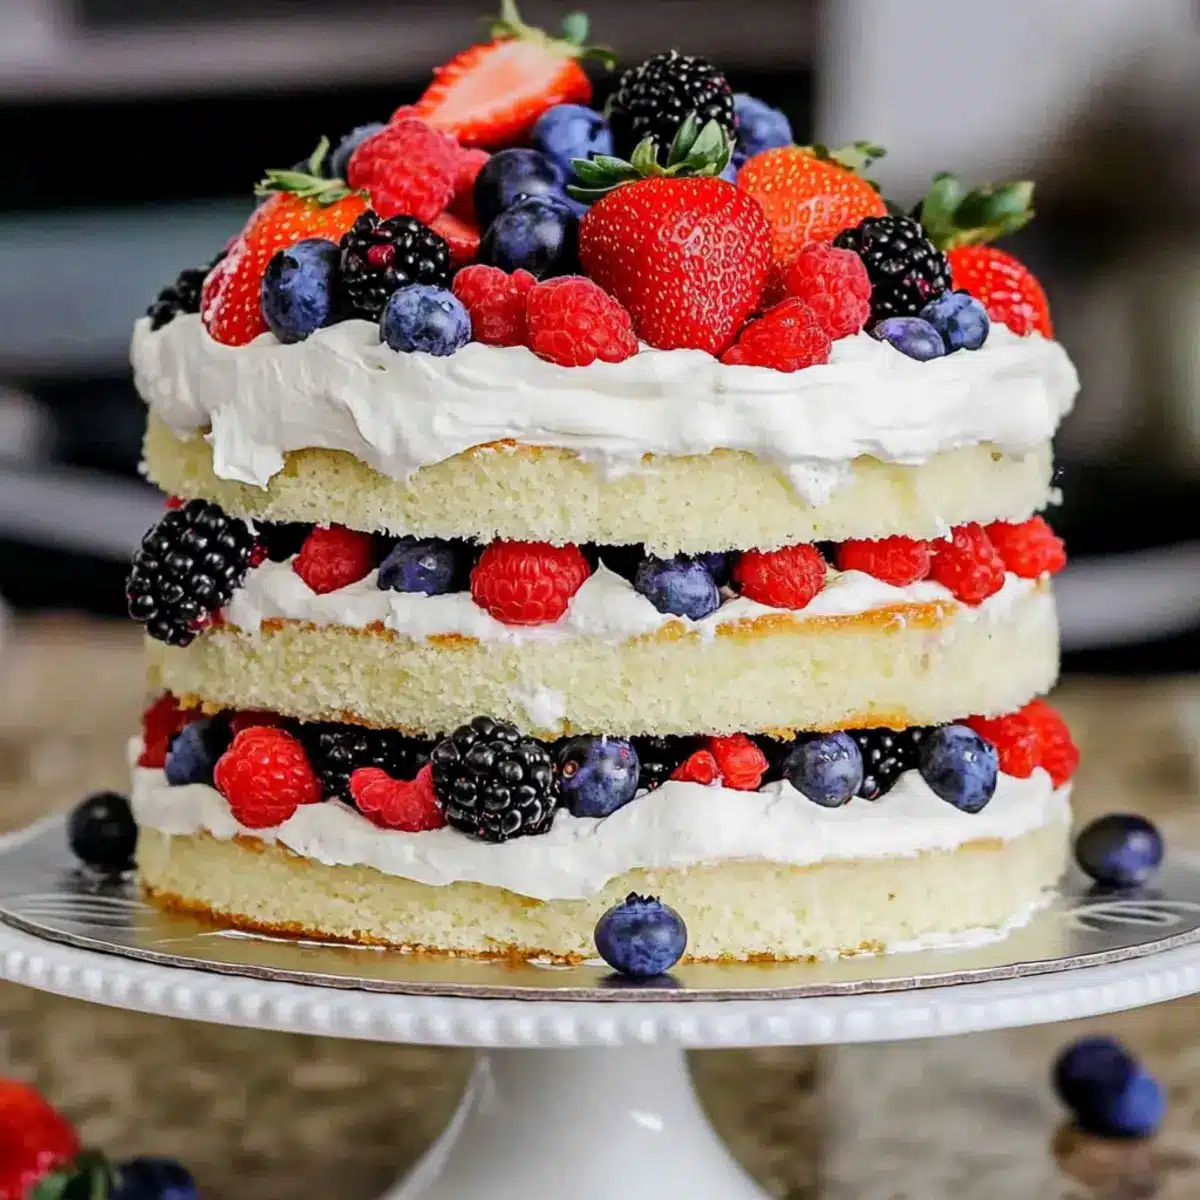
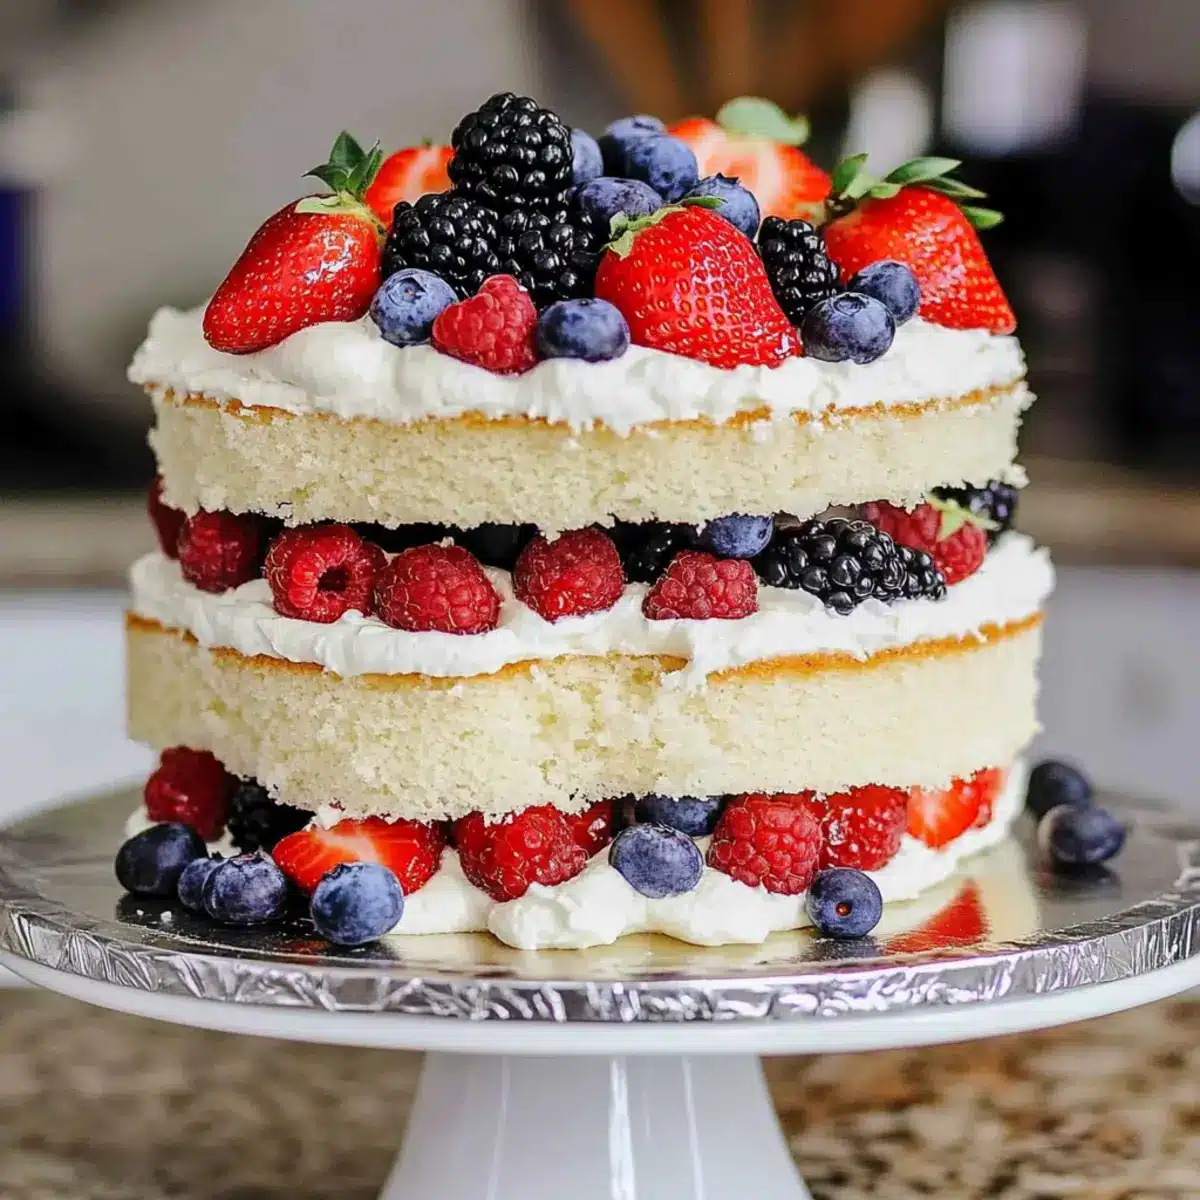
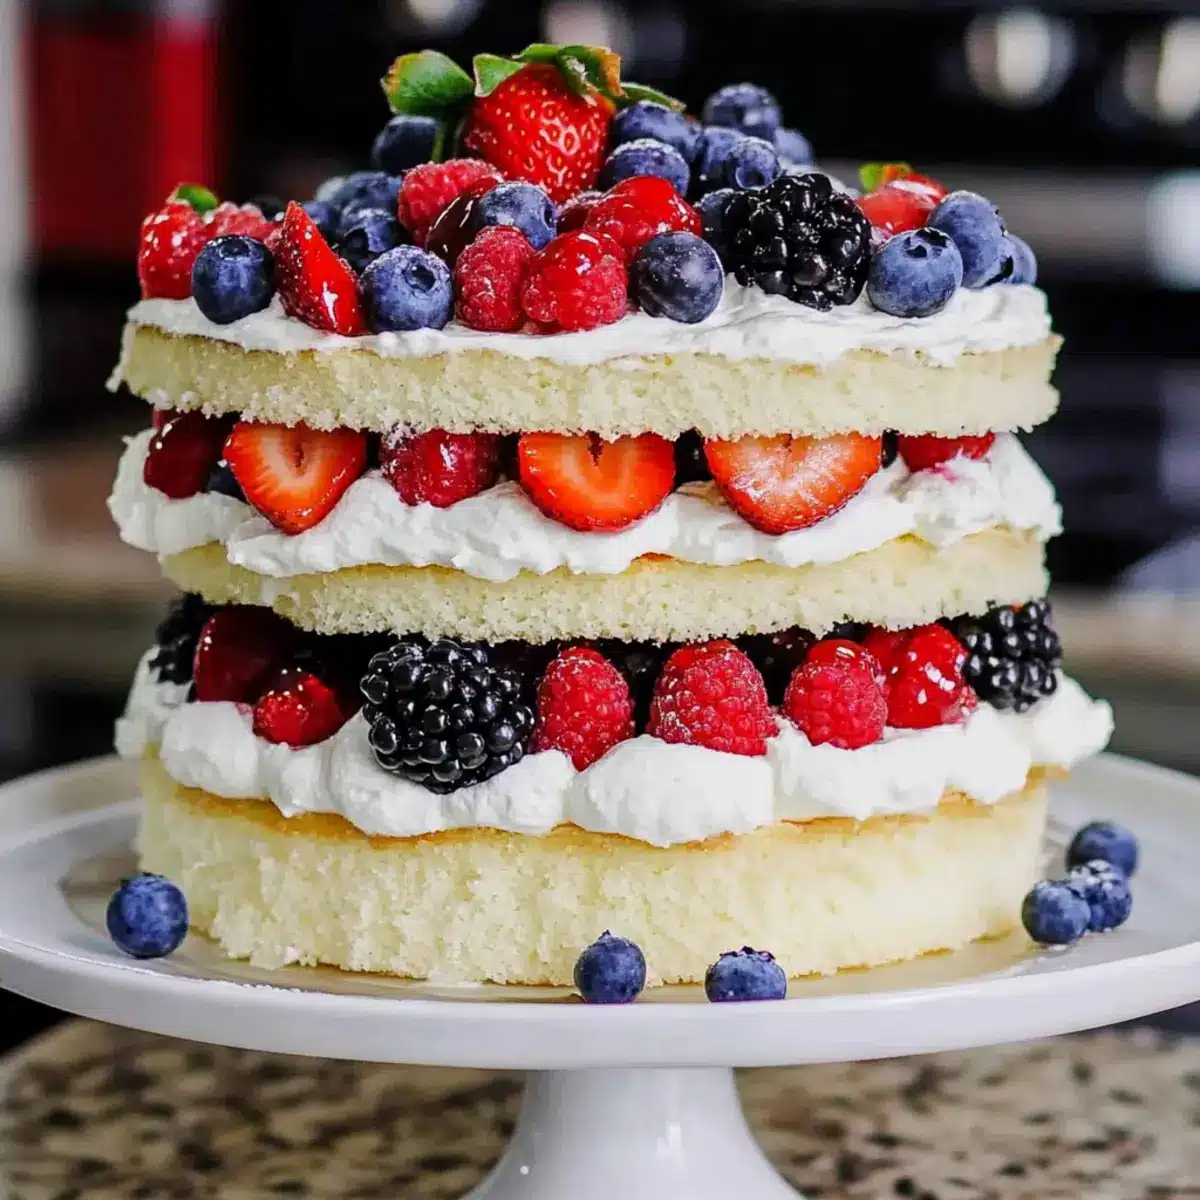
- 1 pint each of fresh blueberries, raspberries, blackberries, and 1 lb fresh strawberries – Adds color, flavor, and freshness; swap with any seasonal fruit like peaches or kiwi if desired.
With these ingredients at hand, you’re one step closer to creating a delightful Layered Angel Food Cake that’s sure to enchant your family and friends!
Step‑by‑Step Instructions for Layered Angel Food Cake
Step 1: Preheat & Prepare Pans
Begin by preheating your oven to 325°F (162°C). While the oven heats, line three 7 or 8-inch cake pans with parchment paper; do not grease them, as the batter requires the sides to cling to rise properly. A nice parchment layer will help you easily remove the cakes after baking.
Step 2: Make Cake Batter
In a stand mixer, combine 10 large egg whites, 2 tablespoons of fresh lemon juice, 1 tablespoon of warm water, 1 ½ teaspoons of cream of tartar, and 1 teaspoon of lemon zest. Mix on low for about one minute. Gradually add ½ cup of granulated sugar, then increase the mixer speed to medium-high until you achieve soft peaks—this will take around 3-4 minutes.
Step 3: Incorporate Dry Ingredients
Sift together 1 cup of cake flour, 1 ¼ cups of powdered sugar, and 1 teaspoon of fine salt into a separate bowl. Gently fold this dry mixture into the whipped egg whites using a rubber spatula, ensuring no streaks of flour remain. This step is crucial for achieving the light and airy texture of your Layered Angel Food Cake.
Step 4: Bake
Divide the cake batter evenly among the prepared pans. Bake in the preheated oven for 22-25 minutes, or until the tops are lightly golden and spring back when touched. Avoid opening the oven door while baking to maintain the temperature and ensure proper rising of the cake layers.
Step 5: Cool Layers
Once baked, carefully invert the pans onto a wire rack to cool completely. This cooling method prevents any shrinkage and keeps your cakes tall and fluffy. Leave the cakes upside down for about an hour, then gently remove the layers from the pans to avoid damaging the delicate texture.
Step 6: Make Frosting
To prepare the stabilized whipped cream frosting, chill your mixing bowl and whisk attachment in the freezer for about 30 minutes. Beat 1 cup of cold cream cheese in the chilled bowl until smooth, then gradually mix in 1 ¼ cups of powdered sugar. Slowly add 2 ½ cups of heavy whipping cream, increasing the speed until the mixture thickens to a fluffy consistency, taking care not to over-mix.
Step 7: Assemble Cake
Place one layer of the cake upside down on a serving platter. Use a spatula to frost the top with your prepared stabilized whipped cream frosting, then layer on an assortment of fresh berries—blueberries, raspberries, blackberries, and strawberries work beautifully. Continue stacking the layers and frosting until all layers are in place; finish by decorating the top with more berries and a dusting of powdered sugar.
How to Store and Freeze Layered Angel Food Cake
Fridge: Store any leftover Layered Angel Food Cake in an airtight container in the refrigerator for up to 3 days to maintain freshness and texture.
Freezer: If you want to freeze the cake, it’s best to frost it before freezing for optimal texture. Wrap the cake securely in plastic wrap and then in aluminum foil, and it can be kept in the freezer for up to 3 months.
Thawing: To enjoy, simply transfer the frozen cake to the fridge for several hours or overnight to thaw, allowing it to regain its fluffy texture before serving.
Reheating: If desired, you can slightly warm individual slices in the microwave for about 10-15 seconds, allowing the frosting to soften beautifully.
Expert Tips for Layered Angel Food Cake
-
Room Temperature Egg Whites: Ensure your egg whites are at room temperature for optimal whipping, resulting in the perfect airy texture for your Layered Angel Food Cake.
-
No Greasing Required: Avoid greasing your pans; it’s essential for the batter to cling to the sides, allowing your cake to rise beautifully without collapsing.
-
Sift Dry Ingredients: Always sift the cake flour and powdered sugar before folding them into the egg whites. This aerates the mixture and guarantees a lighter cake.
-
Watch Your Frosting: Be careful not to over-mix the whipped cream frosting; it should be fluffy and smooth. Stop mixing as soon as you reach the desired consistency.
-
Cool Layers Upside Down: Invert the cake layers to cool on a wire rack. This technique helps maintain their height and prevents shrinkage, keeping your cake fluffy and delightful.
Layered Angel Food Cake Variations
Feel free to personalize your dessert experience with these delightful twists and substitutions!
-
Dairy-Free: Substitute cream cheese and heavy cream with coconut cream for a rich, dairy-free frosting. The tropical flavor will bring a beachy feel to your cake!
-
Gluten-Free: Use a gluten-free cake flour alternative or almond flour instead of regular flour to create a light and fluffy gluten-free version everyone can enjoy!
-
Fruit Swap: Replace mixed berries with seasonal fruits like peaches or kiwi for a unique flavor adventure. Each season brings different bounty—embrace the variety!
-
Flavor Boost: Add a splash of vanilla extract or almond extract to the frosting for an extra layer of flavor. A hint of almond can elevate the whole dessert!
-
Chocolate Drizzle: Melt dark or white chocolate and drizzle it over the cake for a decadent finish. This adds a delightful contrast to the lightness of the angel food cake.
-
Nuts for Crunch: Sprinkle chopped toasted almonds or pistachios between the layers or on top for added texture. The crunch will beautifully complement the soft cake.
-
Lemon Twist: Incorporate lemon curd between the layers for an extra tangy surprise. This zesty addition pairs perfectly with the sweetness of the whipped cream and berries.
-
Mini Versions: Create mini angel food cakes in cupcake form for a fun, individual twist! These bite-sized treats are perfect for picnics or celebrations, like at a gathering featuring our Cozy One Pot Seafood Stew.
Feel inspired yet? With these ideas, your Layered Angel Food Cake can become a canvas for your culinary creativity!
What to Serve with Layered Angel Food Cake
As you prepare to dazzle your guests with this airy delight, consider these complementary dishes to create a harmonious meal.
- Fresh Fruit Salad: A vibrant mix of seasonal fruits like peaches, cantaloupe, and kiwi adds a juicy contrast to the cake’s lightness.
- Lemon Sorbet: This light, refreshing dessert enhances the citrus notes in the cake and provides a lovely palate cleanser.
- Vanilla Ice Cream: A scoop of creamy vanilla ice cream elevates the overall indulgence and contrasts beautifully with the fluffy texture of the cake.
- Minted Lemonade: A chilled glass of mint-infused lemonade brings a zesty brightness that pairs perfectly with the sweetness of the cake.
- Coconut Cream Pie: For those who love a twist, this tropical treat complements the berries’ freshness while adding a luscious creaminess.
- Champagne: A glass of bubbly adds a celebratory flair to your gathering and its crispness pairs delightfully with the fluffy cake.
- Chocolate-Dipped Strawberries: These decadent treats echo the cake’s berry theme while introducing a touch of richness to the overall dessert experience.
Whether hosting a summer picnic or a special gathering, these pairings will enhance the magic of your Layered Angel Food Cake!
Make Ahead Options
These Layered Angel Food Cakes are ideal for meal prep enthusiasts looking to save time during busy weeknights! You can prepare the cake layers up to 24 hours in advance by baking them, then cooling completely and wrapping each layer tightly in plastic wrap before refrigerating. The stabilized whipped cream frosting can also be made ahead; simply store it in an airtight container in the fridge for up to 3 days. When you’re ready to serve, just assemble the layers with the whipped cream frosting and berries, and you’ll have a stunning dessert that tastes just as fresh and delicious as if you made it that day!
Layered Angel Food Cake with Stabilized Whipped Cream Recipe FAQs
What type of egg whites should I use for the best results?
Absolutely! Opt for large egg whites that are fresh and at room temperature. This helps achieve maximum volume and a light texture, which is essential for a perfectly fluffy Layered Angel Food Cake.
How should I store leftover Layered Angel Food Cake?
To maintain its delightful texture, store any leftover cake in an airtight container in the refrigerator for up to 3 days. If you’d like to keep it longer, consider freezing it instead.
Can I freeze the cake, and how should I do it?
Yes, you can freeze your Layered Angel Food Cake! For the best results, frost it first, then wrap it tightly in plastic wrap followed by aluminum foil. This will protect it from freezer burn. The cake can be kept in the freezer for up to 3 months.
What are some common troubleshooting tips for making this cake?
If your egg whites don’t whip to peaks, ensure that your mixing bowl and utensils are completely clean and free of grease, as even a small amount of fat can prevent them from whipping up properly. Also, remember to fold in the dry ingredients gently to maintain the airy texture. If the cake sinks after baking, it might not have been baked long enough or cooled upside down, leading to shrinkage.
Are there any dietary considerations I should keep in mind?
If you have allergies, check that all your ingredients are safe for consumption. This cake includes eggs and dairy, which may not be suitable for vegan diets or those with lactose intolerance. For pets, be cautious; fruits like grapes should be avoided, and whipped cream may not be advisable due to its high fat content. Always consult your vet regarding safe treats for your furry friends!
Light and Fluffy Layered Angel Food Cake with Fresh Berries
Ingredients
Equipment
Method
- Preheat your oven to 325°F (162°C) and line three 7 or 8-inch cake pans with parchment paper.
- In a stand mixer, combine 10 large egg whites, 2 tablespoons of fresh lemon juice, 1 tablespoon of warm water, 1 ½ teaspoons of cream of tartar, and 1 teaspoon of lemon zest. Mix on low for about one minute.
- Gradually add ½ cup of granulated sugar, then increase to medium-high until soft peaks form, about 3-4 minutes.
- Sift together 1 cup of cake flour, 1 ¼ cups of powdered sugar, and 1 teaspoon of fine salt into a separate bowl. Fold into the whipped egg whites gently.
- Divide the cake batter among the prepared pans and bake for 22-25 minutes until lightly golden.
- Invert the pans onto a wire rack to cool completely for about an hour.
- Chill your mixing bowl and whisk attachment, then beat 1 cup of cold cream cheese until smooth. Gradually mix in 1 ¼ cups of powdered sugar.
- Slowly add 2 ½ cups of heavy whipping cream, increasing speed until thick and fluffy.
- Layer the cake upside down on a platter, frost with whipped cream, and top with fresh berries. Repeat with remaining layers.
Leave a Reply