
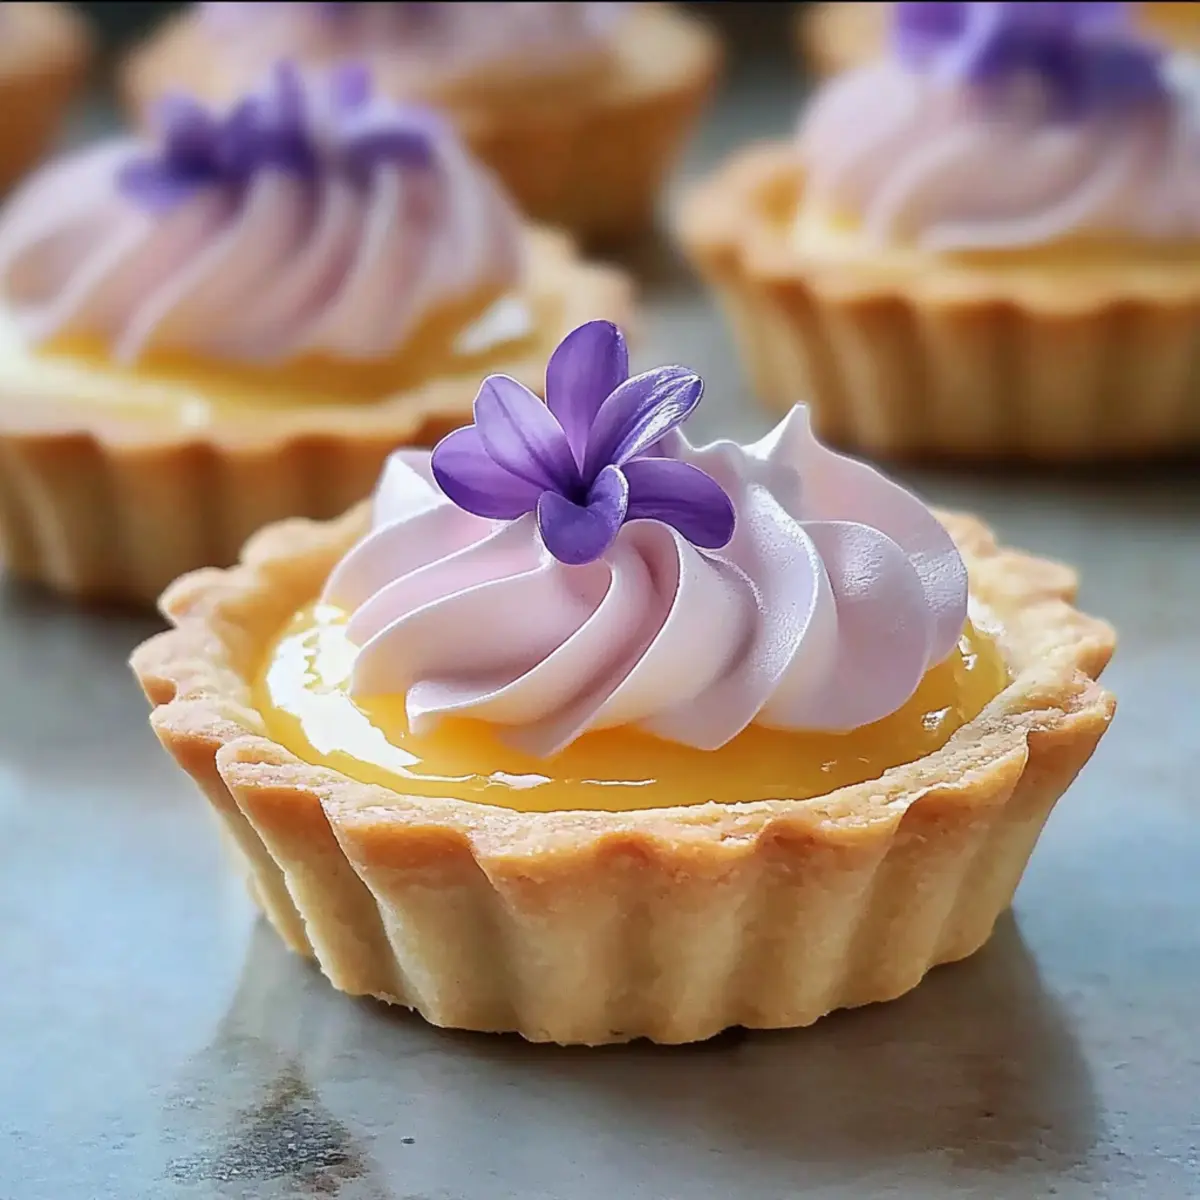
As I watched the vibrant blossoms sway in the spring breeze, inspiration struck: what better way to celebrate this festive season than with a delightful Mini Lemon Tart with Lilac Meringue? This elegant treat perfectly captures the essence of spring, showcasing the bright, zesty flavor of lemon complemented by the enchanting sweetness of lilac-infused meringue. What I love most about this recipe is how it promises a stunning presentation, making it a showstopper for any gathering—particularly for Mother’s Day celebrations. With its quick prep time and gluten-free options, it’s the ideal way to indulge in homemade goodness without the fuss of intricate baking. Are you ready to elevate your dessert game and impress your loved ones with this floral delight? Let’s dive in!
Why is this tart a spring must-have?
Elegant Presentation: The Mini Lemon Tart with Lilac Meringue brings a touch of sophistication, perfect for Mother’s Day or any spring gathering.
Fresh Flavor: Enjoy the refreshing zing of lemon paired with the subtle sweetness of lilac—an exciting twist on traditional desserts.
Quick and Easy: The recipe is hassle-free, allowing you to whip up a gorgeous dessert without spending hours in the kitchen.
Versatile Variations: Explore different flavors with options like Rose Meringue or Lime-Lavender Curd, catering to diverse taste preferences.
Gluten-Free Friendly: Inclusive options mean everyone can partake in this delightful experience. Prepare a gluten-free shell and enjoy!
Treat yourself and loved ones with this stunning creation, much like our Chimichurri Grilled Chicken Bowl with Garlic Sauce brings zest to your meals!
Mini Lemon Tart Ingredients
• Discover the essential components for a delightful Mini Lemon Tart with Lilac Meringue!
For the Tart Shell
• All-Purpose Flour – Provides structure for the tart shells; substitute with gluten-free mixes for a gluten-free version.
• Powdered Sugar – Adds sweetness and a fine texture to the tart shells.
• Unsalted Butter – Contributes richness and flavor; ensure it’s cold for the right texture.
• Egg Yolk – Provides richness and color to the tart shell.
• Water – Binds the tart dough; adjust to achieve the right consistency if needed.
For the Lemon Curd
• Lemon Juice – Offers vibrant acidity and flavor; substitute with fresh lime juice for a twist.
• Lemon Zest – Enhances the lemon flavor with aromatic oils.
• Granulated Sugar – Sweetens the lemon curd.
• Eggs – Thickens and binds the lemon curd.
• Unsalted Butter (for curd) – Enriches the texture of the lemon curd.
For the Lilac Meringue
• Egg Whites – Base for the lilac meringue, providing a fluffy texture.
• Granulated Sugar (for meringue) – Sweetens and stabilizes the meringue.
• Cream of Tartar – Stabilizes egg whites when whipping.
• Vanilla Extract – Adds flavor to the meringue; substitute with rose water for a floral twist.
• Violet Food Coloring – Provides the signature lilac hue; natural alternatives can be used.
Step‑by‑Step Instructions for Mother’s Day Mini Lemon Tart with Lilac Meringue
Step 1: Make the Tart Shells
In a food processor, pulse together the all-purpose flour and powdered sugar until mixed. Add the cold unsalted butter, blending it until crumbly. Next, incorporate the egg yolk and just enough cold water to form a dough. Chill this dough in the refrigerator for at least 30 minutes. Preheat the oven to 350°F (175°C), roll out the chilled dough, and press it into mini tart pans. Prick the bases, line with parchment and weights, then bake for 10-12 minutes until golden. Allow the shells to cool completely.
Step 2: Prepare the Lemon Curd
In a medium saucepan, whisk together the lemon juice, lemon zest, granulated sugar, and eggs until combined. Cook the mixture over medium heat, stirring constantly for about 8-10 minutes, or until it thickens and coats the back of a spoon. Once thickened, remove from heat and whisk in the unsalted butter until smooth. Pour the lemon curd into the cooled tart shells and let them chill in the refrigerator for 1 hour to set beautifully.
Step 3: Make the Lilac Meringue
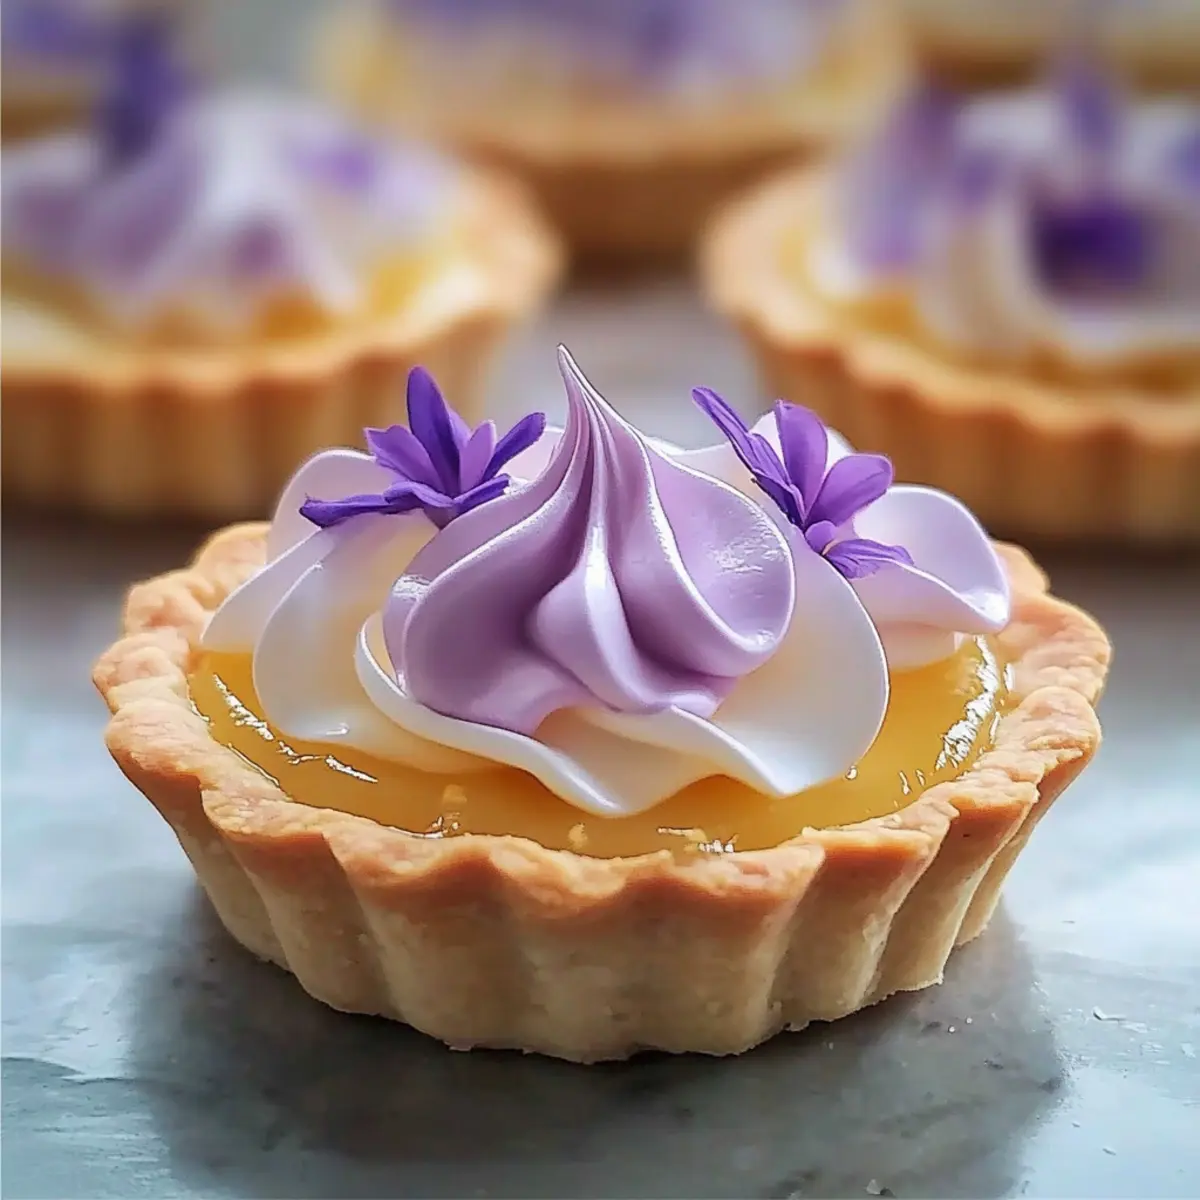
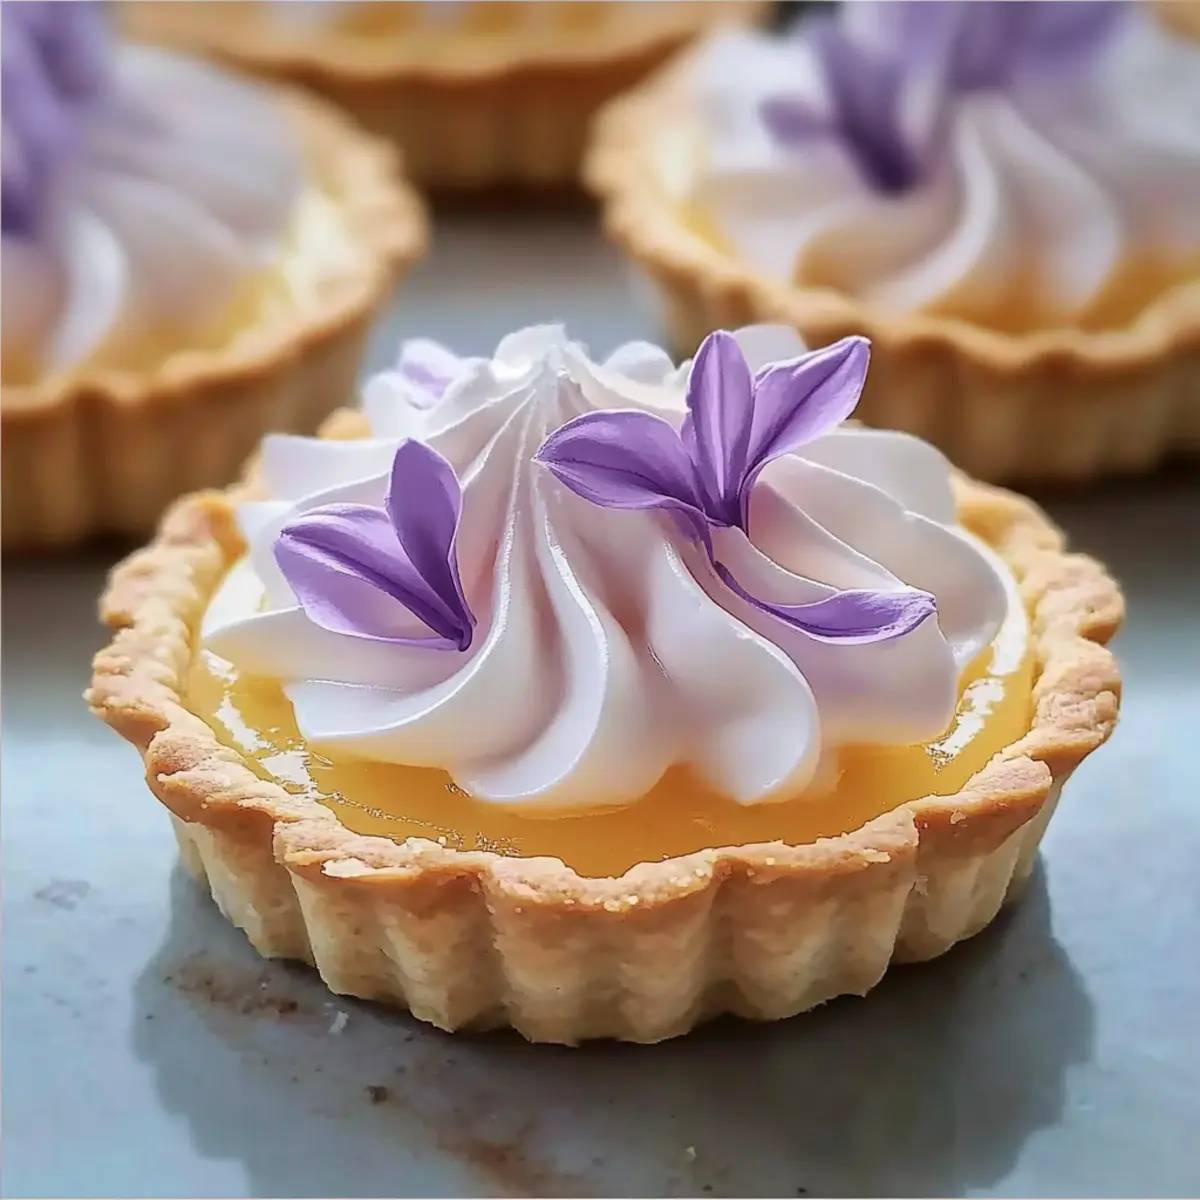
Set up a heatproof bowl over a saucepan of simmering water. In this bowl, combine the egg whites, granulated sugar, and cream of tartar. Whisk gently until the mixture is warm and the sugar has dissolved, around 5 minutes. Transfer the mixture to a stand mixer and beat on high speed for 5-7 minutes, until stiff peaks form and the meringue is glossy. Gently fold in the vanilla extract and violet food coloring for an enchanting lilac hue before piping the meringue onto the chilled lemon tarts.
Step 4: Toast and Garnish
Using a kitchen torch, carefully toast the tips of the lilac meringue until they are golden brown and slightly crisp. Alternatively, you can place the tarts briefly under a broiler, but watch closely to avoid burning. For an elegant finish, garnish each tart with edible lilac petals or a sprinkle of dried lavender. Your Mother’s Day Mini Lemon Tart with Lilac Meringue is now ready to impress!
Expert Tips for Mini Lemon Tart
-
Chill the Dough: Ensure the tart shells are fully chilled before baking to prevent shrinking and maintain their beautiful shape.
-
Room Temperature Eggs: For the best meringue, allow the egg whites to come to room temperature before whipping; this helps achieve maximum volume and stability.
-
Watch the Topping: When toasting the lilac meringue, use a kitchen torch for precise control. If using a broiler, keep an eye on it to avoid burning.
-
Don’t Rush the Curd: Stir the lemon curd constantly while cooking to avoid curdling, ensuring a smooth, velvety filling for your tart.
-
Experiment with Colors: Feel free to adjust the violet food coloring or even try natural alternatives for the meringue to match your desired spring aesthetic.
-
Storage Tips: If making ahead, store the tart shells and lemon curd separately; add the lilac meringue just before serving for the best texture. Enjoy your Mother’s Day Mini Lemon Tart!
What to Serve with Mini Lemon Tart with Lilac Meringue
Elevate your spring gatherings with delightful pairings that complement this floral creation beautifully.
- Lavender Lemonade: A refreshing drink that echoes the tart’s flavors, providing a perfect balance of sweetness and zest.
- Fresh Berries: Juicy strawberries or raspberries add vibrant color and a burst of tangy sweetness that enhances every bite.
- Herbal Tea: A floral-infused tea, like chamomile or jasmine, brings a serene finish, ideal for afternoon treats or post-lunch relaxation.
- Whipped Cream: Light, fluffy whipped cream adds a decadent touch that pairs beautifully with the citrusy notes of the tart.
- Honey Drizzle: A delicate drizzle of honey contributes a warm sweetness, intensifying the floral meringue flavor while providing a lovely sheen.
- Peach Sorbet: Light and refreshing, this fruity dessert brings out the zest in the lemon filling while providing a creamy contrast.
- Shortbread Cookies: Crisp, buttery cookies serve as a delightful sidekick, and their crunch adds a nice texture to the meal.
- Sparkling Wine: A glass of bubbly, slightly sweet wine pairs wonderfully, enhancing the evening’s festive spirit and lifting the tart’s flavors to new heights.
Mini Lemon Tart Variations & Substitutions
Feel free to mix things up and personalize this delightful tart to suit your taste buds!
- Rose Meringue: Swap vanilla extract for rose water and tint the meringue with a soft pink color for a floral twist. Imagine the lovely aroma wafting through your kitchen!
- Lime-Lavender Curd: Substitute lemon juice with fresh lime juice and incorporate culinary lavender sprigs for a unique herbal flavor profile. This combination will truly transport you to a blooming garden!
- Gluten-Free Shell: Use a mix of almond flour and a gluten-free baking blend, ensuring everyone can enjoy this delightful dessert. The nutty flavor will bring a new dynamic to your tarts!
- Berry Topping: Add a medley of fresh berries like raspberries or blueberries on top of the meringue for a burst of color and flavor. These vibrant jewels add both visual appeal and a fruity zing!
- Coconut Meringue: Substitute some of the granulated sugar in your meringue for sweetened shredded coconut to infuse a luscious coconut flavor. Your taste buds will do a happy dance!
- Chocolate Drizzle: After toasting the meringue, drizzle melted dark chocolate over the top for an unexpected decadent addition. This enchantingly rich treat will awaken your senses!
- Citrus Blend: Experiment with a mix of citrus juices, such as orange or grapefruit, in the lemon curd for a refreshing twist. Not only will it be delightful, but it will also give you a citrus rainbow effect!
- Spicy Kick: Add a pinch of cayenne pepper or chili powder to the meringue for an adventurous heat that contrasts beautifully with the sweet tartness. Dare to be bold and surprise your guests!
Don’t forget to enjoy this delectable treat alongside a lovely cup of floral-infused tea, much like what we recommend with our Holiday Roast Beef with Cranberry Balsamic Sauce. The possibilities are endless!
How to Store and Freeze Mini Lemon Tart with Lilac Meringue
Fridge: Store the mini lemon tarts in an airtight container in the fridge for up to 2 days to maintain freshness; this is crucial for the delicate meringue topping.
Tart Shells: Prepare tart shells a day ahead; keep them wrapped in plastic wrap at room temperature to avoid moisture, ensuring they stay crisp.
Lemon Curd: Lemon curd can be refrigerated separately in an airtight jar for up to 1 week; simply fill the tart shells when you’re ready to serve.
Freezer: If needed, freeze baked tart shells for up to 1 month. Let them cool completely, wrap well to avoid freezer burn, and thaw before use.
Make Ahead Options
These Mini Lemon Tart with Lilac Meringue are perfect for busy home cooks eager to prepare delicious desserts in advance! You can make the tart shells and lemon curd up to 24 hours in advance; simply store the cooled tart shells in an airtight container in the refrigerator and the lemon curd separately to maintain freshness. Additionally, the lilac meringue should be made right before serving to ensure it remains fluffy and light. When you’re ready to impress your guests, just fill the tart shells with the chilled lemon curd, pipe on the meringue, and toast it for that perfect finish. This strategy not only saves time but guarantees restaurant-quality results with minimal effort!

Mini Lemon Tart with Lilac Meringue Recipe FAQs
How do I choose ripe lemons for the lemon curd?
Absolutely! When selecting lemons, look for ones that are firm, heavy for their size, and have a vibrant yellow color. Avoid any with dark spots or blemishes, as these may indicate overripeness. Fresh lemons should have a pleasant citrus aroma—this is a sign of their juiciness and flavor.
How should I store the mini tarts before serving?
For the best taste and texture, place your Mini Lemon Tart with Lilac Meringue in an airtight container and store it in the refrigerator for up to 2 days. It’s important to keep the tarts chilled to maintain the delicacy of the meringue. If they need to sit for longer, I recommend storing the tart shells and lemon curd separately, adding the meringue just before you’re ready to serve.
Can I freeze mini lemon tart shells?
Yes, you can! To freeze the baked tart shells, allow them to cool completely, then wrap each shell tightly in plastic wrap or aluminum foil to prevent freezer burn. They can be stored in the freezer for up to 1 month. When you’re ready to use them, just thaw them at room temperature and fill them with lemon curd before topping with meringue.
What if my meringue doesn’t hold stiff peaks?
If you find that your meringue isn’t forming stiff peaks, don’t worry! Ensure your mixing bowl and beaters are completely clean and dry; any grease can hinder the egg whites from whipping up properly. Also, make sure your egg whites are at room temperature, which encourages better volume. Whip them on medium-low speed to start until frothy, then gradually increase to high speed until stiff peaks form. If you still run into issues, it might be a good idea to try adding a dash more cream of tartar to stabilize the meringue.
Is this recipe suitable for those with gluten allergies?
Very! This Mini Lemon Tart with Lilac Meringue can easily be made gluten-free. Simply substitute the all-purpose flour with a gluten-free baking mix or almond flour. Be sure to check that all your other ingredients (like baking powder, if using) are gluten-free as well. Everyone can enjoy this delightful treat with a few simple tweaks!
Mother's Day Mini Lemon Tart with Lilac Meringue Delight
Ingredients
Equipment
Method
- In a food processor, pulse together the all-purpose flour and powdered sugar until mixed. Add the cold unsalted butter, blending until crumbly. Incorporate the egg yolk and enough cold water to form a dough. Chill for at least 30 minutes.
- Preheat the oven to 350°F (175°C). Roll out the chilled dough, press into mini tart pans, prick the bases, line with parchment and weights, and bake for 10-12 minutes until golden. Allow to cool completely.
- In a medium saucepan, whisk together lemon juice, lemon zest, granulated sugar, and eggs. Cook over medium heat, stirring constantly for 8-10 minutes until it thickens. Remove from heat and whisk in unsalted butter until smooth. Pour into cooled tart shells and chill for 1 hour.
- Set up a heatproof bowl over simmering water. Combine egg whites, granulated sugar, and cream of tartar. Whisk until warm and sugar dissolves, about 5 minutes. Beat on high until stiff peaks form. Fold in vanilla extract and violet food coloring, then pipe onto chilled lemon tarts.
- Use a kitchen torch to toast the tips of the lilac meringue until golden brown. Alternatively, use a broiler briefly but monitor closely. Garnish with edible lilac petals or dried lavender.
Leave a Reply