
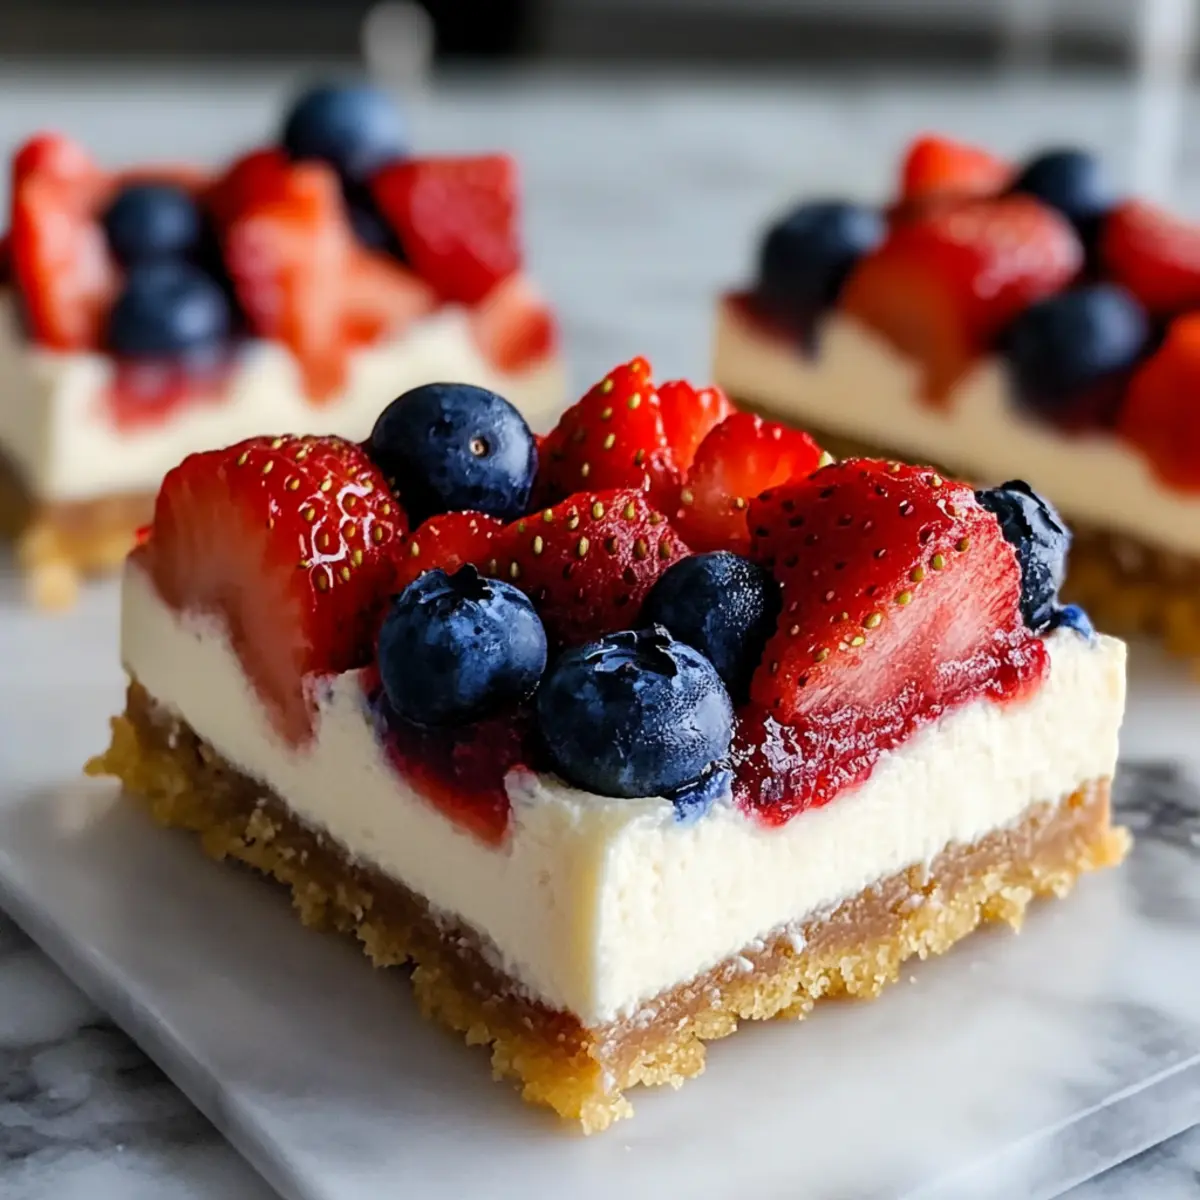
As I stood in the kitchen, the sun filtering in like a warm summer hug, the idea of a No-Bake Flag Cheesecake Bars came to life. Celebrating the vibrant colors of fresh berries, these dessert bars are a fabulous way to add a festive touch to any gathering without the hassle of baking. Not only are they quick to prepare—taking just 20 minutes—but they’re also a delightful treat for both kids and adults, making them a perfect crowd-pleaser. With options for gluten-free substitutions, they invite everyone to indulge in a slice of creamy cheesecake bliss. Ready to impress your guests with this effortless recipe? Let’s dive into the layers of flavor waiting to unfold!
Why Are These Bars So Irresistible?
Ease of Preparation: With just 20 minutes of prep time, you can whip up a stunning dessert that impresses without the need for baking.
Creamy Delight: The soft, airy cheesecake layer contrasts beautifully with the crunchy graham cracker crust, creating a perfect harmony of textures.
Festive Appeal: Decorated like the American flag, these bars are a show-stopping centerpiece that will liven up any holiday party or summer gathering.
Customizable Options: Whether you prefer gluten-free or want to switch up the fruit toppings, the recipe allows for easy substitutions that cater to different dietary needs.
Kid-Friendly Fun: Kids love the vibrant colors and playful presentation, making these bars a hit for family gatherings.
Chill and Serve: Simply make them ahead of time and let them chill, saving you the rush when hosting. Consider pairing these bars with refreshing drinks like our Fluff Trifle Cups for a delightful summer spread!
No-Bake Flag Cheesecake Bars Ingredients
For the Crust
- Graham Crackers – Base for the crust; a gluten-free option is available using gluten-free graham crackers.
- Butter – Binds the crust together; coconut oil can be substituted for a dairy-free variety.
- Granulated Sugar – Sweetens the crust; feel free to reduce or replace with a sugar alternative.
For the Cheesecake Filling
- Cream Cheese – The key ingredient for the filling; ensure it’s at room temperature for easy mixing.
- Powdered Sugar – Sweetens the cheesecake layer; use less if you prefer a less sweet taste.
- Vanilla Extract – Enhances the overall flavor; pure vanilla extract gives a richer taste compared to imitation.
- Heavy Cream – Contributes to a light texture; half-and-half can be used, but the filling will be less airy.
For the Decoration
- Blueberries – Used to create the flag design; raspberries can be a great alternative.
- Strawberries – Provide the iconic red stripes; other berries like kiwi can add a unique twist.
Create a show-stopping dessert with these No-Bake Flag Cheesecake Bars that everyone will adore!
Step‑by‑Step Instructions for No-Bake Flag Cheesecake Bars
Step 1: Prepare the Crust
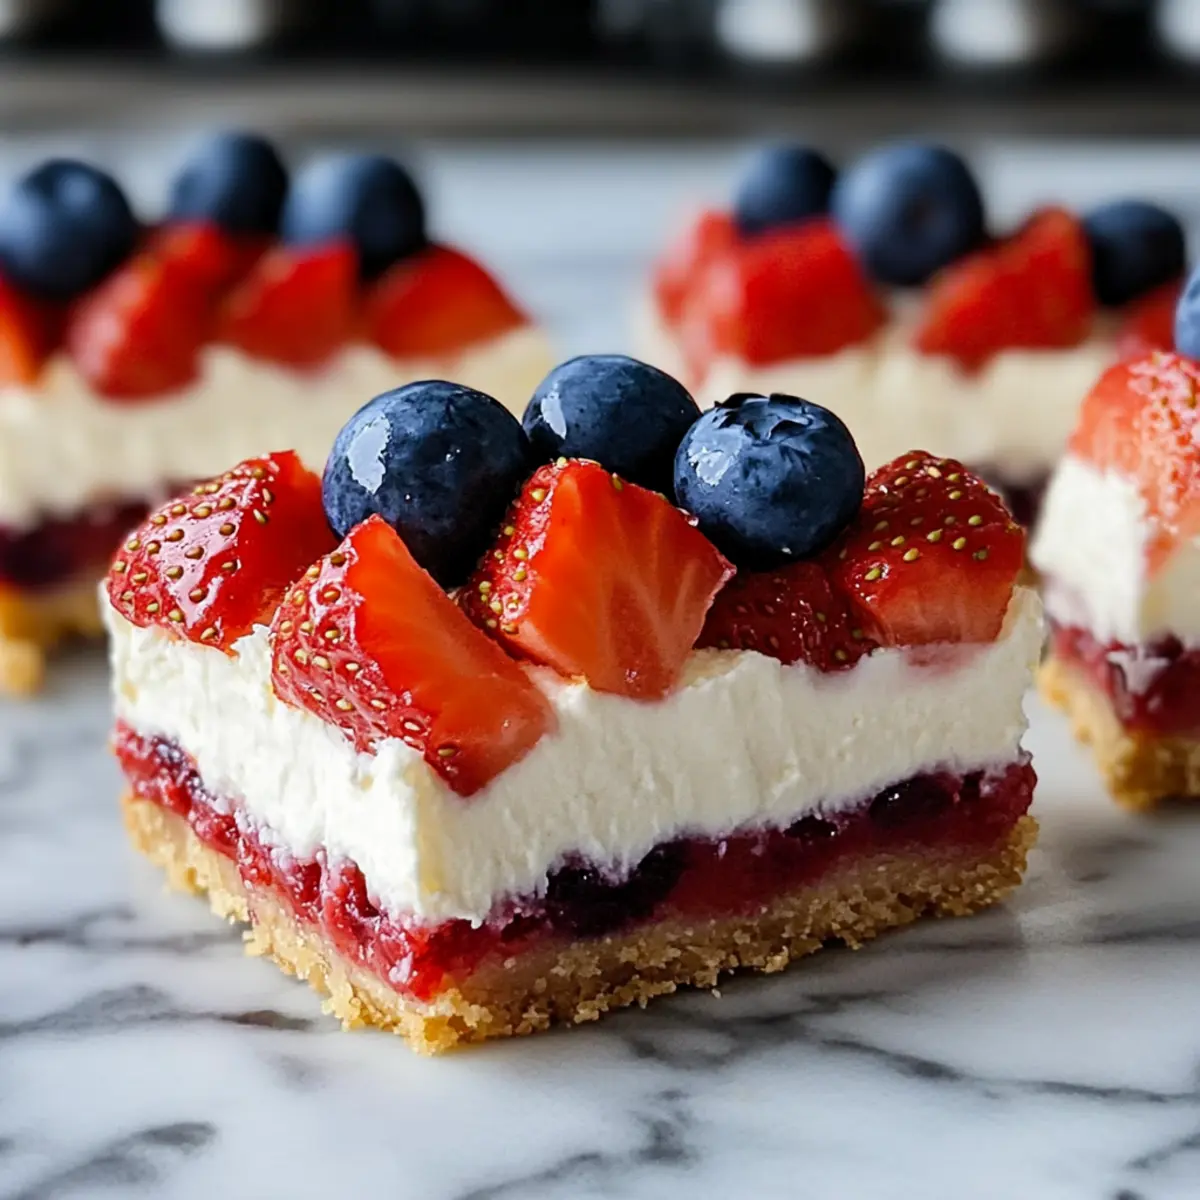
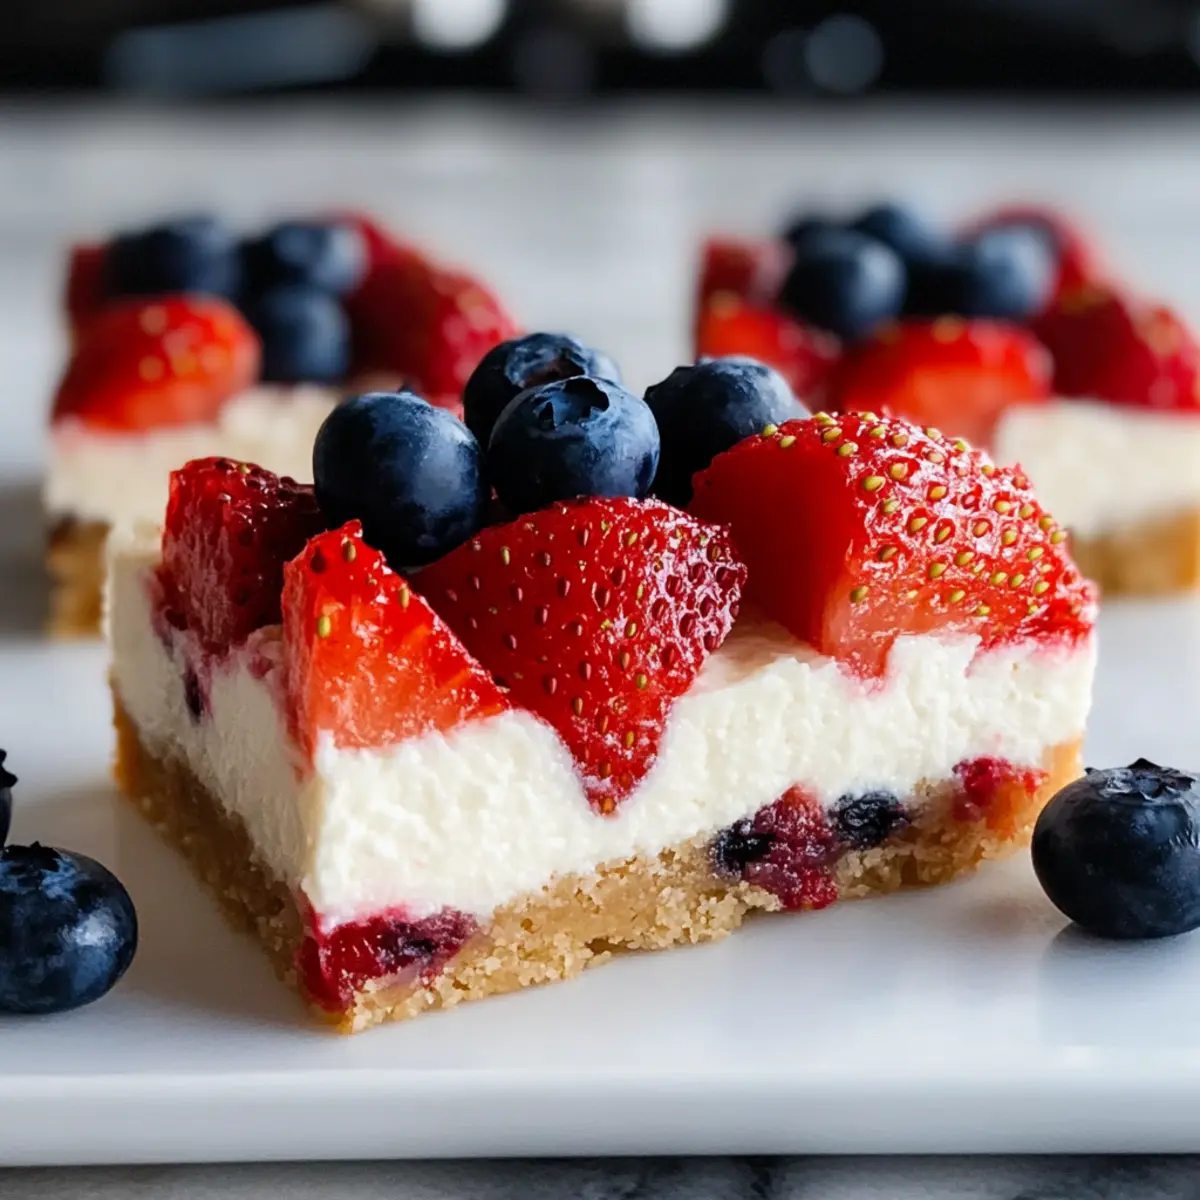
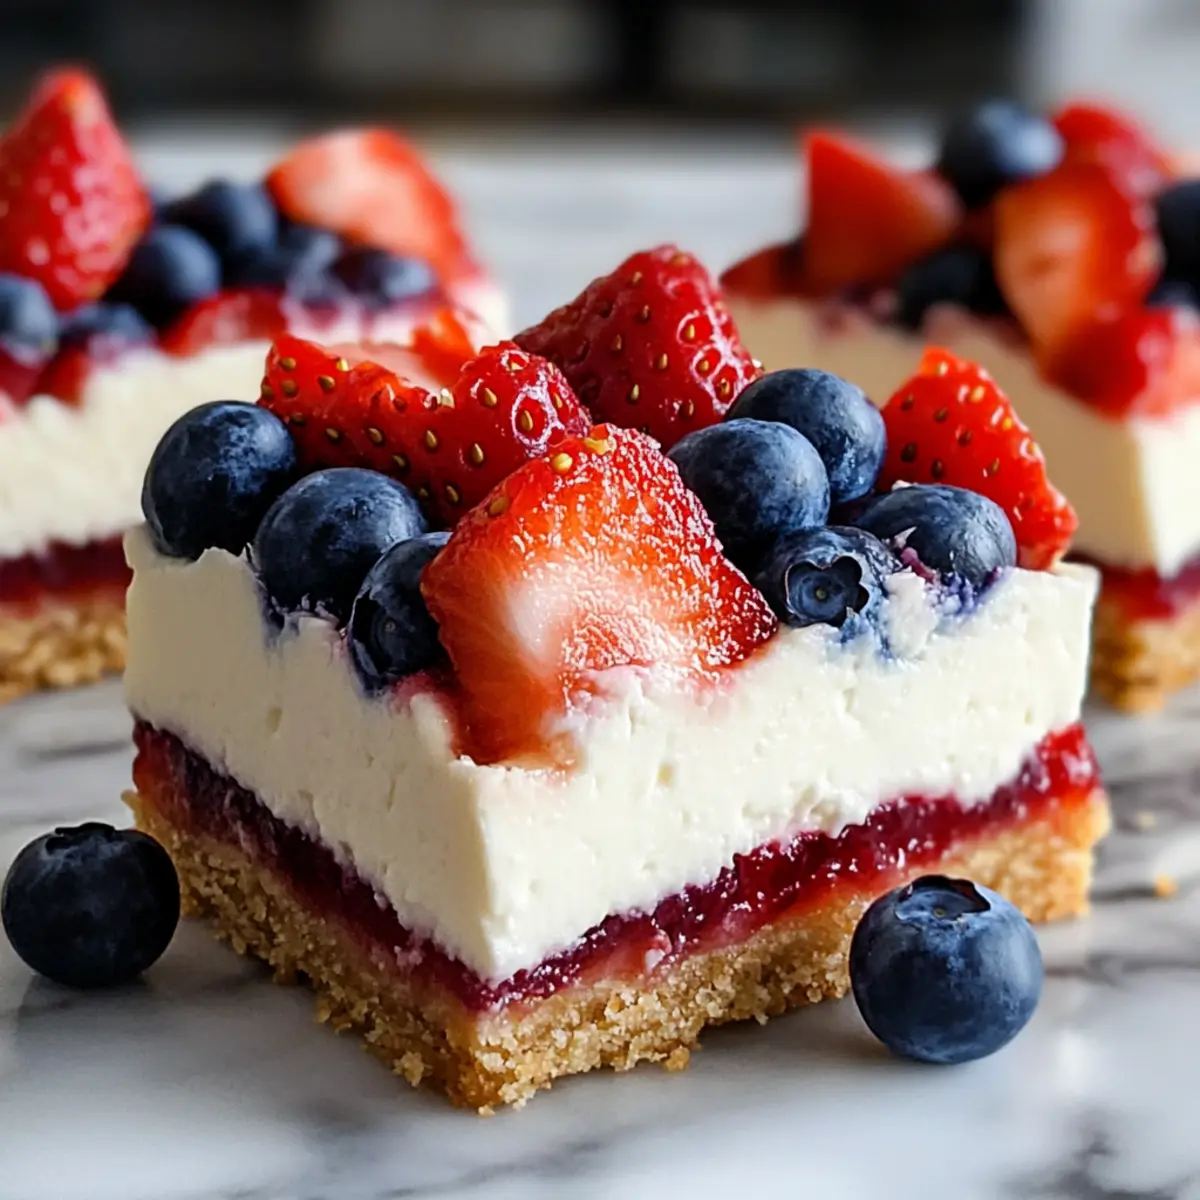
In a large bowl, combine crushed graham crackers, melted butter, and granulated sugar until the mixture resembles wet sand. Press this mixture firmly into the bottom of a 9×13 inch pan, ensuring it’s evenly distributed. Use a flat-bottomed measuring cup to compact the crust for a sturdy base.
Step 2: Make the Cheesecake Filling
In another bowl, beat the softened cream cheese, powdered sugar, and vanilla extract with an electric mixer on medium speed. Continue mixing until the mixture is smooth and creamy, which should take about 2-3 minutes. Scrape down the sides of the bowl to ensure all ingredients are well incorporated for a velvety cheesecake layer.
Step 3: Whip the Cream
In a clean mixing bowl, whip heavy cream using a hand mixer until stiff peaks form, about 3-5 minutes. Be careful not to over-whip; the cream should hold its shape without becoming grainy. Gently fold the whipped cream into the cheesecake mixture using a spatula, combining until well-mixed but still airy.
Step 4: Assemble
Spread the cheesecake filling evenly over the prepared crust using an offset spatula to create a smooth surface. Take care to reach the corners for even coverage. This layering transforms your No-Bake Flag Cheesecake Bars into a creamy delight that supports the vibrant fruit toppings to come.
Step 5: Decorate
Now it’s time to create the flag design! Arrange blueberries in the top left corner to represent the stars and lay sliced strawberries in rows across the filling to form the red stripes. Make sure to place the strawberries neatly for a visually appealing presentation.
Step 6: Chill
Cover the assembled cheesecake bars with plastic wrap and refrigerate for at least 4 hours, or until set. This chilling time allows the layers to firm up and meld together, enhancing the flavors and texture of your No-Bake Flag Cheesecake Bars for the ultimate refreshing dessert.
Step 7: Serve
Once set, remove the bars from the refrigerator and cut them into squares using a sharp knife. Serve the bars chilled, and enjoy the creamy, fruity goodness with friends and family at your next gathering!
Make Ahead Options
These No-Bake Flag Cheesecake Bars are perfect for meal prep! You can prepare the crust and cheesecake filling up to 24 hours in advance, which makes assembly a breeze when you’re ready to serve. To do this, simply crush the graham crackers and mix them with melted butter and sugar, then press it into your pan. For the filling, mix the softened cream cheese, powdered sugar, and vanilla until smooth, then whip the heavy cream separately. Store both components in airtight containers in the refrigerator. When ready to assemble, spread the filling over the crust, decorate with fresh berries, and chill for at least 4 hours—or overnight—for the best flavor. This way, you’ll have a stunning dessert ready to impress with minimal effort!
What to Serve with No-Bake Flag Cheesecake Bars
Imagine a sun-drenched picnic or a lively backyard gathering, where these delightful cheesecake bars become the star of the show.
- Refreshing Lemonade: A zesty lemonade brings a bright citrus contrast that complements the creamy sweetness of the cheesecake bars. Perfect for summer sipping!
- Iced Tea: Unsweetened iced tea offers a classic, slightly bitter balance, elevating the sweetness of the cheesecake without overshadowing it. Serve it with a slice of lemon for an extra touch.
- Grilled Fruit Skewers: Juicy grilled peaches or pineapples add a smoky sweetness that pairs beautifully with the creamy texture of the cheesecake, enhancing that summer vibe.
- Chilled Fruit Salad: A mix of fresh berries and melons creates a refreshing side that echoes the flavors in the cheesecake while providing a healthy contrast. Its vibrant colors will also make your table pop!
- Chocolate Drizzle: A simple drizzle of rich chocolate ganache can elevate your cheesecake bars, adding a touch of luxury and decadence. Pairing chocolate with the fruity flavors is nothing short of bliss.
- Whipped Cream: A dollop of freshly whipped cream served alongside each bar amplifies the creamy indulgence and adds a light, airy touch that feels like a cloud of sweetness.
- Sparkling Water: Served plain or infused with fresh herbs like mint, sparkling water is a light, fizzy option that cleanses the palate between bites.
- Picnic-Style Sandwiches: Light finger sandwiches with cucumber or chicken salad can offer a savory balance to your dessert, ensuring a well-rounded meal experience.
- Light Cheeseboard: A selection of soft cheeses paired with honeys and nuts creates an elegant touch, heightening the flavors and sophistication of your gathering.
- Summer Berry Tart: As a sweet companion, this tart adds another layer of berry goodness, making it a visual and flavorful delight alongside your No-Bake Flag Cheesecake Bars.
Expert Tips for No-Bake Flag Cheesecake Bars
-
Room Temperature Cream Cheese: Ensure your cream cheese is at room temperature for easy blending; cold cream cheese can cause lumps in the filling.
-
Whip Wisely: Be cautious not to over-whip the cream; only whip until stiff peaks form to maintain a light texture in your No-Bake Flag Cheesecake Bars.
-
Chill for Perfection: Allow bars to chill for at least 4 hours to ensure they set properly; skipping this step may result in a messy presentation.
-
Garnish with Care: Use fresh, washed fruits for decoration; this not only enhances taste but also ensures vibrant colors that pop visually.
-
Customizable Crust: For a gluten-free option, use gluten-free graham crackers; you won’t lose any flavor while catering to dietary needs.
No-Bake Flag Cheesecake Bars Variations
Feel free to let your creativity shine while crafting these delectable bars! With a few simple twists, you can create a personalized version that dances with flavor and color.
-
Gluten-Free: Swap regular graham crackers for gluten-free ones to keep everyone happy and healthy.
-
Dairy-Free: Use coconut oil instead of butter in the crust and substitute cream cheese with a dairy-free alternative for a delightful twist.
-
Reduced Sugar: For a lighter version, cut down on both granulated and powdered sugar, or try using a natural sugar substitute like agave syrup.
-
Berry Medley: Use a mix of fresh berries, like raspberries and blackberries, for a colorful flag display that tantalizes the taste buds.
-
Citrus Zest: Add a splash of lemon or lime zest to the cheesecake filling for a tangy flavor boost that pairs wonderfully with the sweetness of the fruit.
-
Chocolate Drizzle: Finish the cheesecake bars with a rich chocolate drizzle to satisfy any chocolate lovers at your gathering.
-
Nutty Crust: Mix in some crushed nuts or add almond flour to the crust for a crunchy texture that elevates the standard graham cracker base.
-
Spiced Variation: Incorporate a dash of cinnamon or nutmeg into the cheesecake filling for warm, cozy flavors that are perfect for any season.
Consider serving these vibrant bars alongside refreshing beverages like Fluff Trifle Cups, which can complement their fruity charm beautifully. Enjoy experimenting!
How to Store and Freeze No-Bake Flag Cheesecake Bars
Fridge: Keep the bars in an airtight container for up to 5 days. This helps maintain the creamy texture and freshness, ensuring every bite is delightful.
Freezer: For longer storage, freeze the bars wrapped tightly in plastic wrap and then place them in a freezer-safe container. They can last for up to 2 months.
Thawing: To enjoy frozen No-Bake Flag Cheesecake Bars, transfer them to the fridge and allow them to thaw overnight before serving.
Reheating: These bars are best served chilled and do not require reheating. Simply cut them straight from the refrigerator for a refreshing treat.
No-Bake Flag Cheesecake Bars Recipe FAQs
What type of graham crackers should I use?
For the crust, traditional graham crackers work beautifully. If you need a gluten-free version, simply swap in gluten-free graham crackers. Many brands offer great flavors and textures that provide a similar delightful crunch without compromising taste!
How should I store the No-Bake Flag Cheesecake Bars?
Store these delicious bars in an airtight container in the refrigerator for up to 5 days. Keeping them covered helps maintain their creamy texture and prevents them from absorbing odors from other foods.
Can I freeze the No-Bake Flag Cheesecake Bars?
Absolutely! To freeze, wrap the cheesecake bars tightly in plastic wrap, then place them in a freezer-safe container. They will stay fresh for up to 2 months. When you’re ready to enjoy, transfer them to the fridge to thaw overnight for the best texture.
What should I do if my cream cheese filling is lumpy?
If your cream cheese is cold, it can clump up and resist blending into a smooth mixture. To avoid this, ensure it’s at room temperature before mixing. If you do encounter lumps, you can use a hand mixer to beat the mixture on medium speed until it’s smooth. This step helps create that creamy indulgence we all crave!
Are there any dietary considerations with this recipe?
Yes, this recipe is vegetarian and can easily be made gluten-free by using gluten-free graham crackers. For those with dairy allergies, substitute the butter with coconut oil for the crust and use a dairy-free cream cheese alternative. Always check packaging for potential allergens when selecting your ingredients.
How can I customize the decoration for the cheesecake bars?
Get creative! Use different berries like raspberries or blackberries to substitute strawberries and blueberries. You could also consider slicing kiwi or even peaches for a fresh twist. The more the merrier when it comes to adding flavor and visual appeal!
No-Bake Flag Cheesecake Bars: A Fun, Festive Delight to Make
Ingredients
Equipment
Method
- In a large bowl, combine crushed graham crackers, melted butter, and granulated sugar until the mixture resembles wet sand. Press this mixture into the bottom of a 9x13 inch pan.
- In another bowl, beat the softened cream cheese, powdered sugar, and vanilla extract with an electric mixer until smooth and creamy, about 2-3 minutes.
- In a clean mixing bowl, whip heavy cream until stiff peaks form, about 3-5 minutes. Gently fold the whipped cream into the cheesecake mixture.
- Spread the cheesecake filling evenly over the prepared crust.
- Arrange blueberries in the top left corner for the stars and lay sliced strawberries across the filling for the red stripes.
- Cover and refrigerate for at least 4 hours, or until set.
- Once set, remove from the refrigerator, cut into squares, and serve chilled.
Leave a Reply