
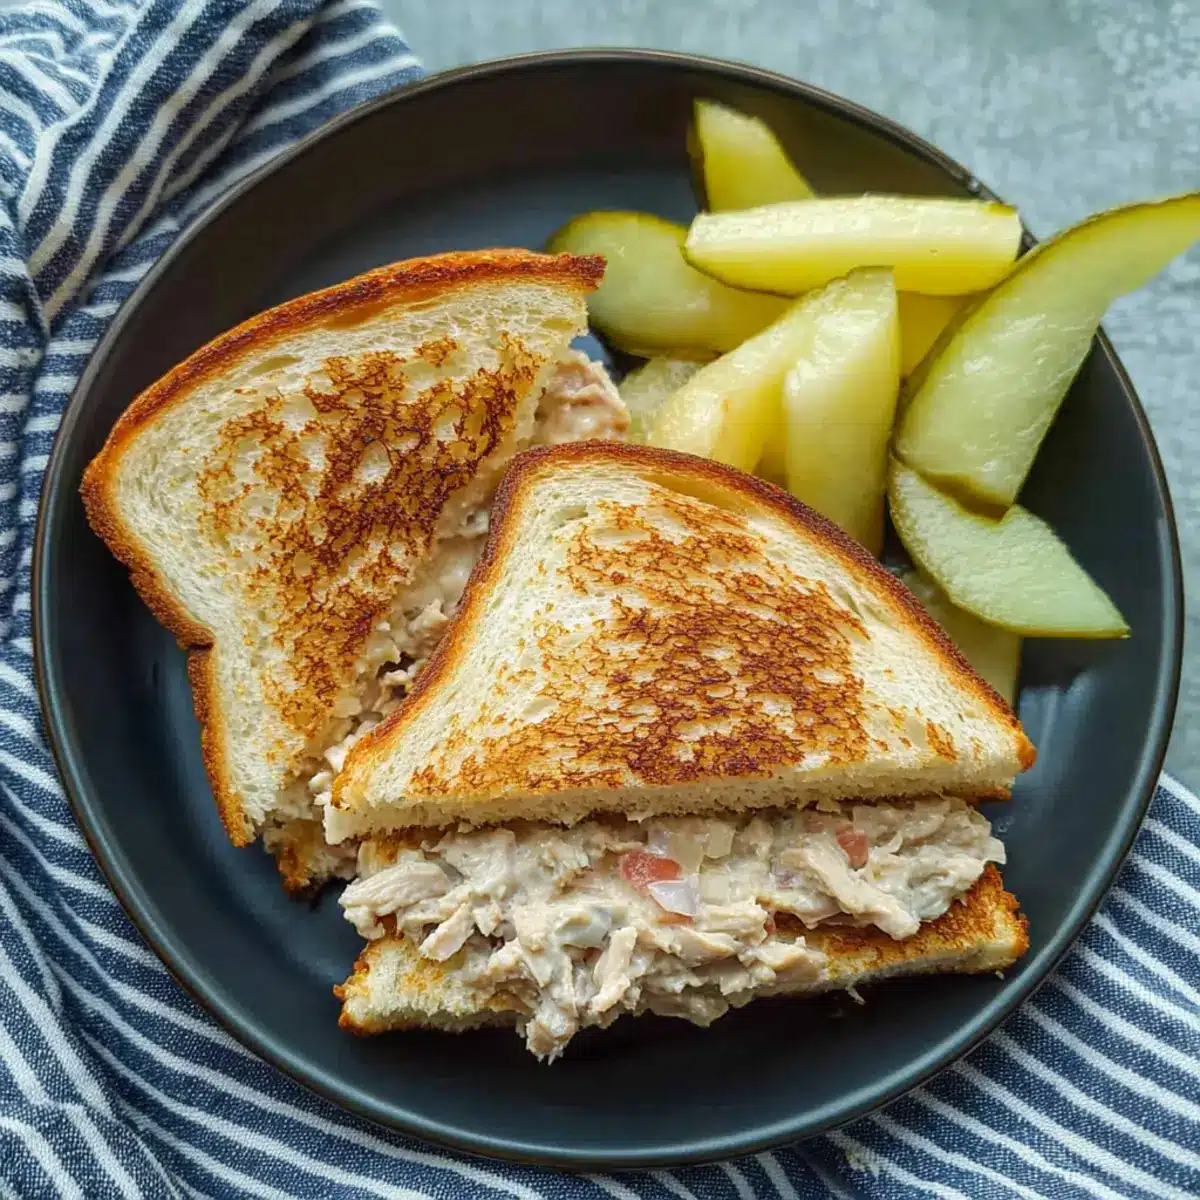
The scent of butter sizzling on a hot skillet instantly transports me back to lazy weekends filled with homemade meals. Today, I’m excited to share my go-to recipe for a Quick and Creamy Tuna Melt Sandwich. With just 15 minutes of prep time, this protein-packed comfort food not only satisfies hunger but brings a gourmet touch to your lunch table. Imagine buttery, toasted bread enveloping a rich tuna mixture, topped with gooey melted cheese and juicy tomatoes. It’s an ideal dish for those looking for a delicious upgrade to the classic sandwich without breaking a sweat in the kitchen. Whether you’re cooking for yourself or a crowd, this delightful treat promises to impress. Are you ready to dive into this cozy culinary adventure?
Why is Tuna Melt Sandwich Perfection?
Quick Preparation: In just 15 minutes, you can whip up this mouthwatering sandwich, making it a perfect weeknight dinner or a satisfying lunch.
Protein-Packed: Filled with tuna, this recipe delivers a hearty dose of protein to keep you energized.
Versatile Ingredients: Customize your melt with various cheeses, or add fresh herbs to suit your taste preferences.
Gourmet Comfort: Enjoy a wholesome spin on classic comfort food, blending rich flavors in every gooey bite.
Crowd-Pleasing Appeal: Whether you’re feeding a family or entertaining friends, this Tuna Melt Sandwich is sure to be a hit, just like my Tuna Casserole Comfort.
Tuna Melt Sandwich Ingredients
For the Filling
• Tuna – Use drained canned tuna for convenience and a nice punch of protein.
• Small Onion – Adds a subtle crunch and sweetness; green onions are a mild alternative.
• Garlic – Fresh minced garlic enhances the depth of flavor, but garlic powder works too.
• Mayonnaise – This creaminess binds the mixture together; try Greek yogurt for a lighter option.
• Salt – Essential for enhancing flavor; adjust it to your preference.
• Ground Black Pepper – Adds mild heat and flavor; freshly ground is always best.
For the Topping
• Tomato – Provides freshness and acidity; ripe medium tomatoes work great, or use sun-dried for a twist.
• Cheddar Cheese – This cheese melts beautifully for a creamy texture; you can substitute with Mozzarella or Pepper Jack for a change.
For Assembly
• Bread – Choose a sturdy loaf like sourdough for toasting; it holds up well to the filling.
• Butter – Ensure it’s at room temperature for easy spreading, which creates a crispy exterior.
Step‑by‑Step Instructions for Tuna Melt Sandwich
Step 1: Mix Filling
In a large mixing bowl, combine the drained canned tuna, finely chopped onion, and minced garlic. Stir in 2–3 tablespoons of mayonnaise, adjusting the amount based on your creaminess preference. Season with salt and ground black pepper to taste. Mix thoroughly until all ingredients are well-blended and the tuna mixture appears creamy, taking about 3 minutes.
Step 2: Assemble Sandwiches
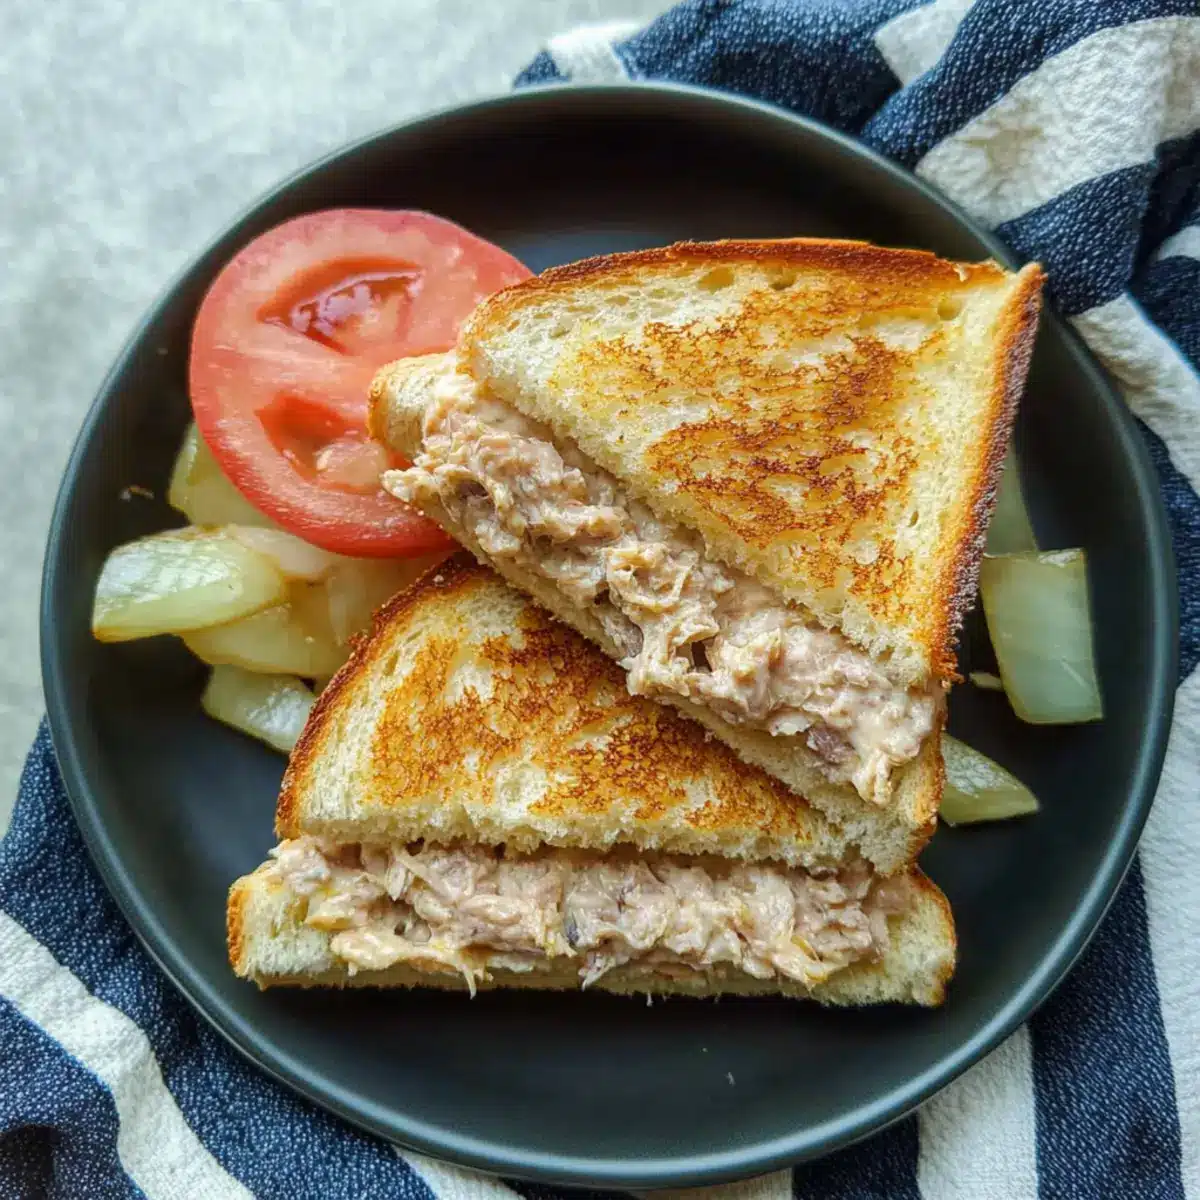
Take two slices of your preferred bread—sourdough works beautifully—and spread half of the creamy tuna mixture generously over one slice. Layer two slices of fresh tomato on top, followed by two slices of your chosen cheese. Place a second slice of bread on top to complete the sandwich assembly, pressing lightly to help it hold together.
Step 3: Butter Bread
Using room temperature butter, spread a generous amount over both outer sides of the assembled sandwich. This will ensure a deliciously crispy, golden-brown crust when toasted. Make sure every edge of the bread is coated for even toasting, taking care not to miss any spots for that perfect finish.
Step 4: Toast
Preheat a non-stick skillet over medium heat for about 2–3 minutes until hot. Carefully place the buttered sandwich in the skillet, cooking for 3–4 minutes per side. Press down gently with a spatula to encourage even toasting and check for a golden brown color before flipping. The cheese should begin to melt as the sides toast.
Step 5: Serve
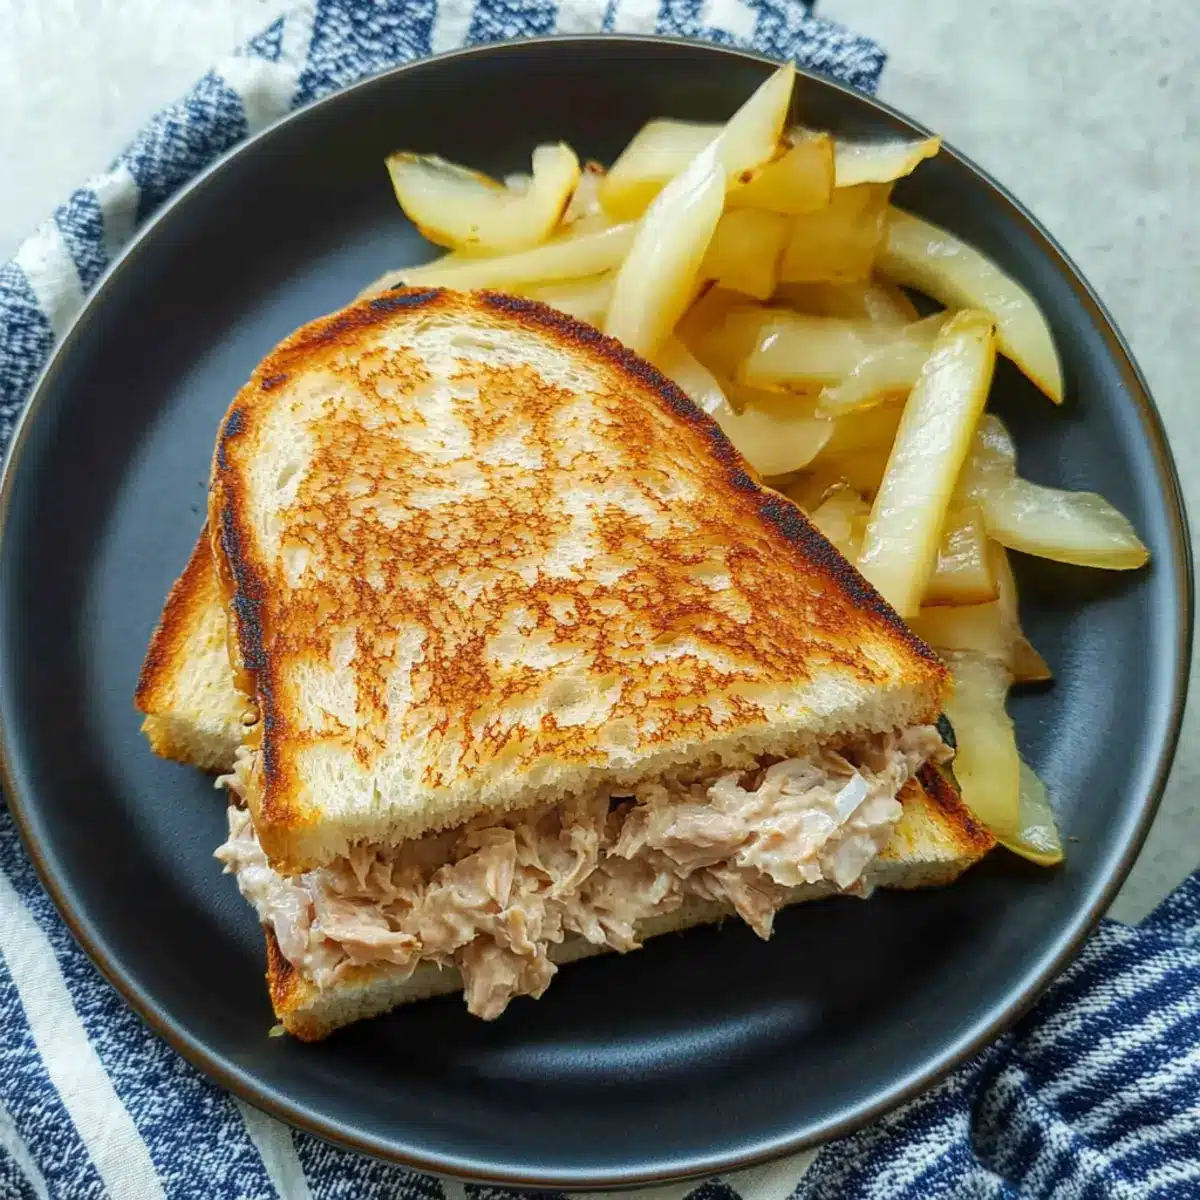
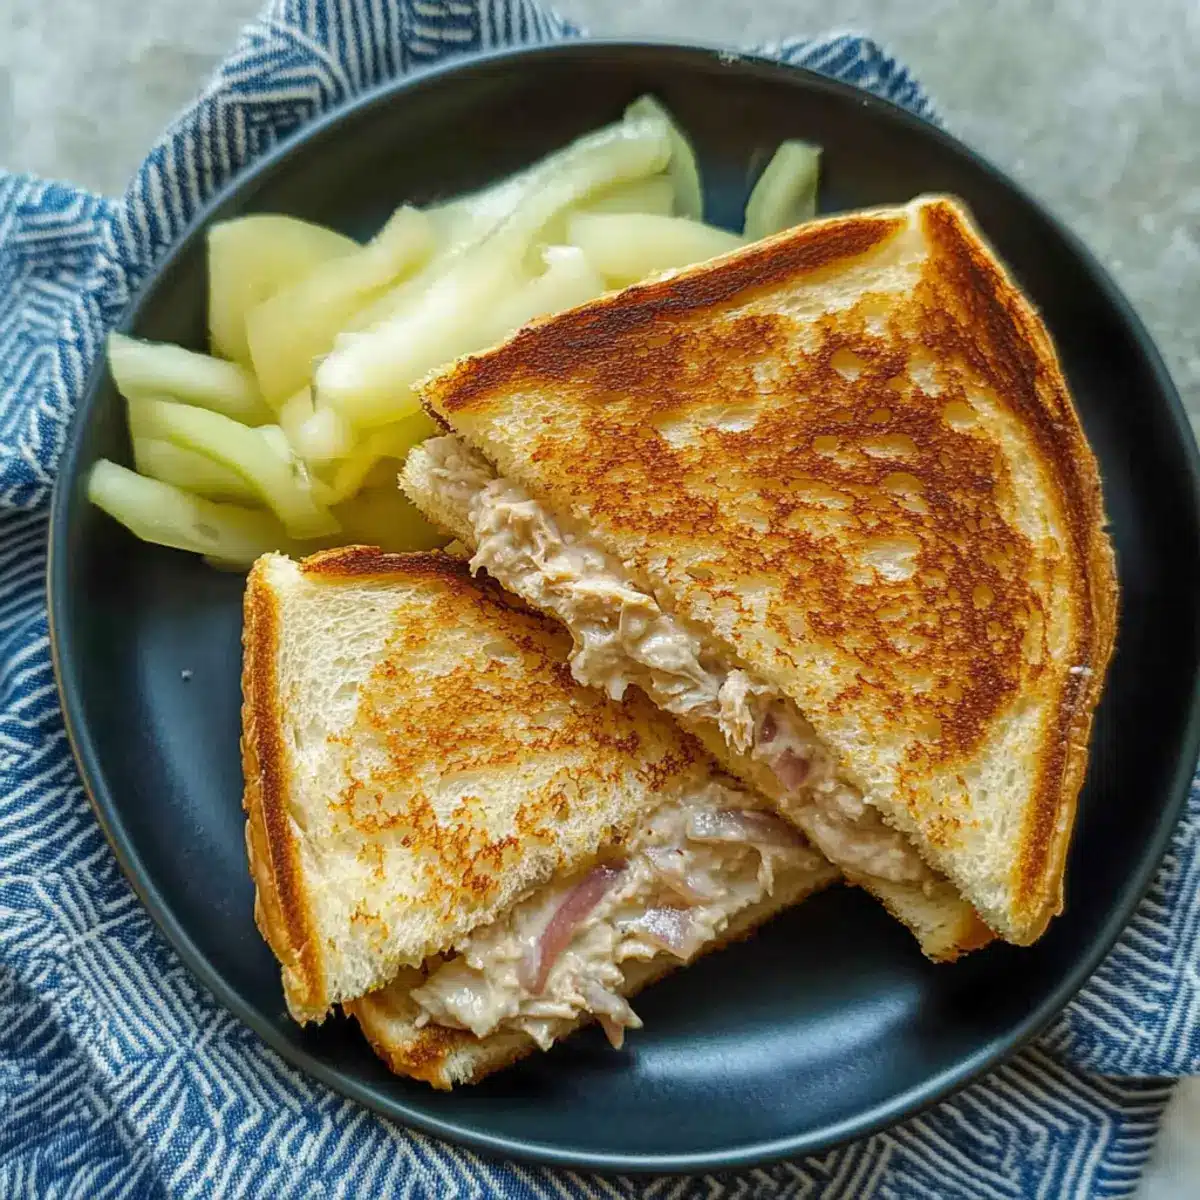
Once both sides of the sandwich are golden brown and the cheese is gooey and melted, remove it from the skillet. Allow it to rest for a minute before slicing in half for easy handling. Serve your warm Tuna Melt Sandwich immediately, perhaps with a side of pickles or a fresh salad for a complete meal experience.
Make Ahead Options
These Tuna Melt Sandwiches are perfect for meal prep enthusiasts! You can mix the creamy tuna filling and refrigerate it for up to 3 days in an airtight container, allowing the flavors to meld beautifully. Alternatively, you can assemble the sandwiches without toasting them and wrap them tightly in plastic wrap for up to 24 hours in the fridge. To maintain quality, remember to butter the bread just before toasting; this ensures the exterior stays crispy. When you’re ready to serve, just heat a non-stick skillet and toast your sandwiches on medium for about 3-4 minutes per side until they’re golden brown and the cheese is melted. You’ll have a delicious, homemade meal on the table with minimal effort!
How to Store and Freeze Tuna Melt Sandwich
Fridge: Store leftover Tuna Melt Sandwich in an airtight container for up to 3 days. Reheat in a skillet to revive that buttery toastiness.
Freezer: If you want to freeze, wrap the assembled sandwiches tightly in plastic wrap or foil. They can be frozen for up to 1 month.
Reheating: To reheat frozen sandwiches, thaw overnight in the fridge, then toast on low heat to warm through and melt the cheese without burning the bread.
Avoid Sogginess: Keep the tomato and any extra moist ingredients separate if preparing the sandwich ahead of time for best texture.
Tips for the Best Tuna Melt Sandwich
-
Choose Quality Tuna: Use good-quality, chunk light or solid white tuna for a flavorful base. Lower-quality tuna can lead to a mushy texture.
-
Don’t Rush the Toasting: Give each side ample time to achieve that golden-brown crust. Rushing may leave you with soggy bread instead of a crispy Tuna Melt Sandwich.
-
Adjust Cheese Levels: Don’t skimp on cheese; it adds richness and helps bind the filling. Feel free to layer extra cheese for gooey deliciousness!
-
Mind the Fillings: Ensure your tuna mixture isn’t too wet. If using too much mayonnaise, it can lead to a soggy sandwich—a balance is key.
-
Add Flavor: Experiment with spices like paprika or cayenne in your tuna mixture for an extra kick that elevates your Tuna Melt Sandwich!
What to Serve with Quick and Creamy Tuna Melt Sandwich
Nothing elevates a delightful Tuna Melt Sandwich like the perfect side dishes and drinks that enhance its flavors.
-
Crispy Pickles: These tangy bites offer a delightful crunch and acidity that cuts through the richness of the melt.
-
Garden Salad: A fresh salad with mixed greens, cucumbers, and cherry tomatoes adds a refreshing contrast, making your meal balanced and vibrant.
-
Sweet Potato Fries: The natural sweetness and slight crispiness of sweet potato fries pair beautifully with the savory tuna flavors.
-
Coleslaw: A creamy coleslaw provides a nice crunch and a hint of sweetness, complementing the sandwich’s savory goodness.
-
Tomato Soup: A warm bowl of tomato soup creates a comforting duo with your Tuna Melt, perfect for dunking and enhancing flavors.
-
Sparkling Lemonade: This invigorating drink balances the rich flavors with a zesty kick, making every bite feel refreshing.
-
Apple Slices with Peanut Butter: For a touch of sweetness, these crunchy apple slices are a perfect standalone snack or a robust way to round out the meal.
Tuna Melt Sandwich Variations
Feel free to get creative with your Tuna Melt Sandwich and customize it to suit your palate!
-
Cheese Options: Try swapping Cheddar for Gruyère or Swiss for a richer flavor that adds a gourmet touch. There’s something delightful about a melty, creamy base that enhances every bite.
-
Herbs: Fresh herbs like dill, chives, or parsley can elevate the flavor profile. Just a handful mixed into your filling can bring a refreshing brightness that makes this sandwich feel extra special.
-
Spicy Version: Add jalapeños or a sprinkle of cayenne pepper to the tuna mixture for a lively kick. If you enjoy a bit of heat, this twist will awaken your taste buds.
-
Veggie Boost: Incorporate finely diced celery or bell peppers into the filling for added crunch and nutrition. This creates a delightful textural contrast that complements the creamy tuna well.
-
Bread Substitutions: Experiment with whole grain or gluten-free bread options to suit your dietary needs. Each variety brings its unique flavor and texture that can change your entire experience.
-
Flavor Infusions: Mix in a spoonful of Dijon mustard or a dash of soy sauce for an unexpected umami punch. This addition will surprise your taste buds and add depth to your classic melt.
-
Mediterranean Flair: Substitute tuna with a mix of flaked smoked salmon or even chickpeas for a different twist. Top with feta cheese and olives for a savory Mediterranean-inspired take.
-
Creamy Avocado: Add sliced avocado to elevate creaminess and add healthy fats. The richness of the avocado pairs beautifully with the tuna and will make the sandwich feel indulgent yet wholesome.
Feel free to explore these variations, mixing and matching to create the perfect tuna melt just for you! If you’re considering trying another delightful dish, check out my comforting Tuna Casserole Comfort or dive into a savory Yellowfin Tuna Savor. Happy cooking!
Tuna Melt Sandwich Recipe FAQs
What kind of tuna should I use for the Tuna Melt Sandwich?
Absolutely! I recommend using good-quality chunk light or solid white tuna for the best flavor and texture. Lower-quality tuna can lead to a mushy filling, which you definitely want to avoid!
How should I store leftover Tuna Melt Sandwich?
Store any leftover Tuna Melt Sandwich in an airtight container in the fridge for up to 3 days. When you’re ready to enjoy it again, simply reheat it in a skillet for that delightful toasty texture.
Can I freeze Tuna Melt Sandwich?
Yes, you can! Wrap the assembled sandwiches tightly in plastic wrap or foil and freeze them for up to 1 month. To reheat, thaw the sandwich in the fridge overnight, then toast it on low heat to warm it through without burning the bread.
What if my tuna mixture is too wet?
Very good question! If you notice your tuna mixture is too wet, simply reduce the amount of mayonnaise you add. I suggest starting with 2 tablespoons and adding more only if necessary. You want that creamy binding without making it soggy!
Can I make this recipe gluten-free?
Absolutely! To make a gluten-free Tuna Melt Sandwich, simply use gluten-free bread. There are several delicious gluten-free sandwich bread options available that will hold up beautifully when toasted.
How do I prevent my sandwiches from getting soggy?
To keep your sandwich crisp, avoid adding fresh tomatoes if preparing ahead of time. Instead, add them right before serving. Additionally, ensure your tuna mixture isn’t too wet, and don’t rush the toasting process to achieve that perfect crunch!
Melt-in-Your-Mouth Tuna Melt Sandwich in 15 Minutes
Ingredients
Equipment
Method
- In a large mixing bowl, combine the drained canned tuna, finely chopped onion, and minced garlic. Stir in 2-3 tablespoons of mayonnaise, adjusting the amount based on your creaminess preference. Season with salt and ground black pepper to taste. Mix thoroughly until all ingredients are well-blended and the tuna mixture appears creamy, taking about 3 minutes.
- Take two slices of your preferred bread—sourdough works beautifully—and spread half of the creamy tuna mixture generously over one slice. Layer two slices of fresh tomato on top, followed by two slices of your chosen cheese. Place a second slice of bread on top to complete the sandwich assembly, pressing lightly to help it hold together.
- Using room temperature butter, spread a generous amount over both outer sides of the assembled sandwich. This will ensure a deliciously crispy, golden-brown crust when toasted.
- Preheat a non-stick skillet over medium heat for about 2-3 minutes until hot. Carefully place the buttered sandwich in the skillet, cooking for 3-4 minutes per side. Press down gently with a spatula to encourage even toasting and check for a golden brown color before flipping.
- Once both sides of the sandwich are golden brown and the cheese is gooey and melted, remove it from the skillet. Allow it to rest for a minute before slicing in half for easy handling. Serve your warm Tuna Melt Sandwich immediately, perhaps with a side of pickles or a fresh salad for a complete meal experience.
Leave a Reply