
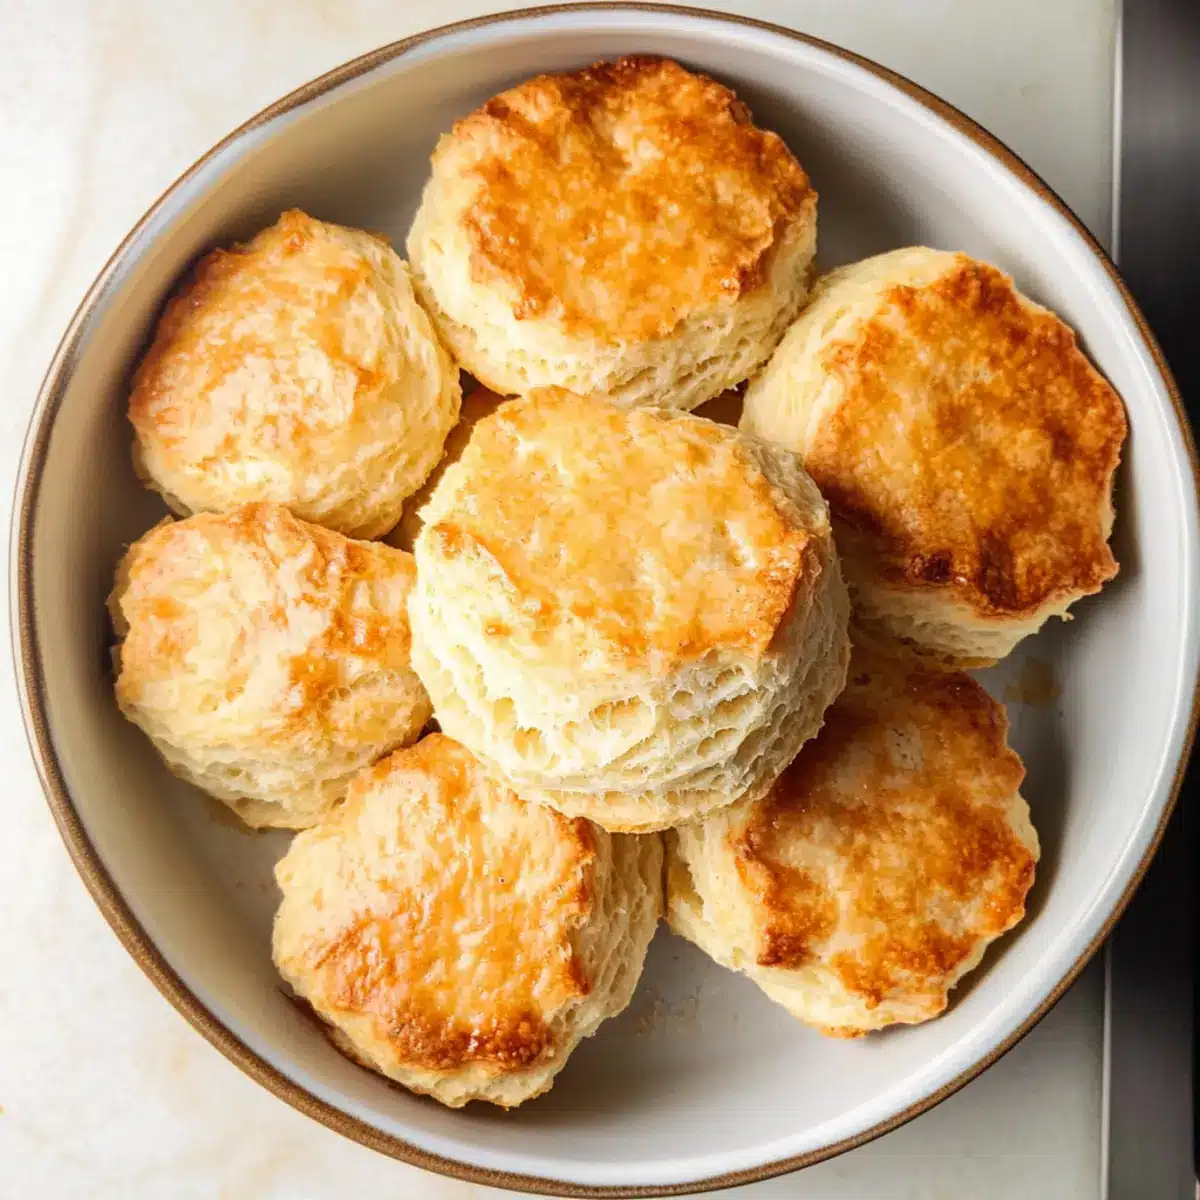
The smell of warm, buttery biscuits wafts through the kitchen, igniting memories of family gatherings and Sunday brunches. These Fluffy Old Fashioned Buttermilk Biscuits are more than just a comfort food; they’re a taste of Southern hospitality that transports me back to my grandmother’s table. Crafted with just a handful of simple ingredients, this recipe guarantees quick prep without sacrificing that homemade charm. Whether enjoyed with sausage gravy or as the perfect side for fried chicken, these biscuits are sure to impress your loved ones. Trust me, once you try them, you’ll be thinking about new ways to use them in your favorite recipes. Ready to whip up a batch? Let’s dive into the magic of biscuit-making!

Why Are Old Fashioned Biscuits So Irresistible?
Comforting, fluffy texture: Each biscuit promises a light and airy bite that melts away effortlessly. Homemade richness: Using simple, fresh ingredients creates that beloved taste you won’t find in store-bought options. Versatile pairing: These biscuits shine with savory sausage gravy, but also make a delightful side for Buttermilk Fried Chicken or your morning coffee. Quick and easy: Perfect for any busy morning, you can whip them up in no time! Get ready to gather around the breakfast table, because these biscuits will have everyone asking for seconds!
Old Fashioned Buttermilk Biscuits Ingredients
For the Biscuit Dough
• All-Purpose Flour – This staple provides essential structure; consider using gluten-free flour for a similar texture.
• Baking Powder – A critical leavening agent for fluffiness; make sure it’s fresh for the best rise.
• Salt – Enhances the flavor profile; reduce if serving with salty proteins for balance.
• Unsalted Butter – Adds richness; should be very cold to create the perfect flaky texture. Substitute with vegetable shortening if necessary, though the flavor will change.
• Buttermilk – Provides the moisture and acidity needed for tenderness; must be cold. Swap with sour cream or plain yogurt if you’re out of buttermilk.
For Serving
• Melted Butter – For brushing on top for an extra touch of richness right out of the oven; add a hint of honey for a sweet contrast if desired.
These Old Fashioned Buttermilk Biscuits are simple yet divine, making them a must-have in your comfort food repertoire!
Step‑by‑Step Instructions for Old Fashioned Buttermilk Biscuits
Step 1: Preheat the Oven
Begin by preheating your oven to 425°F (220°C). While it heats, prepare a light-colored metal or cast iron baking dish by lightly greasing it or lining it with parchment paper. This ensures the classic golden-brown crust you desire for your Old Fashioned Buttermilk Biscuits.
Step 2: Mix Dry Ingredients
In a large mixing bowl, whisk together the all-purpose flour, baking powder, and salt until combined. This simple blend is the backbone of your biscuit dough, creating a light texture. Aim for a uniform mixture free of lumps, which will help the biscuits rise beautifully as they bake.
Step 3: Incorporate Butter
Next, add the cold, cubed unsalted butter to your flour mixture. Using a food processor or a pastry cutter, blend the ingredients until they resemble coarse crumbs. This step is crucial for getting that flaky texture in your biscuits, so keep the butter cold and avoid over-mixing.
Step 4: Add Buttermilk
Pour the cold buttermilk into the mixture, gently stirring with a wooden spoon until just combined. It’s important not to overwork the dough, as this could lead to tough biscuits. The mixture should be slightly sticky but cohesive, giving you the tender biscuit experience you’re after.
Step 5: Form the Dough
Turn the dough out onto a well-floured surface. Gently knead it a few times, just until it comes together, then pat it into a rectangle about ¾ to 1 inch thick. This shaping prepares your dough for the next steps of folding and cutting, setting the stage for your fluffy Old Fashioned Buttermilk Biscuits.
Step 6: Fold the Dough
Begin folding the dough by taking one side toward the center, then the other, creating layers. Rotate the dough horizontally and flatten it again to about the same thickness. Repeat this folding process two more times to create more layers, which will contribute to the flakiness of your biscuits.
Step 7: Cut Biscuits
Using a biscuit cutter, cut out 3-inch circles from the dough, pressing straight down without twisting. This helps keep the edges unsealed for maximum rise. Place the cut biscuits in the prepared baking dish, placing them close together for that lovely tall biscuit structure.
Step 8: Prepare for Baking
Brush the tops of your biscuits lightly with remaining buttermilk. This step adds richness and ensures a beautiful, golden finish as they bake. The luster of the buttermilk will enhance the overall appearance, making your Old Fashioned Buttermilk Biscuits irresistible!
Step 9: Bake
Pop your baking dish into the preheated oven and bake the biscuits for 18-20 minutes. Keep an eye on them as they bake until they are golden brown and puffed up beautifully. The kitchen will fill with mouthwatering aromas, heralding the deliciousness that awaits!
Step 10: Serve
Once baked, remove the biscuits from the oven and brush the tops with melted butter or honey butter. The warmth from the biscuits will soak in the buttery goodness, creating a delightful finish. Serve your Old Fashioned Buttermilk Biscuits warm for the best experience!
Variations & Substitutions for Old Fashioned Buttermilk Biscuits
Feel free to personalize these delicious biscuits and cater to your taste buds! With a few simple tweaks, you can discover new favorites that sing with flavor.
-
Gluten-Free: Use a gluten-free all-purpose flour blend to accommodate gluten intolerances without sacrificing taste or texture.
-
Cheesy Delight: Add 1 cup of shredded cheddar, parmesan, or your favorite cheese directly into the dough for an extra savory kick.
-
Herb Infusion: Stir in 1 tablespoon of finely chopped fresh herbs—like rosemary, thyme, or chives—for a fragrant and flavorful twist.
-
Spicy Kick: Incorporate a pinch of cayenne pepper or a small amount of ground black pepper into your dry ingredients to give your biscuits a gentle heat.
-
Whole Grain: Substitute half a cup of whole wheat flour along with all-purpose flour for a heartier biscuit with added nutrients. They’re surprisingly light and tasty!
-
Sour Cream Substitute: If buttermilk’s not available, mix 1 cup of plain yogurt or sour cream with a splash of milk to create a similar flavor and texture.
-
Sweet Treat: Mix in a tablespoon or two of sugar with your dry ingredients for a subtly sweet flavor that pairs beautifully with honey or preserves.
-
Savory Twist: Try adding crispy cooked bacon bits or diced ham to the dough for a breakfast treat that makes your mouth water, perfect alongside your morning coffee.
These scrumptious variations will keep you coming back for more. And don’t forget, using these biscuits as a base for mouthwatering dishes like Golden Graham Smores or serving with New Orleans Chicken will elevate your meals to the next level!
What to Serve with Fluffy Old Fashioned Buttermilk Biscuits
Indulging in the deliciousness of these warm, buttery delights opens the door to a world of mouthwatering pairings that will elevate any meal.
- Creamy Sausage Gravy: Rich and savory, this classic Southern dish creates a perfect harmony with the biscuits, soaking into every fluffy layer.
- Fried Chicken: Juicy, golden-brown fried chicken makes a hearty meal; let those rich flavors mingle with the buttery biscuits for a true comfort experience.
- Scrambled Eggs: Fluffy, cheesy scrambled eggs add a lightness that pairs beautifully; a sprinkle of fresh chives brightens the dish.
- Honey Butter: A drizzle of this sweet blend adds a luscious touch, transforming each biscuit into a delightful treat for a brunch spread.
- Country Ham: The saltiness of country ham offers a wonderful contrast; serve it alongside biscuits for a savory bite that tantalizes.
- Grits: Creamy, cheesy grits will bring a Southern twist to your meal; their smooth texture complements the biscuits perfectly, creating a comforting combination.
- Fresh Fruit Salad: A refreshing medley of seasonal fruits adds a pop of color and ensures a balanced meal on the table that uplifts the savory flavors.
- Iced Tea: Brewed sweet or unsweetened, this classic beverage quenches thirst and complements the warmth of your biscuit-filled spread with its lovely brightness.
- Maple Syrup: A drizzle of warm maple syrup transforms biscuits into a decadent breakfast treat; try this option for a sweet surprise!
Storage Tips for Old Fashioned Buttermilk Biscuits
Room Temperature: Enjoy these biscuits fresh for up to 2 hours at room temperature, covered with a clean cloth to maintain warmth and prevent drying out.
Fridge: If you have leftovers, store them in an airtight container in the refrigerator for up to 3 days. Reheat in the microwave for a few seconds to bring back their original fluffiness.
Freezer: For longer storage, freeze the baked biscuits in a single layer, then transfer to a freezer-safe bag for up to 2 months. Reheat directly from frozen at 350°F (175°C) for about 10-15 minutes.
Reheating: To enjoy your Old Fashioned Buttermilk Biscuits at their best, brush with melted butter before warming to restore their rich, buttery goodness.
Make Ahead Options
These Old Fashioned Buttermilk Biscuits are ideal for meal prep, saving you precious time during busy mornings! You can mix the dry ingredients and refrigerate them for up to 3 days; this way, all you need to do is add the cold butter and buttermilk when you’re ready to bake. Alternatively, you can prepare the biscuit dough, cut it into rounds, and place them on a lined baking sheet. Cover and refrigerate for up to 24 hours before baking—this method ensures they’re just as fluffy and delicious whenever you bake them. When you’re ready to serve, simply bake them straight from the fridge, adding an extra minute or two to the baking time for perfectly warm, buttery biscuits!
Expert Tips for Fluffy Buttermilk Biscuits
-
Use Cold Ingredients: Cold butter and buttermilk are essential for achieving the flaky layers in your Old Fashioned Buttermilk Biscuits. This keeps the fat from melting too early, allowing for that desirable lift.
-
Avoid Overmixing: Mix the dough just until combined. Overworking it will lead to tough biscuits instead of the fluffy texture we all love. Be gentle!
-
Cut Without Twisting: When using a biscuit cutter, press straight down without twisting to keep the edges from sealing. This promotes the best rise for your biscuits, making them lighter and airier.
-
Touching Is Good: Place the biscuits close together in the baking dish. This helps them rise taller and results in softer sides while developing that perfect crust on top.
-
Check Baking Powder Freshness: Old baking powder won’t give the desired lift. Always check the expiration date to ensure your biscuits are light and fluffy.
Old Fashioned Buttermilk Biscuits Recipe FAQs
What is the best way to choose ripe ingredients for this recipe?
Absolutely! When picking flour, go for all-purpose flour without lumps for a nice texture. For buttermilk, ensure it’s fresh and cold; it should have a creamy consistency and no separation. As for the butter, pick unsalted and keep it very cold—freezing it for about 15 minutes before use works wonders!
How should I store leftover Old Fashioned Buttermilk Biscuits?
Store your leftover biscuits in an airtight container in the refrigerator for up to 3 days. Make sure to cover them well to prevent drying out. When you’re ready to enjoy them again, just pop them in the microwave for a few seconds to regain their fluffy texture. Believe me, a bit of melted butter on top will revive their deliciousness!
Can I freeze Old Fashioned Buttermilk Biscuits?
Yes, you can! To freeze, place the baked biscuits in a single layer on a baking sheet until they are firm. Then, transfer them to a freezer-safe bag or container where they can last for up to 3 months. When you’re ready to eat, simply reheat them directly from the freezer at 350°F (175°C) for about 10-15 minutes, and you’ll have that fresh-baked taste again!
What if my biscuits come out tough or dense?
Very! Tough biscuits often result from overmixing the dough or using warm ingredients. Be sure to mix until just combined. If you’re kneading the dough, keep it gentle—only a few turns to bring it together. Also, make sure your butter and buttermilk are cold; this is key to a light, fluffy texture.
Are these biscuits suitable for people with dietary restrictions?
Absolutely! You can substitute all-purpose flour with a gluten-free blend without sacrificing too much texture. If you have a dairy sensitivity, try using coconut yogurt or a plant-based buttermilk alternative. Just be sure to adjust the measurements accordingly for the best results!
Old Fashioned Buttermilk Biscuits for Ultimate Comfort Mornings
Ingredients
Equipment
Method
- Preheat your oven to 425°F (220°C) and prepare a baking dish.
- Whisk together flour, baking powder, and salt in a bowl.
- Add cold, cubed unsalted butter and blend until coarse crumbs form.
- Gently stir in the cold buttermilk until just combined.
- Turn dough out onto a floured surface and knead lightly.
- Fold the dough several times to create layers.
- Cut out 3-inch circles and place them in the baking dish.
- Brush the tops with buttermilk before baking.
- Bake for 18-20 minutes until golden brown.
- Brush tops with melted butter and serve warm.
Leave a Reply